
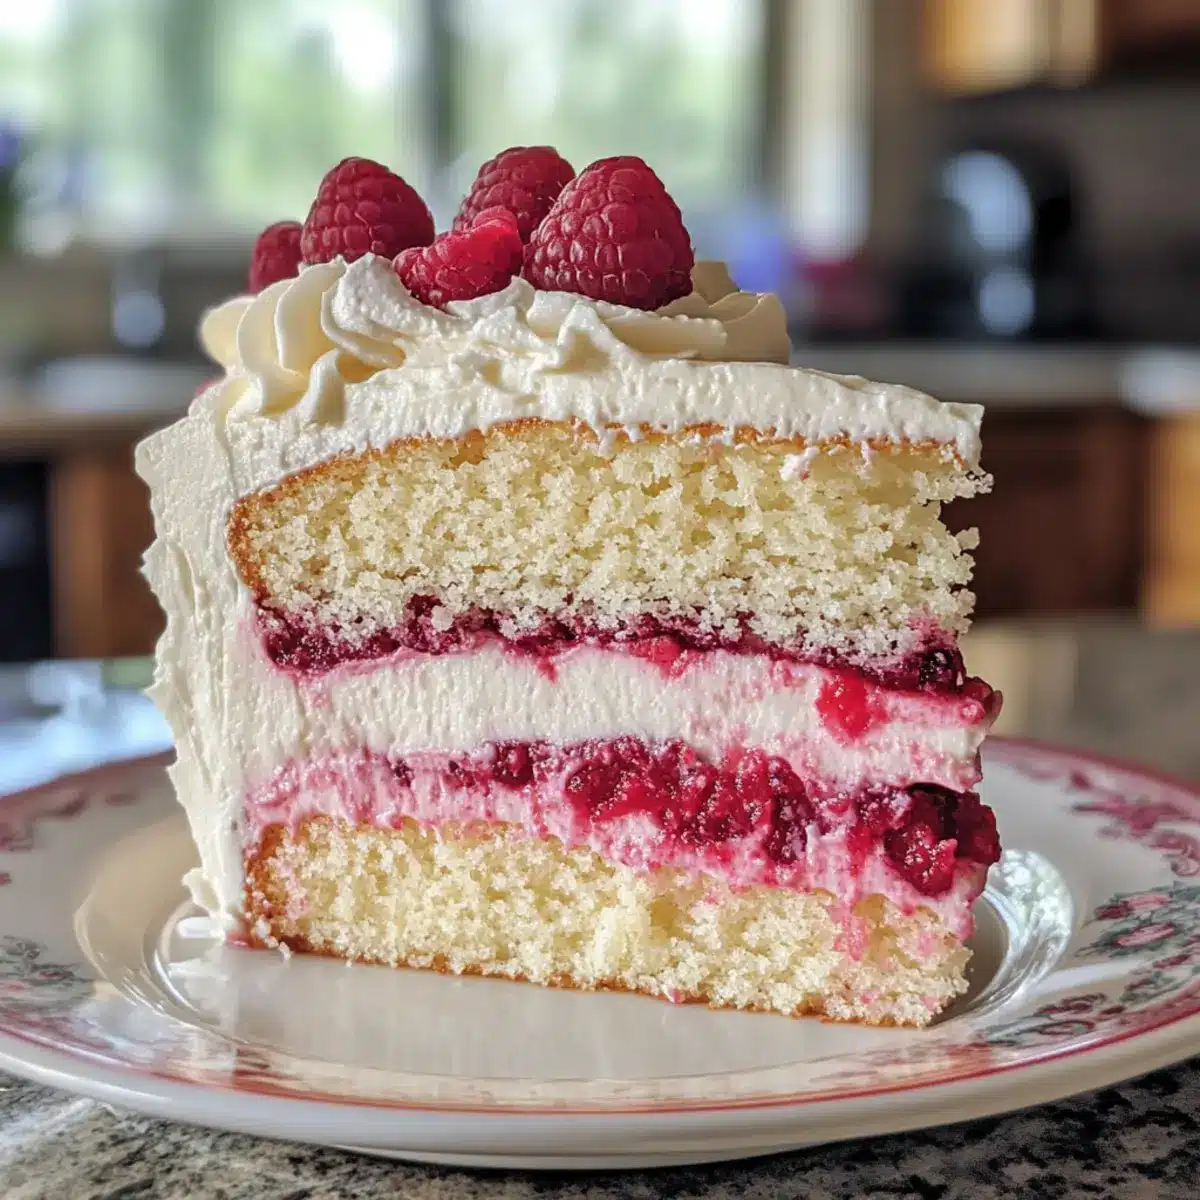
As I pulled the beautifully frosted layers from the oven, the sweet aroma of white chocolate and tart raspberries filled the kitchen, tantalizing my senses. This is the magic of the White Chocolate Raspberry Dream Cake—a dessert that effortlessly combines rich, velvety textures with vibrant fruitiness. Designed for celebrations that call for a showstopper, this cake is as easy to make as it is to fall in love with. Not only does it bring elegance to any gathering, but it also offers a delightful balance of flavors that will have your guests coming back for seconds (or thirds!). Whether you’re celebrating a milestone or simply treating yourself, this cake is the perfect indulgence. Curious how to dive into this luscious creation? Let’s get baking!
Why Is This Cake So Irresistible?
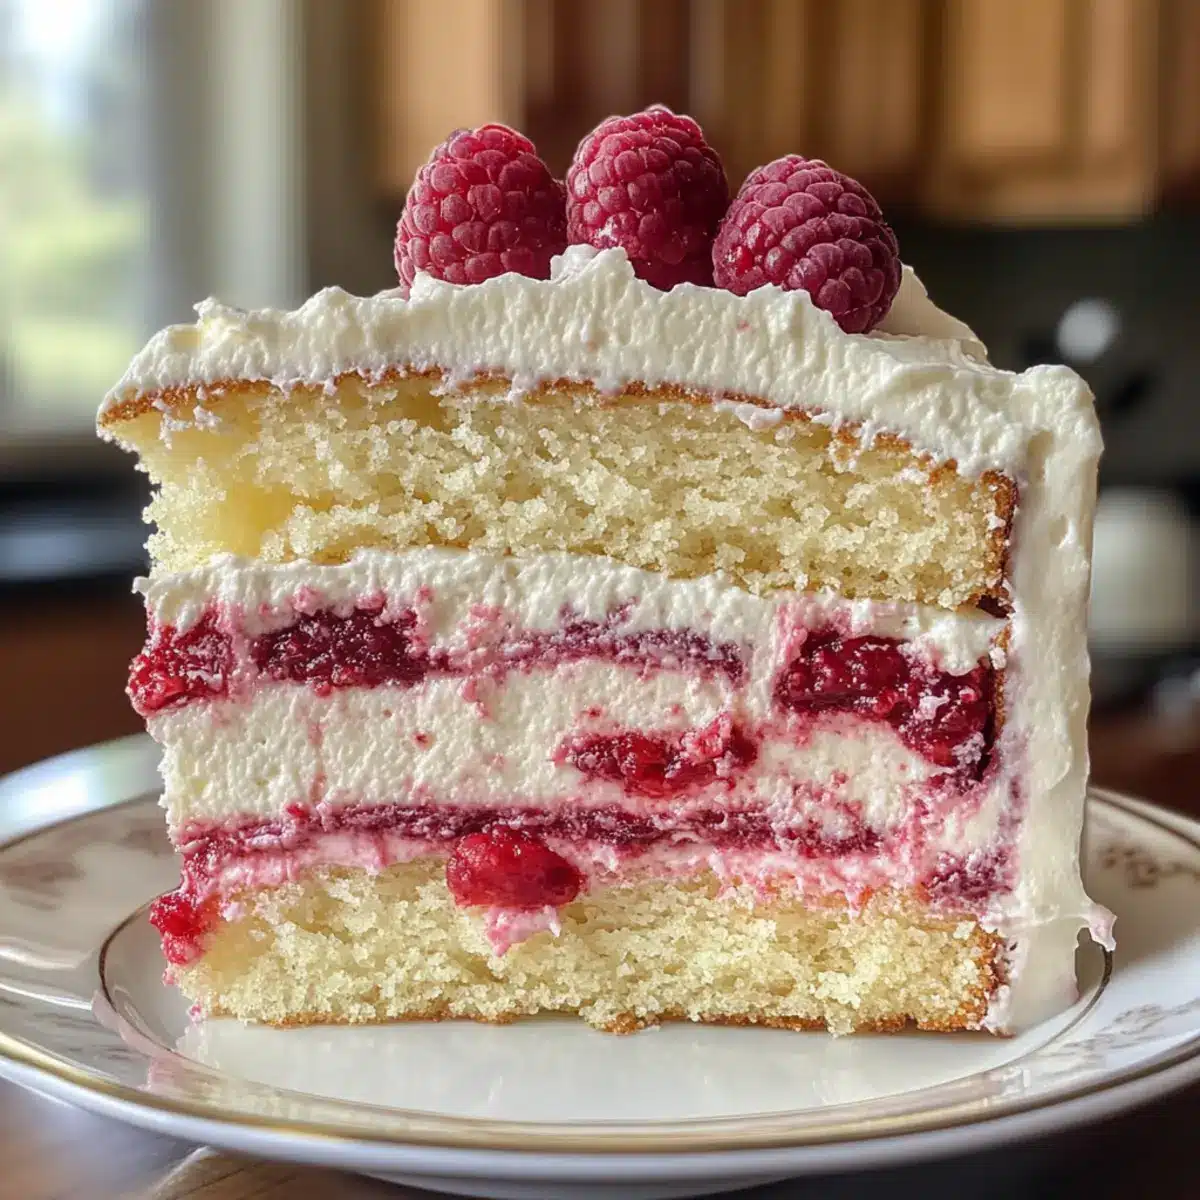
Sublime Flavor: The pairing of rich white chocolate and tangy raspberries creates a taste explosion that’s utterly unforgettable.
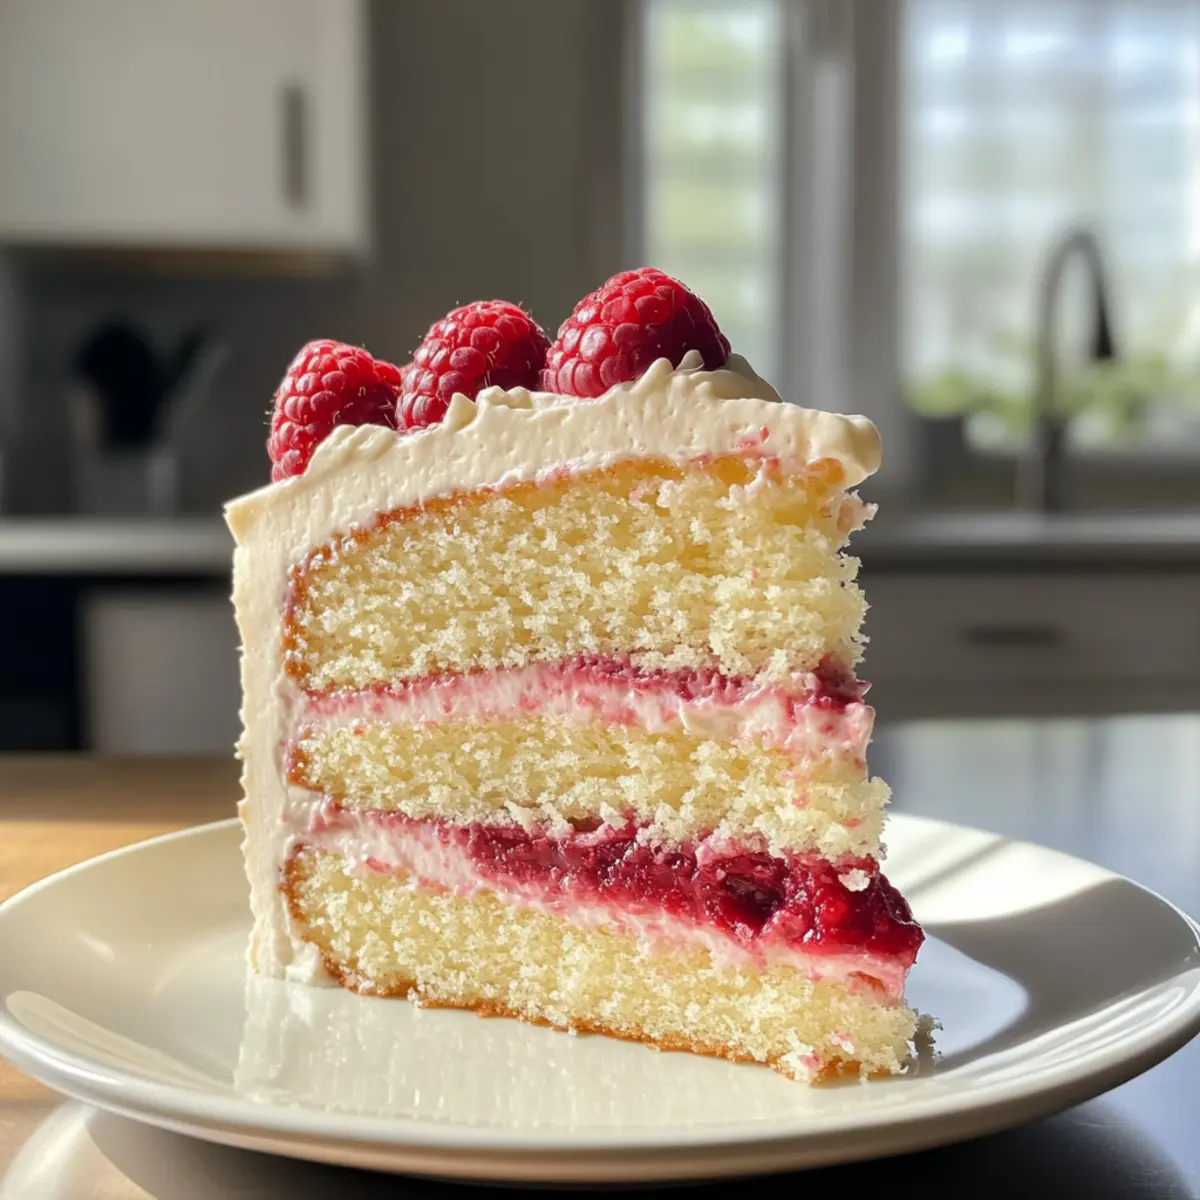
Eye-Catching Presentation: Impress your guests with gorgeous layers adorned with vibrant raspberries and delicate chocolate curls.
Effortless Elegance: This cake steals the show at any gathering yet is surprisingly easy to make—perfect for beginner bakers and pros alike!
Versatile Delight: From birthdays to brunches, this dessert fits any occasion or celebration, ensuring smiles all around.
Make-Ahead Convenience: With simple storage options, you can bake it ahead of time, making hosting stress-free.
If you’re a fan of fruity desserts or need a delectable cake for your next celebration, this White Chocolate Raspberry Dream Cake will surely succeed. Treat yourself to another delightful recipe by exploring my High Protein Chocolate Chia Pudding for a deliciously healthy option!
White Chocolate Raspberry Dream Cake Ingredients
For the Cake
• All-purpose flour – Provides structure; substitute with gluten-free flour for a gluten-free option.
• Baking powder – Helps the cake rise; ensure it’s fresh for the best results.
• Salt – Enhances flavor; can reduce slightly, but don’t omit.
• Unsalted butter – Adds richness and moisture; store-bought margarine can work but may alter taste.
• Granulated sugar – Sweetens the cake; brown sugar can add a slight molasses flavor.
• Large eggs – Binds ingredients and adds moisture; egg substitutes may vary in effect.
• Vanilla extract – Adds depth of flavor; use pure vanilla for the best taste.
• White chocolate chips – Contributes sweetness and a creamy texture; opt for high-quality chocolate for optimal flavor.
• Whole milk – Moisture and richness; can substitute with buttermilk for a tangy flavor.
• Fresh or frozen raspberries – Provides tartness and color; thaw frozen berries before use.
For the Raspberry Filling
• Sugar – Sweetens raspberry mixture; adjust based on berry tartness.
• Lemon juice – Brightens and balances flavors; fresh is preferred.
• Cornstarch – Thickens raspberry filling; arrowroot can be a substitute.
For the Frosting
• Unsalted butter – Creates a creamy frosting base; margarine can be used but will change texture.
• Powdered sugar – Sweetens frosting and helps achieve a silky texture; can add less for a less sweet frosting.
• Milk – Adjusts frosting consistency; plant-based milk can be used.
• Vanilla extract (for frosting) – For a flavor boost; keep pure for best results.
Optional Garnish
• Fresh raspberries – Enhance presentation; add brightness and color.
• White chocolate curls – Provide elegance and additional flavor.
• Mint leaves – Add freshness to the overall presentation.
Make this delightful White Chocolate Raspberry Dream Cake and treat yourself to a slice of bliss!
Step‑by‑Step Instructions for White Chocolate Raspberry Dream Cake
Step 1: Prepare the Cake Batter
Begin by preheating your oven to 350°F (175°C). In a large mixing bowl, beat together 1 cup of softened unsalted butter and 2 cups of granulated sugar using an electric mixer until the mixture is light and fluffy, about 5 minutes. Gradually add 4 large eggs, 2 teaspoons of pure vanilla extract, and 1 cup of melted white chocolate chips, blending until incorporated. Slowly mix in 3 cups of all-purpose flour, 1 tablespoon of baking powder, and a pinch of salt alternately with 1 cup of whole milk until just combined.
Step 2: Bake Layers
Grease three 8-inch round cake pans and evenly distribute the batter among them. Smooth the tops with a spatula for an even finish. Bake in the preheated oven for about 30 minutes, or until a toothpick inserted in the center comes out clean. Once done, remove the pans from the oven and allow the cake layers to cool in the pans for about 10 minutes before transferring them to wire racks to cool completely.
Step 3: Make Raspberry Filling
In a medium saucepan over medium heat, combine 2 cups of fresh or thawed raspberries, ½ cup of granulated sugar, and the juice of one lemon. In a separate bowl, mix 2 tablespoons of cornstarch with a little water to make a slurry, then stir it into the raspberry mixture. Cook this on the stove, stirring constantly, until it thickens, about 5-7 minutes. Remove from heat and let the raspberry filling cool completely before using it in the cake assembly.
Step 4: Prepare Frosting
In a large bowl, beat 1 cup of softened unsalted butter until creamy. Gradually add 4 cups of powdered sugar, followed by 1 cup of melted white chocolate, 2 tablespoons of milk, and 1 teaspoon of vanilla extract. Beat on high speed until the frosting is smooth and spreadable, adjusting the milk if necessary to reach your desired consistency.
Step 5: Assemble Cake
Level the tops of the cooled cake layers with a serrated knife if necessary to ensure they stack evenly. Place one layer on a cake stand or plate and spread a generous portion of raspberry filling on top. Carefully place the second layer on top of the first and repeat the filling process. Add the third layer on top, then cover the entire cake with a layer of white chocolate frosting, smoothing it out for a beautiful finish.
Step 6: Decorate
For a stunning presentation, garnish the top of your White Chocolate Raspberry Dream Cake with fresh raspberries, white chocolate curls, and mint leaves. Allow the cake to chill in the refrigerator for at least 30 minutes before slicing, as this will help the frosting set and make for cleaner cuts when serving. Enjoy the delightful blend of flavors and textures!
White Chocolate Raspberry Dream Cake Variations
Feel free to put your own spin on this decadent dessert and let your creativity shine!
-
Gluten-Free: Substitute all-purpose flour with a 1:1 gluten-free blend for a delightful gluten-free version without sacrificing flavor.
-
Vegan Delight: Use plant-based butter, flax eggs, and non-dairy milk for a vegan adaptation that still impresses with its luscious flavors.
-
Chocolate Lovers: Swap out half of the white chocolate chips for dark chocolate chips—richness follows, elevating the cake’s flavor profile.
-
Fruit Fusion: Experiment with other berries like blueberries or strawberries instead of raspberries to create a unique flavor experience; or combine them all for a Berry Bliss Cake!
-
Cupcake Twist: Transform this cake into cupcakes! Simply fill cupcake liners and reduce baking time, then top with frosting and a raspberry on each for a beautiful presentation.
-
Lemon Zest Boost: Add a teaspoon of lemon zest into the cake batter for a bright pop of citrus flavor that complements the raspberries beautifully, enhancing the overall freshness.
Imagine a slice of this divine cake alongside a scoop of homemade vanilla ice cream or drizzled with homemade raspberry sauce—it’s heaven on a plate! If you’re looking for other delicious options, why not try my White Chocolate Raspberry creation or treat yourself to a rich Chocolate Mousse Cake? Enjoy your baking adventure!
How to Store and Freeze White Chocolate Raspberry Dream Cake
Fridge: Store leftovers in an airtight container for up to 4 days, ensuring the cake remains fresh and moist.
Freezer: Individual slices can be frozen for up to 2 months. Wrap each slice in plastic wrap and foil for maximum freshness.
Thawing: When ready to enjoy, thaw slices in the fridge overnight for a gradual defrost, retaining the cake’s delicate texture.
Reheating: For a warm treat, gently reheat individual slices in the microwave for 10-15 seconds—perfect for melting the frosting slightly!
Make Ahead Options
These White Chocolate Raspberry Dream Cake components can be prepared ahead of time, making your baking experience a breeze! You can bake the cake layers up to 3 days in advance; simply wrap them tightly in plastic wrap and refrigerate to keep them fresh. The raspberry filling can be made up to 24 hours before and stored in an airtight container in the fridge. For the frosting, prepare it one day in advance, ensuring it stays covered at room temperature. When you’re ready to serve, allow all components to come to room temperature before assembling for that fresh-baked taste. This makes creating your stunning cake stress-free, so you can focus on enjoying your celebration!
What to Serve with White Chocolate Raspberry Dream Cake?
Indulging in a slice of this decadent cake opens a world of delightful pairings to amplify your dessert experience.
-
Fresh Berries: The tartness of additional berries enhances the cake’s flavor, creating a fresh and vibrant burst in every bite.
-
Vanilla Ice Cream: A scoop of creamy vanilla ice cream adds a luscious contrast to the rich cake, making each mouthful a dreamy treat.
-
Whipped Cream: Light and airy whipped cream provides a lovely texture that perfectly balances the velvety richness of the cake’s frosting.
-
Tea or Coffee: A warm cup of tea or freshly brewed coffee offers a comforting complement, enhancing the cake’s sweet notes beautifully.
-
Chocolate Ganache: For the chocolate lovers, a drizzle of warm chocolate ganache elevates the cake’s richness and adds a silky depth to each slice.
-
Raspberry Sauce: Drizzling homemade raspberry sauce over the cake highlights its fruity element, providing a sweet-tart contrast that brightens the indulgence.
-
Mint Tea: The refreshing taste of mint tea provides a cool, soothing backdrop, perfectly balancing the sweet flavors of the cake.
-
Sour Cream: A dollop of tangy sour cream can cut through the sweetness, offering a deliciously balanced contrast on your palate.
Each of these pairings enhances the White Chocolate Raspberry Dream Cake experience, ensuring that every moment spent indulging is as heavenly as the last.
Expert Tips for White Chocolate Raspberry Dream Cake
-
Room Temperature Ingredients: Use room temperature butter, eggs, and milk for a smoother batter, ensuring a light and fluffy cake texture.
-
Mind the Mixing: Avoid overmixing after adding the dry ingredients; this prevents a dense consistency in your white chocolate raspberry dream cake.
-
Melt Chocolate Gently: When melting white chocolate, use a double boiler or microwave in short bursts to avoid seizing; stir until smooth.
-
Cool Raspberry Filling: Let the raspberry filling cool completely before layering; this prevents melting the frosting and ensures better presentation.
-
Chill Before Serving: Refrigerate the assembled cake for at least 30 minutes before slicing; this helps the frosting set and makes cutting easier for clean slices.
White Chocolate Raspberry Dream Cake Recipe FAQs
How do I select ripe raspberries for my cake?
Absolutely! When choosing raspberries, look for plump, firm berries that are vibrant in color without any dark spots or mushiness. The aroma should be sweet and fragrant. Avoid berries that appear dull or have excessive mold; they won’t provide the best flavor for your White Chocolate Raspberry Dream Cake.
What is the best way to store leftovers?
Very! You can store any leftover cake in an airtight container in the fridge for up to 4 days. Make sure to cover the cake well to prevent it from drying out. If you need to keep it for longer, freezing is a fantastic option!
Can I freeze this cake?
Absolutely! You can freeze individual slices of your White Chocolate Raspberry Dream Cake for up to 2 months. Wrap each slice tightly in plastic wrap and then in aluminum foil to ensure they remain fresh. When you’re ready to indulge, simply thaw the slices in the fridge overnight for the best texture.
What if my raspberry filling is too runny?
No worries! If your raspberry filling turns out too runny, you can add a bit more cornstarch. Mix 1 tablespoon of cornstarch with two tablespoons of cold water to create a slurry. Stir this into your filling while it’s still warm and return it to the heat. Cook, stirring continuously, until thickened to your desired consistency. Let it cool before layering on the cake.
Are there any dietary considerations for this recipe?
Absolutely! You can make this cake gluten-free by substituting the all-purpose flour with a gluten-free alternative. For dairy-free options, use plant-based butter and milk. Keep in mind, however, that these substitutions may alter the final taste and texture slightly. Always check for allergies when serving, especially with chocolate and raspberries.
How can I make this cake in advance?
Certainly! You can bake the layers and prepare the raspberry filling ahead of time. Store the cake layers wrapped in plastic wrap at room temperature. Prepare the raspberry filling and refrigerate it in an airtight container. The frosting can also be made a day in advance and stored in the fridge. When you’re ready to assemble, everything will be ready to go, making your baking experience much smoother!

Indulge in White Chocolate Raspberry Dream Cake Bliss
Ingredients
Equipment
Method
- Preheat your oven to 350°F (175°C).
- In a large mixing bowl, beat together softened unsalted butter and granulated sugar until light and fluffy, about 5 minutes.
- Gradually add eggs, vanilla extract, and melted white chocolate chips, blending until incorporated.
- Slowly mix in flour, baking powder, and salt alternately with milk until just combined.
- Grease three 8-inch round cake pans and distribute the batter evenly.
- Bake for about 30 minutes, until a toothpick comes out clean.
- Cool in pans for 10 minutes before transferring to wire racks.
- In a medium saucepan, combine raspberries, sugar, and lemon juice.
- Mix cornstarch with water to make a slurry, stir into the raspberry mixture, and cook until thickened, about 5-7 minutes.
- Let the raspberry filling cool completely before using it.
- Beat softened unsalted butter until creamy, then gradually add powdered sugar, melted white chocolate, milk, and vanilla extract.
- Beat until smooth and spreadable, adjusting milk as necessary.
- Level the tops of the cooled cake layers and stack them with raspberry filling in between.
- Cover the cake with white chocolate frosting and smooth the top.
- Garnish the top with fresh raspberries, white chocolate curls, and mint leaves.
- Chill in the refrigerator for at least 30 minutes before slicing.
Leave a Reply