
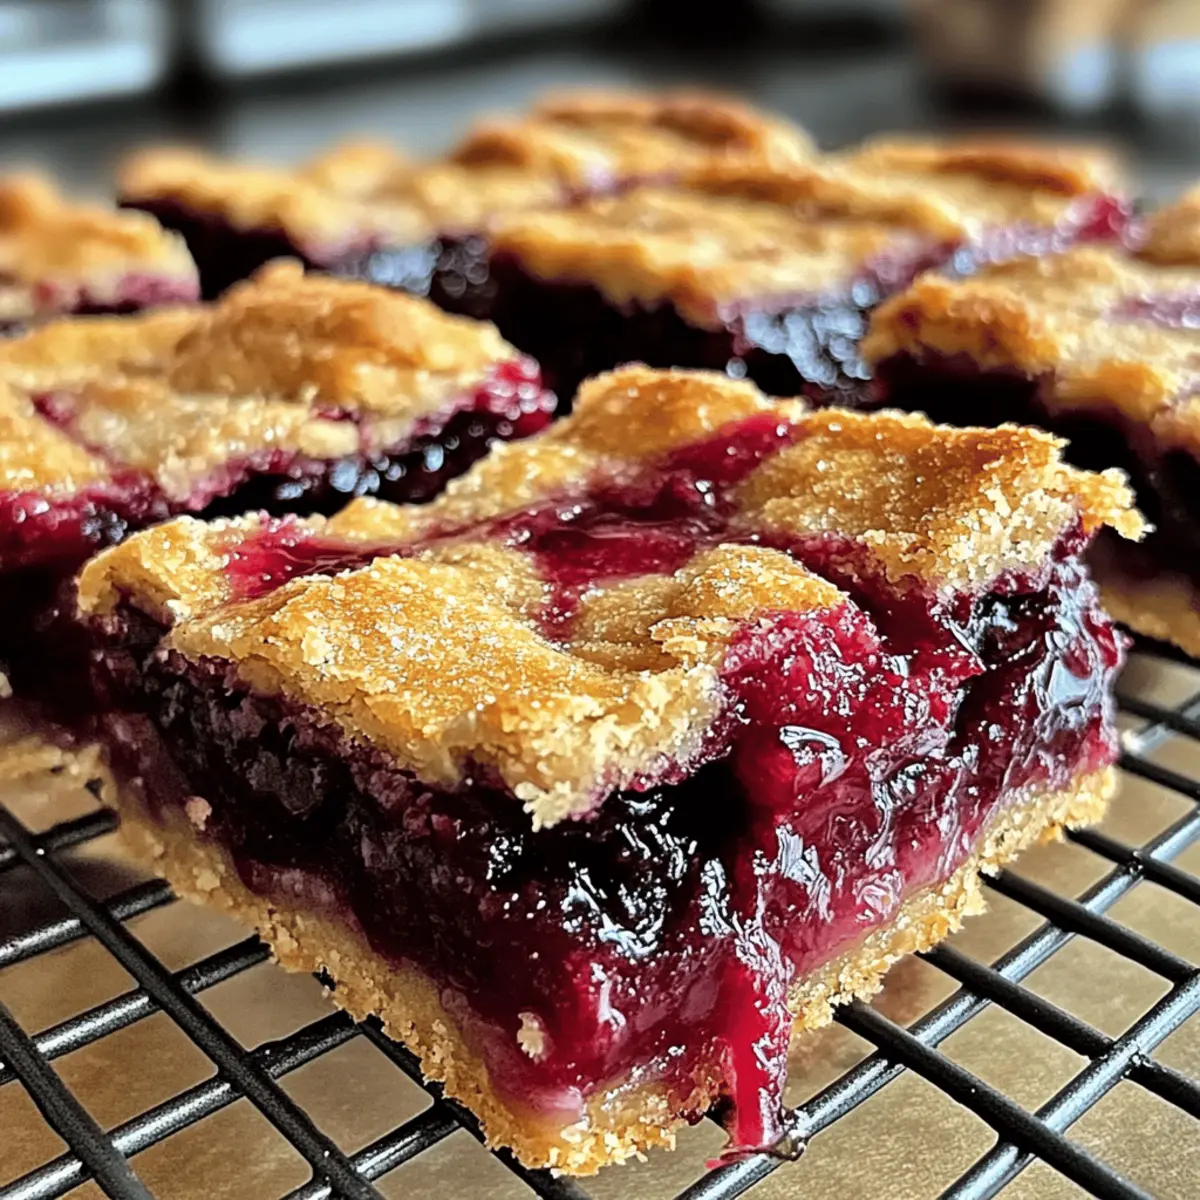
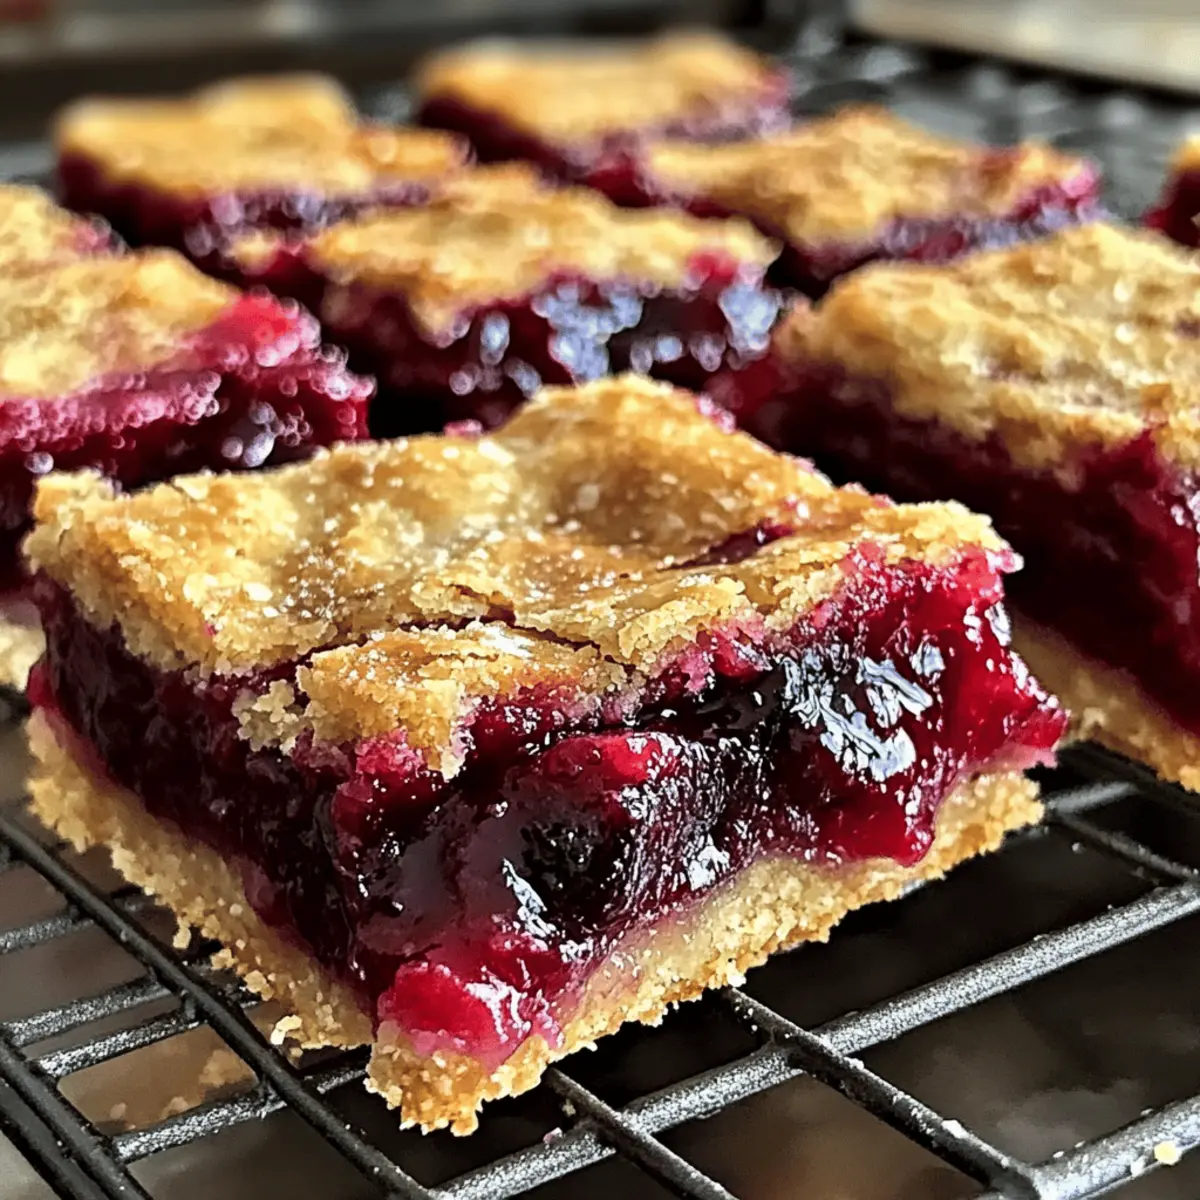
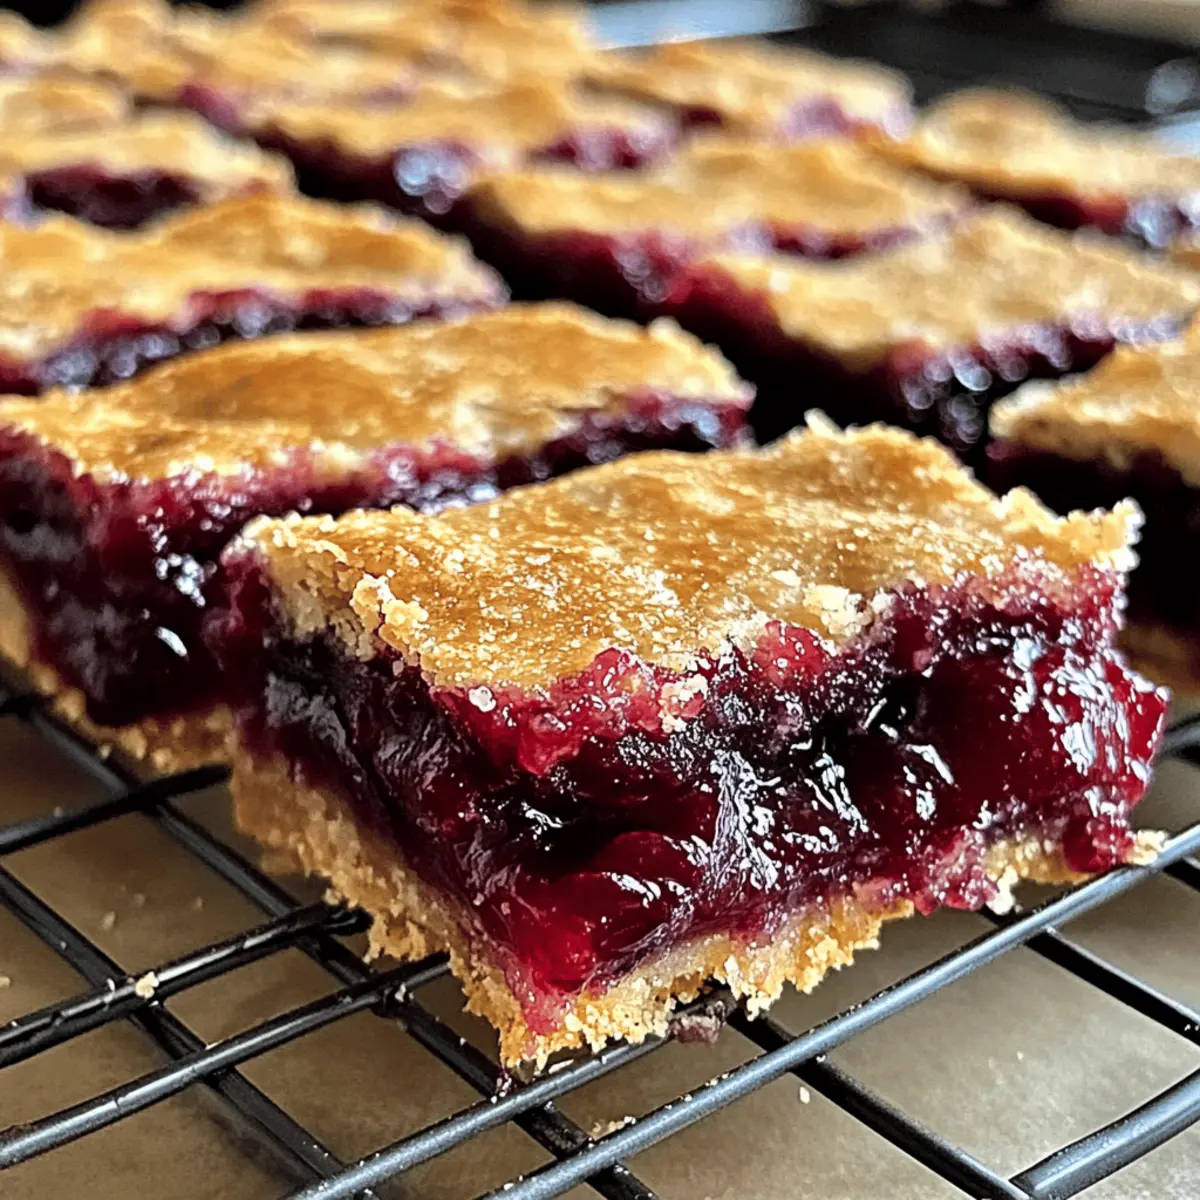
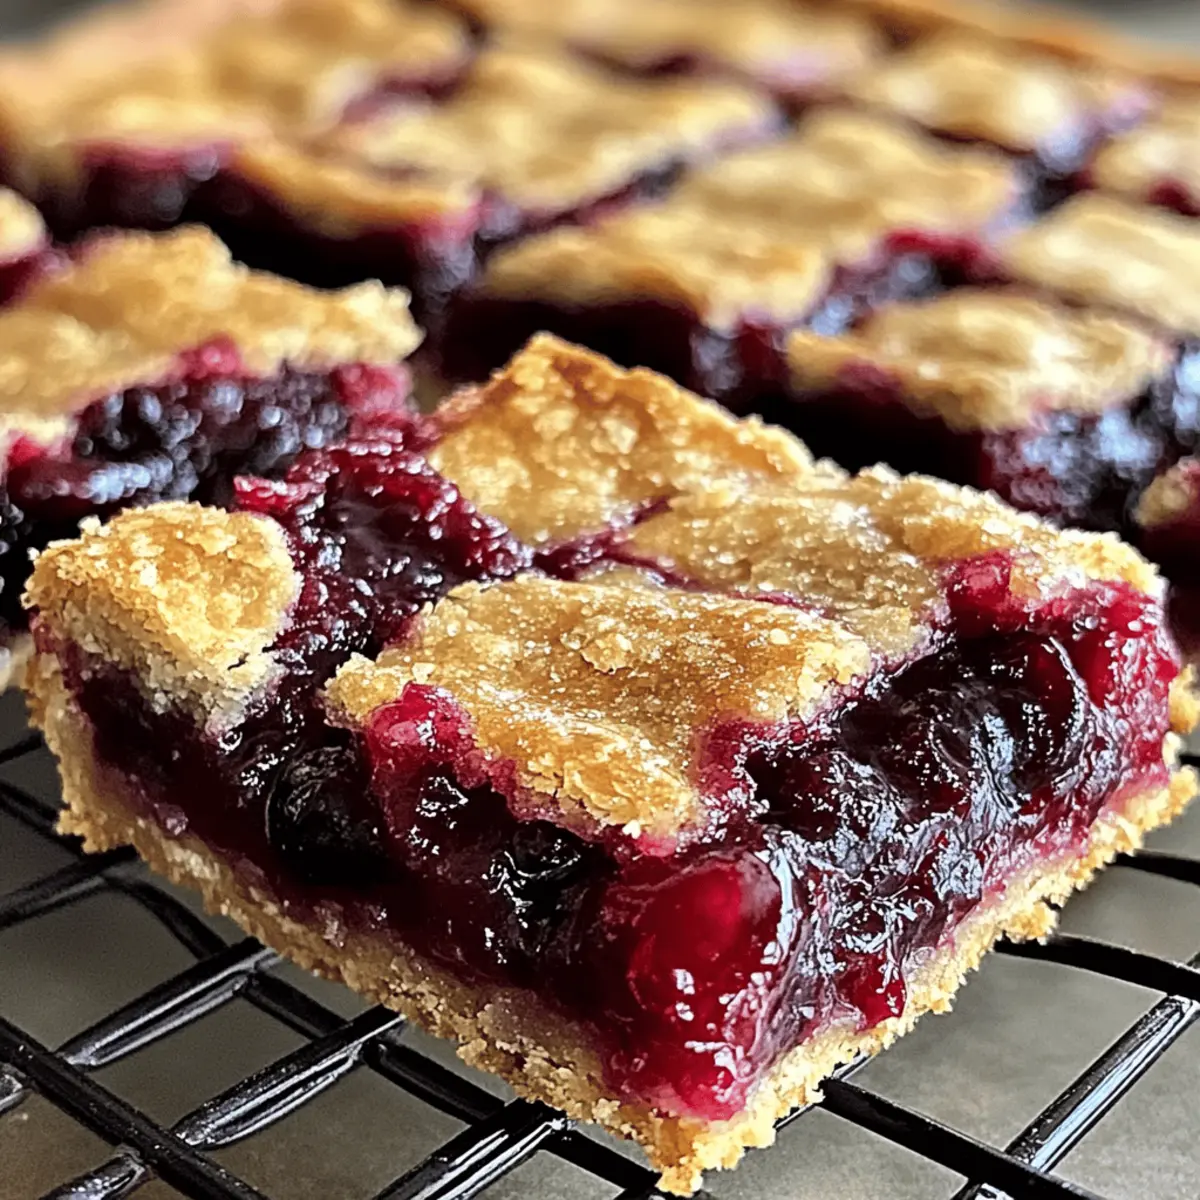
The sweet, tangy aroma of cherries fills the kitchen, instantly bringing back memories of summer picnics and family gatherings. I’m excited to share my recipe for Irresistible Cherry Pie Bars, a delightful twist on the classic cherry pie that’s not only easy to prepare but also perfect for sharing with loved ones. These bars feature a buttery crust that embraces a lush cherry filling, making them a true crowd-pleaser at any occasion. With just a handful of ingredients and minimal prep time, you’ll have a comforting dessert that satisfies any craving for homemade goodness. Plus, they’re adaptable—feel free to switch out the cherries for your favorite fruits! So, are you ready to bring a slice of nostalgia to your table? Let’s dive into this delightful recipe!
Why Are Cherry Pie Bars Irresistible?
Irresistible sweetness: These Cherry Pie Bars capture the essence of classic pie in a simple, shareable form—perfect for your next gathering.
Minimal prep time: With only a handful of ingredients, you can whip up these treats quickly, making them a go-to for busy days.
Versatile flavors: Feel free to switch up the cherries for your favorite fruits, allowing endless adaptability to suit any taste.
Crowd-pleasing appeal: The buttery crust and luscious filling come together to create a dessert that everyone will adore, whether at potlucks or family dinners.
Nostalgic comfort: Enjoy the comforting flavors and aromas reminiscent of summer—they make every bite a delightful experience. Try serving them alongside our delectable vanilla ice cream for a perfect dessert duo!
Cherry Pie Bars Ingredients
• Discover the essentials for making Cherry Pie Bars that are irresistible!
For the Crust
- Butter – Adds richness and moisture; unsalted butter allows for adjustable salt levels.
- Granulated Sugar – Sweetens the crust; consider using brown sugar for a deeper flavor.
- All-Purpose Flour – Forms the crust structure; whole wheat flour can be substituted for added texture.
- Salt – Enhances flavor and balances the sweetness.
For the Filling
- Fresh Cherries or Pie Filling – Provides that signature sweet, tangy cherry flavor; canned cherry pie filling is a convenient substitute.
- Vanilla Extract – Adds a fragrant note; optional, but enhances the filling’s flavor.
Step‑by‑Step Instructions for Cherry Pie Bars
Step 1: Preheat the Oven
Start by preheating your oven to 350°F (175°C). This temperature is essential to achieve the perfect golden crust for your Cherry Pie Bars. While the oven heats up, gather your baking dish, parchment paper, and all your ingredients to ensure a smooth cooking experience.
Step 2: Prepare the Crust
In a medium mixing bowl, combine melted butter, granulated sugar, all-purpose flour, and a pinch of salt. Use a fork or your hands to mix until the mixture resembles coarse crumbs. Once mixed, press this crumbly dough evenly into the bottom of a greased 9×9-inch baking dish. Make sure to create an even layer for the foundation of your Cherry Pie Bars.
Step 3: Bake the Crust
Place the baking dish in the preheated oven and bake the crust for 15 minutes, or until it turns lightly golden. This step is crucial as it sets the texture and flavor of the crust. Keep an eye on it, as it should be just golden and not overdone, ready to cradle the cherry filling perfectly.
Step 4: Prepare the Cherry Filling
While the crust bakes, prepare the cherry filling by cooking the pitted, fresh cherries in a saucepan over medium heat. Add a bit of sugar and a splash of vanilla extract if using, stirring frequently until the mixture thickens slightly—about 5–7 minutes. If using canned cherry pie filling, you can skip this step and prepare it according to the package directions.
Step 5: Assemble the Bars
After the crust has baked, remove it from the oven and let it cool slightly. Pour the warm cherry filling evenly over the baked crust, spreading it gently to ensure every bite has that delicious cherry flavor. This layer adds a vibrant touch and a delightful contrast to the buttery base.
Step 6: Bake the Cherry Pie Bars
Return the baking dish to the oven and bake for an additional 25 to 30 minutes. Keep an eye on the edges, which should turn bubbly and start to brown just slightly. This visual cue indicates that the cherry filling is cooking through, creating the perfect texture for your Cherry Pie Bars.
Step 7: Cool and Slice
Once baked, remove the dish from the oven and let the bars cool completely at room temperature. This step is essential as cooling allows the filling to set properly, making slicing easier. After cooling, cut into squares and serve your delicious Cherry Pie Bars to friends and family. Enjoy!
Make Ahead Options
These Cherry Pie Bars are perfect for busy home cooks looking to save time without sacrificing flavor! You can prepare the crust up to 24 hours in advance; simply mix the ingredients and press them into the baking dish, then cover and refrigerate. The cherry filling can also be made ahead and stored in an airtight container for up to 3 days in the fridge; just ensure it’s cooled completely before placing it in the fridge. When you’re ready to serve, simply bake the crust and add the filling, then pop them back in the oven until bubbly. This way, you’ll enjoy your homemade Cherry Pie Bars just as delicious and fresh without the last-minute rush!
Cherry Pie Bars Variations & Substitutions
Customize your Cherry Pie Bars with these delightful twists and swaps that will make your taste buds sing!
-
Berry Medley: Substitute fresh cherries with strawberries, blueberries, or raspberries for a fresh fruit twist. Each berry adds its unique flavor, making each bar a delightful surprise.
-
Spiced Flavor: Add a sprinkle of cinnamon or nutmeg to the cherry filling for a warmer, spiced touch. This simple addition elevates your dessert’s aromatic profile, inviting everyone to take a bite.
-
Crumble Topping: Create a crumb topping by mixing extra flour, sugar, and butter into a crumble before baking, adding texture and a crunchy finish. This layer of deliciousness takes your Cherry Pie Bars to the next level.
-
Nutty Crunch: Incorporate chopped walnuts or pecans into the crust for added crunch and a hint of nuttiness. The combination of flavors creates a delightful balance with the sweet cherry filling.
-
Zesty Twist: For a refreshing kick, add a bit of lemon or orange zest to the filling. This citrus twist brightens the flavors and adds an unexpected brightness to each bite.
-
Chocolate Delight: Drizzle melted chocolate over the baked bars or incorporate chocolate chips into the filling for a rich, decadent flavor. Chocolate and cherries are a classic pairing that everyone will love.
-
Swap the Crust: Use a graham cracker crust instead of a buttery crust for a different texture and taste. This sweet and crunchy base offers a delightful contrast to the luscious cherry filling.
-
Guilt-Free Option: Try using a sugar substitute or whole wheat flour for a healthier version of these bars without compromising on taste. You’ll enjoy all the delicious flavors with a lighter touch!
Feel free to mix and match these ideas to create your perfect version of Cherry Pie Bars. For an added treat, serve them with a scoop of our tempting vanilla ice cream on the side for a dessert that’s truly irresistible!
What to Serve with Cherry Pie Bars
The aroma of buttery, cherry-filled bars lingers in the air, inviting everyone to gather around for a sweet experience.
-
Vanilla Ice Cream: The creamy, cold scoop melts beautifully over warm Cherry Pie Bars, creating a delightful contrast in temperature and texture. It’s a classic pairing that enhances that nostalgic flavor.
-
Whipped Cream: A dollop of fluffy whipped cream adds an airy touch to each bite, complementing the dense filling while providing extra sweetness.
-
Coffee: A steaming cup of coffee offers a rich, bitter balance to the sugary bars, making it the perfect afternoon treat for a cozy gathering.
-
Fresh Berries: Serve a side of fresh strawberries or blueberries for a vibrant, tart complement that brightens up the dessert and adds a refreshing element.
-
Chocolate Drizzle: A light drizzle of melted chocolate over the bars enriches the flavor profile, adding a touch of indulgence that chocolate lovers will adore.
-
Mint Tea: The herbal freshness of mint tea works wonders in softening the sweetness of the Cherry Pie Bars, creating a harmonious, soothing dessert experience.
-
Cinnamon Sugar Pecans: The crunchy, spiced nuts provide a delightful contrast, adding a sweet crunch that pairs beautifully with the soft cherry filling.
-
Lemonade: The citrusy zing from a glass of lemonade counters the sweetness, making it an invigorating accompaniment that brightens up any summer picnic.
-
Almond Milk: For a dairy-free option, chilled almond milk is a nutty, light choice that works well alongside the rich flavors of the bars.
Expert Tips for Cherry Pie Bars
• Pitted Cherries: Ensure cherries are pitted and roughly chopped before adding them to the filling for even distribution and easier slicing.
• Cooling Time: Allow the cherry pie bars to cool completely in the baking dish before slicing; this ensures clean edges and prevents a messy serving.
• Storage Know-How: If you have leftovers, store them in an airtight container at room temperature for up to 3 days or refrigerate for up to a week to maintain freshness.
• Flavor Boost: Consider adding a sprinkle of cinnamon or nutmeg to the filling for a warm, spiced twist that enhances the irresistible cherry flavor.
• Crust Perfection: Keep an eye on the crust while baking. It should turn lightly golden, as overbaking can lead to a dry texture for your Cherry Pie Bars.
Storage Tips for Cherry Pie Bars
Room Temperature: Store your Cherry Pie Bars in an airtight container at room temperature for up to 3 days to keep them fresh and flavorful.
Fridge: For longer storage, refrigerate the bars in an airtight container for up to a week, allowing you to enjoy them for a little while longer.
Freezer: If you want to keep them for an extended period, freeze Cherry Pie Bars for up to 2 months in a freezer-safe container, layered with parchment paper for easy separation.
Reheating: To enjoy them warm, simply thaw in the refrigerator overnight, then reheat in the microwave at low power for quick warming or back in a preheated oven at 350°F (175°C) for a few minutes.
Cherry Pie Bars Recipe FAQs
How do I choose ripe cherries for the filling?
When selecting fresh cherries, look for firm ones with a deep red color and a shiny skin. Avoid cherries that have dark spots all over, as they may be overripe. The best cherries will be sweet, plump, and free from blemishes—this ensures the cherry flavor shines in your Cherry Pie Bars!
How should I store leftover Cherry Pie Bars?
To keep your bars fresh, store them in an airtight container at room temperature for up to 3 days. If you want to prolong their life, refrigerate them for up to a week. If you have a few leftover, I often pop them into the freezer, where they can stay good for up to 2 months. Just remember to separate layers with parchment paper to make eating them later a piece of cake!
Can I freeze Cherry Pie Bars?
Absolutely! To freeze your Cherry Pie Bars, allow them to cool completely, then cut them into squares. Layer them with parchment paper in a freezer-safe container and seal it tightly. They can be frozen for up to 2 months. When you’re ready to enjoy, just thaw them in the fridge overnight and warm them up in the oven or microwave for a comforting treat!
What if my crust gets too hard?
If your crust ends up TOO hard, it might have been overbaked or mixed too much. Next time, try to keep an eye on the baking time, ensuring it turns just golden and use a light touch when mixing the dough. If you want to soften it, just warm it slightly in the microwave for a few seconds before serving!
Are there any dietary restrictions I should consider while making these Cherry Pie Bars?
Yes! If you’re making these for someone with dietary restrictions, opt for gluten-free flour as a substitute for all-purpose flour. Additionally, check if the cherries are suitable for those with allergies. If using canned pie filling, make sure it doesn’t contain ingredients that could trigger allergies. Most importantly, for those watching their sugar intake, feel free to substitute with a sugar alternative, ensuring everyone can enjoy these delicious Cherry Pie Bars!
Irresistible Cherry Pie Bars: Your New Favorite Sweet Treat
Ingredients
Equipment
Method
- Preheat your oven to 350°F (175°C).
- In a medium mixing bowl, combine melted butter, granulated sugar, all-purpose flour, and salt. Mix until resembling coarse crumbs and press into a greased 9x9-inch baking dish.
- Bake the crust for 15 minutes until lightly golden.
- Prepare the cherry filling by cooking fresh cherries in a saucepan over medium heat. Add sugar and vanilla extract, stirring until thickened (5-7 minutes).
- Pour the cherry filling evenly over the baked crust.
- Bake for an additional 25 to 30 minutes, until edges are bubbly and golden.
- Let the bars cool completely at room temperature, then cut into squares and serve.
Leave a Reply