
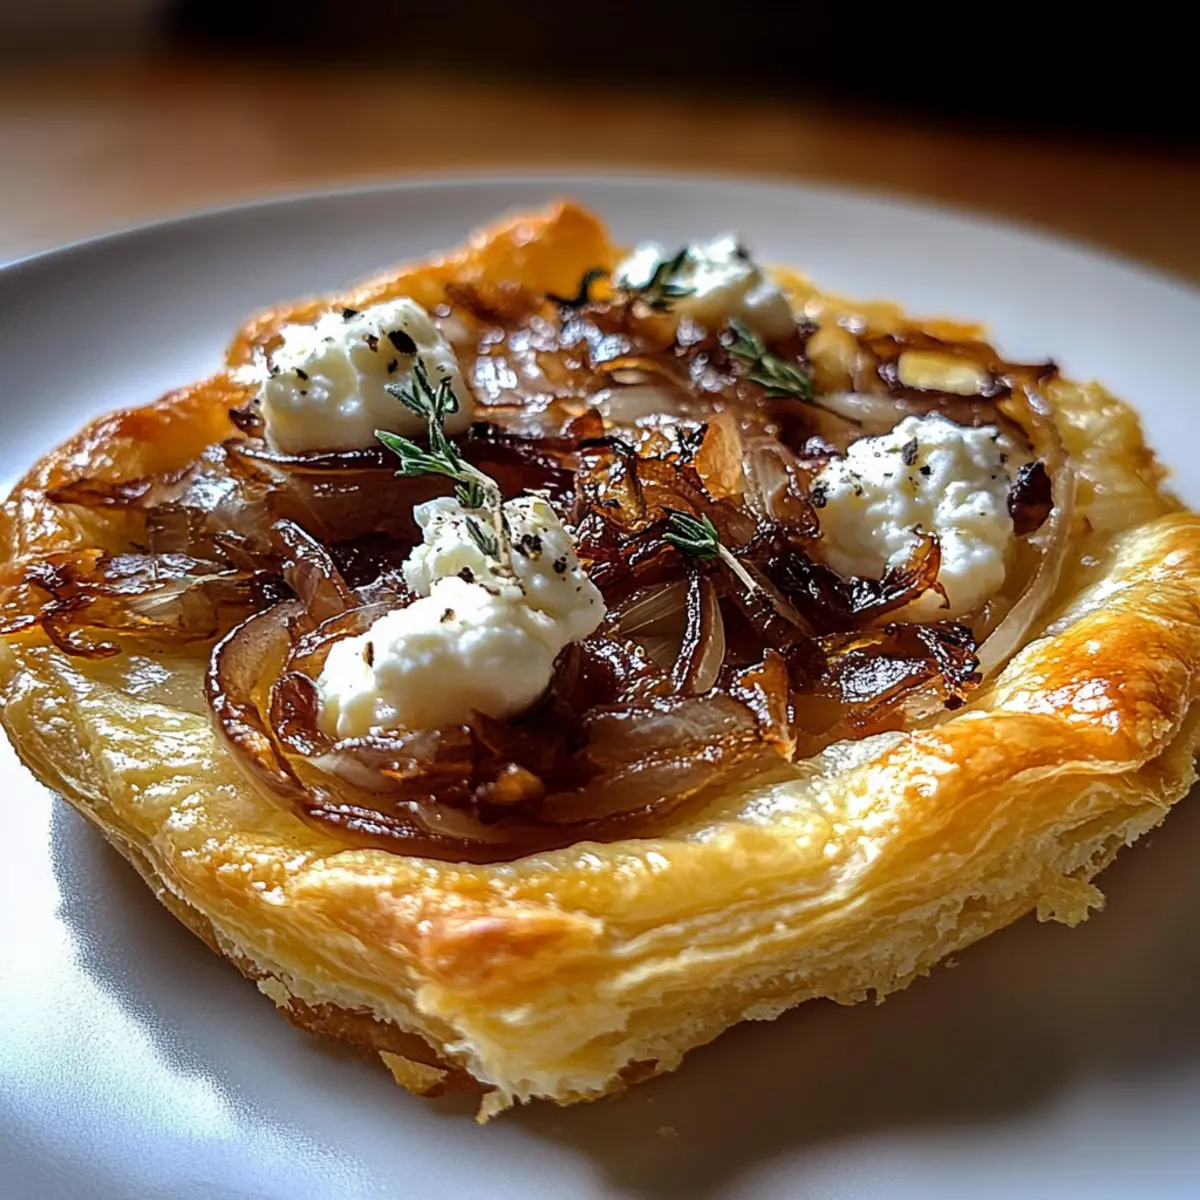
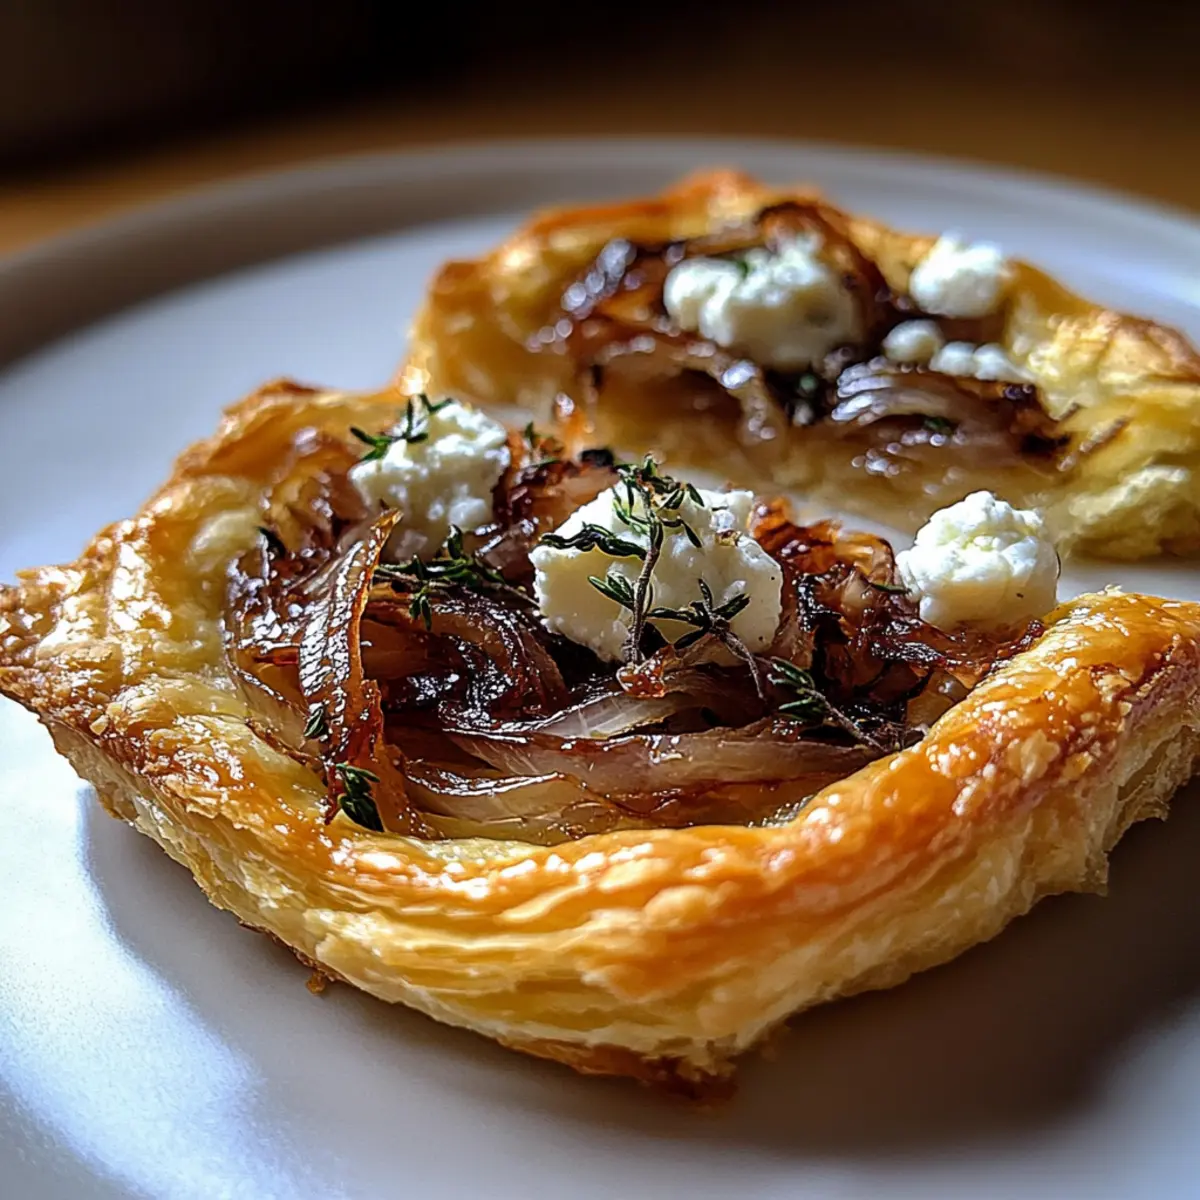
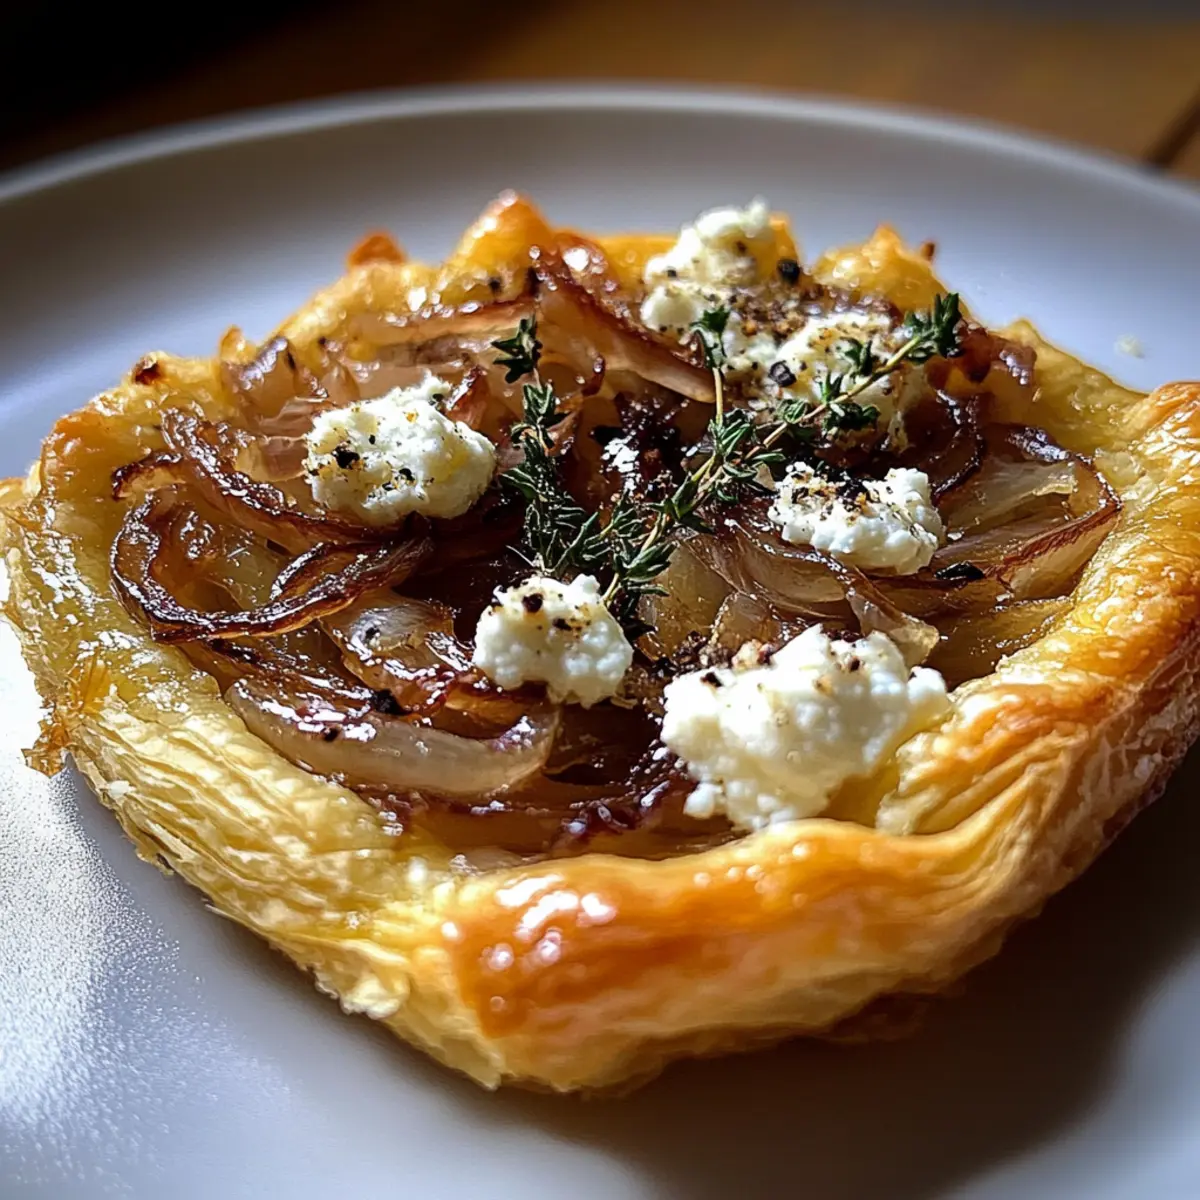
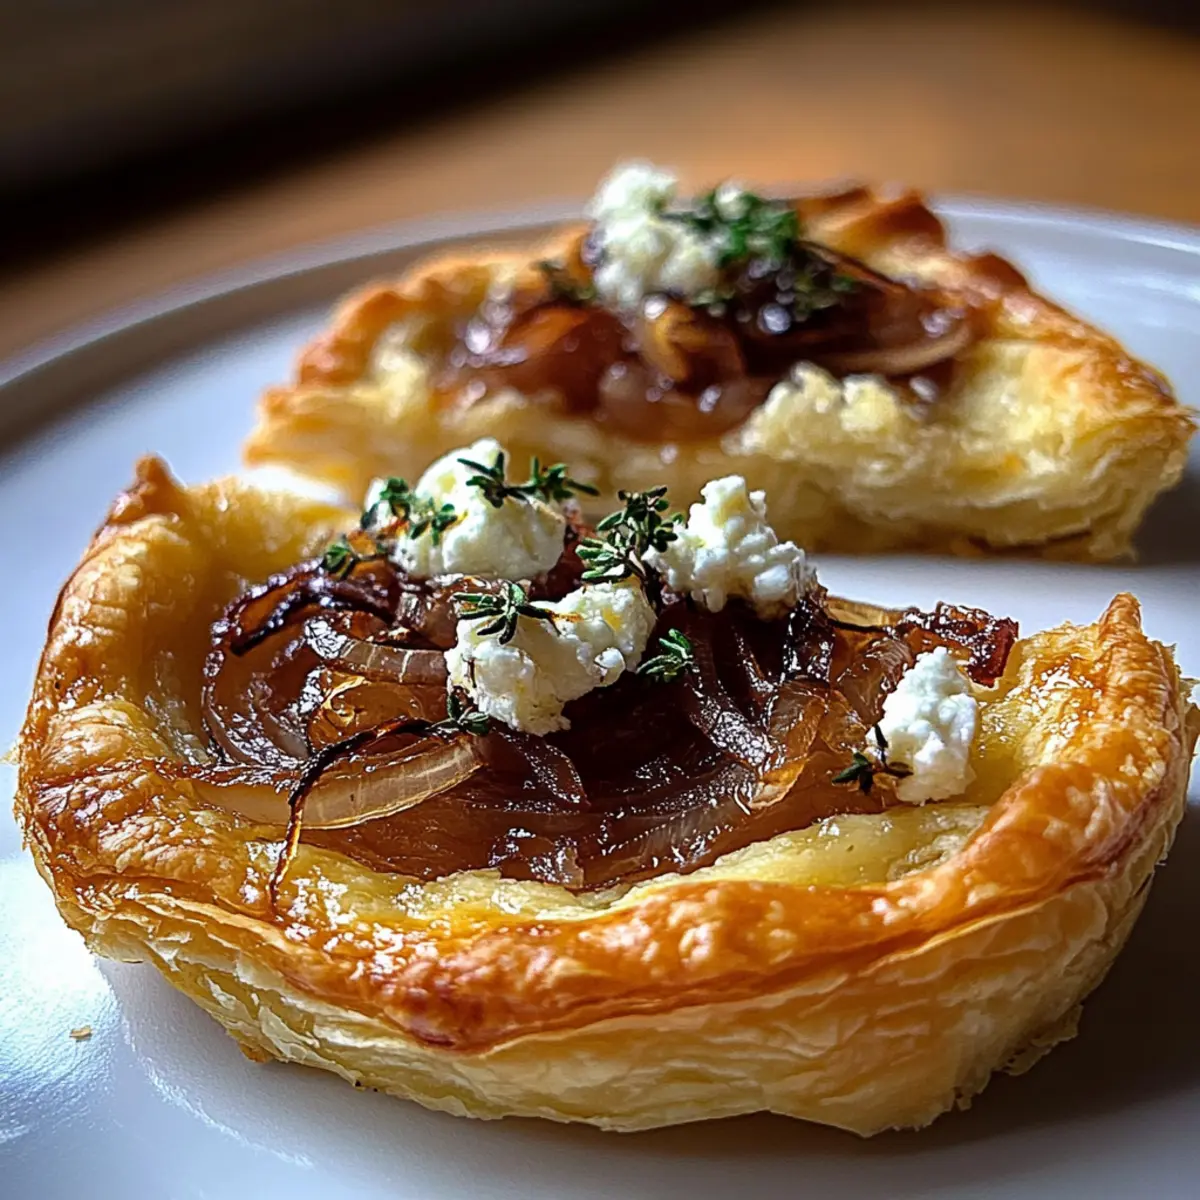
As I stood in my cozy kitchen, the sweet aroma of slowly caramelized onions wafted through the air, igniting nostalgia and hunger all at once. This transformative magic is the heart of my Irresistible Caramelized Onion and Goat Cheese Tarts. With just 25 minutes of preparation and 20 minutes of baking, these savory delights turn simple ingredients into an impressive appetizer that will charm any guest. Packed with flavor and an irresistible flaky texture, they make for a perfect solution to those tired of fast food. Imagine serving these golden pastries at your next gathering or enjoying them as a personal treat, making bite-sized memories with every morsel. What twists will you add to make them your own?
Why Are These Tarts So Irresistible?
Simplicity, just a few ingredients come together to create a gourmet appetizer that’s as easy to whip up as it is satisfying. Rich, savory flavors shine through with the perfect blend of sweet caramelized onions and creamy goat cheese. Elegant presentation makes them a standout dish for gatherings, while also being a fantastic treat during quiet nights at home. Versatility allows you to customize with other veggies or cheeses, ensuring they never get boring. Quick to prepare, these tarts save you time without sacrificing flavor! Serve them warm as a delightful starter or enjoy them at room temperature like these delicious Egg Cheese Toasts. Trust me, your taste buds will thank you!
Caramelized Onion and Goat Cheese Tarts Ingredients
• Here’s what you’ll need to create these delightful tarts!
For the Pastry
- Puff Pastry – This flaky, buttery base is essential for achieving that light texture; opt for frozen for convenience.
For the Onions
- Olive Oil – Adds richness while frying the onions; you can swap it with butter for a delightful twist.
- Butter – Enhances the flavor; use an equal amount of oil if you’re aiming for a dairy-free option.
- Onions – Yellow onions caramelize beautifully for sweetness; feel free to use red onions for a sharper bite.
- Sugar – This helps with caramelization, enhancing the sweetness of the onions; honey or maple syrup works as alternatives.
- Salt & Pepper – Important for flavor balance; adjust according to your taste preferences.
- Balsamic Vinegar – Provides acidity to balance the sweetness; red wine vinegar can serve as a good substitute.
- Thyme – This earthy herb complements the cheese beautifully; rosemary can be used for a different herbal note.
For the Topping
- Goat Cheese – Its creamy tang works wonders with the sweet onions; for a milder flavor, try using cream cheese or feta instead.
These Caramelized Onion and Goat Cheese Tarts are not just a recipe; they’re an experience waiting to happen! Enjoy your cooking adventure!
Step‑by‑Step Instructions for Caramelized Onion and Goat Cheese Tarts
Step 1: Caramelize the Onions
In a large skillet, heat 2 tablespoons of olive oil and 1 tablespoon of butter over medium heat until shimmering. Add 3 sliced yellow onions along with 1 tablespoon of sugar, and season with salt and pepper. Fry gently for 15-20 minutes, stirring occasionally, until the onions become golden brown and jammy. Finally, stir in 1 tablespoon of balsamic vinegar and a sprinkle of thyme, cooking for an additional 5 minutes to deepen the flavors.
Step 2: Prepare the Pastry
While the onions are caramelizing, lightly flour a clean surface and roll out one sheet of frozen puff pastry to about ¼ inch thick. Cut the pastry into 6 equal rectangles to form the base of your Caramelized Onion and Goat Cheese Tarts. Ensure the edges are slightly thicker for a defined crust, and transfer them to a parchment-lined baking sheet to ready them for assembly.
Step 3: Assemble Tarts
Once the onion mixture has cooled slightly, spread a generous layer of caramelized onions evenly over each pastry rectangle, leaving about a ½ inch border around the edges. Crumble 4 ounces of goat cheese on top of the onions, allowing the creamy tang to blend beautifully with the sweet toppings. For an extra touch, feel free to scatter additional thyme leaves before proceeding to the next step.
Step 4: Bake
Preheat your oven to 400°F (200°C). Bake the assembled tarts in the preheated oven for about 15 minutes, or until they are puffed up and golden brown. Keep an eye on the pastries, as they should be beautifully crisp and flaky when they’re ready. Once done, remove them from the oven and allow them to cool slightly on the baking sheet before serving to enjoy the delightful contrast of textures in your Caramelized Onion and Goat Cheese Tarts.
How to Store and Freeze Caramelized Onion and Goat Cheese Tarts
Fridge: Store leftover tarts in an airtight container for up to 2 days to maintain freshness.
Freezer: For longer storage, freeze the assembled but unbaked tarts. Wrap tightly in plastic wrap and foil; they can last up to 3 months.
Reheating: For the best results, reheat baked tarts in a 350°F oven for 5-7 minutes to restore crispness. Avoid microwaving, as it can lead to sogginess.
Make-Ahead: You can prepare the filling and pastry in advance. Assemble the Caramelized Onion and Goat Cheese Tarts right before baking for optimal taste and texture.
Caramelized Onion and Goat Cheese Tarts Variations
Feel free to make these tarts your own with delightful twists and substitutions that spark your culinary creativity!
-
Cheese Options: Swap out goat cheese for ricotta or a blend of creamy cheeses for different flavor profiles.
-
Veggie Boost: Add chopped spinach or sautéed mushrooms for added nutrition and a different texture that complements the tarts beautifully.
-
Sweet Drizzle: Drizzle with honey before baking to enhance the sweetness of the caramelized onions, creating a delicious contrast of flavors.
-
Herb Twists: Instead of thyme, try rosemary or sage for a fresh herbal twist that adds depth to your savory tarts.
-
Gluten-Free: Use gluten-free puff pastry for a friendly alternative that’s just as flaky and satisfying.
-
Spicy Kick: Add crushed red pepper flakes or a sprinkle of cayenne for a subtle heat that elevates the overall flavor profile.
-
Savory Additions: Mix in some crumbled bacon or prosciutto before baking for a meaty, savory twist that pairs wonderfully with the cheese.
-
Accompanying Dips: Serve with a side of balsamic reduction or fig jam for an extra layer of flavor that will keep your guests coming back for more!
These rifts on the classic Caramelized Onion and Goat Cheese Tarts will not only impress your guests but also keep your taste buds delighted and eager for more delicious home-cooked meals! For another cheesy treat, you might also enjoy these Mashed Potato Cheese Puffs or a cozy dish of Chicken Mac Cheese!
What to Serve with Caramelized Onion and Goat Cheese Tarts
Looking to elevate your delightful tarts into a full culinary experience? Here are some delicious pairings that will create a harmonious meal.
-
Creamy Mashed Potatoes: Velvety and buttery, these provide a comforting balance to the tarts’ savory notes and maintain an elevated feel.
-
Mixed Green Salad: Fresh greens dressed in a light vinaigrette add brightness and a crunchy texture, offsetting the creamy layers of the tarts beautifully.
-
Roasted Cherry Tomatoes: Their burst of sweetness complements the tart’s flavors, while their juicy texture contrasts wonderfully with the flaky pastry.
-
Herbed Quinoa: Packed with protein and herbs, this dish adds a nutty flavor and fluffy texture that enhances the overall meal experience.
-
Carrot and Celery Sticks: Perfect for munching, these fresh, crunchy veggies offer a refreshing break from the richness of the tarts. Dip them into a tangy yogurt sauce for added flavor!
-
Sparkling White Wine: A chilled glass of this bubbly drink complements the tangy goat cheese, making it an elegant choice for any gathering.
For dessert, consider serving a light fruit sorbet. Its refreshing sweetness can cleanse the palate, making for a perfect finish after the caramelized onion and goat cheese tarts.
Expert Tips for Caramelized Onion and Goat Cheese Tarts
• Patience Is Key: Allow onions to caramelize slowly over medium heat for a rich, sweet flavor; stirring too often can result in uneven cooking.
• Perfect Layering: Spread caramelized onions evenly on the pastry to avoid sogginess; keep a border around the edges.
• Add a Sweet Drizzle: For a unique flavor twist, drizzle a small amount of honey on top before baking your Caramelized Onion and Goat Cheese Tarts.
• Reheat with Care: Instead of using a microwave, reheat leftovers in a 350°F oven for 5-7 minutes to maintain their crispiness.
• Cheese Substitutions: Experiment with different cheeses like ricotta or feta for a milder flavor, but ensure the texture complements the caramelized onions.
Make Ahead Options
These Caramelized Onion and Goat Cheese Tarts are perfect for busy home cooks looking to save time during meal prep! You can caramelize the onions up to 3 days in advance and store them in an airtight container in the refrigerator. Additionally, you can roll out the pastry and cut it into rectangles up to 24 hours ahead, keeping them covered to prevent drying out. When you’re ready to serve, simply assemble the tarts by topping the pastry with the chilled onions and crumbled goat cheese, then bake as directed. This way, you’ll have a gourmet appetizer ready with minimal effort, allowing you to enjoy delicious homemade flavors without the last-minute rush!
Caramelized Onion and Goat Cheese Tarts Recipe FAQs
What type of onions should I use for caramelizing?
For the best results in your Caramelized Onion and Goat Cheese Tarts, I recommend using yellow onions as they caramelize beautifully, becoming sweet and jammy. If you prefer a sharper taste, feel free to swap in red onions. The key is to be patient—let them cook slowly for rich flavor.
How long can I store the tarts in the fridge?
You can store leftover tarts in an airtight container for up to 2 days. To keep them fresh and flavorful, make sure they’re completely cooled before placing them in the container. If you find them losing crispness, reheat them in a 350°F oven for about 5-7 minutes to regain that delightful flaky texture.
Can I freeze the tarts?
Absolutely! For longer storage, I often freeze the assembled but unbaked tarts. Simply wrap each tart tightly in plastic wrap, then in foil to prevent freezer burn. They can be frozen for up to 3 months. When you’re ready to enjoy, bake them directly from the freezer—just add a few extra minutes to their baking time!
What if my caramelized onions are too soggy?
No worries! If your onions turn out too soggy, you may not have cooked them long enough to release their moisture. To fix this, return your cooked onions to the pan over low heat to evaporate excess liquid. Stir occasionally over low heat until they are thickened and jammy. Then, proceed with assembling your tarts!
Are these tarts suitable for people with dietary restrictions?
Yes! These Caramelized Onion and Goat Cheese Tarts can be adjusted for various dietary needs. For a dairy-free option, substitute butter with olive oil and use a dairy-free cheese. Just keep an eye on ingredient labels for any allergens. They’re perfect for vegetarian diets and can be made nut-free with proper cheese choices.
Savory Caramelized Onion and Goat Cheese Tarts You’ll Love
Ingredients
Equipment
Method
- In a large skillet, heat 2 tablespoons of olive oil and 1 tablespoon of butter over medium heat until shimmering. Add 3 sliced yellow onions along with 1 tablespoon of sugar, and season with salt and pepper. Fry gently for 15-20 minutes until golden brown and jammy. Stir in 1 tablespoon of balsamic vinegar and thyme, cooking for an additional 5 minutes.
- While the onions are caramelizing, lightly flour a clean surface and roll out one sheet of puff pastry to about ¼ inch thick. Cut the pastry into 6 equal rectangles and transfer to a parchment-lined baking sheet.
- Once the onion mixture has cooled slightly, spread a generous layer of caramelized onions over each pastry rectangle, leaving a ½ inch border. Crumble 4 ounces of goat cheese on top of the onions.
- Preheat your oven to 400°F (200°C). Bake the tarts for about 15 minutes, or until puffed up and golden brown. Allow them to cool slightly before serving.
Leave a Reply