
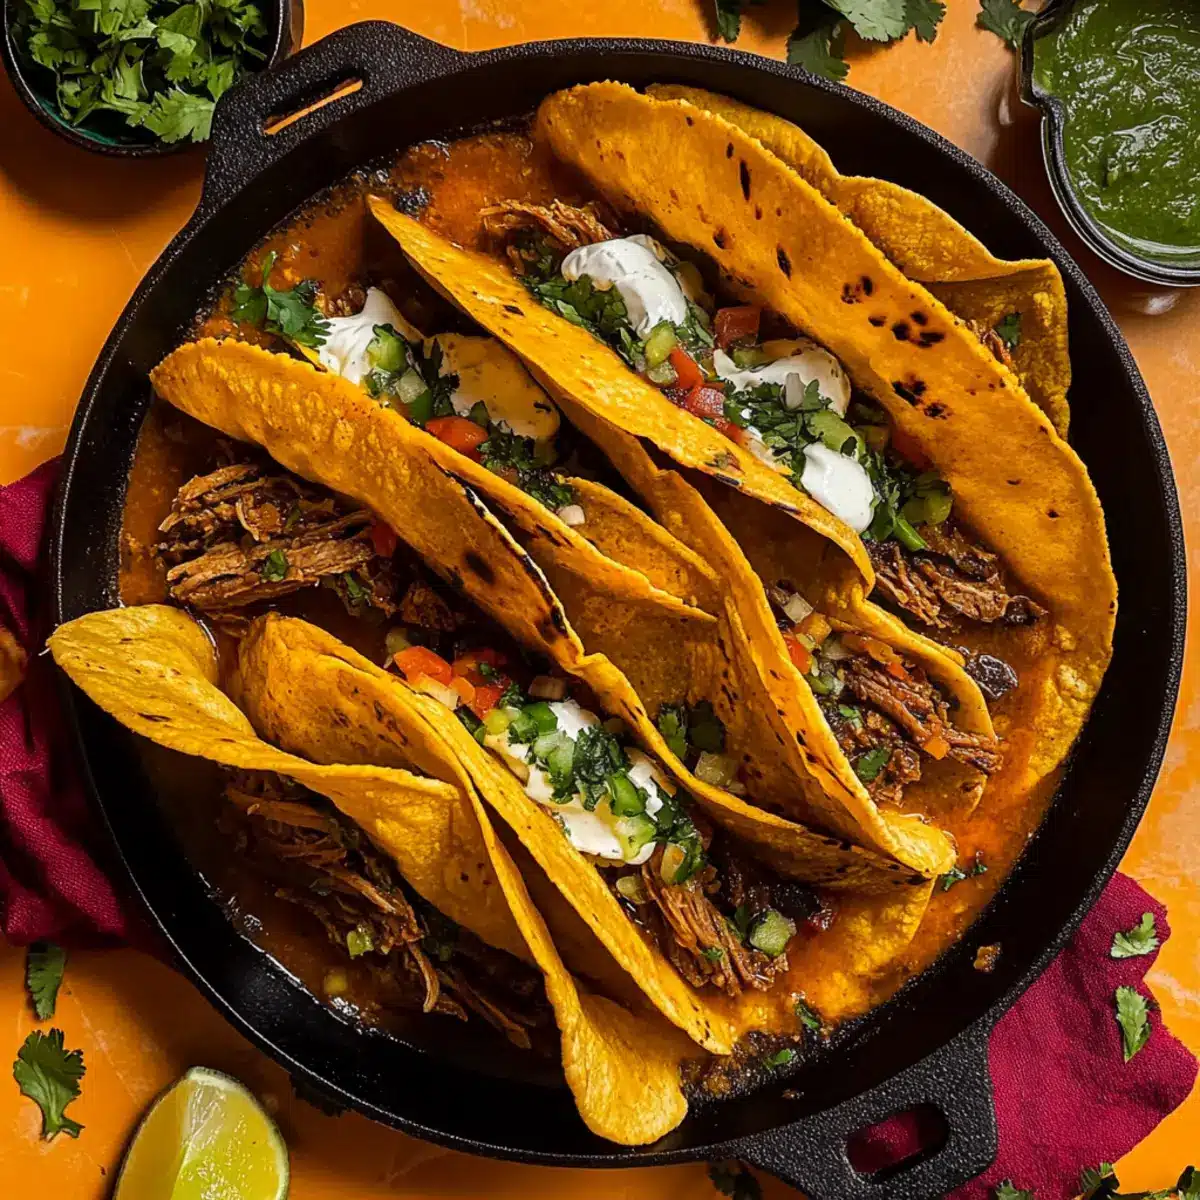
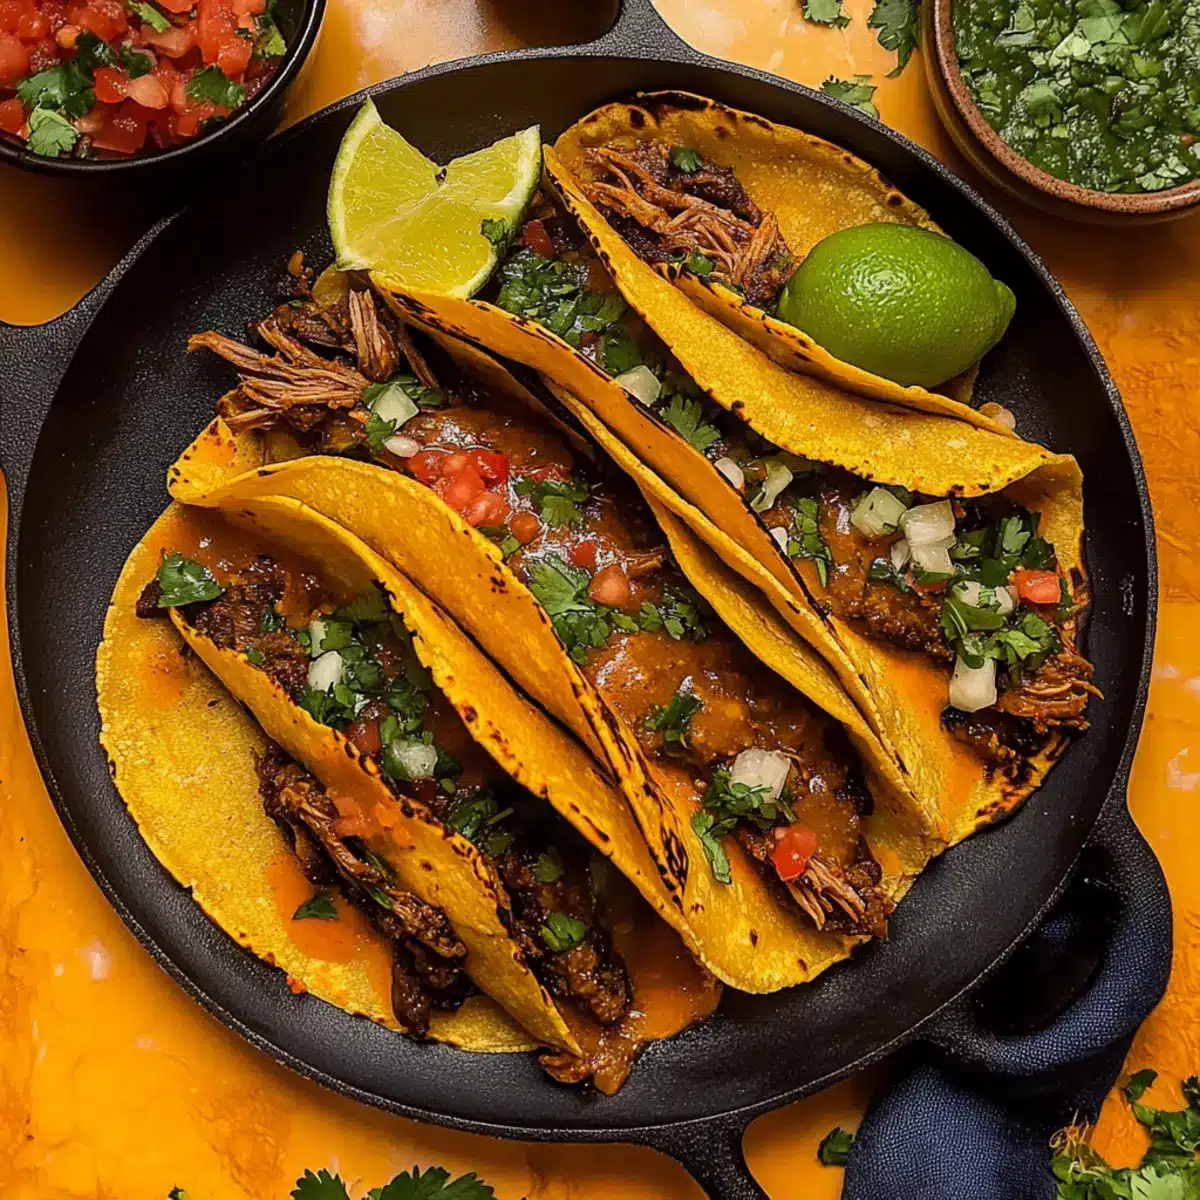
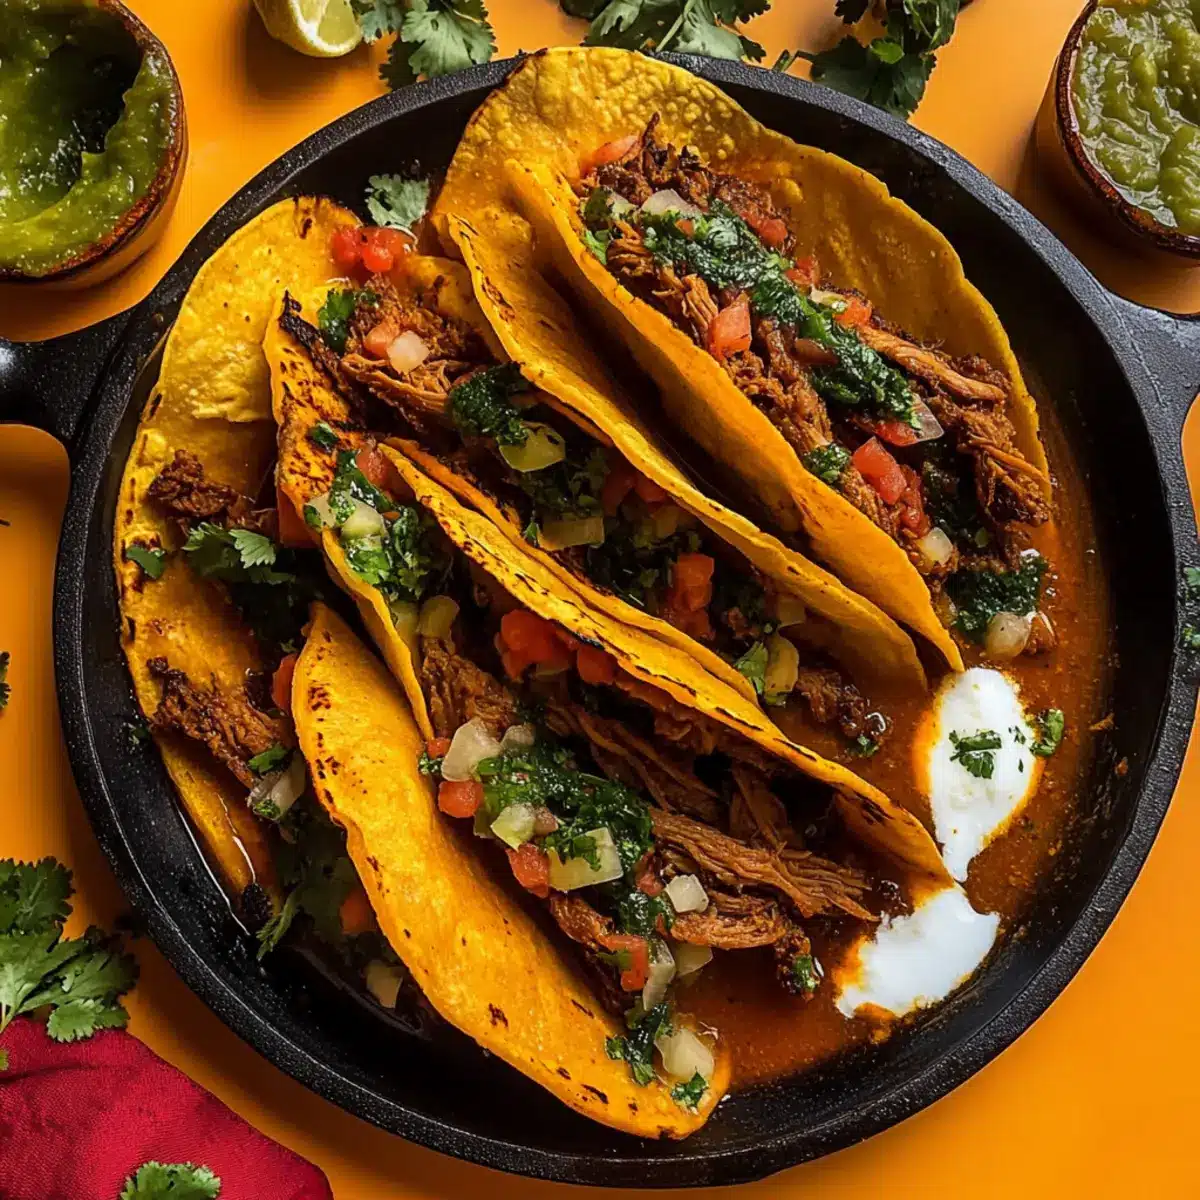
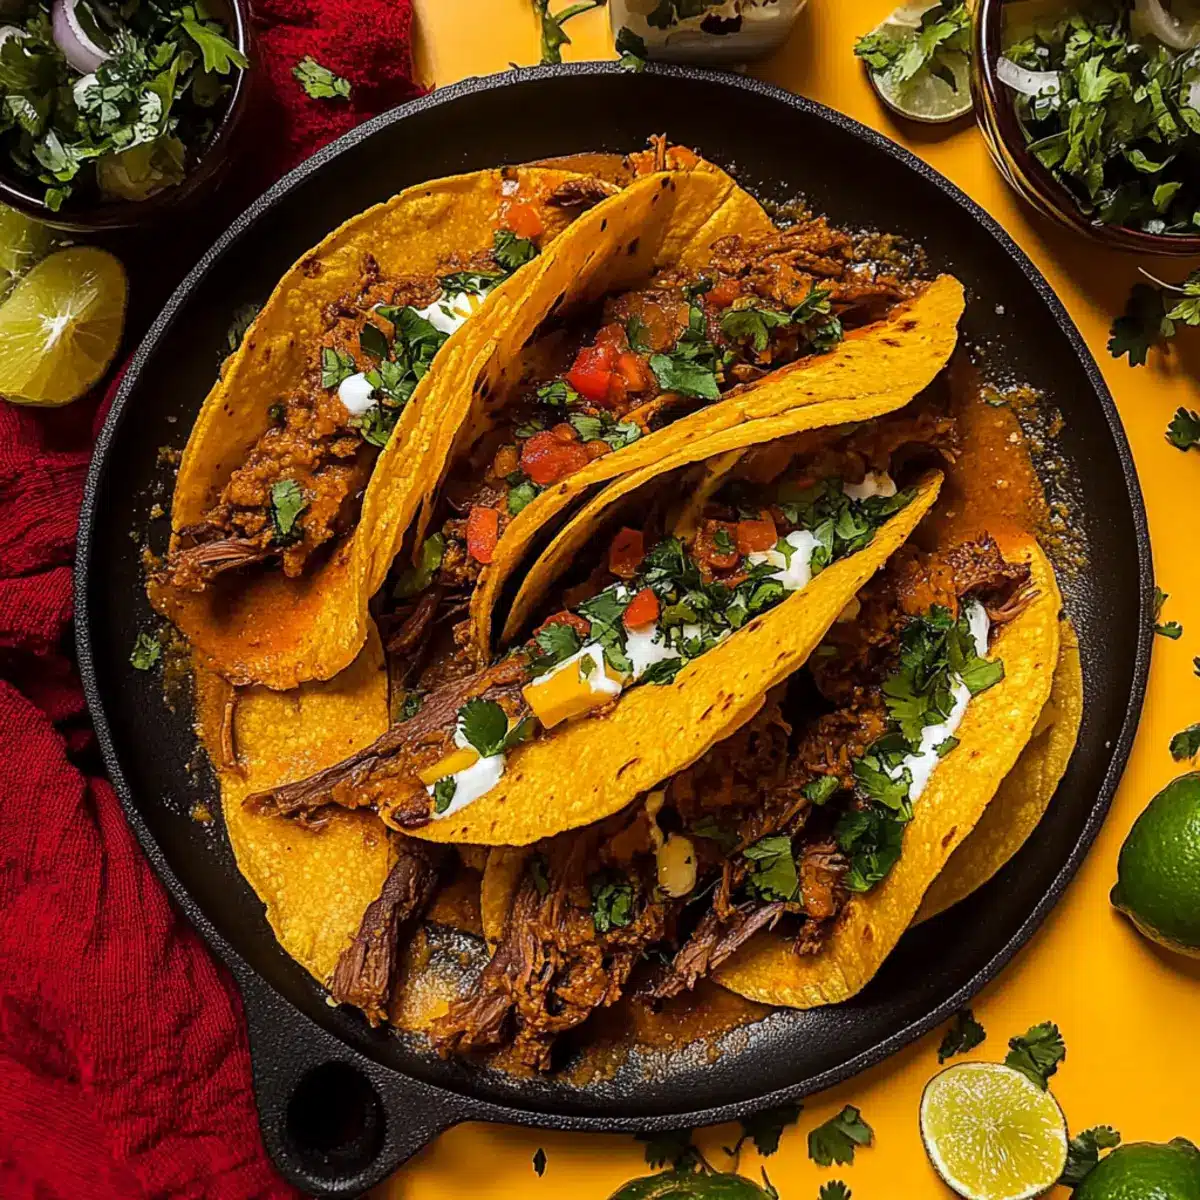
The air was thick with spice as I slid my homemade birria tacos onto the table, their crispy edges beckoning everyone for a bite. These Fave Birria Tacos are not just a dish; they’re a sensory journey into the heart of vibrant Mexican cuisine. Imagine tender, shredded beef paired with melting cheese and a spicy consomé, all nestled in a warm tortilla. What’s even better? This recipe is incredibly versatile, making it perfect for a cozy weeknight dinner or a festive game-day feast. Plus, there’s no need to worry about dietary restrictions; you can easily adapt this dish to be gluten-free, dairy-free, or even vegan with just a few tweaks. Are you ready to dive into the mouthwatering world of birria tacos? Let’s get cooking!
Why Are Birria Tacos So Delicious?
Flavor Explosion: The blend of dried chiles, spices, and tender meat creates a depth of flavor that’s simply unmatched.
Make-Ahead Magic: You can prepare the filling ahead of time, making busy weeknights a breeze!
Customizable Options: Whether you’re a beef lover or looking for a plant-based alternative like jackfruit, there’s a birria taco for everyone.
Dip it Deliciously: The rich consomé not only enhances the tacos but makes for an incredible dipping sauce. For a special twist, check out these Crunch Cheesecake Tacos for dessert!
Family-Friendly Fun: Everyone loves tacos! They’re perfect for gatherings where everyone can build their own, ensuring that nobody leaves the table unsatisfied.
Get ready to impress your guests and enjoy this satisfying dish!
Birria Tacos Ingredients
• Discover the essential ingredients for irresistible Birria Tacos!
For the Chili Paste
- Dried Guajillo Peppers – Adds heat and subtle sweetness for a balanced flavor.
- Dried Ancho Chiles – Infuses depth with rich, smoky notes.
- Chipotle Peppers in Adobo – Provides a smoky spice kick; if unavailable, crushed red pepper flakes work too.
For the Filling
- Organic Chuck Roast Beef – The star ingredient for tender, juicy tacos; consider chicken, lamb, or shredded jackfruit as alternatives.
- Onion (Chopped & Diced) – Adds sweetness; yellow onion offers the best flavor.
- Garlic Cloves – Enhances overall flavor; substituting with garlic powder is a simple option.
- Sea Salt & Black Pepper – Balances flavors; adjust quantities to your preference.
For the Sauce
- Crushed Tomatoes – Provides acidity and body; tomato puree is a viable substitute.
- Organic Beef Stock – Forms the base of the consomé; chicken stock or vegetable broth lightens up the dish.
- Apple Cider Vinegar – Brings tanginess; lemon juice can replace it if needed.
- Bay Leaves – Imparts herbal notes; remember to remove them before serving.
- Mexican Oregano – Essential for an authentic touch; regular oregano can work in smaller amounts.
For Assembly
- Organic Corn Tortillas – The perfect vehicle for your filling; opt for flour tortillas if you prefer.
- Shredded Oaxaca Cheese – Melt-in-your-mouth cheese for that delicious filling; for vegan options, try Follow Your Heart mozzarella.
- Chopped Fresh Cilantro – Adds brightness; parsley can be substituted for a different flavor.
- Pico de Gallo – A fresh topping that adds flavor and texture; can be homemade or store-bought.
With these ingredients, you’re all set to create mouthwatering Birria Tacos that everyone will adore!
Step‑by‑Step Instructions for Birria Tacos
Step 1: Prepare Chili Paste
Begin by removing the stems and seeds from dried guajillo and ancho chiles. In a medium saucepan, bring 2 cups of beef stock to a boil, then add the chiles, cover, and let them sit for 15-20 minutes to soften. Once rehydrated, blend the chiles with the remaining chili paste ingredients until smooth, creating a vibrant base for your Birria Tacos.
Step 2: Sear Meat
Preheat your oven to 350°F. In a large Dutch oven, heat 2 tablespoons of extra virgin olive oil over medium-high heat. Season the organic chuck roast beef generously with sea salt, black pepper, and garlic powder. Sear the meat for 3-4 minutes on each side until it achieves a golden-brown crust, then remove it from the pot and set aside while keeping the drippings.
Step 3: Sauté Aromatics
In the same Dutch oven, add the chopped onions and sauté for 3-4 minutes until they become translucent. Next, stir in the prepared chili paste, allowing it to simmer for 1-2 minutes to deepen the flavors. Then, incorporate the rest of the beef stock and a little water, stirring well before adding the seared beef back into the pot, ensuring it’s submerged in the sauce.
Step 4: Braise Meat
Cover the Dutch oven with its lid and transfer it to the preheated oven. Allow the beef to braise for 2.5 hours, checking for tenderness after this time. You’ll know it’s ready when the meat is fork-tender and easily shreddable, filling your kitchen with irresistible aromas while preparing your Birria Tacos.
Step 5: Shred Beef
Once the braising is complete, carefully remove the Dutch oven from the oven. Use two forks to shred the beef directly in the pot, mixing it gently with the rich sauce to keep it moist. Ensure there’s enough sauce for serving; this flavorful liquid can also double as a dipping consomé for your tacos.
Step 6: Assemble Tacos
Quickly dip each organic corn tortilla into the hot consomé to infuse some flavor. In a non-stick skillet with a drizzle of olive oil, lightly fry each tortilla until it’s slightly crispy, about 30 seconds per side. Fill the tortillas with shredded beef, diced onions, and a generous amount of shredded Oaxaca cheese, then fold and char until golden brown.
Step 7: Serve
Serve your delectable Birria Tacos immediately, accompanied by the dipping consomé and pico de gallo for added zest. The crispy outside and juicy filling will have everyone craving more of these delicious tacos, making them an unforgettable meal for any occasion.
Make Ahead Options
These Birria Tacos are perfect for busy weeknights or any occasion when you want to save time! You can prepare the chili paste and braise the beef up to 24 hours in advance. Simply follow the steps to make the chili paste, then sear and braise the meat. Allow it to cool, then shred the beef and store it in an airtight container with some sauce to keep it moist. This mix can be refrigerated for up to 3 days. When you’re ready to enjoy your tacos, just reheat the beef in a skillet, dip the tortillas in the warmed consomé, and quickly fry them before adding the filling for that irresistible, fresh taste! Enjoy the convenience of having delicious Birria Tacos ready to go with minimal effort!
Birria Tacos Variations & Substitutions
Feel free to let your culinary creativity shine by customizing these delicious Birria Tacos to suit your taste and dietary needs!
- Chicken: Swap the beef for tender, shredded chicken for a lighter, yet equally flavorful option.
- Plant-Based Jackfruit: For a vegan twist, use shredded jackfruit instead of meat; it absorbs all the rich flavors beautifully.
- Lamb or Goat: Embrace tradition! Substitute the beef with lamb or goat for a deeper, richer taste that highlights classic birria flavors.
- Gluten-Free Tortillas: If you need to be gluten-free, opt for corn tortillas or specialized gluten-free tortilla brands for assembly.
- Dairy-Free Cheese: Choose dairy-free alternatives like cashew or almond-based cheeses to keep your tacos vegan-friendly and still cheesy.
- Extra Smokiness: Add a dash of smoked paprika to your chili paste for an intensified smoky flavor; it’s delightful with the beef.
- Spicy Kick: If you love heat, throw in some chopped jalapeños or habaneros to the filling for a fiery flavor boost.
- Herb Alternatives: Consider replacing cilantro with fresh parsley or green onions if you prefer a different herbal profile in your tacos.
Each variation enables you to experience the magic of these Birria Tacos in a unique way—whether you’re whipping up a comforting weeknight dinner or placing a new twist on a beloved classic. While you’re at it, don’t forget to explore more comforting recipes like these Irresistible Shrimp Tacos or elevate your dessert game with these tantalizing Crunch Cheesecake Tacos!
Expert Tips for Birria Tacos
- Texture Perfection: Ensure your taco tortillas are warm and pliable before dipping them in the consomé to prevent cracking.
- Flavor Boost: Allow the beef to marinate in the chili paste overnight for an even richer flavor profile in your Birria Tacos.
- Consistent Cooking: Monitor the braising time closely; overcooking may result in dry meat. Aim for fork-tender perfection!
- Crispy Finish: For extra crunch, dip tortillas in the consomé only briefly before frying—too long can make them soggy.
- Easy Clean-Up: Use a slow cooker for braising the meat; it saves time and reduces the dishes post-preparation.
Storage Tips for Birria Tacos
Fridge: Keep leftover fillings in an airtight container for up to 4 days to maintain freshness.
Freezer: Store unassembled tacos in plastic wrap and then in a freezer bag for up to 3 months. This allows for easy reheating later.
Reheating: To reheat, place covered tortillas filled with the beef in a preheated oven at 350°F for about 10-15 minutes, or until heated through. Serve with warmed consomé for dipping.
Room Temperature: Avoid leaving cooked Birria Tacos out at room temperature for more than 2 hours to ensure food safety.
What to Serve with My Fave Birria Tacos
Transform your Birria Tacos from a delicious dish into a memorable meal with these perfect pairings.
- Mexican Rice: Fluffy and seasoned with spices, this classic side adds a comforting touch that balances the rich flavors of the tacos.
- Refried Beans: Creamy and hearty, refried beans bring protein to your plate, making your meal both satisfying and filling.
- Chips and Salsa: A crunchy starter, fresh tortilla chips served with zesty salsa create excitement before the main event. It’s the perfect way to whet your appetite!
- Guacamole: Creamy avocado dip enhances the tacos’ flavors without overwhelming them. A sprinkle of lime juice keeps things bright and fresh.
- Corn Elote: Sweet, grilled corn slathered in creamy sauce provides a delightful burst of flavor and a bit of crunch, complementing the softness of the tacos beautifully.
- Cilantro Lime Slaw: This refreshing slaw adds a crisp, tangy contrast that helps cut through the rich meatiness of the tacos while enhancing the overall flavor profile.
- Lemonade or Horchata: A refreshing drink like lemonade or traditional horchata beautifully balances the spices with a sweet and creamy touch.
- Churros with Chocolate Sauce: For dessert, consider serving warm churros dusted with sugar and cinnamon alongside a bowl of rich chocolate sauce. It’s a fiesta of flavors to end your meal on a high note!
Birria Tacos Recipe FAQs
How do I choose the best dried chiles for my Birria Tacos?
Absolutely! Look for dried guajillo and ancho chiles that feel flexible and have a vibrant color. Avoid any with dark spots or that feel overly brittle. Fresh peppers will bring the best flavor and heat to your chili paste!
What’s the best way to store leftover Birria Tacos?
I recommend storing leftover fillings in an airtight container in the fridge for up to 3-4 days. Make sure to keep the tortillas and the filling separate to retain their textures. Reheat them individually in a skillet or oven to keep the tortillas crispy!
Can I freeze Birria Tacos for later?
Very! To freeze unassembled tacos, wrap each one tightly in plastic wrap, then place them in a freezer-safe bag. They’ll keep well for up to 3 months. To reheat, remove the plastic wrap and bake in a preheated oven at 350°F for about 10-15 minutes or until warmed through.
What should I do if my beef turns out dry after braising?
If you find your beef is dry, it might have been overcooked during the braising process. To avoid that in the future, I recommend checking the tenderness after the suggested cooking time of 2.5 hours. Look for fork-tender meat, and if it starts to feel tough, take it out earlier!
Are there any dietary considerations for Birria Tacos?
Absolutely! To make them gluten-free, use organic corn tortillas. For a dairy-free or vegan option, substitute beef with shredded jackfruit and opt for dairy-free cheese alternatives like Follow Your Heart mozzarella. Always check ingredient labels to ensure they fit your dietary needs!
Can I make the chili paste ahead of time?
You can definitely make the chili paste ahead! Just prepare it as per the recipe, let it cool, and store it in an airtight container in the fridge for up to 1 week. This helps deepen the flavors, making your Birria Tacos even more delicious!
Irresistible Birria Tacos: Tender, Juicy, and Flavor-Packed!
Ingredients
Equipment
Method
- Prepare Chili Paste: Remove the stems and seeds from dried guajillo and ancho chiles. In a medium saucepan, bring 2 cups of beef stock to a boil, then add the chiles, cover, and let them sit for 15-20 minutes to soften. Once rehydrated, blend the chiles with the remaining chili paste ingredients until smooth.
- Sear Meat: Preheat your oven to 350°F. In a large Dutch oven, heat 2 tablespoons of extra virgin olive oil over medium-high heat. Season the organic chuck roast beef with sea salt, black pepper, and garlic powder. Sear for 3-4 minutes on each side until golden brown, then remove and set aside.
- Sauté Aromatics: In the same Dutch oven, add the chopped onions and sauté for 3-4 minutes until translucent. Add the prepared chili paste, simmer for 1-2 minutes, then incorporate the rest of the beef stock and water. Add the seared beef back into the pot, ensuring it's submerged in sauce.
- Braise Meat: Cover the Dutch oven with its lid and transfer it to the oven. Allow the beef to braise for 2.5 hours, checking for tenderness. It should be fork-tender and easily shreddable.
- Shred Beef: Remove the Dutch oven from the oven. Use two forks to shred the beef directly in the pot, mixing it gently with the sauce to keep it moist. Ensure there's enough sauce for serving.
- Assemble Tacos: Dip each tortilla in the hot consomé for flavor infusion. In a skillet, lightly fry each tortilla until crispy, about 30 seconds per side. Fill with shredded beef, diced onions, and shred Oaxaca cheese, then fold and char until golden brown.
- Serve: Serve your Birria Tacos immediately with dipping consomé and pico de gallo. Enjoy the crispy exterior and juicy filling!
Leave a Reply