
As I rummaged through my pantry, I stumbled upon a forgotten treasure: bubblegum extract, that childhood favorite that instantly transported me back to carefree days. This led to crafting my new obsession—the Bubblegum Cloud Slice! This whimsical dessert is not only a delightful nod to nostalgia but also incredibly easy to whip up, taking 20% less time than your average sweet treat. With its light, airy texture and playful flavors, this dessert is a perfect addition to both spontaneous gatherings and planned celebrations. Plus, you’ll love that it can easily cater to different dietary preferences with a few clever swaps! Curious about how this fun and fluffy indulgence can become your new go-to dessert? Let’s dive right in!

Why is the Bubblegum Cloud Slice a Must-Try?
Nostalgic, Fun Flavor: Enjoy the playful essence of bubblegum that’s sure to bring back childhood memories with every bite.
Light and Fluffy: This dessert boasts an airy texture, making it the perfect treat to indulge in without feeling weighed down.
Quick to Make: With its streamlined process, the Bubblegum Cloud Slice takes 20% less time to prepare than typical desserts, making it a time-saver for busy schedules.
Versatile Options: Easily modify this recipe to suit various dietary needs—check out how to swap ingredients for gluten-free and vegan versions! You might also enjoy this delightful Brown Sugar Chai for another playful twist.
Crowd-Pleasing Treat: This whimsical dessert is guaranteed to impress your guests and brighten up any gathering, making it an irresistible choice for celebrations and casual get-togethers alike.
Bubblegum Cloud Slice Ingredients
Whip up this whimsical treat with ease!
For the Base
- Graham Crackers – Serves as the delightful base for the dessert; consider gluten-free options if needed.
- Butter or Coconut Oil – Adds moisture and holds the crust together; use coconut oil for a dairy-free alternative.
For the Filling
- Bubblegum Extract – Infuses that signature playful flavor; if unavailable, vanilla extract is a suitable substitute.
- Heavy Cream or Coconut Cream – Provides a light, fluffy texture; opt for coconut cream for a vegan version.
- Gelatin – Ensures the dessert holds its shape; choose plant-based gelatin if you’re following a vegan diet.
- Yogurt – Contributes creaminess and a slight tang; dairy-free yogurt works perfectly for vegans.
Optional Add-Ons
- Fresh Fruit – Enhances both nutrition and flavor; feel free to use strawberries or bananas for a fresh touch.
- Crushed Candy Pieces – Add a fun crunch on top, perfect for a playful finishing touch.
With these simple ingredients, you’re well on your way to making a delightful Bubblegum Cloud Slice that’s sure to evoke smiles and nostalgia!
Step‑by‑Step Instructions for Bubblegum Cloud Slice
Step 1: Prepare the Crust
Begin by preheating your oven to 350°F (175°C). In a mixing bowl, combine crushed graham crackers with melted butter or coconut oil until well blended. Press this mixture firmly into the bottom of a 9×9-inch baking pan, creating an even layer. Bake for about 10 minutes until lightly golden, then remove and allow it to cool completely.
Step 2: Whip the Cream
While the crust cools, take a large mixing bowl and pour in the heavy cream or coconut cream. Using an electric mixer, whip the cream on medium speed for approximately 3-5 minutes, or until soft peaks form. Stop once you notice a smooth and fluffy texture, being careful not to over-whip, as it can become grainy. Set the whipped cream aside gently.
Step 3: Combine the Filling Ingredients
In another bowl, mix the yogurt, bubblegum extract, and softened gelatin that has been dissolved in warm water. Stir the mixture well for about 1-2 minutes until it’s fully combined, ensuring there are no lumps. The Bubblegum Cloud Slice filling should develop a vibrant, cohesive color, reminiscent of cotton candy.
Step 4: Fold in the Whipped Cream
Carefully fold the whipped cream into the yogurt mixture using a spatula. Do this gently to maintain the airy texture, incorporating about one-third of the whipped cream first before adding the rest. Ensure everything is well mixed but still light and fluffy, yielding a cloud-like filling for your Bubblegum Cloud Slice.
Step 5: Pour the Filling
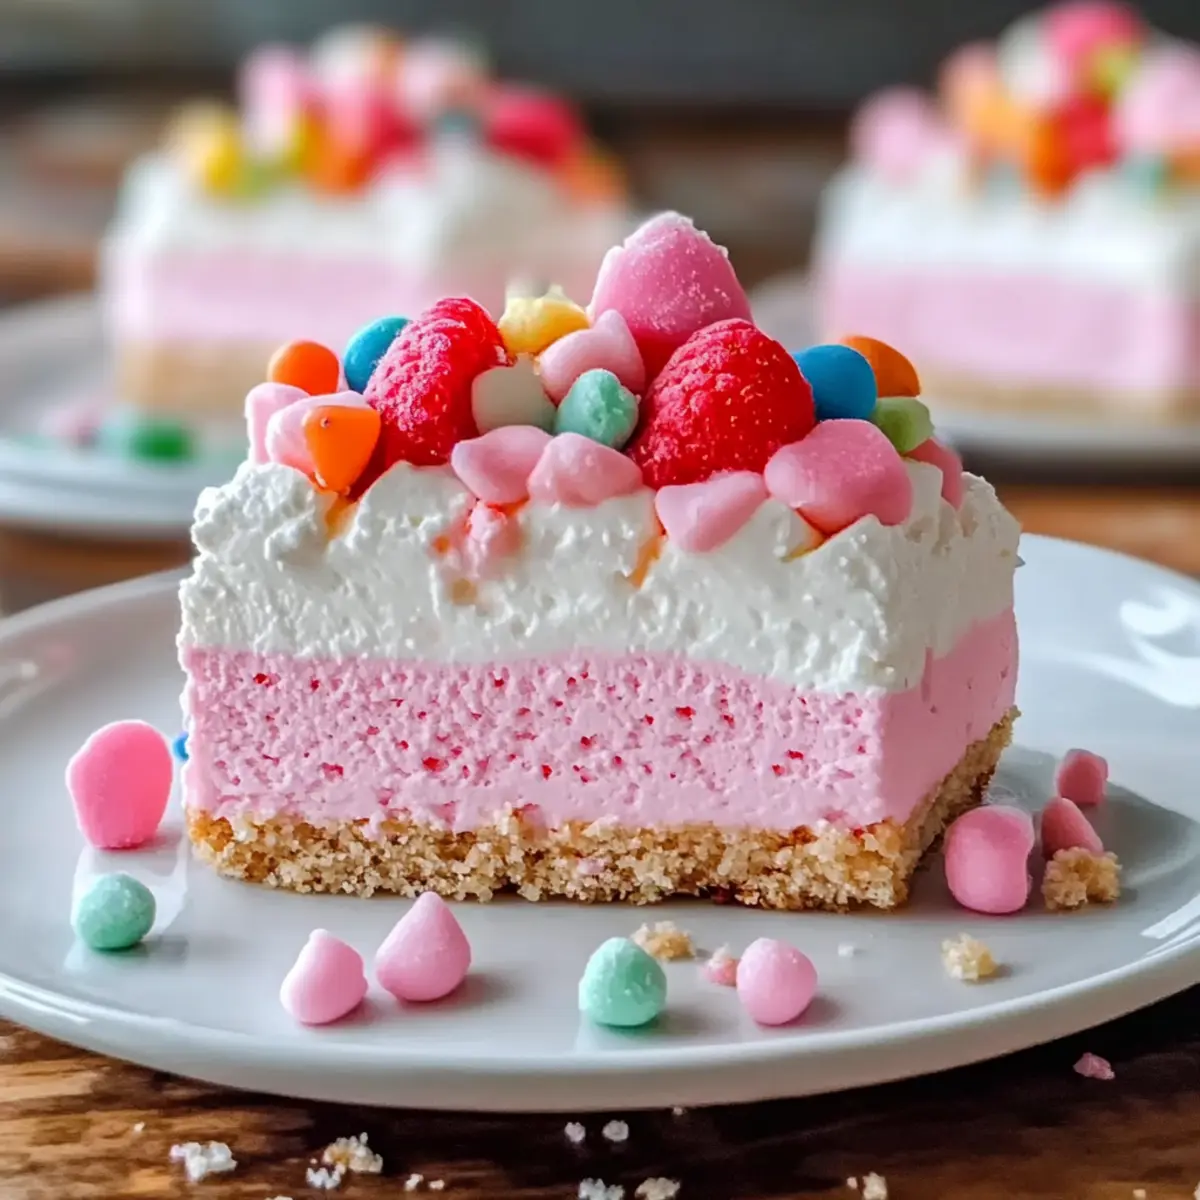
Once the filling is well combined, pour it gently over the cooled graham cracker crust. Use a spatula to spread it evenly, ensuring a smooth, flat surface on top. You’ll see the lovely pastel pink color emerge, which will add to the whimsical charm of your Bubblegum Cloud Slice dessert.
Step 6: Refrigerate to Set
Cover the pan with plastic wrap and place it in the refrigerator for at least 60 minutes. This time allows the gelatin to firm up the filling, achieving that perfect sliceable texture. You’ll know it’s ready when the filling holds its shape and feels firm to the touch.
Step 7: Serve and Enjoy
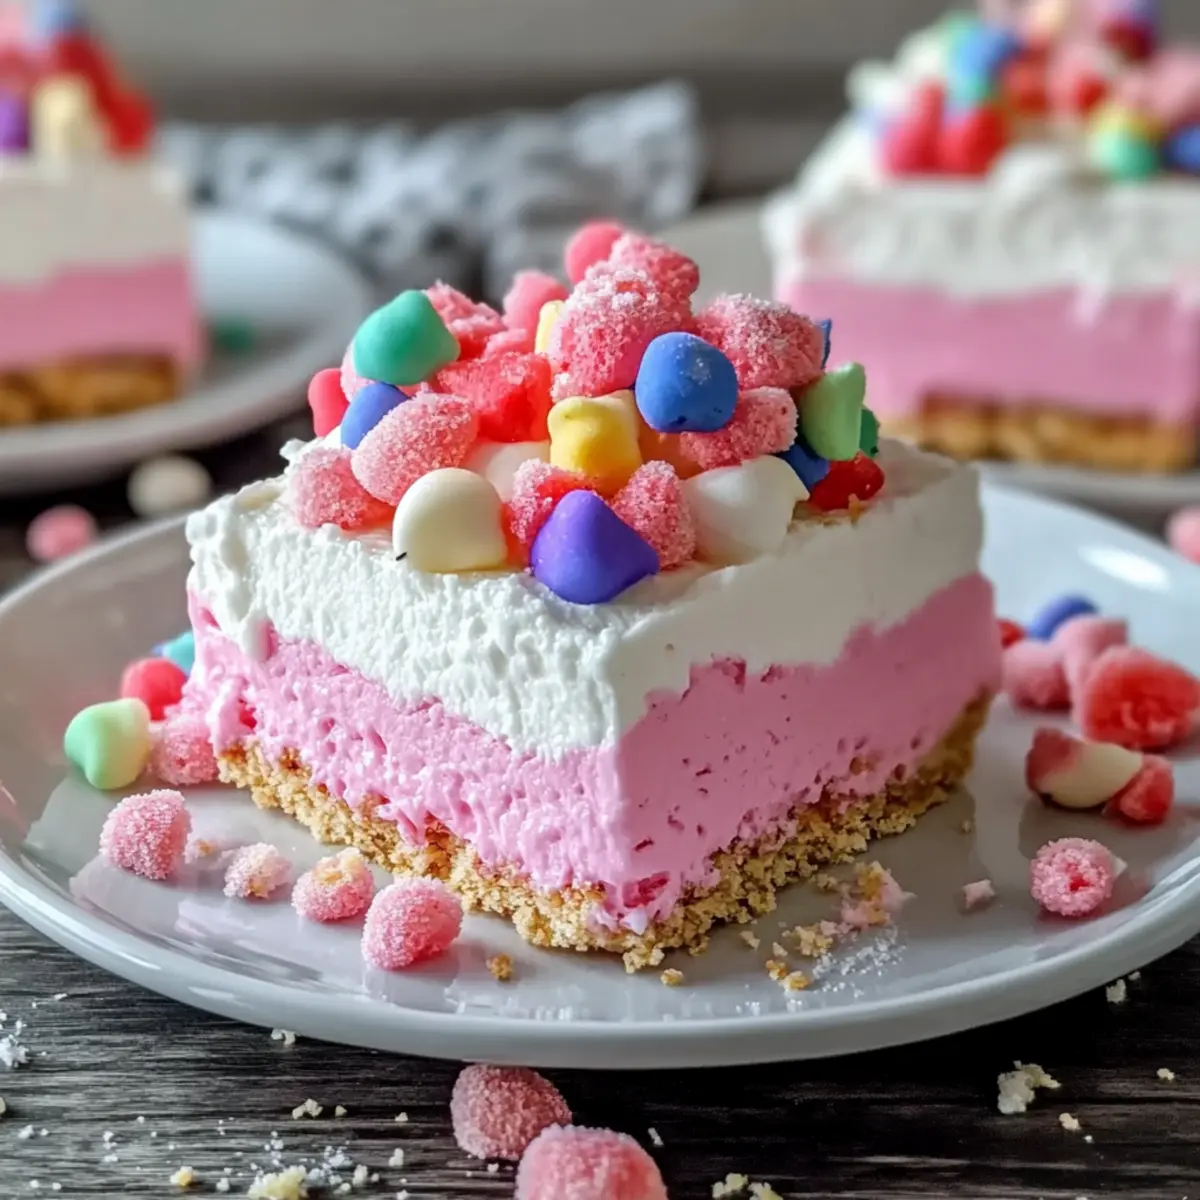
After chilling, remove the Bubblegum Cloud Slice from the refrigerator and cut it into squares using a sharp knife. For an extra touch, top each slice with optional fresh fruit or a sprinkle of crushed candy pieces for added fun and crunch. Serve chilled and savor every nostalgic bite!
Expert Tips for Bubblegum Cloud Slice
• Cream Consistency: Avoid over-whipping the cream to maintain a smooth, fluffy texture; watch for soft peaks to achieve the best results.
• Gelatin Handling: Ensure that the gelatin is completely dissolved to prevent lumps in the filling, which can affect the overall smoothness of your Bubblegum Cloud Slice.
• Substitution Awareness: If using substitutes, such as coconut cream or gluten-free graham crackers, double-check for compatibility in ratios to achieve similar results.
• Cool Crust: Always let the crust cool fully before adding the filling; a warm crust can cause it to become soggy and ruin the texture.
• Storage Tips: Store leftover slices in an airtight container in the fridge to maintain their freshness for up to 3 days while preserving that delightful taste!
What to Serve with Bubblegum Cloud Slice Dessert?
Create a delightful meal experience by pairing this whimsical dessert with some tasty companions that enhance its playful flavor.
- Fruit Salad: A refreshing fruit salad adds a burst of freshness and complements the sweet bubblegum flavor beautifully. Combine juicy strawberries, bananas, and melon for a vibrant medley!
- Whipped Cream Topping: Elevate your Bubblegum Cloud Slice by adding a dollop of fluffy whipped cream on top. It enhances the dessert’s creaminess while adding a light touch.
- Chocolate Shavings: Contrast the sweetness with rich chocolate shavings. The bittersweet notes create a lovely balance against the playful bubblegum flavor.
- Candy Sprinkles: For a fun touch, sprinkle colorful candy pieces on top. It’s not just decorative; it adds a bit of crunch and whimsy that kids will love!
- Lemon Sorbet: A scooped serving of lemon sorbet on the side brings a zesty, refreshing twist that cuts through the dessert’s sweetness, cleansing the palate.
- Sparkling Lemonade: Pair with a cold glass of sparkling lemonade to amplify the fun, effervescent experience. The citrusy zing works well to complement the bubblegum notes!
- Mini Cupcakes: Serve cute, fluffy mini cupcakes for an added treat. Choose flavors that contrast but don’t overshadow the Bubblegum Cloud Slice’s playful profile.
- Chilled Iced Tea: An icy glass of raspberry iced tea offers a fruity and refreshing drink option that harmonizes with your dessert without overpowering it.
- Fresh Mint Leaves: Garnish with fresh mint leaves for a hint of herbal brightness. This simple addition enhances visual appeal and adds a delightful aroma!
How to Store and Freeze Bubblegum Cloud Slice
Fridge: Keep your Bubblegum Cloud Slice in an airtight container in the refrigerator, where it will stay fresh for up to 3 days. This ensures that the fluffy texture and playful flavor remain intact.
Freezer: If you want to keep the dessert longer, you can freeze it! Wrap individual slices in plastic wrap and place them in a freezer-safe container. They’ll keep well for up to 2 months.
Thawing: When ready to enjoy, transfer the frozen Bubblegum Cloud Slice to the fridge for several hours or overnight to thaw gently. Avoid microwaving, as this can affect the texture.
Serving: Serve chilled after thawing. Add fresh fruit or crushed candy pieces for a beautiful presentation and an extra burst of nostalgia!
Make Ahead Options
The Bubblegum Cloud Slice is a fantastic dessert for those who love to meal prep! You can prepare the graham cracker crust and filling up to 24 hours in advance to save time on busy days. Simply follow the instructions to make the crust, allowing it to cool completely before refrigerating it. When it comes to the filling, mix the yogurt, bubblegum extract, and gelatin ahead of time, then fold in the whipped cream just before you pour it over the crust before serving. This technique maintains the dessert’s fluffy texture, ensuring it remains just as delightful. Finally, refrigerate for a minimum of 1 hour to set—perfect for having this whimsical treat ready to impress guests while saving you time!
Bubblegum Cloud Slice Variations
Feel free to get creative with the Bubblegum Cloud Slice to suit your taste buds and dietary needs!
-
Fruit-Infused: Swap bubblegum extract for your favorite fruit extract, like strawberry or raspberry, for a delicious twist that brightens the flavor profile.
-
Dairy-Free Delight: Use coconut cream instead of heavy cream for the fluffiest vegan version. It maintains that airy texture while being completely dairy-free!
-
Gluten-Free Base: Substitute graham crackers with gluten-free cookies or crush oats mixed with coconut oil for a gluten-free crust that everyone can enjoy.
-
Plant-Based Gelatin: For a vegan-friendly treat, look for agar-agar as a perfect substitute that still provides the structure your dessert needs without compromising on the fun!
-
Crunchy Toppings: Boost the texture by adding crushed candy pieces or colorful sprinkles on top before serving. This adds a playful crunch that complements the creaminess beautifully.
-
Heat it Up: Infuse a bit of heat by mixing a pinch of cayenne or cinnamon with the filling for an unexpected flavor pop that’ll surprise your guests in a delightful way.
-
Berry Bliss: Enhance the nutritional profile with fresh berries mixed into the filling. Strawberries or blueberries add vibrant color and tang that elevate the dessert.
-
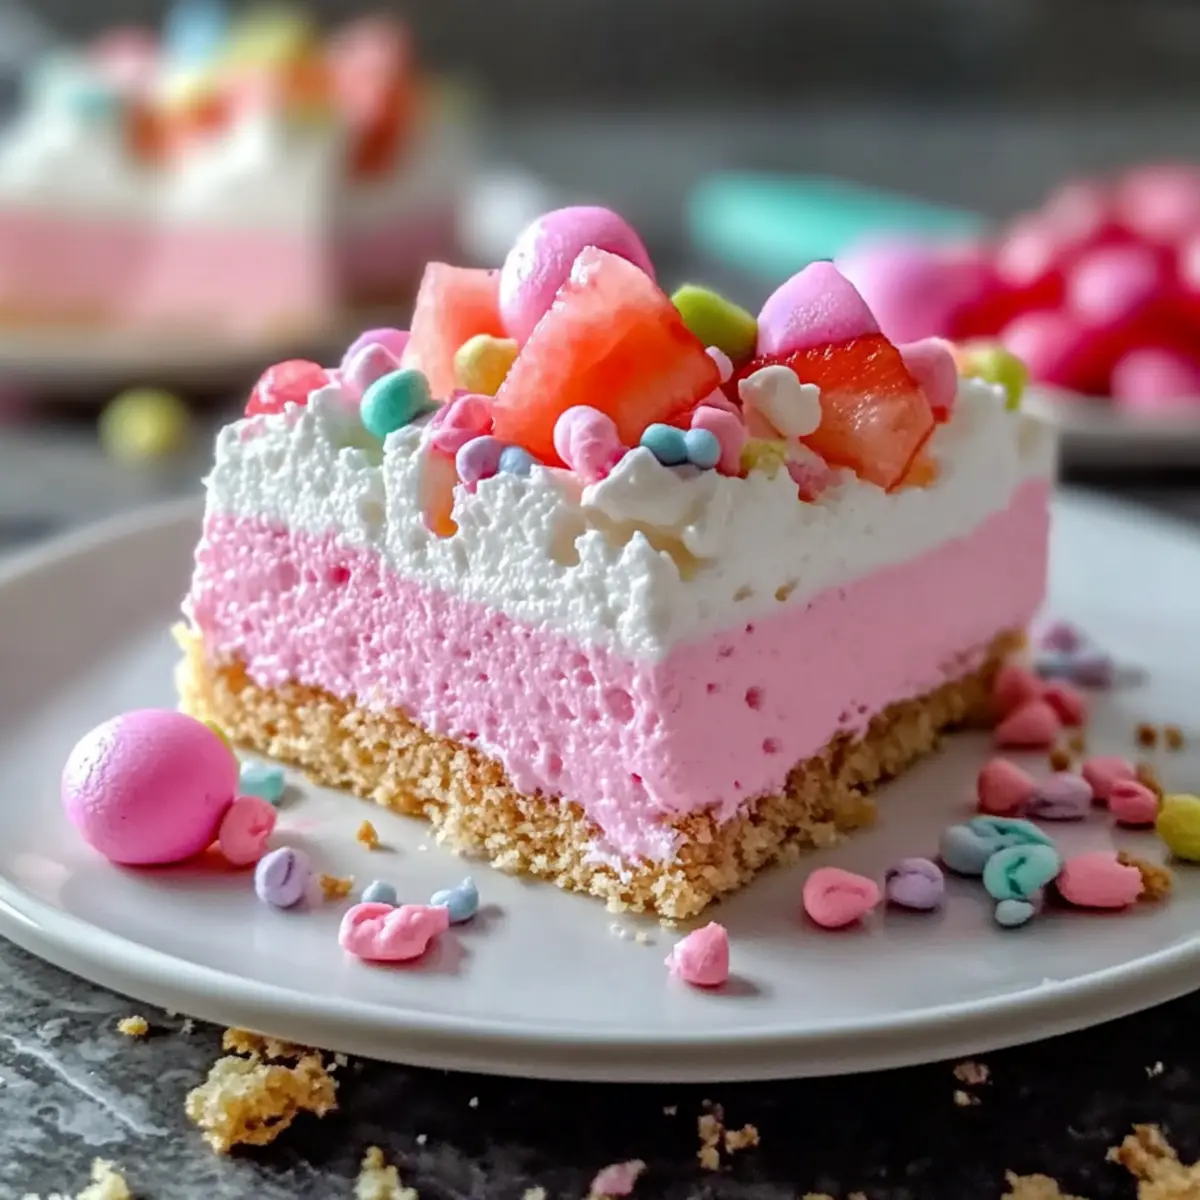
Decorative Finish: For an eye-catching presentation, top each slice with whipped cream and a few slices of fresh fruit, giving your Bubblegum Cloud Slice a whimsical look reminiscent of a carnival treat.
Explore these variations and see how each twist can bring a fresh take to this nostalgic dessert! You might also enjoy this delicious Brown Sugar Chai for a warm and cozy alternative when you’re in need of comfort food!
Bubblegum Cloud Slice Recipe FAQs
What’s the best way to choose bubblegum extract?
Absolutely! When selecting bubblegum extract, look for quality brands that use food-grade flavoring without artificial colors or preservatives. If it’s a bit too sweet or lacks the authentic bubblegum flavor, you can swap it with vanilla extract to retain a subtle sweetness and aromatic notes.
How can I store leftover Bubblegum Cloud Slice?
To keep your Bubblegum Cloud Slice fresh, place it in an airtight container in the refrigerator. It will stay good for up to 3 days, maintaining its delightful fluffy texture and flavor. Be sure to cover it well with plastic wrap if you don’t have a suitable container!
Can I freeze the Bubblegum Cloud Slice?
Yes, you can definitely freeze this whimsical dessert! Wrap each slice individually in plastic wrap, followed by aluminum foil, and place them in a freezer-safe container. They will maintain their delightful taste for up to 2 months. When you’re ready to enjoy, simply transfer the slices to the fridge for several hours or overnight to thaw gently—no microwave needed!
What should I do if my whipped cream becomes grainy?
Very! If your whipped cream turns grainy, it’s likely a sign that it has been over-whipped. To salvage it, gently fold in a tablespoon of cream at room temperature, whisking it together softly until smooth. Remember to stop whisking once you see soft peaks forming, as this helps in achieving that perfect light and airy texture.
Are there any allergen considerations for the Bubblegum Cloud Slice?
Indeed! If you or your guests have allergies, be cautious about the ingredients. Substituting dairy with coconut cream, using plant-based yogurt, and gluten-free graham crackers ensures the dessert is more inclusive. Always check ingredient labels, especially for flavorings, to avoid any allergic reactions.
How can I adjust this recipe for vegan diets?
If you want to make this Bubblegum Cloud Slice vegan-friendly, it’s easy! Substitute heavy cream with coconut cream, and ensure your yogurt is plant-based. Use agar-agar instead of gelatin to firm up the dessert, following the package instructions for both preparation and ratios. Just remember that this will change the texture slightly, but it will still be delicious!
Indulge in Bubblegum Cloud Slice for a Fun, Whimsical Treat
Ingredients
Equipment
Method
- Begin by preheating your oven to 350°F (175°C). In a mixing bowl, combine crushed graham crackers with melted butter or coconut oil until well blended. Press this mixture firmly into the bottom of a 9x9-inch baking pan, creating an even layer. Bake for about 10 minutes until lightly golden, then remove and allow it to cool completely.
- While the crust cools, take a large mixing bowl and pour in the heavy cream or coconut cream. Using an electric mixer, whip the cream on medium speed for approximately 3-5 minutes, or until soft peaks form. Stop once you notice a smooth and fluffy texture, being careful not to over-whip.
- In another bowl, mix the yogurt, bubblegum extract, and softened gelatin that has been dissolved in warm water. Stir the mixture well for about 1-2 minutes until it’s fully combined, ensuring there are no lumps.
- Carefully fold the whipped cream into the yogurt mixture using a spatula. Do this gently to maintain the airy texture, incorporating about one-third of the whipped cream first before adding the rest.
- Once the filling is well combined, pour it gently over the cooled graham cracker crust. Use a spatula to spread it evenly, ensuring a smooth, flat surface on top.
- Cover the pan with plastic wrap and place it in the refrigerator for at least 60 minutes. This time allows the gelatin to firm up the filling, achieving that perfect sliceable texture.
- After chilling, remove the Bubblegum Cloud Slice from the refrigerator and cut it into squares using a sharp knife. For an extra touch, top each slice with optional fresh fruit or a sprinkle of crushed candy pieces for added fun and crunch.
Leave a Reply