
As I watched my little niece clutching her Easter basket, I couldn’t help but smile at the joy of spring celebrations. That moment inspired these Adorable Easter Bunny Sugar Cookie Cups, which are perfect for igniting festive cheer in every home. Combining soft cake mix cookies with a heavenly white chocolate ganache filled with pastel M&Ms, these sweet treats are not only easy to make but also a delightful centerpiece for any holiday gathering. With just a handful of ingredients, even novice bakers can whip together these whimsical cookies, making them an ultimate crowd-pleaser! Whether you’re hosting a family brunch or simply indulging at home, these Easter Bunny Sugar Cookie Cups promise to brighten your day. Curious to see how effortlessly you can bring this festive treat to life? Let’s dive in!
Why Make Easter Bunny Cookie Cups?
Festive Fun: These Easter Bunny Sugar Cookie Cups are bound to be the star of any spring gathering, bringing smiles to both kids and adults alike.
Easy Preparation: With just a few easy steps, even novice bakers can create these delightful treats without breaking a sweat.
Customizable Delight: This recipe offers endless possibilities! Swap the white chocolate ganache for colorful whipped cream or fill them with your favorite mousse for a twist.
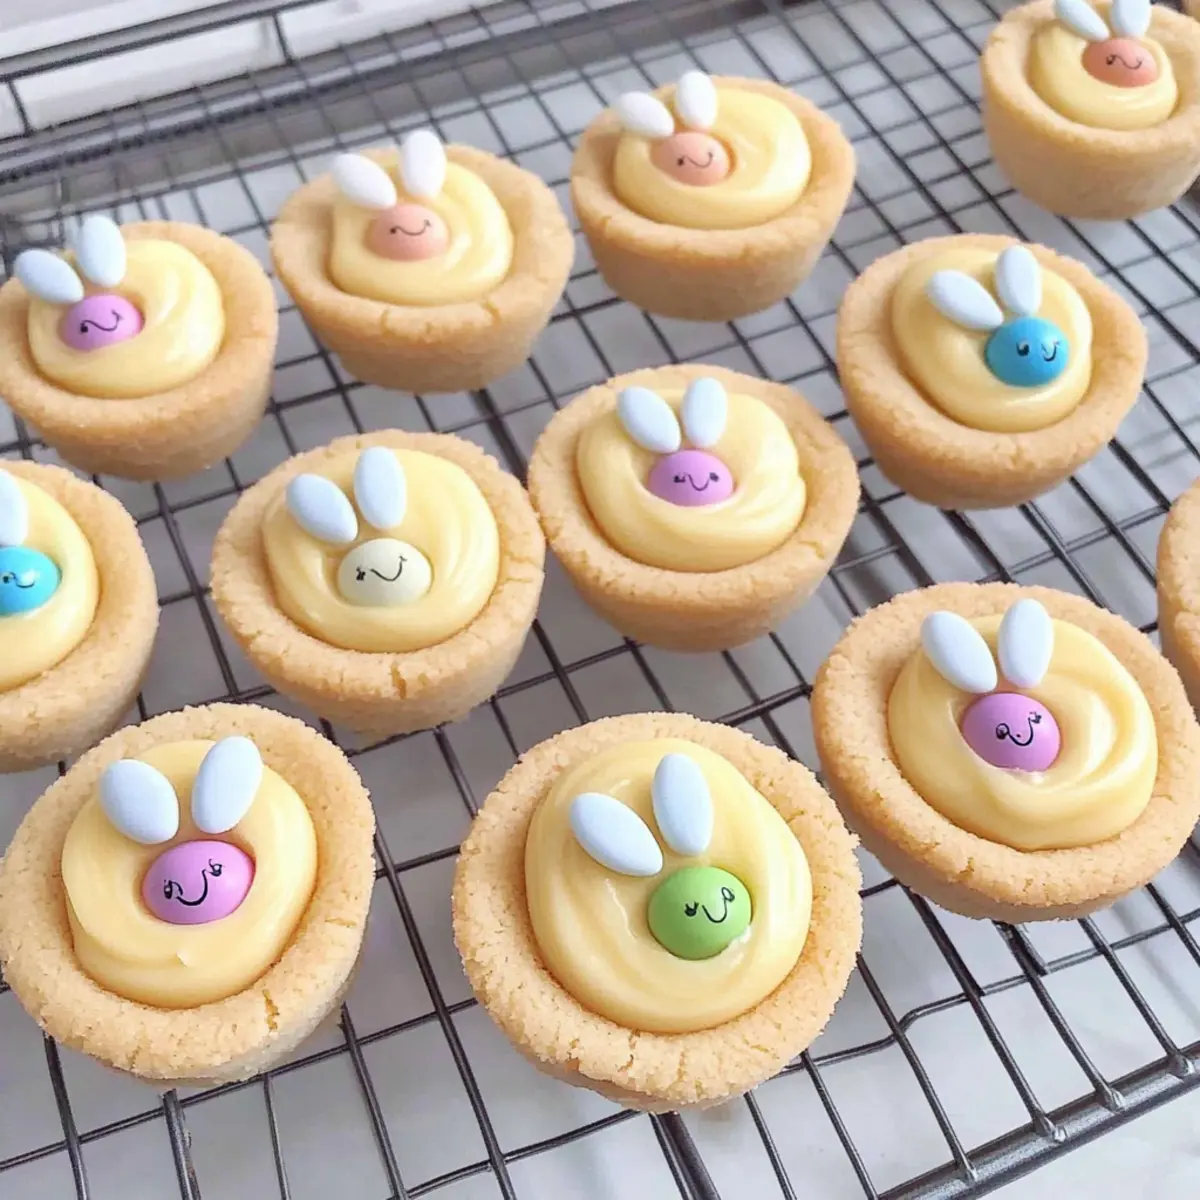
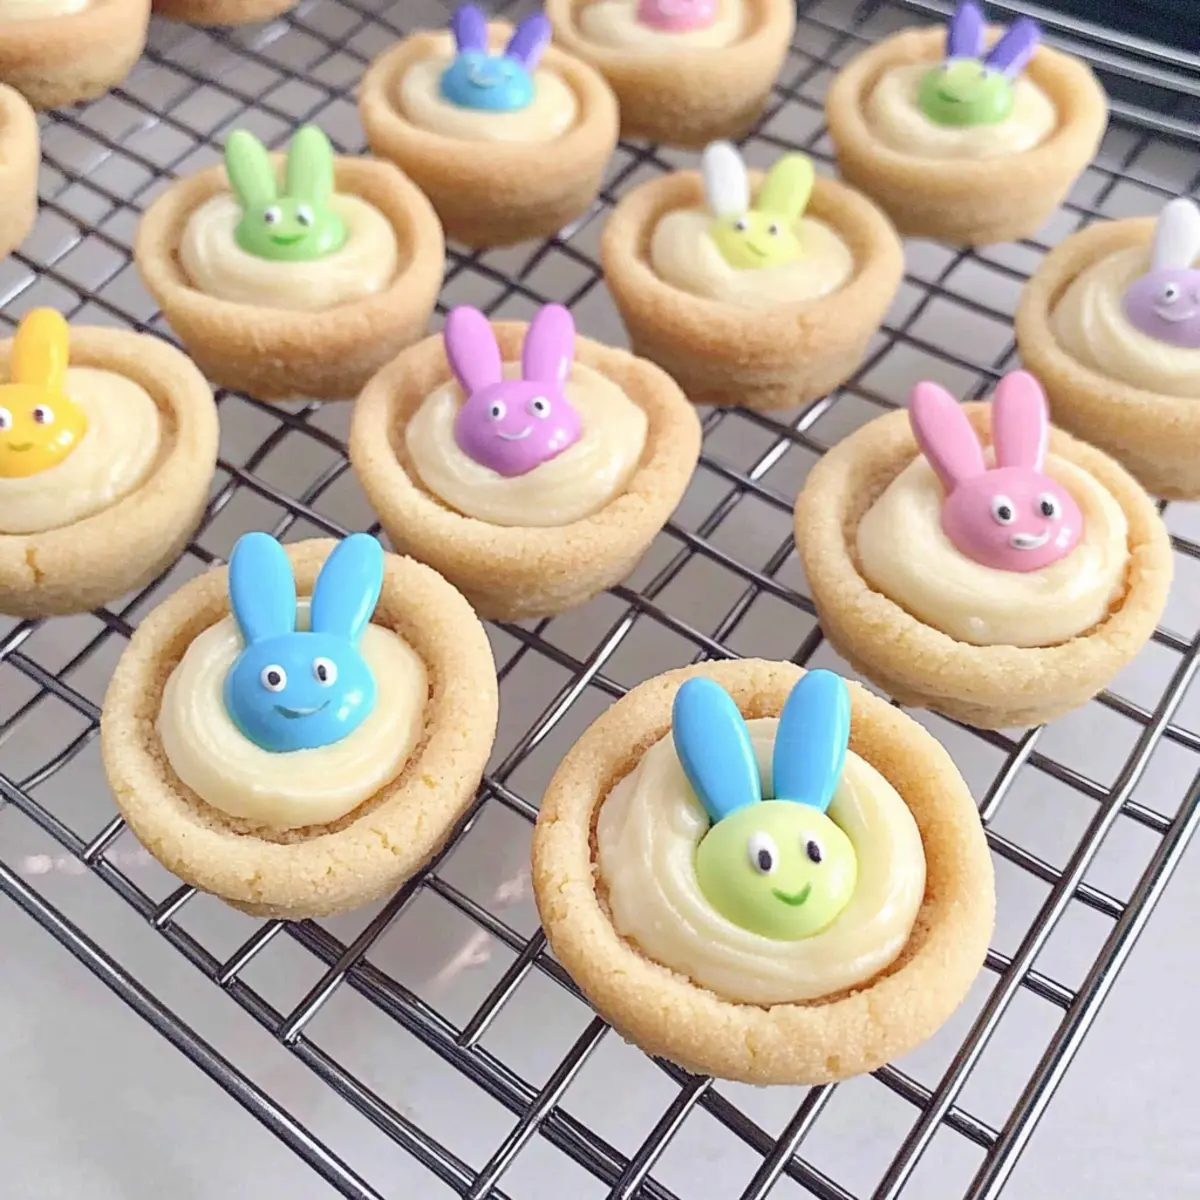
Impressive Presentation: The playful design featuring adorable bunny faces topped with pastel M&Ms ensures these cookies are not just delicious, but also a feast for the eyes.
Quick to Make: Ready in under an hour, you’ll have these sugar cookie cups baking in no time—perfect for last-minute celebrations or surprise gatherings.
These adorable cookie cups are similar to what you’ll find in our fun-filled Breakfast Granola Cups or the delicious flavors of Biscoff Cookie Butter, showing just how versatile and cheerful homemade desserts can be!
Easter Bunny Sugar Cookie Cups Ingredients
For the Cookie Base
• White or Yellow Cake Mix – Provides structure and sweetness. Can substitute with gluten-free cake mix for a gluten-free option.
• Flour – Adds stability to the batter. Use a 1:1 gluten-free flour blend as a substitute.
• Unsalted Butter (8 tbsp) – Adds richness and moisture. Melted coconut oil can be a dairy-free alternative.
• Large Egg (1) & Egg Yolk (1) – Binds ingredients and adds moisture. For egg-free, try flaxseed meal mixed with water.
• Pure Vanilla Extract (2 tsp) – Enhances flavor. Almond extract can be substituted for a different flavor profile.
• Sugar (¼ cup for rolling) – Creates a sweet crunch on the surface. Optional, can skip for less sweetness.
For the Ganache
• White Chocolate Chips (1 cup) – Forms the decadent ganache. Use any preferred chocolate for variation.
• Heavy Cream (¼ cup) – Helps to create a smooth ganache. Coconut cream can be used in a dairy-free version.
For the Decoration
• M&Ms (58 pieces, approx. 2 per cookie cup) – For decoration and festive appearance. Substitute with chocolate-covered raisins for a different look.
With these simple ingredients, you’re on your way to creating delightful Easter Bunny Sugar Cookie Cups that will make any celebration sweeter!
Step‑by‑Step Instructions for Easter Bunny Sugar Cookie Cups
Step 1: Preheat the Oven
Begin by preheating your oven to 325°F (160°C). Take out a mini muffin tin and generously spray each cup with cooking spray, ensuring easy removal later. This ensures your Easter Bunny Sugar Cookie Cups will have a delightful, soft texture and won’t stick to the pan.
Step 2: Mix the Dough
In a large mixing bowl, whisk together the white or yellow cake mix and flour until thoroughly combined. Next, add the melted unsalted butter, large egg, egg yolk, and vanilla extract. Stir the mixture until it forms a soft, cohesive dough that’s ready to be shaped into cookie cups.
Step 3: Shape the Cookie Cups
With your hands, roll the dough into 1-tablespoon-sized balls. Lightly coat each dough ball in granulated sugar for a sweet and sparkly exterior. Place the sugar-coated dough balls into the prepared muffin cups, ensuring they are spaced evenly to allow for spreading during baking.
Step 4: Bake the Cookie Cups
Place the muffin tin in the preheated oven and bake for 14 minutes. The cookie cups are done when they appear puffy and have slight cracks on the surface but are not golden brown. This is the perfect bake for tender Easter Bunny Sugar Cookie Cups that will hold their shape.
Step 5: Create Indents
Immediately after removing the muffin tin from the oven, take a spoon’s handle and gently press into the center of each cookie to create a small indent. This will form the perfect cavity for the creamy ganache later. Allow the cookie cups to cool in the tin for 5-10 minutes before transferring them to a wire rack to cool completely.
Step 6: Prepare the Ganache
To make the luscious ganache, combine the white chocolate chips and heavy cream in a microwave-safe bowl. Heat the mixture in the microwave in 15-second intervals, stirring in between until smooth and fully melted. This silky ganache will be the crowning glory of your Easter Bunny Sugar Cookie Cups.
Step 7: Fill with Ganache
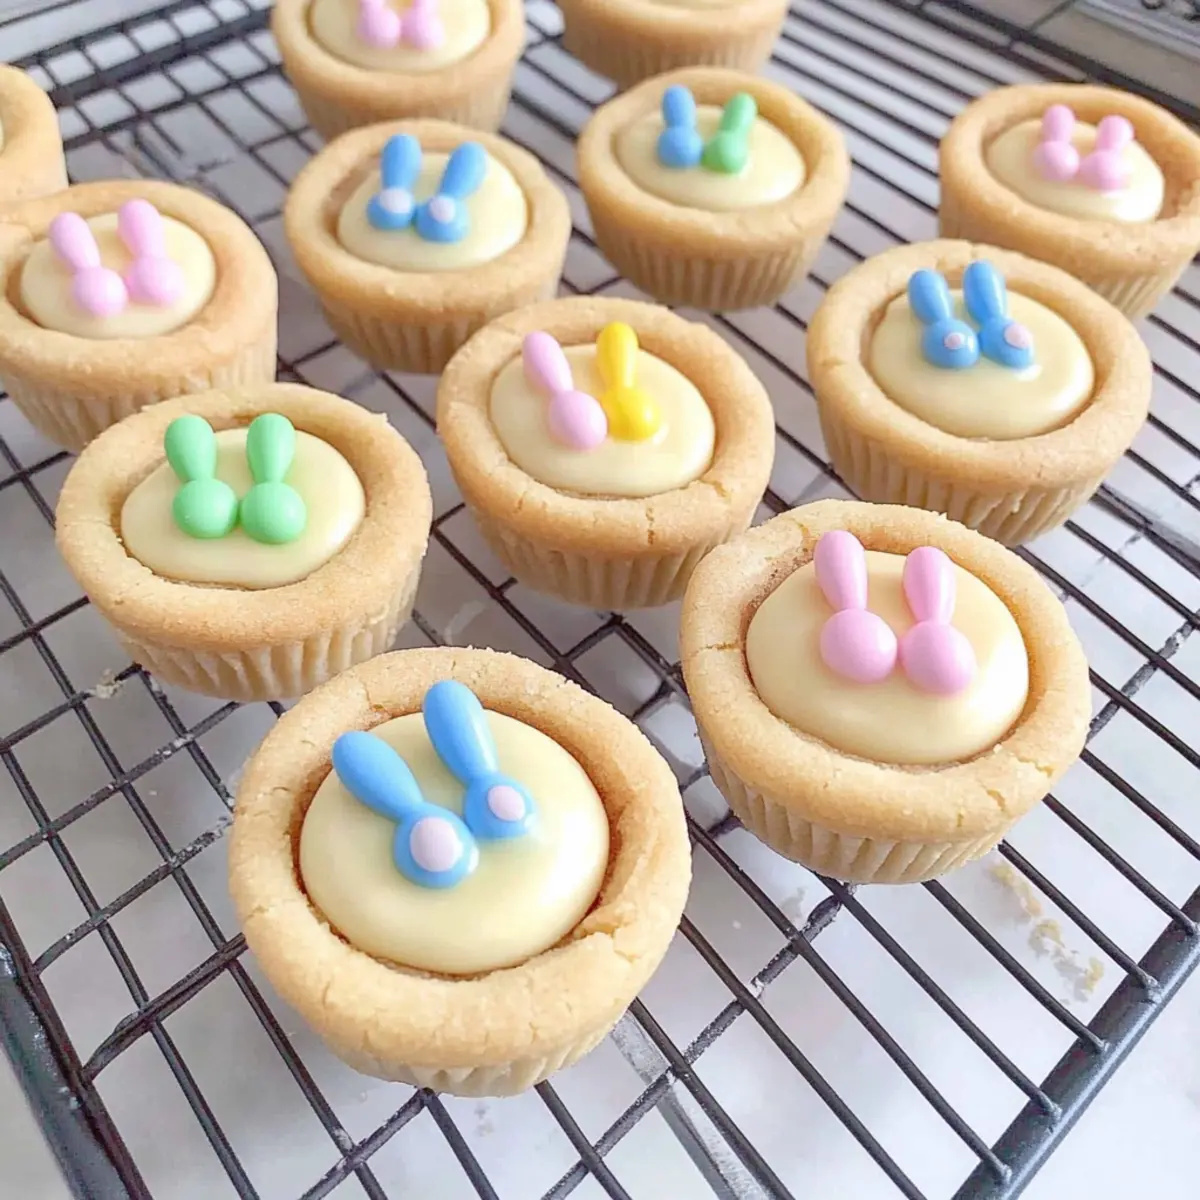
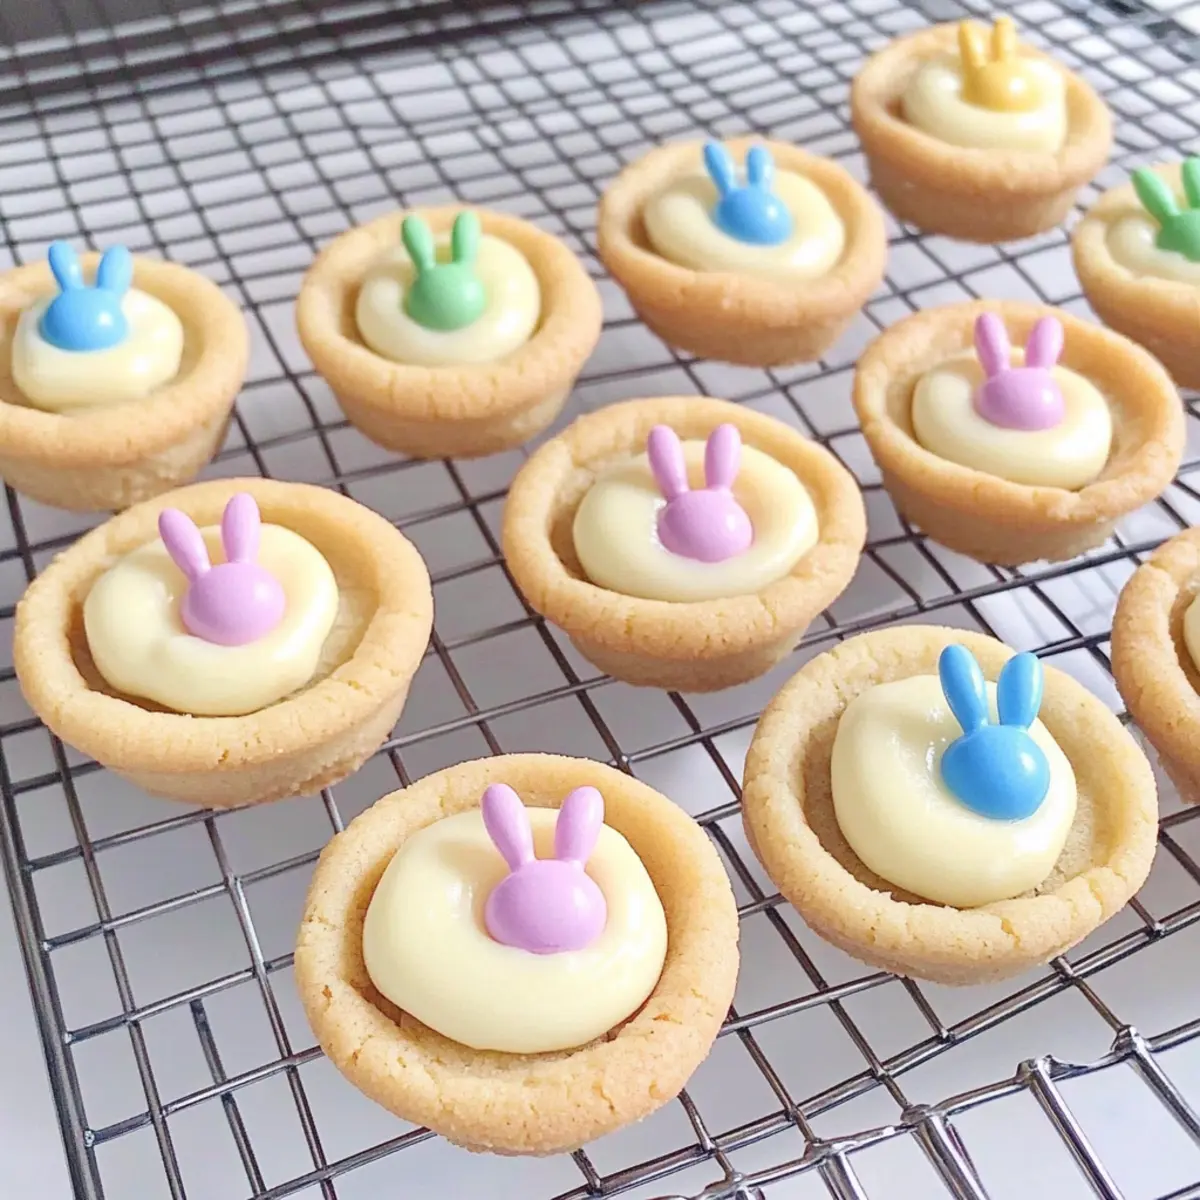
Once the cookie cups are completely cooled, carefully fill each indent with the prepared white chocolate ganache. Do this gently to avoid overflowing and to ensure a beautiful presentation. Ensure each cookie cup is generously filled, bringing a delightful creaminess to each bite.
Step 8: Decorate with M&Ms
To create adorable bunny faces, take a whole M&M and place it in the center of the ganache for the bunny’s face. Cut additional M&Ms in half using a pill cutter and arrange two halves atop the whole M&M to resemble bunny ears. This whimsical decoration will make your Easter Bunny Sugar Cookie Cups a festive treat.
Step 9: Allow to Set
Finally, once decorated, let the completed cookie cups sit at room temperature for 1-2 hours. This will allow the ganache to set properly, giving you the perfect texture to enjoy. After this setting time, your Easter Bunny Sugar Cookie Cups will be ready to dazzle at any holiday gathering!
Expert Tips for Easter Bunny Sugar Cookie Cups
-
Chill the Dough: If your dough feels too soft to work with, pop it in the fridge for 10-15 minutes to make shaping easier. This can prevent misshaped cookie cups.
-
Avoid Overbaking: Keep a close watch while baking; your cookies should be puffy and slightly cracked but not golden. Overbaking can lead to dryness in your Easter Bunny Sugar Cookie Cups.
-
Proper Indentation: Use a spoon’s handle for making the indent right after baking. This ensures you have enough space for the rich ganache filling without compromising cookie structure.
-
Ganache Consistency: When melting the chocolate and cream, stir frequently to achieve a smooth consistency. Avoid overheating, which can lead to grainy ganache.
-
Creative Decor: Experiment with different candies for decorating the cookie cups. Feel free to substitute M&Ms with pastel chocolates or even fruit for a surprise twist.
Easter Bunny Sugar Cookie Cups Variations
Feel free to sprinkle some magic on your cookies! These delightful variations and substitutions will allow you to personalize your Easter Bunny Sugar Cookie Cups to match your palate and dietary preferences.
- Gluten-Free: Use a gluten-free cake mix in place of the regular for an equally delicious treat that everyone can enjoy.
- Dairy-Free: Swap melted butter with coconut oil and heavy cream with coconut cream to create a rich and creamy texture without dairy.
- Colorful Fun: Replace white chocolate chips with colorful candy melts or even dark chocolate for a vibrant twist that adds both flavor and excitement.
- Fruit-Filled: Instead of a ganache filling, why not use a dollop of fresh fruit compote or whipped cream, topped with berries for a refreshing change?
- Nutty Crunch: Stir in some chopped nuts or crushed cookies into the dough for an added layer of flavor and texture that will surprise your guests!
- Spiced-Up Cookies: Add a sprinkle of cinnamon or nutmeg to the cookie base for a warm flavor that celebrates the season.
- Chocolate Lovers: For a double chocolate experience, replace the cake mix with chocolate cake mix and add chocolate chips into the batter.
- Festive Toppings: Have fun with different toppings! Use pastel sprinkles or edible glitter for a more celebratory look—perfect for vibrant Easter festivities!
Just like with our delightful Brown Sugar Chai or Marry Bake Cups, there’s room for creativity in every bite!
Make Ahead Options
These Easter Bunny Sugar Cookie Cups are ideal for busy home cooks looking to save time! You can prepare the cookie dough up to 24 hours in advance; simply mix it, shape it into balls, and refrigerate. For even better results, create the cookie cups and cool them a day ahead, storing them in an airtight container to maintain their softness. When you’re ready to serve, fill the cooled cups with ganache (made fresh for the best taste) and decorate with M&Ms just before serving, keeping them just as adorable and delicious as when they were first made. Enjoy the flexibility of prepping these fun treats ahead of time!
What to Serve with Easter Bunny Sugar Cookie Cups?
These delightful treats are sure to bring joy to your festive table, but what to pair them with for a complete celebration?
-
Creamy Vanilla Ice Cream: A scoop of rich vanilla ice cream adds a cool creaminess that beautifully balances the sweetness of the cookie cups. Perfect for dipping or enjoying alongside!
-
Fresh Fruit Salad: A bright medley of berries and citrus provides a refreshing contrast to the rich ganache—enhancing flavors while adding a pop of color to your dessert spread.
-
Sparkling Lemonade: The zing of sparkling lemonade invigorates the palate and complements the sweetness of the Easter Bunny Sugar Cookie Cups, making each bite feel like springtime fun!
-
Chocolate Milk: This classic pairing brings sheer nostalgia and a touch of indulgence to your dessert table. The rich, creamy chocolate flavor pairs perfectly with the cookie’s sweetness.
-
Minty Mojito Mocktail: A refreshing minty mocktail creates a fun, festive vibe and offers a delightful contrast with the cookie’s sweetness—making it an ideal accompaniment for celebration!
-
Whipped Cream with Sprinkles: A dollop of lightly sweetened whipped cream topped with vibrant sprinkles adds whimsical flair. It’s a fun way to enhance your cookie cups while adding creaminess.
-
Easter-themed Cupcakes: Enhance the festive atmosphere with an array of Easter-themed cupcakes. Their varied flavors can complement the sugar cookie cups perfectly, offering a delightful dessert options.
Indulge in these pairings, and let your Easter Bunny Sugar Cookie Cups shine as the star of your delicious celebration!
How to Store and Freeze Easter Bunny Sugar Cookie Cups
Room Temperature: Store cookie cups in an airtight container at room temperature for up to 2 days for optimal freshness and to maintain their softness.
Fridge: You can refrigerate the Easter Bunny Sugar Cookie Cups for up to a week. Just be sure to keep them in an airtight container to prevent them from drying out.
Freezer: For longer storage, freeze the cookie cups for up to 3 months. Wrap each cup in plastic wrap and place them in a freezer-safe bag for best results.
Reheating: To enjoy, simply thaw them at room temperature for a couple of hours or microwave for about 10-15 seconds to soften before serving.
Easter Bunny Sugar Cookie Cups Recipe FAQs
How do I choose the best cake mix for my cookie cups?
Absolutely! For the best results with your Easter Bunny Sugar Cookie Cups, opt for a white or yellow cake mix. Look for mixes with a date far from expiration for optimal freshness. If you’re aiming for a gluten-free option, many brands now have great gluten-free cake mixes that provide a similar taste and texture.
What is the best way to store leftover cookie cups?
Very! To keep your cookie cups fresh, store them in an airtight container at room temperature for up to 2 days. If you want them to last longer, you can refrigerate them for up to a week. Just make sure to keep them well-sealed to avoid drying out.
Can I freeze these cookie cups for later?
Absolutely! If you want to prepare ahead, you can freeze your Easter Bunny Sugar Cookie Cups for up to 3 months. After they cool completely, wrap each cookie cup tightly in plastic wrap and store them in a freezer-safe bag. When you’re ready to enjoy them, simply thaw them at room temperature for a couple of hours or microwave for about 10-15 seconds to soften.
What if the dough is too soft to work with?
No problem! If you find that your dough is too soft and sticky, simply chill it in the refrigerator for 10-15 minutes. Chilling the dough makes it easier to roll into balls and shape into cookie cups, ensuring that your Easter Bunny Sugar Cookie Cups turn out perfectly!
Can my pets share in the cookie fun?
Not really! While these cookie cups are adorable, they contain ingredients like chocolate and sugar that aren’t safe for pets. Always keep these festive treats out of reach of your furry friends to ensure their happiness and health.
Can I customize the decorations on my cookie cups?
Absolutely! The possibilities are endless! Feel free to swap out M&Ms for other candies like chocolate-covered raisins or seasonal sprinkles. For a different flavor flair, you could even use fruit, like a slice of strawberry or kiwi, to bring a refreshing twist to your Easter Bunny Sugar Cookie Cups.
Delightful Easter Bunny Sugar Cookie Cups for Sweet Celebrations
Ingredients
Equipment
Method
- Preheat your oven to 325°F (160°C) and spray a mini muffin tin with cooking spray.
- In a mixing bowl, whisk together cake mix and flour. Add melted butter, egg, egg yolk, and vanilla extract, stirring until it forms a soft dough.
- Roll the dough into 1-tablespoon balls, coat in sugar, and place in muffin cups.
- Bake for 14 minutes until puffy and slightly cracked.
- Impress the center of each cookie with a spoon handle to create indents, then cool in the tin for 10 minutes.
- Melt white chocolate chips and heavy cream in the microwave until smooth, mixing frequently.
- Fill indents in cooled cookie cups with ganache.
- Decorate with M&Ms to create bunny faces.
- Allow to set at room temperature for 1-2 hours.
Leave a Reply