
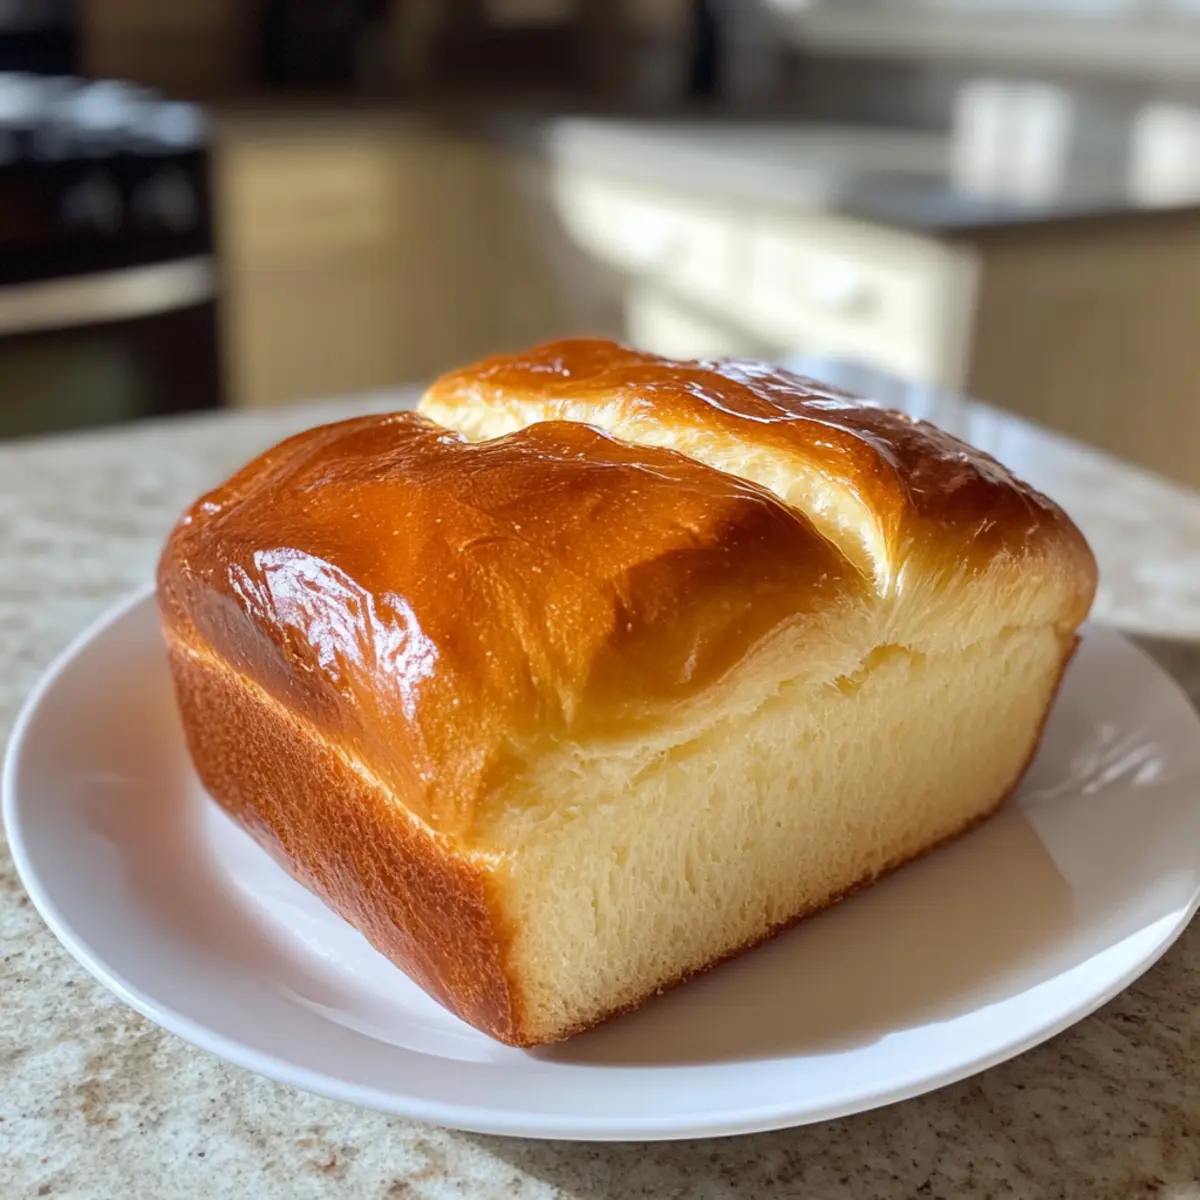
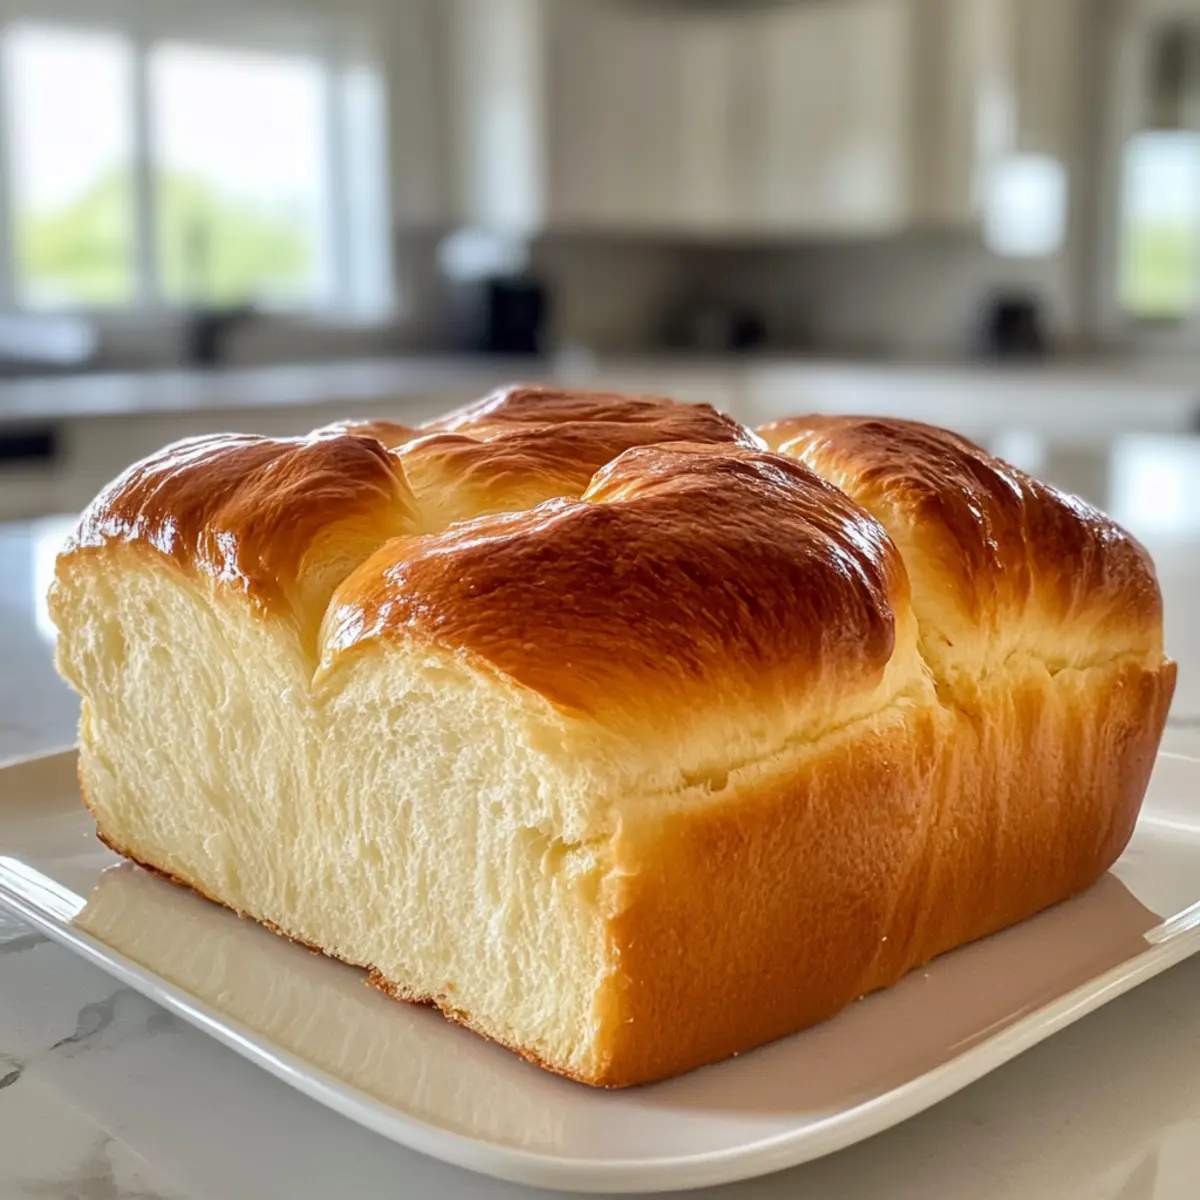
The smell of freshly baked bread wafted through my kitchen, transforming my home into a cozy bakery. This delightful experience is exactly what you’ll encounter when you make Judy’s Homemade Brioche. This rich and luxurious French bread is not only a feast for the eyes but also a treat for the palate, perfect for breakfast or elevated sandwiches. With its buttery goodness and tender crumb, this homemade brioche recipe becomes a rewarding project that you can confidently tackle, despite its seemingly daunting reputation. One of the best perks of this recipe is that it requires overnight proofing, allowing you to plan ahead and enjoy the fruits of your labor without the usual time crunch. Plus, it opens the door to endless variations – braid it, mold it into buns, or simply embrace its classic loaf shape. Are you ready to take the plunge and transform your baking game? Let’s dive in!
Why is Homemade Brioche Worth It?
Decadent Delight: Once you take a bite, the rich, buttery flavor will transport you to a Parisian bakery.
Simple Process: With the overnight proofing method, you can prepare a stunning brioche without spending hours in the kitchen.
Versatile Shapes: Whether you want a classic loaf, elegant braid, or individual buns, this recipe can adapt to any occasion.
Perfect for Sharing: Impress friends and family with a freshly baked loaf that is bound to be a conversation starter! If you’re a fan of homemade delights, try our Gyoza Homemade Japanese or Baked Teriyaki Salmon.
Memories Await: The joy of baking brioche at home creates lasting memories, whether it’s a lazy Sunday morning or a special holiday!
Homemade Brioche Ingredients
For the Dough
• Eggs – 6 large eggs (at room temperature); enriches the dough for a tender texture. Ensure they’re at room temperature to incorporate easily.
• Unsalted Butter – 1 cup (2 sticks / 230g, at room temperature); provides richness and improves texture. Soften well for easy mixing.
• All-Purpose Flour – 4¾ cups (620g, divided); the main structure of the bread. Use 130g for the initial mixture, then 260g for subsequent additions.
• Active Dry Yeast – 1 tablespoon (9g); helps the dough rise. Fresh yeast ensures better results.
• Granulated Sugar – ¼ cup (50g); adds sweetness and aids yeast activation.
• Salt – 1½ teaspoons (8g); enhances flavor and regulates yeast activity.
• Warm Water – ½ cup (120 ml, about 120°F / 49°C); activates the yeast. Ensure water is not too hot to avoid killing the yeast.
For the Finish
• Sugar Water – 2 teaspoons sugar (10g) mixed with 1 tablespoon water; used for brushing on baked brioche for a glossy finish.
Unlock the secret of crafting a perfect homemade brioche recipe with these rich ingredients, and elevate your baking prowess!
Step‑by‑Step Instructions for Judy’s Rich & Decadent Homemade Brioche
Step 1: Prepare Ingredients
Begin by allowing 6 large eggs and 1 cup of unsalted butter to reach room temperature, about 30 minutes. This ensures easy incorporation into your dough. While waiting, gather your equipment—an electric mixer with a paddle attachment for effortless mixing, and a large mixing bowl for combining the ingredients.
Step 2: Combine Dry Ingredients
In the electric mixer bowl, combine 1 cup (130g) of all-purpose flour, 1 tablespoon of active dry yeast, ¼ cup of granulated sugar, and 1½ teaspoons of salt. Mix these ingredients on low speed until well blended, about 1 minute. This base creates the perfect environment for your yeast to activate as we prepare for the rich dough ahead.
Step 3: Activate Yeast Mixture
Next, slowly pour in ½ cup of warm water (about 120°F/49°C) into the dry ingredients while mixing on low speed. Continue mixing for approximately 2 minutes until the mixture forms a thick paste. This step is vital for ensuring your yeast is activated and ready to help your brioche rise.
Step 4: Incorporate Eggs
With the mixer on low speed, add the room-temperature eggs one at a time, mixing until each is fully absorbed before adding the next. This process should take about 3-5 minutes in total. The eggs will enrich your dough, contributing to its luscious texture and flavor, characteristic of Judy’s homemade brioche.
Step 5: Add More Flour
Gradually add 2 cups (260g) of all-purpose flour to the mixture, keeping the mixer on low speed until fully combined. The dough will be quite sticky at this point, but that’s just perfect! This is the foundational step where you begin to build the structure needed for a bakery-quality brioche.
Step 6: Mix in Butter
Now, introduce the softened butter in small batches, mixing on low until each addition is fully incorporated. This should take about 4-5 minutes. After all the butter is mixed in, add the remaining 1¼ cups (about 1¾ cups in total) of flour slowly until you achieve a thick and slightly sticky dough that clears the sides of the bowl.
Step 7: First Proofing
Cover the bowl with plastic wrap, then allow the dough to proof at room temperature for about 3 hours, until it doubles in size. This crucial step builds the brioche’s airy texture. Make sure to find a warm, draft-free spot in your kitchen for optimal proofing conditions.
Step 8: Chill the Dough
After the dough has risen, gently punch it down to release its gas, then cover it again and refrigerate overnight. This cold fermentation enhances the flavor and texture of your brioche, making it taste even more luxurious when baked.
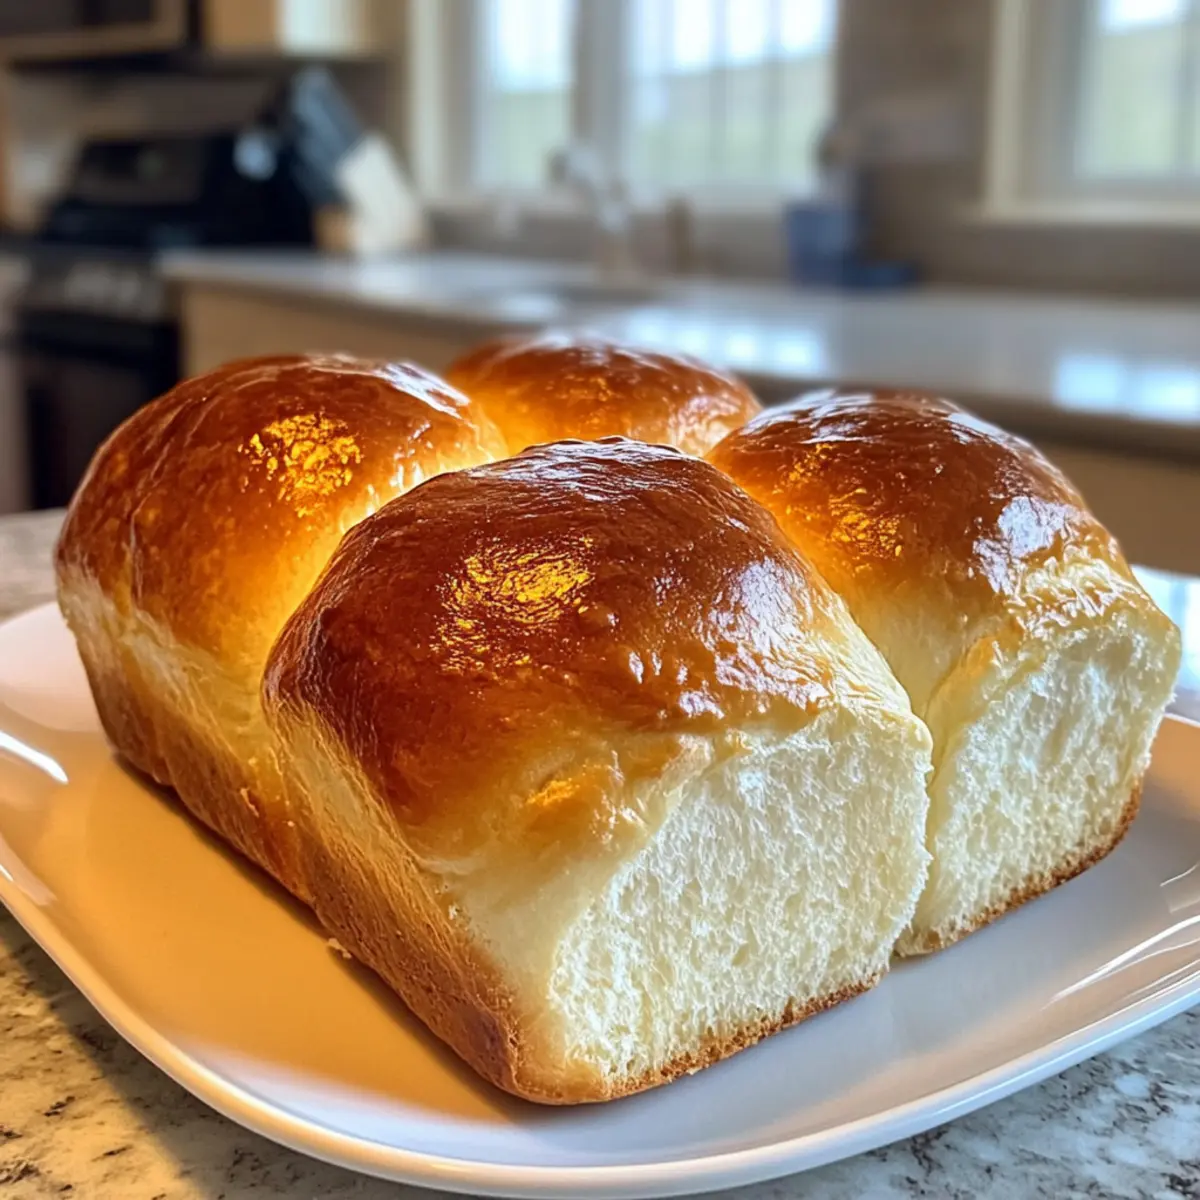
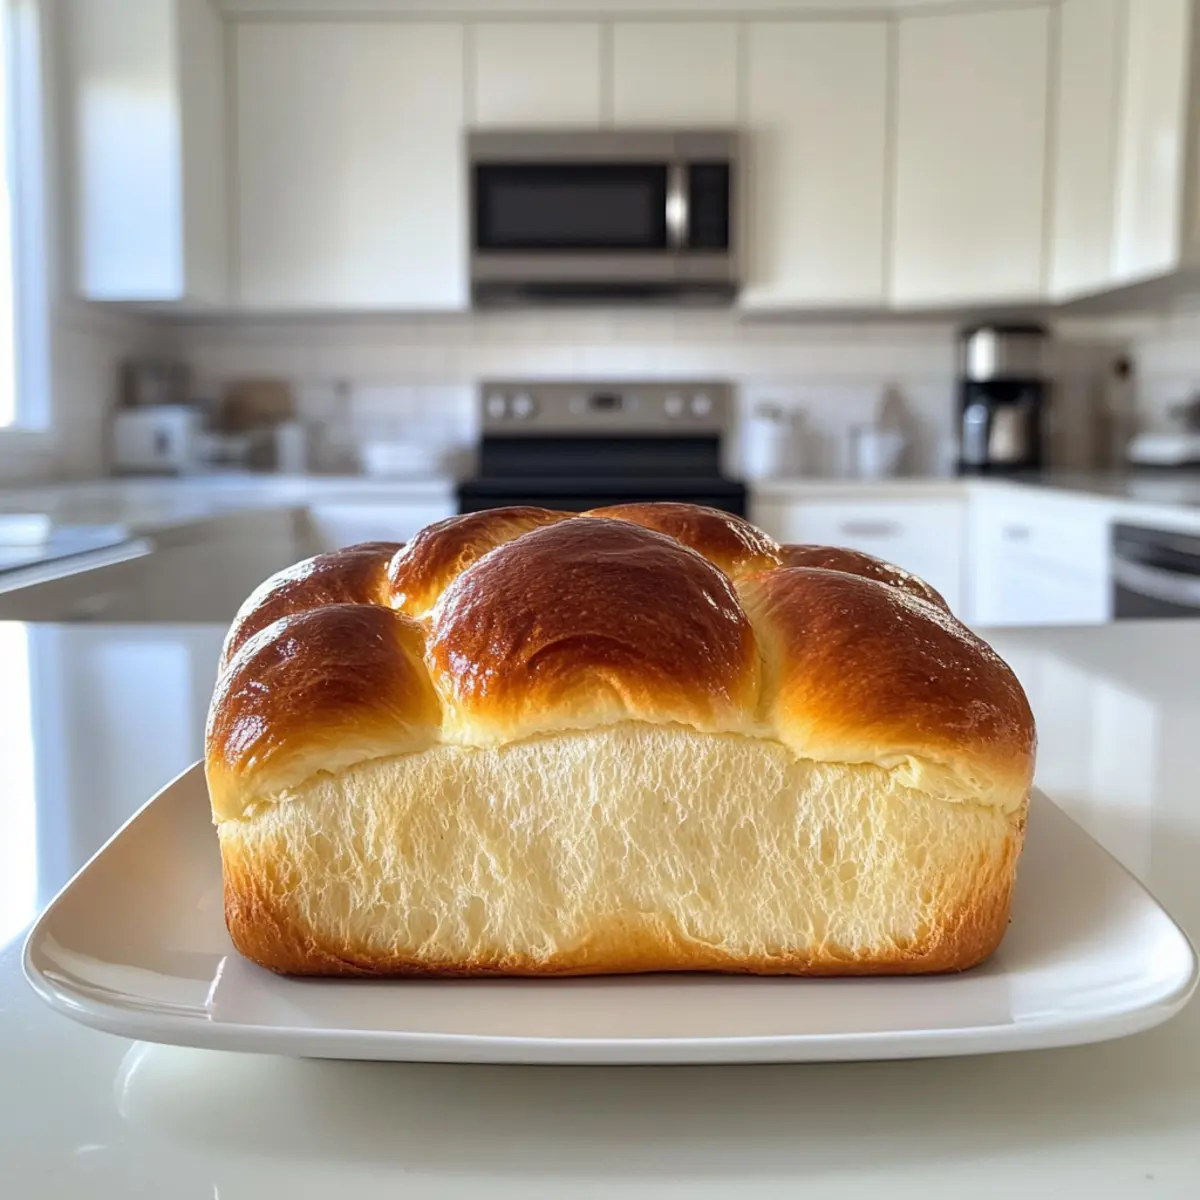
Step 9: Shape Your Loaves
The next day, remove the dough from the refrigerator, and divide it into two equal pieces. Shape each piece to fit in your prepared 9×5 inch loaf pans. Don’t rush this process; take your time to create smooth surfaces to ensure even rising and baking.
Step 10: Second Proofing
Cover the shaped loaves with plastic wrap and let them proof at room temperature for 2½ to 3 hours until they double in size once more. This step is essential for achieving that light and fluffy texture you’re aiming for in Judy’s homemade brioche.
Step 11: Bake the Brioche
Preheat your oven to 350°F (180°C). Once preheated, bake the loaves for 37-40 minutes, checking for a deep golden brown crust. If they brown too quickly, tent them with foil. This helps lock in moisture while ensuring the centers fully cook through.
Step 12: Brush and Cool
As soon as the brioche comes out of the oven, brush the tops with the prepared sugar water to give them a glossy finish. Let the loaves cool in the pans for about 5 minutes before transferring them to a wire rack to cool completely. This final touch enhances both presentation and flavor.
Storage Tips for Homemade Brioche
-
Room Temperature: Store leftover brioche in an airtight container at room temperature for up to 3 days to maintain its soft texture and rich flavor.
-
Fridge: If you need to keep it longer, wrap your brioche tightly in plastic wrap and refrigerate for up to a week, though this may slightly dry it out.
-
Freezer: For longer storage, freeze brioche in an airtight bag for up to 3 months. Be sure to slice it beforehand for easy thawing and serving.
-
Reheating: To enjoy leftover brioche, warm slices briefly in the oven at 350°F (180°C) for about 5-10 minutes, or toast them lightly for a refreshing burst of homemade flavors.
What to Serve with Judy’s Rich & Decadent Homemade Brioche
Enjoy a delightful spread of flavors that perfectly complements the luxurious taste of this French bread.
-
Creamy Mashed Potatoes: Their velvety texture contrasts beautifully with the brioche, adding a comforting, earthy element to your meal. Serve alongside roasted meats for a decadent dinner.
-
Fresh Fruit Salad: A vibrant mix of seasonal fruits enhances the sweetness of the brioche, making it a refreshing addition to brunch. The burst of flavors brings a light balance, perfect for spring or summer gatherings.
-
Lemon Curd: The zesty brightness of lemon curd creates a wonderful tart contrast to the rich, buttery brioche. Spread a generous layer on your warm slices or serve it as a dip alongside tea.
-
Homemade Jam: Offering a sweet and fruity touch, homemade jam pairs wonderfully with brioche toasted in a skillet. Spread it on warm slices for breakfast, and savor the satisfying blend of flavors.
-
Savory Egg Strata: This hearty baked dish adds a savory element that beautifully balances the brioche’s richness. The creamy texture of eggs and cheese mingles seamlessly with the tender bread.
-
Sparkling Wine: A glass of bubbly elevates any occasion and pairs wonderfully with the buttery notes of brioche. Sip it during breakfast celebrations or at a cozy afternoon tea for an extra touch of elegance.
Homemade Brioche Recipe Variations
Feel free to get creative with Judy’s Homemade Brioche and make it uniquely yours!
- Gluten-Free: Substitute all-purpose flour with a gluten-free flour blend, adjusting liquid as needed for proper texture.
- Whole Wheat: Use half whole wheat flour for a nuttier flavor and a more robust texture in your brioche.
- Sweet & Savory Fillings: Add chocolate chunks or dried fruits for a sweet twist; experiment with herbs and cheese for savory options.
- Citrus Zest: Incorporate lemon or orange zest into the dough for a refreshing citrus lift that enhances its overall flavor.
- Brioche Buns: Shape the dough into smaller rolls for brunch sliders or gourmet burgers—perfect for impressing your guests!
- Herb-Infused: Add finely chopped fresh herbs like rosemary or thyme to the dough for a delightful aromatic experience in every bite.
- Rich Egg Wash: Instead of just sugar water, brush with beaten egg for a richer, shinier crust as well as added flavor.
- Fillet Options: Experiment with adding minced garlic and cheese to the dough for a savory option, reminiscent of a French focaccia.
Looking to expand your homemade baking repertoire? Try our Baked Swordfish Lemon for a delightful dinner pairing or enjoy a comforting Patty Melt made with this beautiful brioche!
Expert Tips for Homemade Brioche
-
Room Temperature Ingredients: Ensure your butter and eggs are at room temperature for smooth mixing and proper emulsification, crucial for a tender brioche.
-
Yeast Activation: Use warm water at 120°F (49°C) to activate the yeast—too hot, and you’ll kill it, resulting in a dense loaf.
-
Be Patient: Allow adequate time for proofing. This step is vital for developing the airy texture of your homemade brioche.
-
Check Dough Consistency: The dough should be sticky but manageable. If it becomes too dry, you may not achieve that essential moist crumb.
-
Experiment with Flavors: Feel free to add chocolate chunks, nuts, or dried fruits during shaping for delightful variations on your homemade brioche!
Make Ahead Options
These Judy’s Homemade Brioche are perfect for meal prep enthusiasts! You can prepare the dough up to 24 hours in advance by following the first proofing step, allowing it to rise for about 3 hours, then refrigerating overnight. This slow fermentation enhances the flavor while saving time on baking day. You can also shape the loaves and store them in the refrigerator for up to 3 days before the second proofing; simply cover them tightly with plastic wrap to maintain freshness. When ready to bake, allow the shaped loaves to proof at room temperature until doubled (about 2½-3 hours) and then proceed with baking. This way, you’ll have fresh homemade brioche without the last-minute rush!
Judy’s Rich & Decadent Homemade Brioche Recipe FAQs
What is the best way to select ripe ingredients for homemade brioche?
Absolutely! For the best results, always choose fresh, high-quality ingredients. When selecting eggs, look for ones that have no cracks and are within the expiration date. For butter, ensure it’s unsalted and at room temperature, which should be soft and smooth to the touch. This not only helps with mixing but enhances flavor as well. Fresh active dry yeast is essential; always check that it’s within its expiry for optimal rising.
How should I store my homemade brioche and how long will it last?
Very good question! Store your brioche in an airtight container at room temperature for up to 3 days. If you want to keep it longer, wrap it tightly in plastic wrap and keep it in the fridge for up to a week, though this may make it slightly drier. For long-term storage, slice the brioche and freeze it in an airtight bag for up to 3 months. When you’re ready to enjoy it, just toast or warm the slices for a freshly baked taste!
Can I freeze leftovers from my homemade brioche? If so, how?
Absolutely! Freezing your brioche is a great way to preserve its deliciousness. First, make sure it’s fully cooled. Then, slice the brioche to allow for easy thawing later. Wrap each slice or the whole loaf tightly in plastic wrap, ensuring there are no air pockets, and place it inside a freezer-safe bag. Label it with the date and store it in the freezer for up to 3 months. When you’re ready to enjoy it, simply thaw it overnight in the fridge or slice off pieces and toast them straight from the freezer!
What should I do if my brioche dough doesn’t rise as expected?
No worries; this can happen! First, check if your yeast is still active by dissolving some in warm water (around 110°F/43°C) with a pinch of sugar. If it doesn’t bubble within 10 minutes, your yeast might be expired. If your dough isn’t rising, ensure it’s in a warm, draft-free place for proofing. Sometimes, dough requires longer proofing time, especially in cooler environments. If all else fails, knead in a little more flour to help with the texture.
Are there any dietary considerations I should be aware of when making brioche?
Great question! Traditional brioche contains butter and eggs, which may not be suitable for those with dairy or egg allergies. If you’re looking for alternatives, consider using a vegan butter substitute and flax eggs (1 tablespoon of ground flaxseed mixed with 2.5 tablespoons of water for each egg). Also, for those with gluten sensitivities, you may experiment with gluten-free all-purpose flour, but be cautious as the texture may vary. Always double-check ingredient labels and recipes to ensure they meet your dietary needs.
Delicious Homemade Brioche Recipe That's Easier Than You Think
Ingredients
Equipment
Method
- Begin by allowing the eggs and butter to reach room temperature for about 30 minutes.
- In the mixer bowl, combine the flour, yeast, sugar, and salt.
- Slowly pour in warm water into the dry ingredients while mixing.
- Add the room-temperature eggs one at a time, mixing until absorbed.
- Gradually add the remaining flour until fully combined, resulting in a sticky dough.
- Incorporate softened butter in small batches, mixing until each is absorbed.
- Cover and proof the dough at room temperature for 3 hours.
- After it has risen, gently punch it down and refrigerate overnight.
- Divide the dough into two pieces and shape into loaves.
- Let the shaped loaves proof for 2½ to 3 hours.
- Preheat the oven to 350°F and bake for 37-40 minutes.
- Brush with sugar water for a glossy finish and cool.
Leave a Reply