
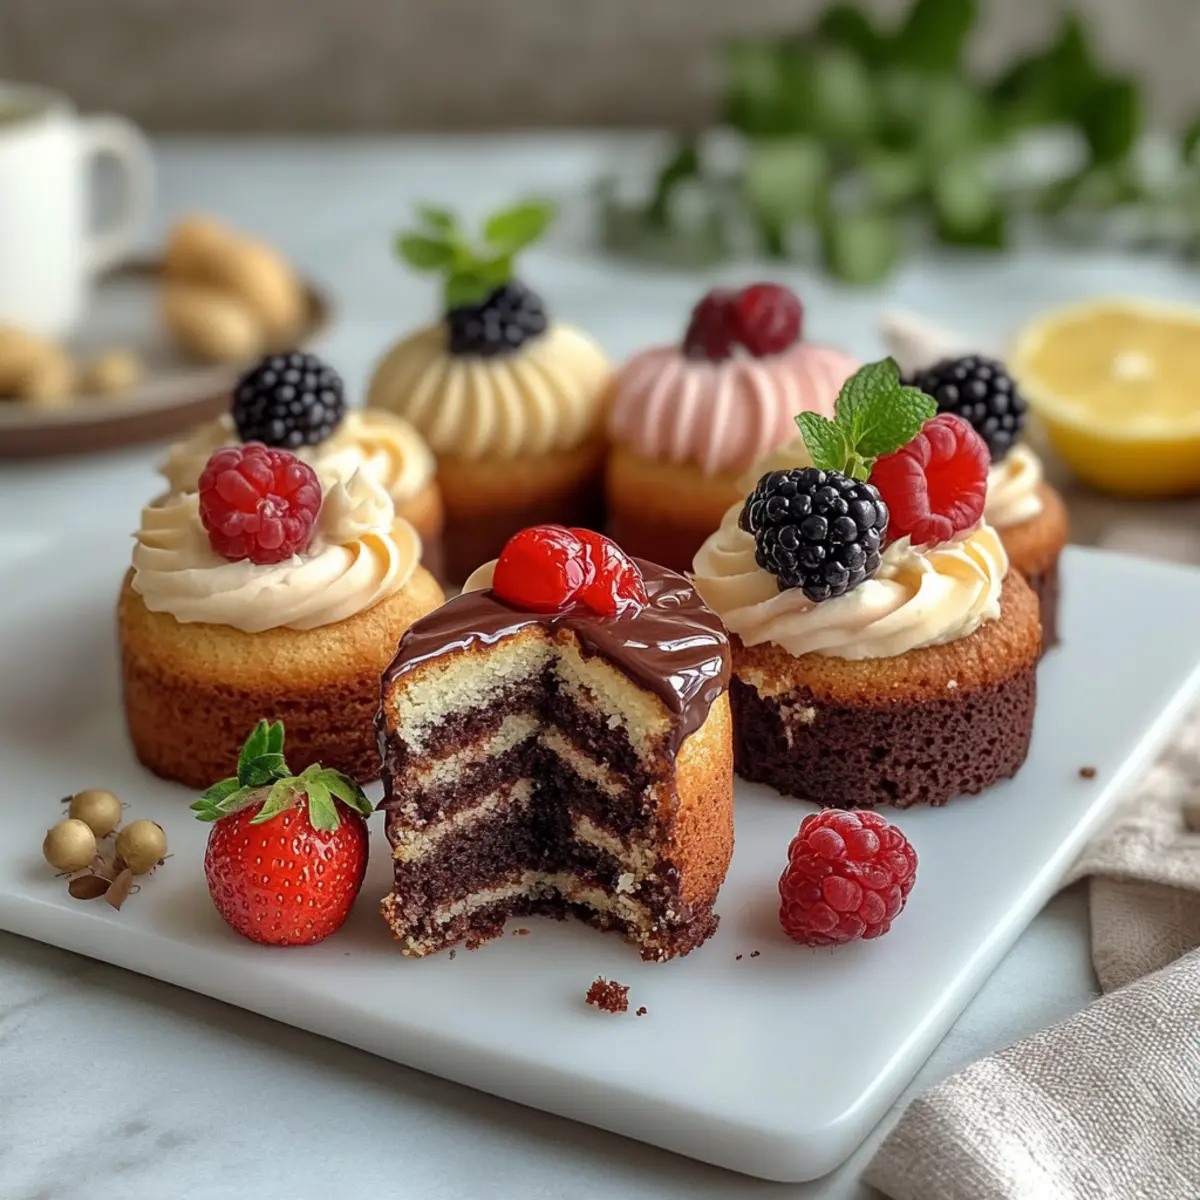
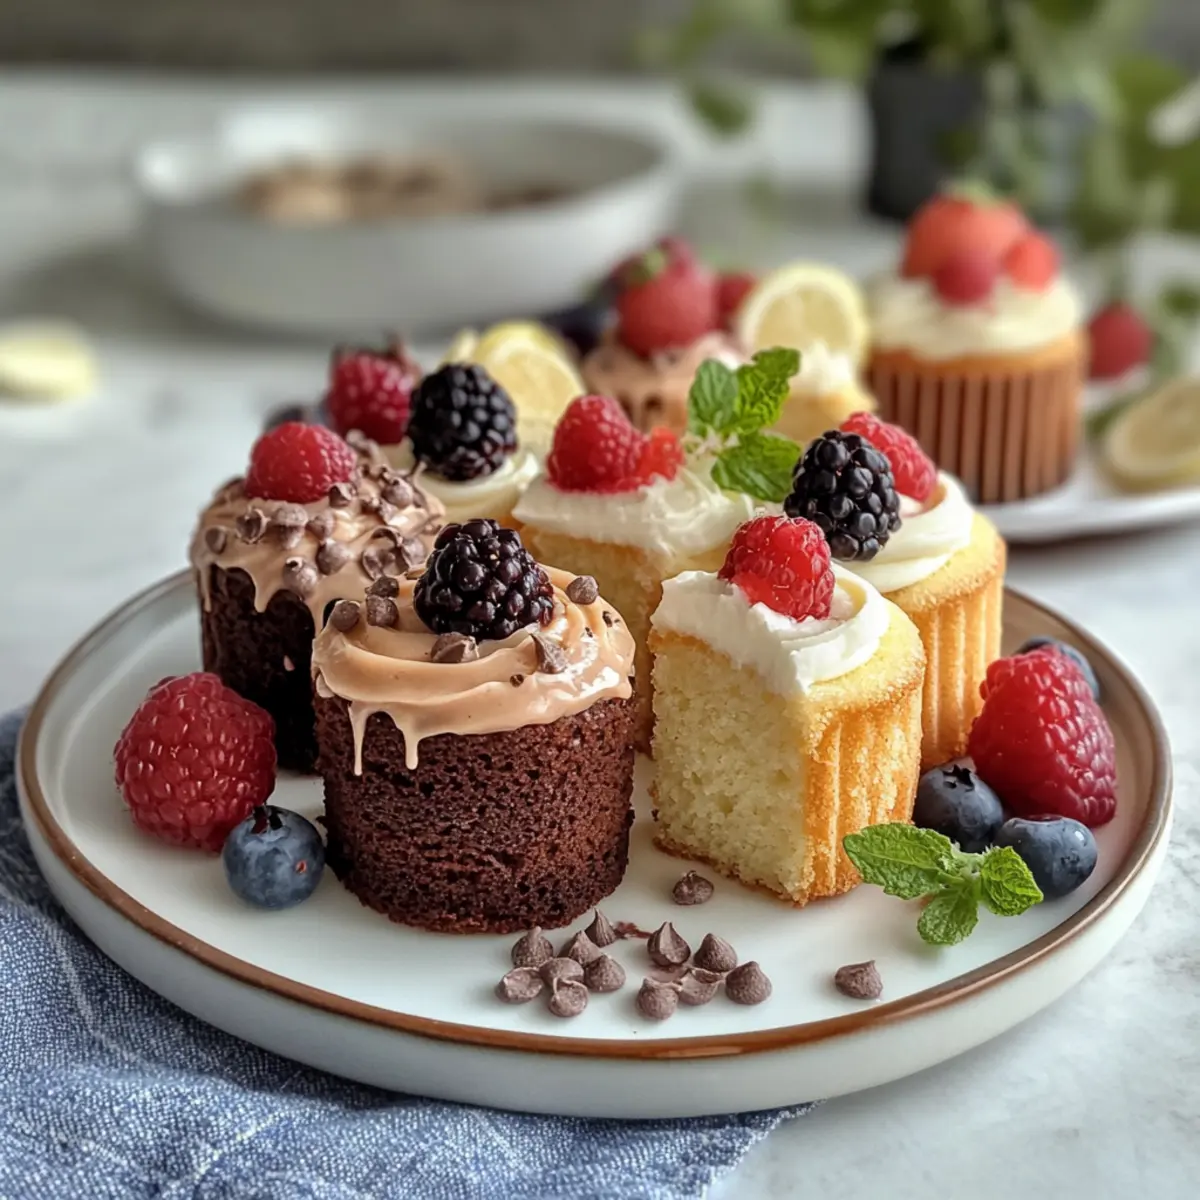
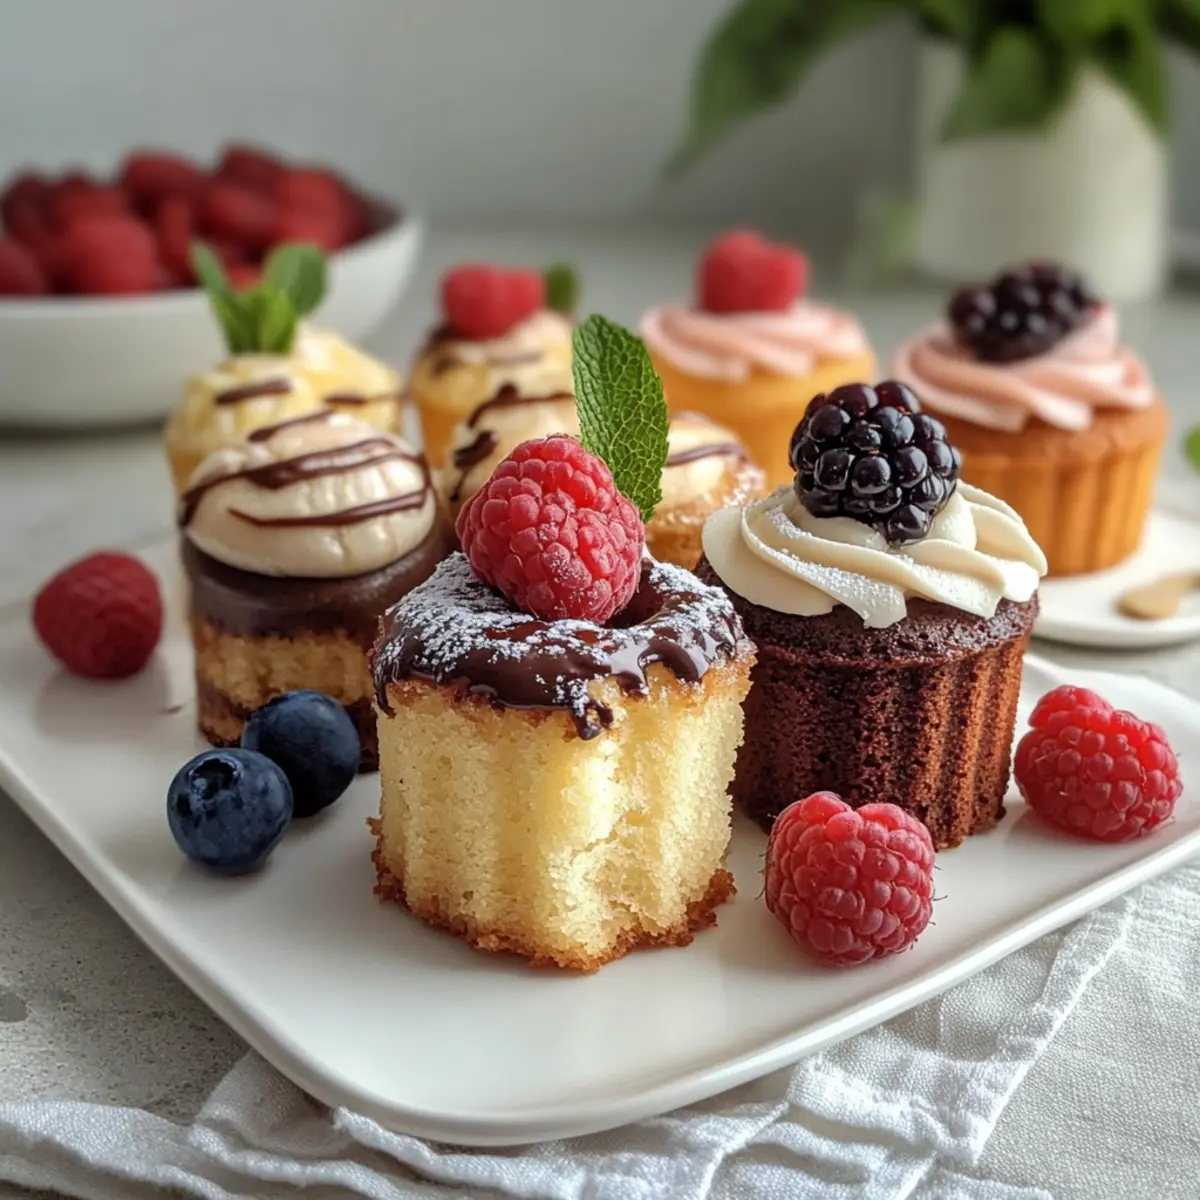
“Wouldn’t it be delightful if you could hold happiness in the palm of your hand?” That’s precisely the feeling you’ll get with these charming Mini Cakes, which come in irresistible flavors like classic vanilla, rich chocolate, and bright lemon. Not only are these petite desserts perfect for sharing at gatherings, but they also bake up in a flash, allowing both novice and seasoned bakers to whip up sweetness without spending hours in the kitchen. Their versatility means you can easily adapt them for any occasion, making any gathering feel a little more special. So, are you ready to dive into a world of delightful flavors and the joy of baking? Let’s get started!
Why Are Mini Cakes So Irresistible?
Unmatched Versatility: Mini cakes can be tailored to any occasion, whether it’s a summer BBQ or a cozy winter gathering. Quick Baking: These treats bake in just 15-20 minutes, allowing you to enjoy homemade desserts without the wait. Flavor Explosion: Each bite bursts with unique flavors, from classic vanilla to decadent chocolate or zesty lemon. Crowd-Pleasing Size: Perfectly portioned, they satisfy sweet cravings without overwhelming. For additional delightful bites, pair these mini cakes with our Matcha Cupcakes Deliciously or indulge in the rich flavors of Coffee Pancakes Chocolate. Get ready to spread joy in every small serving!
Mini Cakes Ingredients
• Note: Gather these essentials to create a delightful array of mini cakes bursting with flavor!
For the Batter
• Flour – Provides structure; you can use gluten-free flour for a gluten-free version.
• Sugar – Adds sweetness and contributes to texture; substitute with coconut sugar for a refined-sugar-free alternative.
• Butter – Provides richness and moisture; switch to margarine or a vegan butter alternative for dairy-free options.
• Eggs – Binds ingredients and enhances moisture; for a vegan option, replace with flaxseed meal mixed with water.
• Baking Powder – A vital leavening agent for lightness; stick to the recommended amount for best results.
• Salt – Enhances flavor balance; it’s essential for all recipes.
• Milk – Adds moisture and tenderness; almond or soy milk works for a dairy-free variation.
• Vanilla Extract – Acts as a flavor enhancer; optional for some flavor variations.
• Cocoa Powder – Provides rich flavor in chocolate variations; sifting is recommended to avoid lumps.
• Berries (optional) – Adds delightful flavor and moisture in fruity variations; fresh or frozen work well—just adjust sugar to taste.
Step‑by‑Step Instructions for Delightful Mini Cakes
Step 1: Preheat and Prepare
Begin by preheating your oven to 350°F (175°C). While the oven warms up, generously grease your mini bundt, round, or cupcake pans with butter or a cooking spray to ensure easy release. This step is crucial for your mini cakes to come out beautifully without sticking.
Step 2: Mix Dry Ingredients
In a medium bowl, whisk together the flour, baking powder, and salt to create a light, even mixture. For chocolate mini cakes, sift in the cocoa powder to avoid lumps and ensure a smooth batter. This blend is the foundation of your delightful mini cakes, setting them up for a fluffy, tender texture.
Step 3: Cream Butter and Sugar
In a large mixing bowl, beat the softened butter and sugar together using an electric mixer on medium speed. Continue mixing for about 3-4 minutes until the mixture is light and fluffy, turning a pale color. This step incorporates air into the mixture, creating a lovely lift in your mini cakes.
Step 4: Incorporate Wet Ingredients
Add the eggs to the creamed butter mixture, one at a time, beating well after each addition. Next, stir in the vanilla extract. Gradually mix in the dry ingredients along with the milk, alternating between the two, until just combined. Be careful not to over-mix, as this can affect the tenderness of your mini cakes.
Step 5: Fill Pans
Using a spoon or a small ice cream scoop, fill each prepared pan with the batter, filling them about two-thirds full. This allows enough room for the mini cakes to rise while baking. The batter should look even and smooth at the top, ensuring a nice presentation once baked.
Step 6: Bake
Place the filled pans into the preheated oven and bake for 15-20 minutes. To check for doneness, insert a toothpick into the center of a mini cake; it should come out clean or with a few crumbs attached. This indicates your mini cakes are perfectly baked and ready to be cooled.
Step 7: Cool the Cakes
Once baking is complete, remove the pans from the oven and let them cool for about 10 minutes. Afterward, carefully transfer the mini cakes to a wire rack to cool completely. This cooling process helps set the flavors and textures, ensuring a delightful treat when served.
Step 8: Glaze (if applicable)
While the mini cakes are cooling, prepare your choice of glaze, such as a simple vanilla or tangy lemon icing, or a rich chocolate ganache. Once the cakes are completely cool, drizzle the glaze generously over the tops, allowing it to cascade down the sides. This final touch enhances the visual appeal and flavor of your delightful mini cakes.

Make Ahead Options
These Mini Cakes are perfect for busy home cooks looking to save time without sacrificing flavor! You can prepare the batter up to 24 hours in advance. Simply mix all the dry ingredients and store them in an airtight container, then keep the wet ingredients (butter, eggs, milk, vanilla) in the fridge. On baking day, just bring everything to room temperature before combining them for a seamless mix. You can also bake the mini cakes ahead and refrigerate them, wrapping each one individually in plastic wrap for up to 3 days to maintain moisture. When you’re ready to serve, simply drizzle with your chosen glaze and enjoy delightful, fresh flavors with minimal effort!
What to Serve with Delightful Mini Cakes?
Indulging in tiny, sweet bites inspires thoughts of delicious pairings that enhance their charm and flavor.
-
Fresh Berries: Bright, juicy berries add a burst of flavor and vibrant color, perfectly complementing the sweetness of the mini cakes.
-
Whipped Cream: Light and airy, whipped cream brings a luscious texture that elevates each cake, making every bite feel like a celebration.
-
Ice Cream: Creamy ice cream offers a delightful contrast in temperature and texture, turning your mini cakes into a dessert experience that’s truly indulgent.
-
Melon Salad: A refreshing, sweet melon salad adds a light, fruity element that balances the richness of the cakes while invigorating your taste buds.
-
Sparkling Wine: Pair with a glass of bubbly to enhance the festive vibe, where the sparkles dance alongside the generous bites of delight.
-
Chocolate Ganache: Drizzling rich chocolate ganache over mini cakes intensifies their sweetness, creating an indulgent treat that chocolate lovers will adore.
Each pairing not only enhances the flavors but also invites you to experience these delicious mini cakes in delightful new ways.
Mini Cakes: Customization Ideas
Embrace your creativity and personalize these mini cakes to suit your taste and occasion!
- Dairy-Free: Substitute regular milk with almond or soy milk for a delightful dairy-free version. This small change can make a big difference in keeping everyone included.
- Vegan Delight: Replace eggs with flaxseed meal mixed with water for a vegan alternative. Not only is it plant-based, but it adds a unique flavor twist you’ll adore.
- Gluten-Free: Use a gluten-free flour blend for a guilt-free treat that everyone can enjoy. It opens up the world of mini cakes to those with gluten sensitivities.
- Sweetness Swap: Opt for coconut sugar instead of regular sugar for a lovely caramel-like flavor in your mini cakes. You might just find this subtle switch offers a whole new depth of taste!
- Zesty Lemon Variation: Add fresh lemon zest to the batter to brighten up the flavors. It’s like taking a bite of sunshine, making your mini cakes irresistible!
- Chocolate Lovers’ Twist: For an ultra-decadent touch, fold in chocolate chips or a sprinkle of cocoa powder into the vanilla batter. Who can resist a surprise chocolate burst?
- Berry Burst: Toss in some fresh or frozen berries for a fruity upgrade that boosts moisture and natural sweetness. Berries can give your mini cakes a gorgeous pop of color, too!
- Spices for Warmth: Incorporate warm spices like cinnamon or nutmeg to create a comforting flavor profile, especially wonderful for autumn gatherings. This will warm your heart and your kitchen!
For more delightful ideas, you might consider pairing these mini cakes with our tasty Coffee Pancakes Morning for a sweet start to your day or enjoy them with our flavorful Banana Oats Pancakes. Enjoy the journey of baking!
How to Store and Freeze Mini Cakes
Room Temperature: Store mini cakes in an airtight container at room temperature for up to 3 days to keep them fresh and moist.
Fridge: If you prefer, keep mini cakes in the refrigerator; however, they may dry out quickly, so consume within 2-3 days for the best taste.
Freezer: For longer storage, freeze mini cakes individually wrapped in plastic wrap and then in a zip-top bag for up to 3 months. Thaw in the fridge overnight before serving.
Reheating: To enjoy them warm, briefly microwave mini cakes for 10-15 seconds, or place them in a preheated oven at 350°F (175°C) for a few minutes.
Helpful Tricks for Mini Cakes
• Use Room Temperature Ingredients: Ensure your butter, eggs, and milk are at room temperature for a smoother batter blend and better rise in your mini cakes.
• Watch Your Mixing: Over-mixing can lead to tough mini cakes; mix just until combined after adding flour to maintain fluffiness.
• Quality Bakeware Matters: Invest in high-quality, non-stick pans for easy release; this prevents any heartbreaking sticking when removing your mini cakes.
• Rotate for Even Baking: Halfway through baking, rotate your pans to ensure even heat distribution, helping all mini cakes bake uniformly.
• Check for Doneness: Use a toothpick to test the center of the cakes; it should come out clean to ensure perfectly baked mini cakes ready to enjoy.
Mini Cakes Recipe FAQs
What type of flour should I use for mini cakes?
I recommend using all-purpose flour for the best texture, but for a gluten-free option, you can substitute with a gluten-free flour blend. Just make sure it’s measured correctly to ensure your mini cakes have the right structure!
How should I store leftover mini cakes?
Store mini cakes in an airtight container at room temperature for up to 3 days. If you need to keep them longer, I’d suggest wrapping each mini cake in plastic wrap and placing them in a zip-top bag for freezer storage. This method helps retain their moisture and flavor.
Can I freeze mini cakes, and if so, how?
Absolutely! To freeze your mini cakes, wrap each one tightly in plastic wrap, then place them in a freezer-safe zip-top bag. This prevents freezer burn and preserves their delightful flavors. They can be frozen for up to 3 months. Just thaw them in the refrigerator overnight when you’re ready to enjoy!
What should I do if my mini cakes sink in the middle?
If your mini cakes sink, it may be due to overmixing the batter or not baking them long enough. Make sure to mix until just combined after adding flour and always check for doneness with a toothpick before removing them from the oven. If they seem undercooked, give them a few extra minutes.
Are these mini cakes suitable for those with allergies?
While the original recipe contains eggs and dairy, you can easily adapt it for dietary considerations. Substitute eggs with a flaxseed meal and water mixture for a vegan option, and use dairy-free butter and almond or soy milk for a dairy-free version. Always check for any other specific allergies with your ingredients.
How can I tell when my mini cakes are done baking?
To check if your mini cakes are done, insert a toothpick into the center of one; it should come out clean or with just a few moist crumbs attached. This ensures they’re perfectly baked and ready to be enjoyed!
Irresistible Mini Cakes: Sweet Bites of Joy for Every Occasion
Ingredients
Equipment
Method
- Preheat your oven to 350°F (175°C) and grease your pans.
- Whisk together flour, baking powder, and salt in a medium bowl. Sift in cocoa powder for chocolate cakes.
- Beat softened butter and sugar together until light and fluffy.
- Add eggs one at a time, beating well. Stir in vanilla. Gradually mix in dry ingredients and milk alternately.
- Fill each pan about two-thirds full with batter.
- Bake for 15-20 minutes, checking doneness with a toothpick.
- Cool in pans for 10 minutes, then transfer to a wire rack to cool completely.
- Prepare a glaze of your choice and drizzle over cooled cakes.
Leave a Reply