
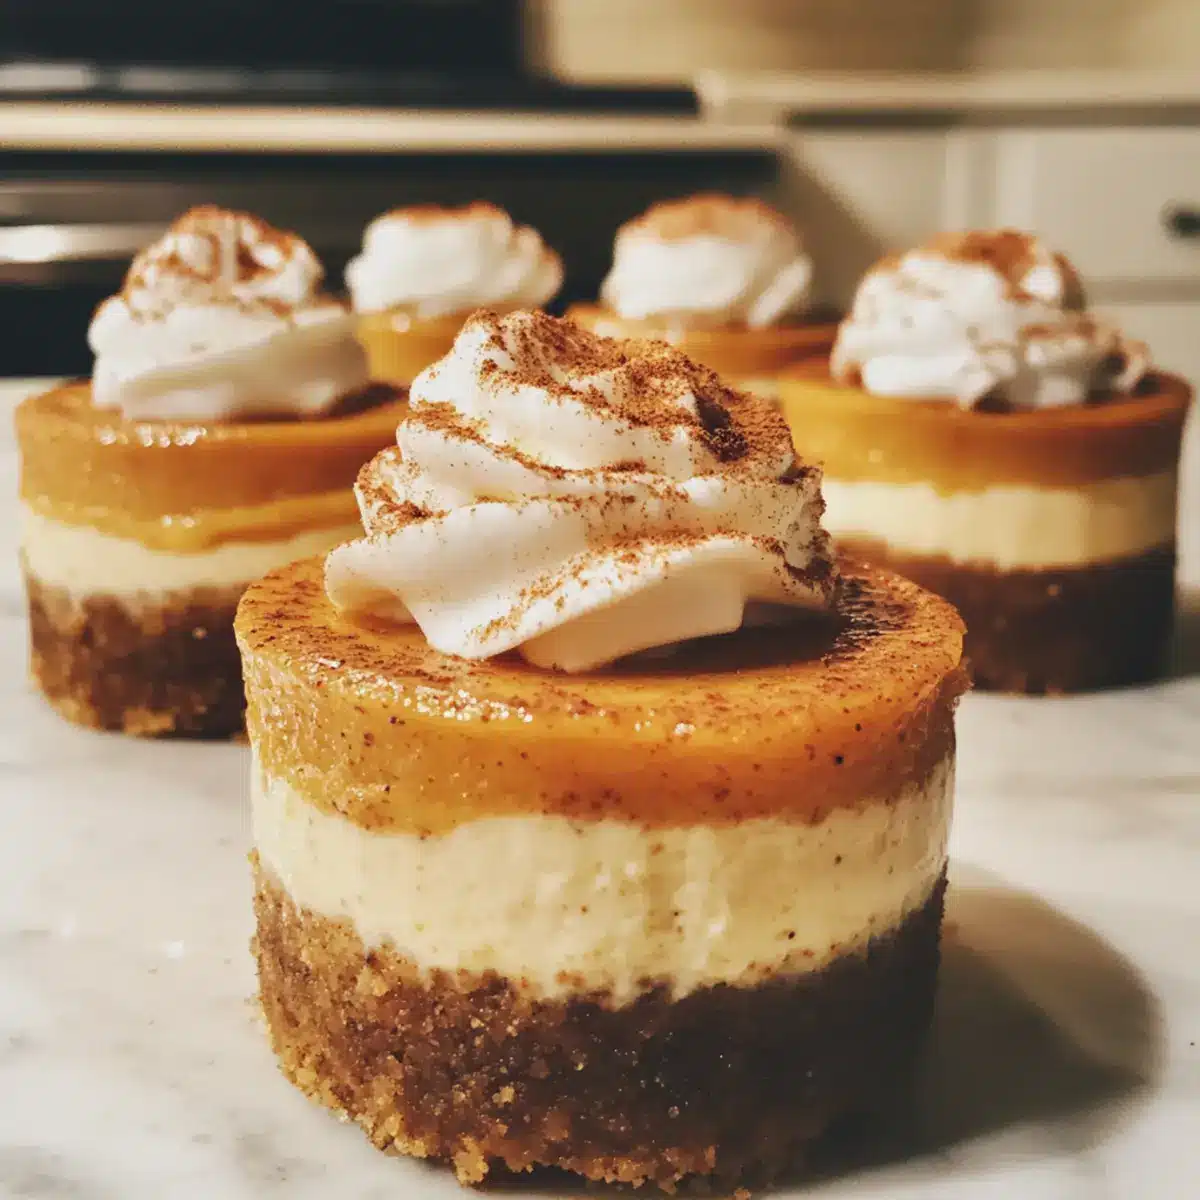
The aroma of cinnamon and nutmeg dancing through the kitchen instantly transports me to the heart of autumn. As the leaves begin to turn and the chill of the season sets in, I find myself craving the comforting flavors of cozy holiday gatherings. This is when my Mini Pumpkin Cheesecakes come into play—an irresistible fall dessert that captures the essence of pumpkin spice in every delectable bite. Not only are they a crowd-pleaser, but their make-ahead nature means you can enjoy easy entertaining without last-minute stress. Picture a creamy, spiced filling nestled in a buttery graham cracker crust—what’s not to love? Ready to bring some warmth to your dessert table? Let’s dive into this delightful recipe together!
Why Are Mini Pumpkin Cheesecakes Perfect?
Irresistible Flavor: Combining rich cream cheese with pumpkin and warm spices, these cheesecakes are a celebration of fall flavors in every bite.
Quick and Easy: With straightforward steps and minimal fuss, you can whip these up in a flash—ideal for busy holiday prep.
Customizable Delights: Switch up toppings and crusts to suit your taste, from homemade whipped cream to a ginger snap crust, making each batch your own.
Crowd-Pleasing Treat: Whether for Thanksgiving or a cozy gathering, these mini cheesecakes are sure to impress your guests and leave them asking for more.
Make-Ahead Magic: Save time by preparing them in advance; they chill beautifully, allowing you to enjoy more moments with family and friends.
Get ready to indulge in a dessert that’s as fun to make as it is to eat! For more pumpkin-inspired treats, check out my Pumpkin Pie Bars and Pumpkin Spice Muffins.
Mini Pumpkin Cheesecake Ingredients
For the Crust
• Graham Crackers – Provides a classic sweet base; you can also use gluten-free options.
• Granulated Sugar – Sweetens the crust and balances the flavors; substitute with coconut sugar for a healthier choice.
• Salted Butter – Binds the crust together for firmness; unsalted butter works, just adjust added salt accordingly.
For the Filling
• Softened Cream Cheese – Creates the rich, creamy texture; ensure it’s at room temperature to avoid lumps.
• Pumpkin Puree – This is the star of your mini pumpkin cheesecakes; use pure pumpkin puree, not filling!
• Dark Brown Sugar – Adds deep, molasses sweetness; light brown sugar can be swapped in a pinch.
• Heavy Whipping Cream – Keeps the cheesecake filling light and creamy; coconut cream is a great dairy-free alternative.
• Eggs – Provide essential structure and richness; use vegan egg replacements if needed.
• Pumpkin Pie Spice – Infuses warm fall flavors; make your own using cinnamon, nutmeg, and ginger.
• Vanilla Extract – Amplifies the overall taste; aim for pure vanilla extract for the best results.
With these Mini Pumpkin Cheesecake ingredients, you’ll be on your way to creating a delightful fall dessert that embodies the essence of the season!
Step‑by‑Step Instructions for Mini Pumpkin Cheesecakes
Step 1: Preheat and Prepare Pans
Begin by preheating your oven to 325°F (165°C). While it’s heating, prepare two muffin pans by placing cupcake liners into each cavity. This will help form the perfect base for your mini pumpkin cheesecakes and allow for easy removal after baking.
Step 2: Crush the Graham Crackers
In a food processor, crush the graham crackers into fine crumbs until they resemble sand. This usually takes about 30 seconds. If you prefer, you can place the crackers in a zip-top bag and crush them with a rolling pin. They need to be uniform for a smooth crust.
Step 3: Mix the Crust Ingredients
In a medium bowl, combine the crushed graham crackers with granulated sugar and melted butter. Stir until the mixture sticks together when pressed. This should take about 1-2 minutes, ensuring there are no dry bits left. The mixture should look moist and well-incorporated before moving to the next step.
Step 4: Fill the Liners with Crust Mixture
Spoon the graham cracker mixture evenly into the prepared cupcake liners, about two-thirds full in each. Use the back of a spoon or your fingers to firmly press the crust down. This creates a solid base that will hold together beautifully after baking, taking about 5 minutes to evenly distribute and press down.
Step 5: Bake the Crusts
Place the muffin pans in the preheated oven and bake the crusts for 7 minutes. You’ll see them bubble slightly, indicating they’re setting properly. Once done, remove them from the oven and let them cool while you prepare the filling, allowing the flavors to meld beautifully.
Step 6: Prepare the Cheesecake Filling
In a large mixing bowl, use an electric mixer to beat the softened cream cheese until smooth. This should take about 1-2 minutes. Gradually add in the remaining ingredients: pumpkin puree, dark brown sugar, heavy whipping cream, eggs, pumpkin pie spice, and vanilla extract. Mix until just combined, avoiding over-mixing.
Step 7: Pour the Filling Over Crusts
Carefully pour the creamy cheesecake filling into each crust-filled liner, filling them about three-quarters of the way full. Be gentle to avoid splashing. This step should take about 5 minutes, ensuring that each mini pumpkin cheesecake is evenly filled for perfect baking.
Step 8: Bake the Cheesecakes
Return the muffin pans to the oven and bake for 20-22 minutes, or until the centers are slightly jiggly yet set. The edges should look firm and a light golden color around the top. Once baked, remove them from the oven and place the pans on a wire rack to cool completely.
Step 9: Chill the Mini Cheesecakes
After cooling for about 30 minutes at room temperature, transfer the mini pumpkin cheesecakes to the refrigerator. Let them chill for at least 3 hours, or preferably overnight, to allow the flavors to deepen and the texture to set beautifully.
Step 10: Serve with Toppings
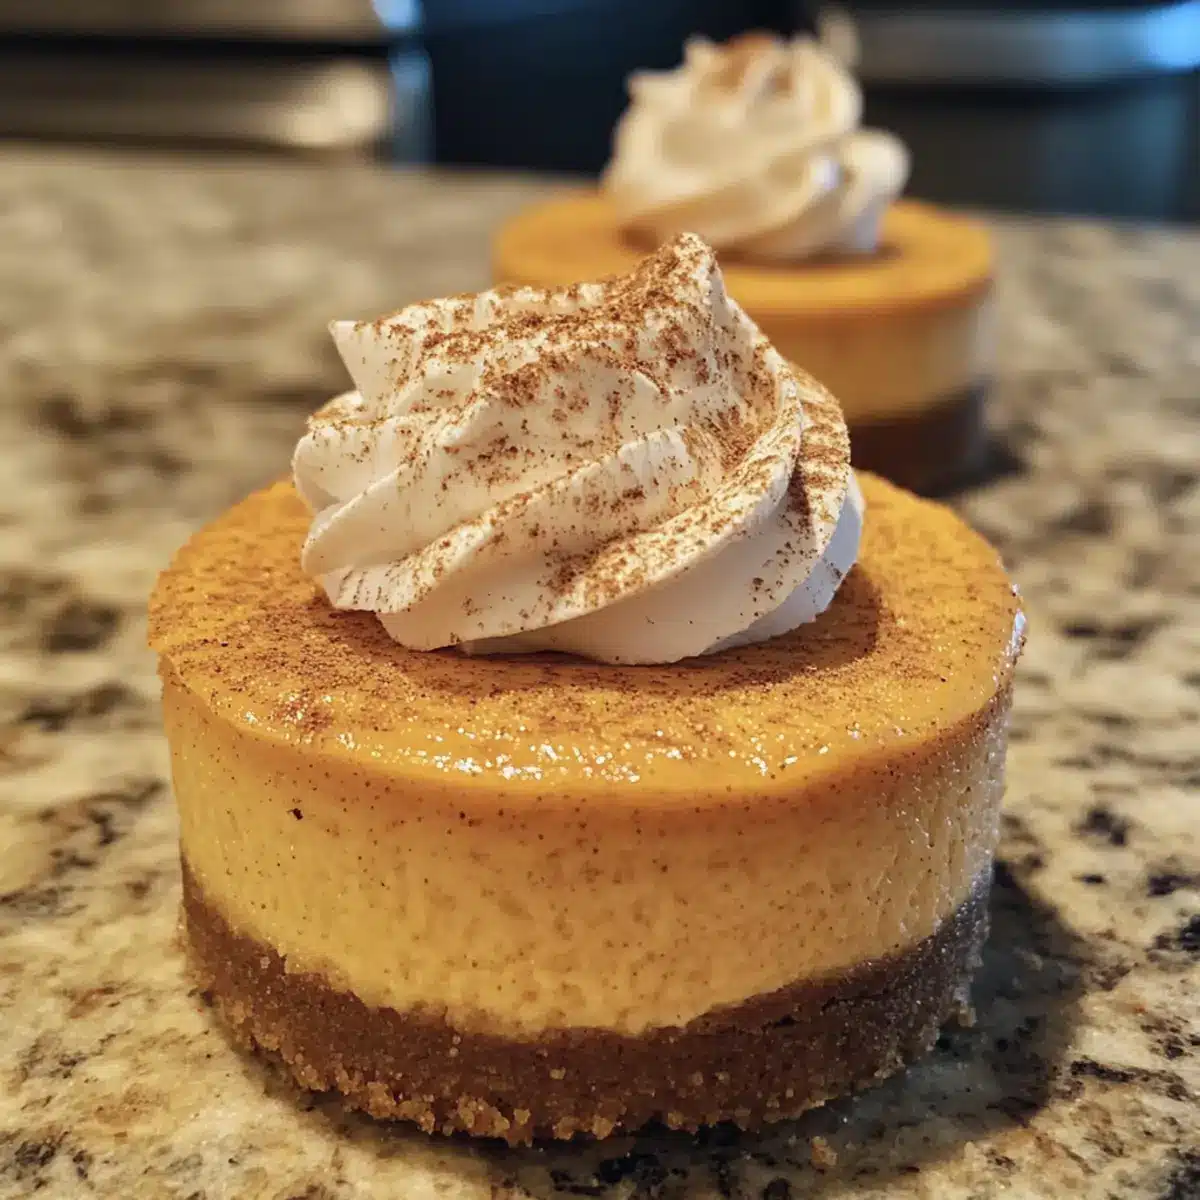
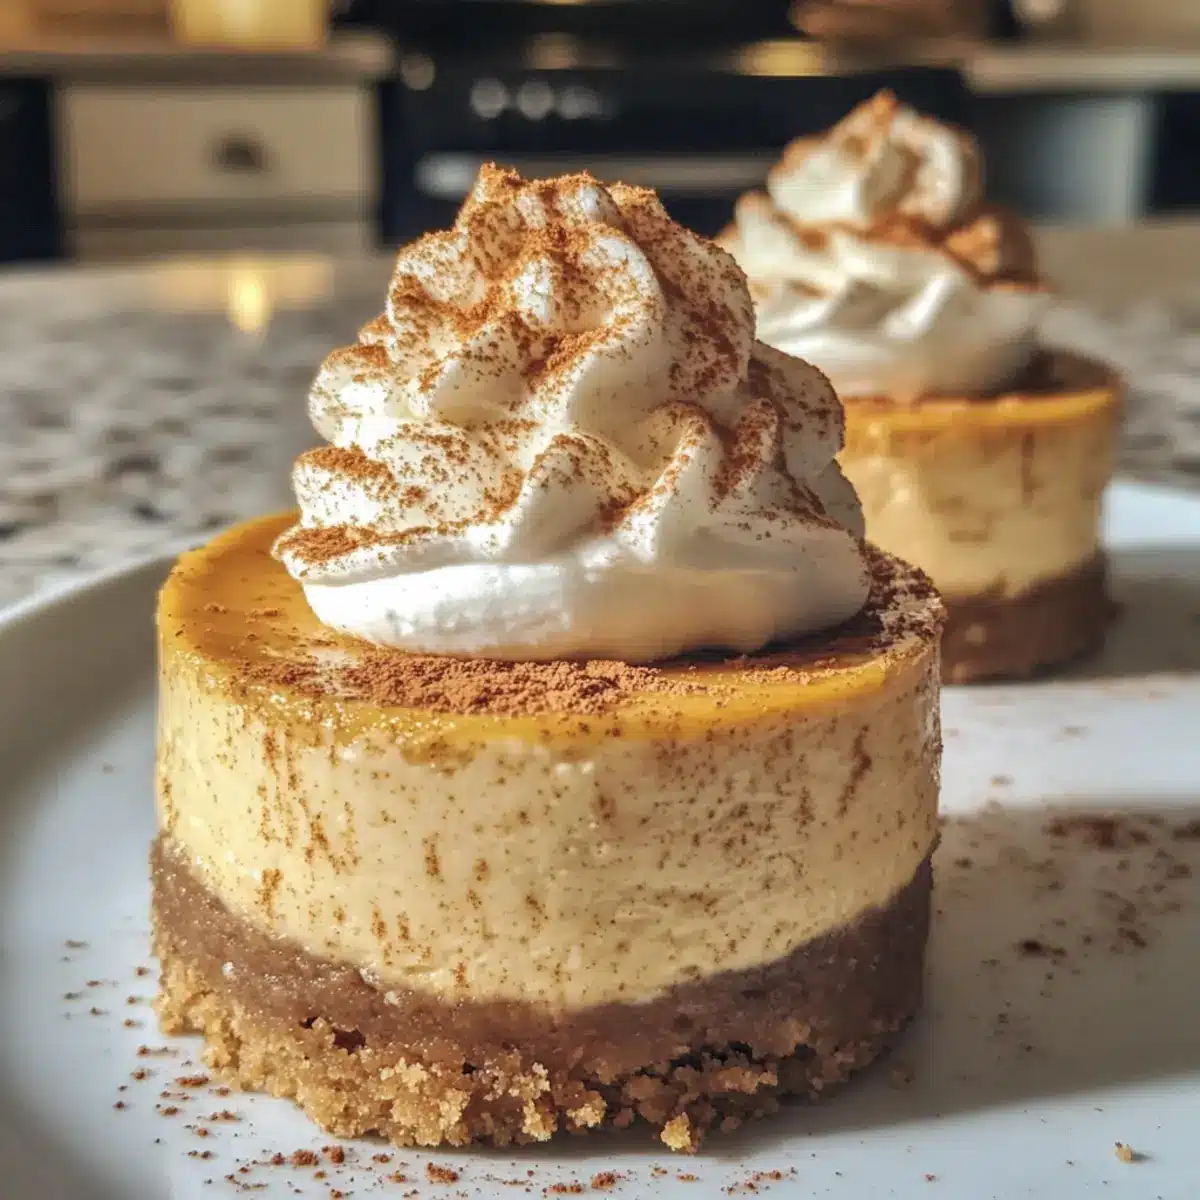
Once chilled, carefully remove the cheesecakes from their liners. Top each mini pumpkin cheesecake with a dollop of whipped cream or your favorite toppings, like caramel sauce or a sprinkle of extra pumpkin pie spice. Your delightful mini pumpkin cheesecakes are now ready to impress!

What to Serve with Irresistible Mini Pumpkin Cheesecakes
Imagine a delightful fall gathering, where the warm spices of cinnamon and nutmeg intertwine with the comforting creaminess of your desserts.
- Spiced Apple Cider: The sweetness and warmth of spiced cider beautifully enhance the flavors of the cheesecakes, making each bite feel like a cozy embrace.
- Whipped Cream: A dollop of homemade whipped cream on top adds a light, airy texture, balancing the richness of the cheesecake.
- Maple Pecan Pie: Serve alongside a slice of maple pecan pie for a rich, nutty companion; the contrasting textures celebrate the season’s best.
- Coffee or Espresso: A freshly brewed cup of coffee or espresso pairs wonderfully, cutting through the creaminess and accentuating the pumpkin spice flavor.
- Cranberry Sauce: A tart cranberry compote can elevate the dessert experience, adding a refreshing, tangy taste that complements the sweetness of the cheesecakes.
- Caramel Sauce: Drizzle homemade caramel sauce over the top for an indulgent touch—this sweet addition creates a decadent contrast with the pumpkin filling.
- Ginger Snap Cookies: These cookies offer a spicy crunch that pairs perfectly with the creamy texture, also echoing the warm spice notes in the cheesecakes.
- Chocolate Cupcakes: For a fun dessert spread, add rich chocolate cupcakes—they’re a delightful contrast that guests will love.
- Pumpkin Spice Latte: Sip on a pumpkin spice latte to bring the flavors full circle; it’s the ultimate cozy beverage for fall festivities.
Mini Pumpkin Cheesecakes: Variations & Substitutions
Feel free to get creative and make these mini pumpkin cheesecakes your own with some delightful variations!
-
Dairy-Free: Substitute heavy whipping cream with coconut cream and use dairy-free cream cheese for a creamy, plant-based option.
-
Gluten-Free: Swap graham crackers for gluten-free cookie crumbs or a nut-based crust, ensuring everyone can indulge!
-
Spiced Up: Add a pinch of cayenne pepper or a splash of maple syrup to pump up the flavor and add a unique twist to the sweetness.
-
Seasonal Swaps: Top with caramelized apples or poached pears to give your mini cheesecakes an autumn-inspired flair. They’ll add an extra layer of warmth!
-
Flavor Infusions: Mix in some orange zest with the filling for a citrusy burst that complements the pumpkin beautifully. The zesty freshness brightens every bite.
-
Chocolate Lovers: Incorporate chocolate chips into the cheesecake filling or drizzle melted chocolate on top for an indulgent treat that’s hard to resist.
-
Nutty Crunch: Top with crushed pecans or walnuts for a delightful crunch that contrasts with the creamy filling, adding another layer of texture.
-
Fruity Finish: Serve with a layer of cranberry compote or fresh berries for a tart balance against the sweetness, creating a burst of flavor.
Your mini pumpkin cheesecakes will shine even brighter with these fun variations! If you’re also planning on making other fall treats, be sure to check out my lovely Pumpkin Pie Bars for more ways to enjoy this season’s flavor. And don’t forget about the simple joys of a classic Pumpkin Spice Latte to wash it all down!
Expert Tips for Mini Pumpkin Cheesecakes
Room Temperature Cream Cheese: Ensure the cream cheese is at room temperature to avoid any lumps in your filling. A smooth texture is key!
Don’t Over-Mix: Mix ingredients just until combined. Over-mixing can introduce air bubbles that may cause cracks while baking.
Proper Cooling Time: Allow the mini pumpkin cheesecakes to cool completely before chilling in the refrigerator. This ensures flavors meld perfectly without residual warmth.
Chill Before Serving: For best results, let them chill overnight. The longer they sit, the creamier and more flavorful they become.
Customize to Taste: Feel free to experiment with different crusts or toppings—ginger snap crusts offer a delicious twist to classic mini pumpkin cheesecakes!
Storage Tips for Mini Pumpkin Cheesecakes
Fridge: Store your mini pumpkin cheesecakes in an airtight container in the refrigerator for up to 3 days to maintain freshness and flavor.
Freezer: For longer storage, freeze the cheesecakes, placing them in a single layer on a baking sheet until frozen solid. Transfer to an airtight container or freezer bag, where they’ll last for up to 1 month.
Thawing: To enjoy your frozen mini pumpkin cheesecakes, simply thaw them at room temperature for 1-2 hours or in the refrigerator overnight before serving.
Serving: Before serving, consider adding fresh toppings like whipped cream or caramel sauce for an extra touch of indulgence.
Make Ahead Options
These Mini Pumpkin Cheesecakes are perfect for busy home cooks looking to save time during the holiday rush! You can prepare the graham cracker crusts and fill them with the cream cheese mixture up to 24 hours in advance; simply assemble and refrigerate them covered until you’re ready to bake. After baking, allow them to cool for about 30 minutes, then chill them in the refrigerator for at least 3 hours or preferably overnight to let the flavors meld beautifully. To maintain their quality, store them in an airtight container, and top with whipped cream just before serving for a fresh finish. Enjoy these delightful treats without the last-minute stress!
Mini Pumpkin Cheesecakes Recipe FAQs
How do I select ripe pumpkins or pumpkin puree?
When choosing pumpkins for your mini pumpkin cheesecakes, look for ones with a firm skin and no dark spots or blemishes. They should feel heavy for their size. For puree, always opt for pure pumpkin puree rather than pumpkin pie filling to ensure the best flavor and texture in your cheesecakes.
What is the best way to store mini pumpkin cheesecakes?
Store your mini pumpkin cheesecakes in an airtight container in the refrigerator for up to 3 days. To keep them fresh, ensure they’re well-sealed. I often use plastic wrap over the container if I won’t be serving them immediately to maintain moisture.
Can I freeze mini pumpkin cheesecakes?
Absolutely! To freeze them, place your mini pumpkin cheesecakes in a single layer on a baking sheet until they are solid. Then, transfer them to an airtight container or freezer bag, where they can stay fresh for up to 1 month. When you’re ready to enjoy them, let them thaw at room temperature for 1-2 hours or overnight in the refrigerator.
What if my cheesecake filling is lumpy?
If your filling is lumpy, make sure your cream cheese is at room temperature before mixing. If lumps persist, you can blend the mixture in a food processor for a minute or two to smooth it out. Just handle it gently to avoid incorporating too much air, which can lead to cracks when baking.
Are mini pumpkin cheesecakes safe for people with allergies?
Always check for specific ingredients that may trigger allergies. For instance, you can substitute the cream cheese with a dairy-free alternative, and use gluten-free graham crackers if you’re accommodating gluten sensitivities. If you’re unsure, I recommend reading labels carefully and consulting with guests about any dietary restrictions.
What toppings can I use for my mini pumpkin cheesecakes?
Great question! You can top them with homemade whipped cream, a drizzle of salted caramel, or even a sprinkle of extra pumpkin pie spice. For something different, consider adding crushed nuts or a thin slice of fresh pear for a delightful texture contrast!
Creamy Mini Pumpkin Cheesecakes for Cozy Fall Nights
Ingredients
Equipment
Method
- Preheat your oven to 325°F (165°C) and prepare muffin pans with cupcake liners.
- In a food processor, crush the graham crackers into fine crumbs.
- Combine crushed graham crackers, granulated sugar, and melted butter in a bowl. Stir until it sticks together.
- Spoon the crust mixture into cupcake liners, filling about two-thirds full and press down.
- Bake crusts for 7 minutes, then let cool.
- Beat softened cream cheese until smooth, then gradually add pumpkin puree, dark brown sugar, heavy whipping cream, eggs, pumpkin pie spice, and vanilla extract until just combined.
- Pour the filling into each crust, filling three-quarters full.
- Bake for 20-22 minutes until centers are slightly jiggly yet set.
- Cool for 30 minutes, then chill in the refrigerator for at least 3 hours or overnight.
- Remove from liners and top with whipped cream or other toppings before serving.
Leave a Reply