
As I stood in my kitchen, the warm scent of vanilla wafted through the air, instantly transporting me back to my grandmother’s house, where her Old-Fashioned Homemade Banana Pudding was the star of every family gathering. This iconic Southern dessert combines creamy vanilla custard, crunchy vanilla wafers, and perfectly ripe banana slices, creating a comforting treat that’s both nostalgic and irresistible. Not only is this classic dessert incredibly easy to assemble, but it’s also a guaranteed crowd-pleaser for potlucks and holiday celebrations alike. With every serene spoonful, you’re savoring a piece of culinary heritage that brings loved ones together. Curious to see how you can create this timeless delight in your own kitchen? Let’s get started!
Why Is This Banana Pudding Irresistible?
Creamy, Dreamy Layers: Indulge in the luxurious, rich texture of homemade custard that perfectly complements tender banana slices and crunchy vanilla wafers.
Nostalgic Comfort: Each bite brings you back to cherished family gatherings, evoking memories of warmth and togetherness.
Simple to Make: With just a few accessible ingredients, this classic recipe keeps the focus on flavorful fun, making it perfect for both beginner and seasoned cooks.
Versatile Twist Ideas: Feel free to switch up your cookies—try Biscoff for a new twist or go non-dairy with almond milk, just like in my Mango Chia Pudding recipe!
Perfect for Any Occasion: Whether it’s a holiday feast or a casual dinner with friends, this indulgent treat is guaranteed to impress. Embrace the magic of Old-Fashioned Homemade Banana Pudding and create culinary memories today!
Old-Fashioned Homemade Banana Pudding Ingredients
For the Pudding
• Sugar – Provides sweetness; brown sugar can give it a richer flavor.
• Flour – Acts as a thickening agent for the pudding; avoid substitutions to maintain texture.
• Salt – Enhances flavor; using kosher or sea salt yields the best results.
• Milk – Creates a rich base for the pudding; feel free to substitute with non-dairy options like almond milk.
• Eggs – Adds creaminess and helps the pudding set; egg substitutes can be used for a vegan variation, though results might differ.
• Vanilla Extract – Introduces a warm, aromatic flavor; opt for pure vanilla extract over imitation for the best taste.
For the Layers
• Vanilla Wafers – Provides structure and a delightful crunch; graham crackers or Biscoff cookies can be used for a different twist.
• Bananas – Adds natural sweetness and flavor; always choose ripe bananas for optimal taste in your Old-Fashioned Homemade Banana Pudding.
Step‑by‑Step Instructions for Old-Fashioned Homemade Banana Pudding
Step 1: Mix Dry Ingredients
In a medium saucepan, whisk together ¾ cup sugar, ¼ cup flour, and a pinch of salt over medium heat. Ensure there are no lumps, as this mixture will become the base of your creamy pudding. Keep stirring for about 1-2 minutes until warmed through, preparing for the addition of milk to create a loving foundation for your Old-Fashioned Homemade Banana Pudding.
Step 2: Add Milk and Thicken
Gradually pour in 3 cups of milk while whisking continuously to combine. Increase the heat to medium-high and cook the mixture, stirring often, until it thickens and bubbles, which takes about 8-10 minutes. As it thickens, you’ll notice it resembling a custard-like consistency, indicating you’re on the right path to creamy pudding bliss.
Step 3: Temper the Eggs
In a separate bowl, whisk 3 large eggs until frothy. Carefully add a small amount of the hot pudding mixture into the beaten eggs, stirring constantly to temper them. Once combined, return this egg mixture back to the saucepan. Continue cooking for another 2 minutes over medium heat, stirring gently until it comes to a gentle boil, ensuring your pudding thickens beautifully.
Step 4: Flavor the Pudding
Remove the saucepan from the heat, then stir in 1 tablespoon of pure vanilla extract, infusing your pudding with aromatic warmth. Allow the mixture to cool for about 15 minutes, stirring occasionally to prevent a film from forming on the surface. This cooling step is crucial, as it ensures that your Old-Fashioned Homemade Banana Pudding stays creamy without clumping.
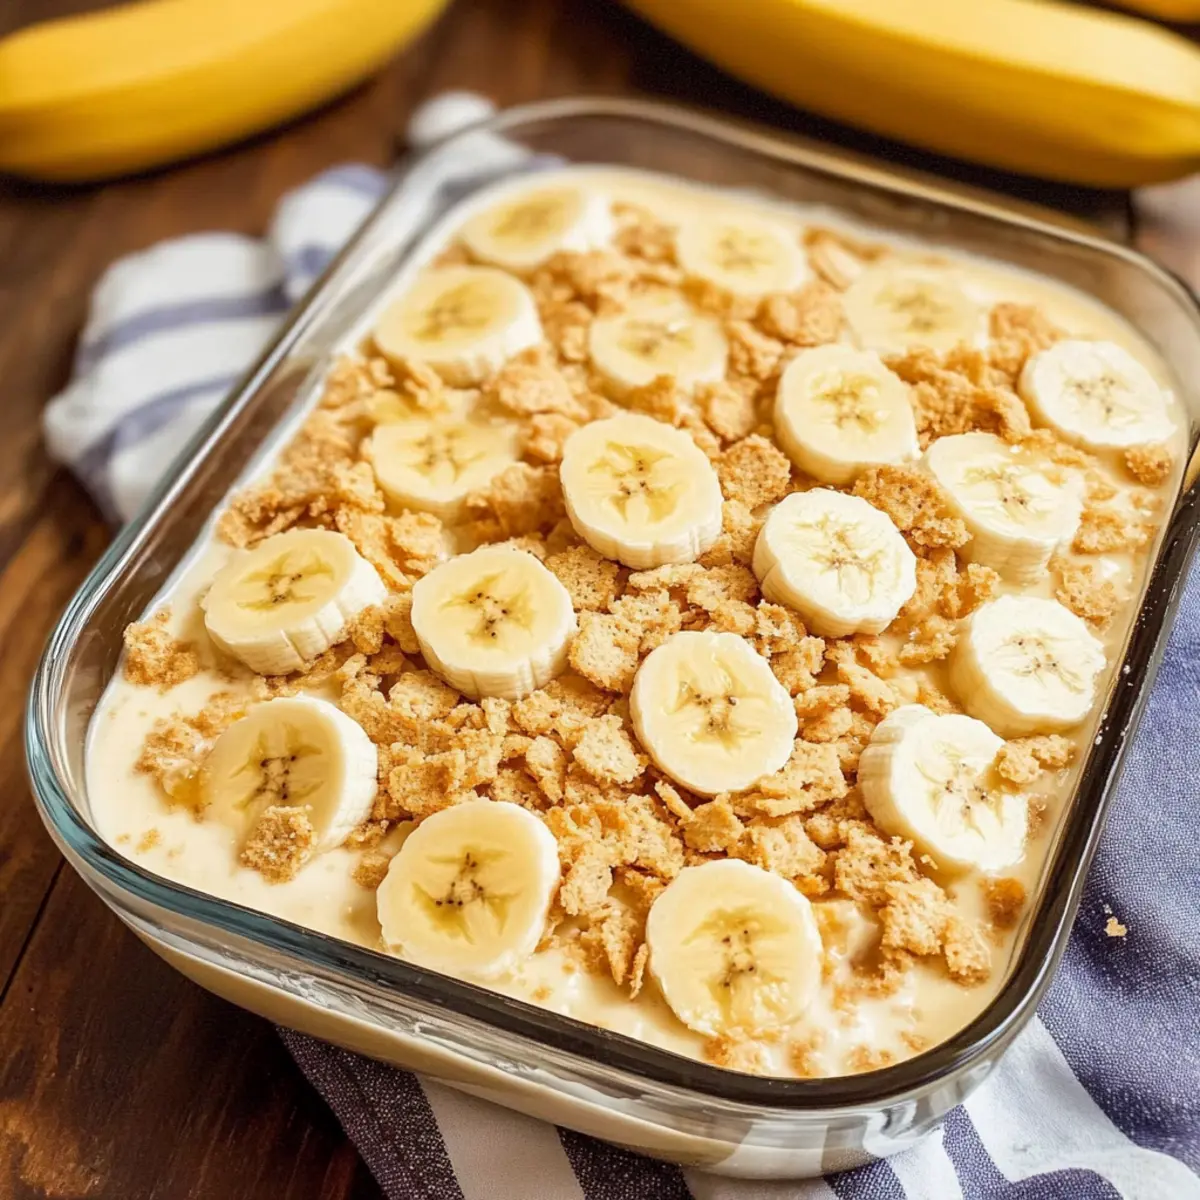
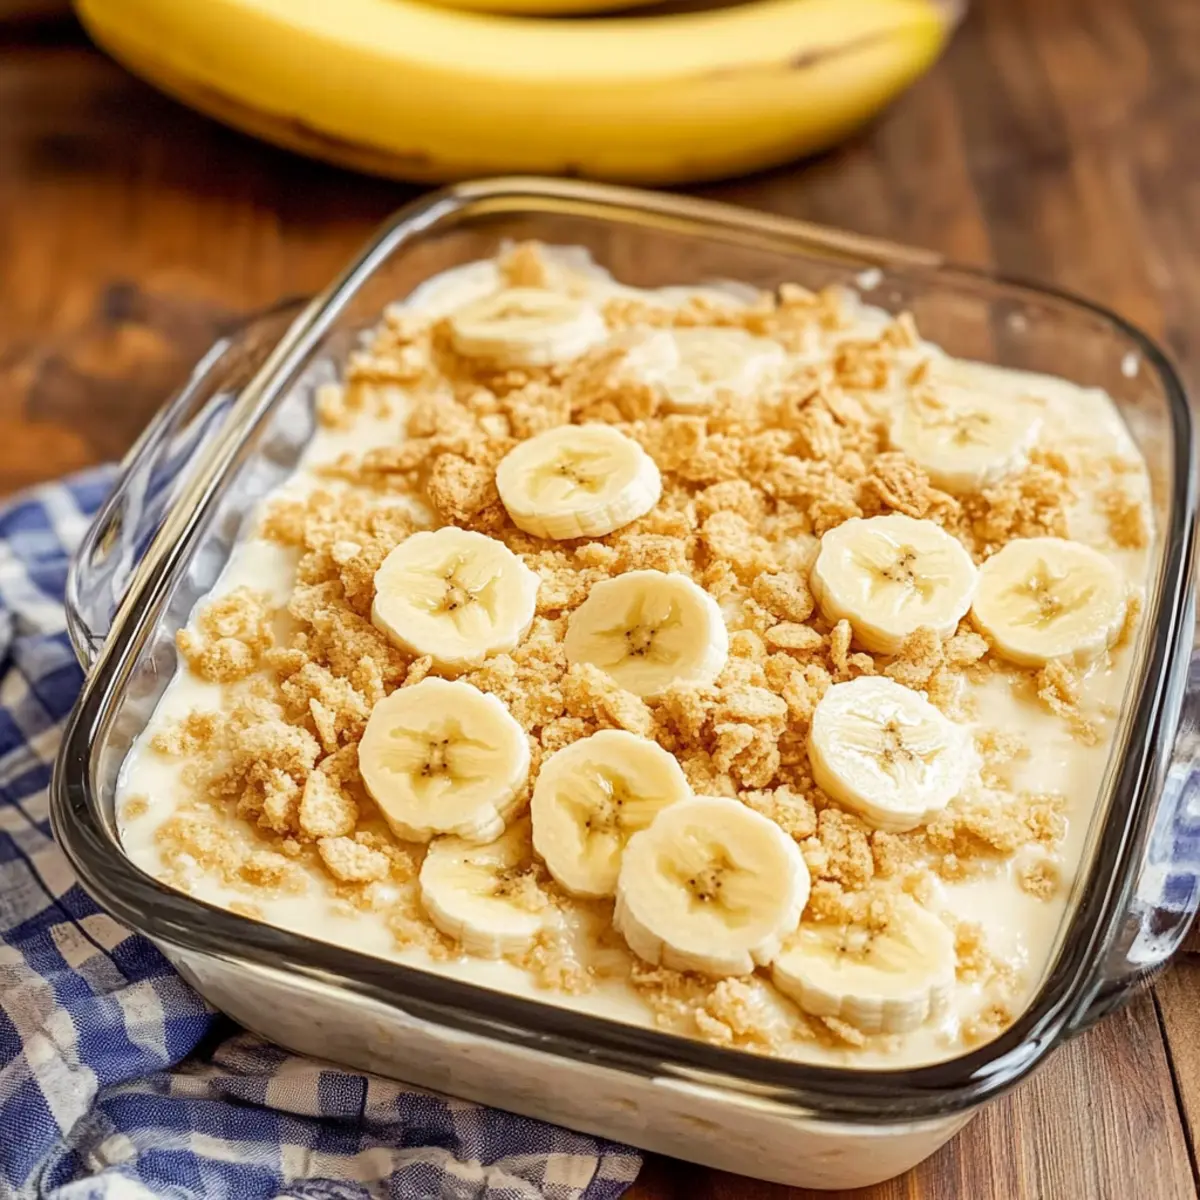
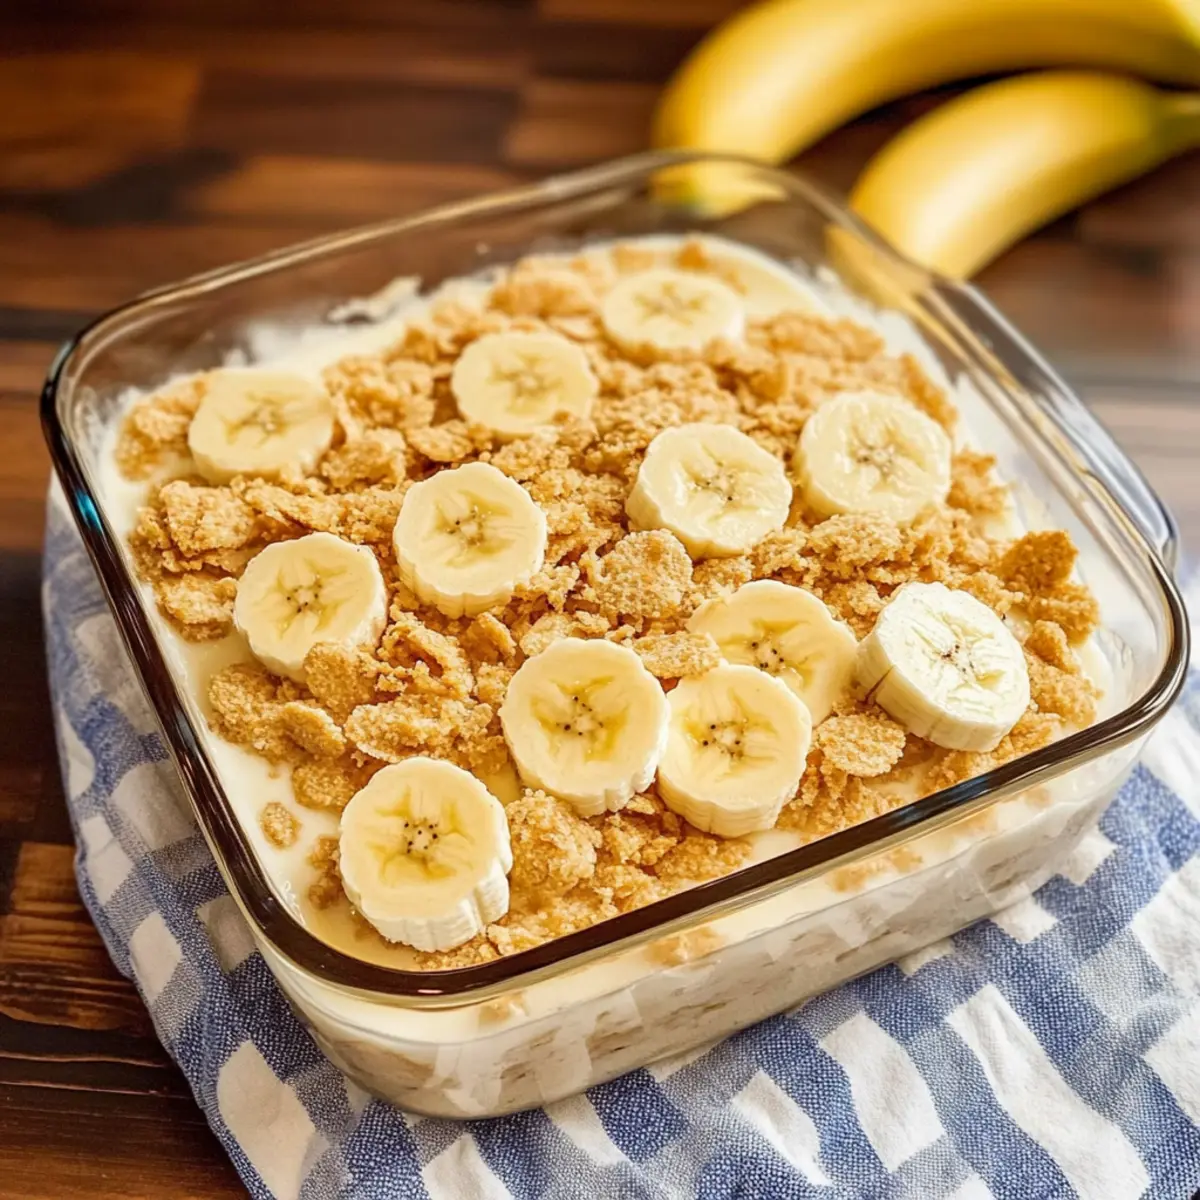
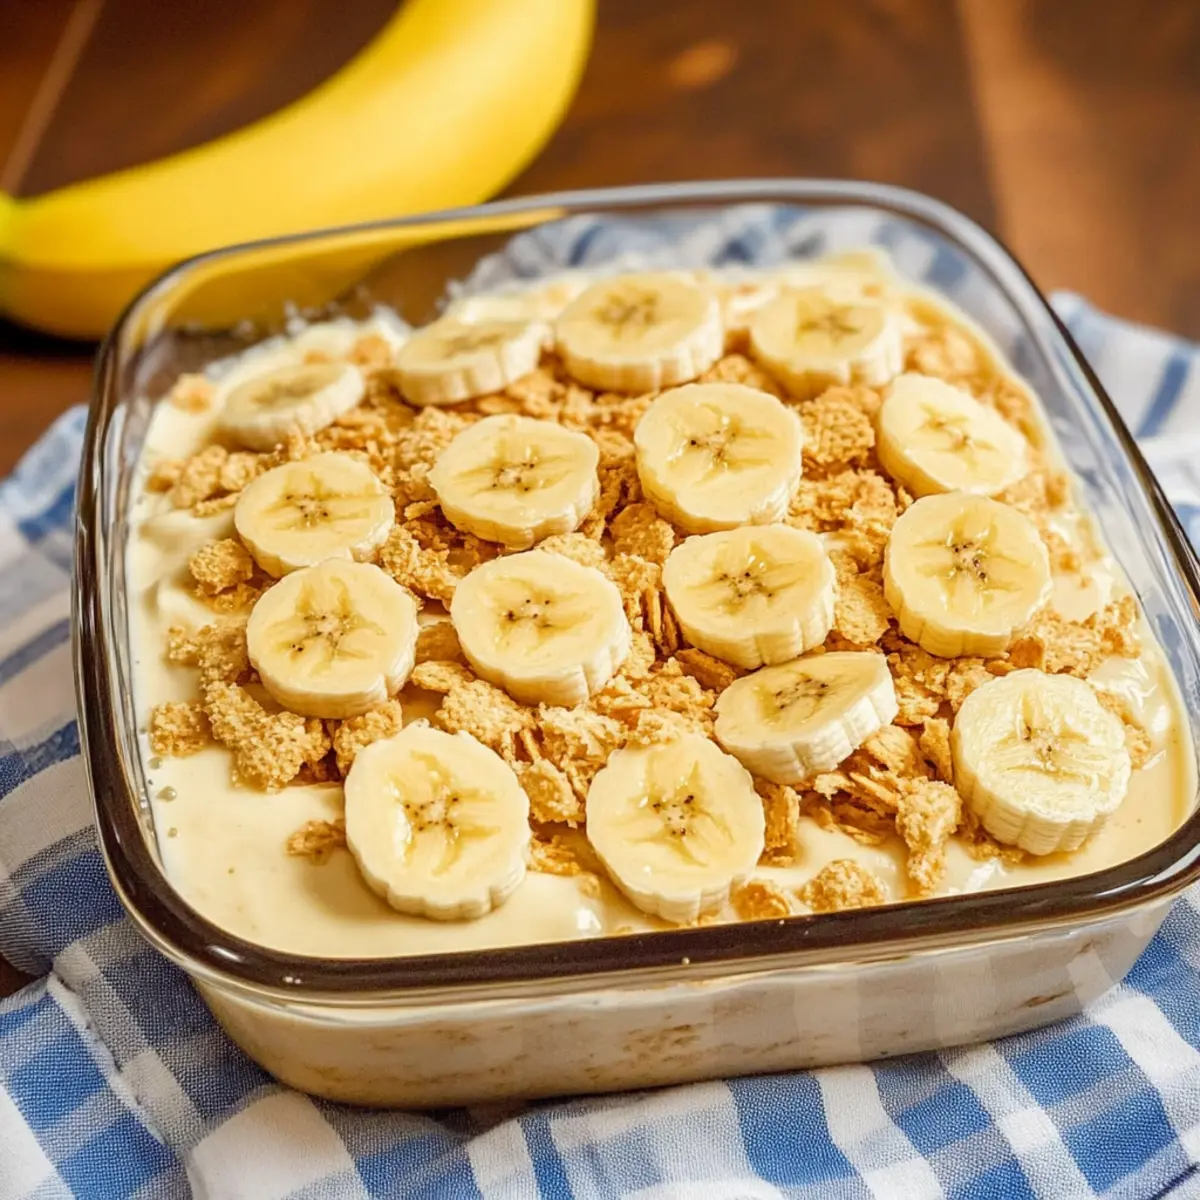
Step 5: Layer the Pudding
In an ungreased 8-inch baking dish, begin layering your dessert. Start with 25 vanilla wafers at the bottom, followed by half of the sliced bananas. Next, spread half of the warm pudding mixture over the fruit, allowing the wafers to absorb a little moisture. Repeat the layers with the remaining bananas and pudding, finishing with the last of the pudding on top for a luscious finish.
Step 6: Chill and Set
Cover the baking dish with plastic wrap to prevent it from absorbing any odors in the refrigerator. Chill the assembled Old-Fashioned Homemade Banana Pudding for at least 4 hours, but overnight is even better for optimal flavor blending. This resting period allows the vanilla wafers to soften, creating that delightful textural contrast you cherish.
Step 7: Serve with a Crunch
When you’re ready to serve, remove the pudding from the refrigerator and unwrap it with excitement. To add a delightful finishing touch, crush a few extra vanilla wafers and sprinkle them atop the pudding. This added crunch enhances each creamy spoonful, elevating your Old-Fashioned Homemade Banana Pudding to pure bliss. Enjoy chilled with family and friends!
Expert Tips for Old-Fashioned Homemade Banana Pudding
-
Chill Wisely: Allow your pudding to chill overnight for the best flavor. It gives the layers time to meld and the wafers to soften perfectly.
-
Achieve the Right Thickness: Make sure to cook the pudding mixture until it’s thick and bubbly—about 8-10 minutes. This ensures a smooth, creamy consistency in your Old-Fashioned Homemade Banana Pudding.
-
Banana Placement: Add bananas only before serving to prevent browning. This keeps your dessert fresh and presents beautifully with each spoonful.
-
Don’t Rush the Cooling: Let the pudding cool for at least 15 minutes after adding the vanilla. This step is crucial for achieving the ideal creamy texture without clumping.
-
Skip the Freezer: Refrigerate, don’t freeze! Freezing will ruin the creamy texture of your Old-Fashioned Homemade Banana Pudding. Aim to enjoy it fresh within 4 days.
How to Store and Freeze Old-Fashioned Homemade Banana Pudding
Fridge: Keep your Old-Fashioned Homemade Banana Pudding covered with plastic wrap in the refrigerator for up to 4 days to maintain freshness.
Banana Addition: To prevent browning, only add banana slices right before serving. This ensures they stay fresh and vibrant!
Airtight Storage: If you need to store leftovers, use an airtight container to avoid absorbing unwanted odors from the fridge.
Avoid Freezing: Freezing is not recommended, as it compromises the creamy texture of the pudding. Enjoy it fresh for the best experience!
What to Serve with Old-Fashioned Homemade Banana Pudding
As you delight in this luxurious dessert, think about pairing it with comforting sides or refreshing accompaniments that enhance your dining experience.
-
Creamy Mashed Potatoes: The velvety texture complements the pudding’s creaminess beautifully, grounding your meal with a savory touch.
-
Buttery Cornbread: This slightly sweet, crumbly bread adds warmth and homey vibes, making your dessert feel even more indulgent.
-
Fresh Berry Salad: Juicy, tangy berries contrast the pudding’s sweetness, offering a refreshing burst of flavor for palate balance.
-
Grilled Shrimp Skewers: The smoky, savory notes of the shrimp provide an unexpected yet delightful contrast to the rich dessert. A perfect outdoor pairing!
-
Iced Tea or Lemonade: A glass of iced tea, whether sweetened or unsweetened, pairs wonderfully, cleansing the palate between bites. For something zesty, lemonade’s tartness complements the sweet flavors of the pudding.
-
Chocolate Chip Cookies: For those who crave a chocolatey finish, adding a cookie gives a crunchy texture while echoing the comforting sweetness of the pudding.
Each of these pairings serves to elevate your Old-Fashioned Homemade Banana Pudding experience, providing a delightful feast for both the senses and the heart.
Old-Fashioned Homemade Banana Pudding Variations
Inviting flavors await as you explore delightful twists on this cherished recipe!
-
Dairy-Free: Substitute the milk with almond milk or coconut milk for a creamy non-dairy option.
This simple switch provides a lighter touch while maintaining that smooth texture you love. -
Vegan: Swap eggs for a commercial egg replacer or ¼ cup of applesauce and use non-dairy milk.
It’s a delicious way to enjoy banana pudding that everyone can savor together! -
Flavor Boost: Mix in a dash of cinnamon or nutmeg for warming spice notes that enhance the custard.
Just a pinch adds an aromatic depth, making each spoonful even more inviting. -
Cookie Variety: Replace vanilla wafers with Biscoff cookies or chocolate wafers for a unique flavor twist.
Enjoy surprises in every layer as you create a delightful contrast to the classic taste! -
Nutty Crunch: Add chopped pecans or walnuts between the layers for a delightful crunch.
This extra texture will surprise your taste buds and elevate the traditional pudding experience. -
Fruity Layers: Include layers of berries like strawberries or raspberries paired with banana for a fresh burst of flavor.
These fruity additions make your dessert vibrant and seasonal, bringing a beautiful pop of color! -
Caramel Drizzle: Top your pudding with a drizzle of caramel sauce just before serving.
This indulgent touch adds richness that pairs perfectly with the creamy layers beneath.
Try some of these variations during your next gathering, and for other delicious treats, consider whipping up Banana Oats Pancakes or a divine High Protein Pudding too! The possibilities are endless, and every variation is sure to delight.
Make Ahead Options
These Old-Fashioned Homemade Banana Pudding are perfect for busy weeknights and meal prep enthusiasts! You can prepare the pudding mixture up to 24 hours in advance, allowing the flavors to meld together beautifully. Simply follow the initial steps to cook and cool the pudding, then layer the vanilla wafers and bananas. Cover the dish with plastic wrap and refrigerate it for up to 4 days; however, it’s best to add the bananas just before serving to prevent browning. When you’re ready to enjoy, simply finish with crushed vanilla wafers on top, and you’ll be treated to a delicious dessert that tastes just as fresh as when you made it!
Old-Fashioned Homemade Banana Pudding Recipe FAQs
How do I choose ripe bananas for this pudding?
Choosing ripe bananas is vital for the flavor of your Old-Fashioned Homemade Banana Pudding. Look for bananas that are yellow with a few brown spots—this indicates optimal ripeness and maximum sweetness. Avoid bananas that are overly brown or have dark spots all over, as they can become mushy and taste overly sweet.
What is the best way to store leftover banana pudding?
To store your Old-Fashioned Homemade Banana Pudding, cover it tightly with plastic wrap and place it in the refrigerator. It will stay fresh for up to 4 days. To keep the bananas from browning, I recommend adding banana slices just before serving, maintaining their vibrant color and flavor.
Can I freeze leftover banana pudding?
Unfortunately, freezing your Old-Fashioned Homemade Banana Pudding is not recommended. The texture of the pudding can change once thawed, resulting in a grainy consistency that detracts from the creamy experience. Instead, enjoy your banana pudding fresh and refrigerated for the best taste and texture!
What should I do if my pudding doesn’t thicken?
If your pudding doesn’t thicken as expected, it may need more time on the heat. Make sure you’re cooking it at medium heat and stirring constantly. If it’s still not thickening, you can whisk together a bit of cornstarch with cold milk (about 1 tablespoon of cornstarch with 2 tablespoons of milk) and stir it into the warm pudding. Continue cooking until it thickens, keeping in mind that it should bubble and have a custard-like consistency.
Are there any dietary considerations for this recipe?
Absolutely! If you’re looking for a non-dairy option, almond milk works well as a substitute for regular milk. For those who are vegan, you can experiment with egg replacers like applesauce or flaxseed meal; however, this may alter the pudding’s consistency slightly. Always check for any allergies, especially with ingredients like eggs and vanilla wafers, which may contain gluten.
How should I serve this banana pudding for gatherings?
For an elegant presentation, serve your Old-Fashioned Homemade Banana Pudding in individual parfait glasses. Layer the pudding, bananas, and wafers artfully, and finish with a sprinkle of crushed vanilla wafers on top. This not only looks stunning but also allows each guest to enjoy their own delightful portion!
Old-Fashioned Homemade Banana Pudding You'll Crave Every Time
Ingredients
Equipment
Method
- In a medium saucepan, whisk together ¾ cup sugar, ¼ cup flour, and a pinch of salt over medium heat. Stir for 1-2 minutes until warmed through.
- Gradually pour in 3 cups of milk while whisking continuously. Increase heat and cook until thickened and bubbling, about 8-10 minutes.
- In a separate bowl, whisk 3 large eggs. Slowly add a small amount of hot pudding to temper. Return to saucepan and cook for 2 minutes until thick.
- Remove from heat and stir in 1 tablespoon of pure vanilla extract. Allow to cool for 15 minutes, stirring occasionally.
- In an ungreased 8-inch baking dish, layer 25 vanilla wafers, half of the bananas, half of the pudding, then repeat the layers.
- Cover with plastic wrap and chill in the refrigerator for at least 4 hours.
- Before serving, crush extra vanilla wafers and sprinkle on top for added crunch.
Leave a Reply