
As I sifted through the clutter of my kitchen, I stumbled upon a forgotten pack of Oreos, their chocolatey goodness practically begging to be transformed into something extraordinary. That’s when the idea struck me: Oreo Cheesecake Cookie Cups! These delightful morsels not only combine the rich flavors of creamy cheesecake with a crunchy Oreo crust, but they also come together in a fraction of the time a traditional cheesecake requires. Perfect for any gathering or your cozy nights in, these cookie cups are a surefire way to impress friends and family while satisfying your sweet tooth. Plus, with ingredient swaps on the table, you can customize them to fit any dietary needs. Are you curious to dive into this delicious adventure? Let’s get baking!
Why Will You Love These Cookie Cups?
Easy Baking: The process is super simple, making it perfect for bakers of all skill levels.
Unique Twist: These cups offer a delightful take on traditional cheesecake that will wow your guests!
Swappable Ingredients: Feel free to substitute with your favorite cookies or flavors to personalize your dessert, just like with my Light Healthy Cheesecake for a lighter option.
Quick to Prepare: In under 30 minutes, you can create these treats, leaving you more time for fun at your gathering!
Crowd Pleaser: Perfect for potlucks or family gatherings, they’re a hit with both kids and adults alike.
Decadent Layers: Enjoy a crunchy Oreo crust paired with smooth, rich cheesecake filling—who could resist?
Get inspired and take your dessert game to another level with these Oreo Cheesecake Cookie Cups!
Oreo Cheesecake Cookie Cups Ingredients
For the Crust
• Oreos – The base structure for the cookie crust; for variety, substitute with any chocolate cookie.
• Butter – Binds the Oreo crumbs and adds richness; use unsalted butter for better control over saltiness.
For the Filling
• Cream Cheese – Creates the creamy cheesecake filling; full-fat cream cheese is recommended for optimal texture and flavor.
• Sugar – Sweetens the filling; can be replaced with a sugar alternative for a healthier option.
• Sour Cream – Adds tanginess and creaminess to the filling; Greek yogurt is a great substitute if you prefer.
• Chocolate Chips – Optional for extra texture and chocolate flavor; use mini chips for even distribution.
For the Topping
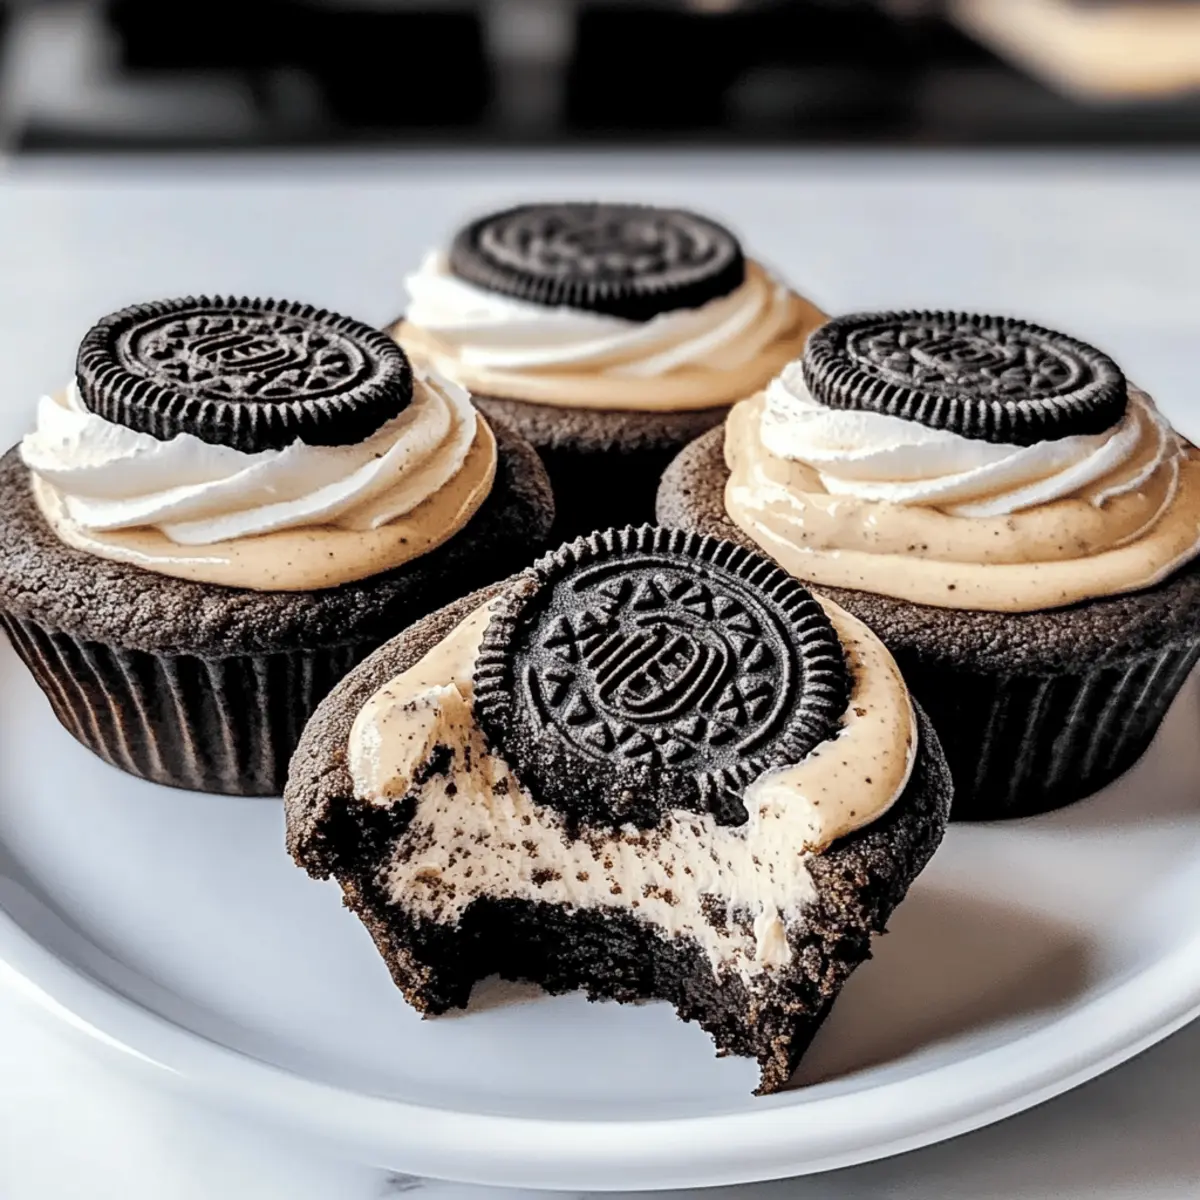
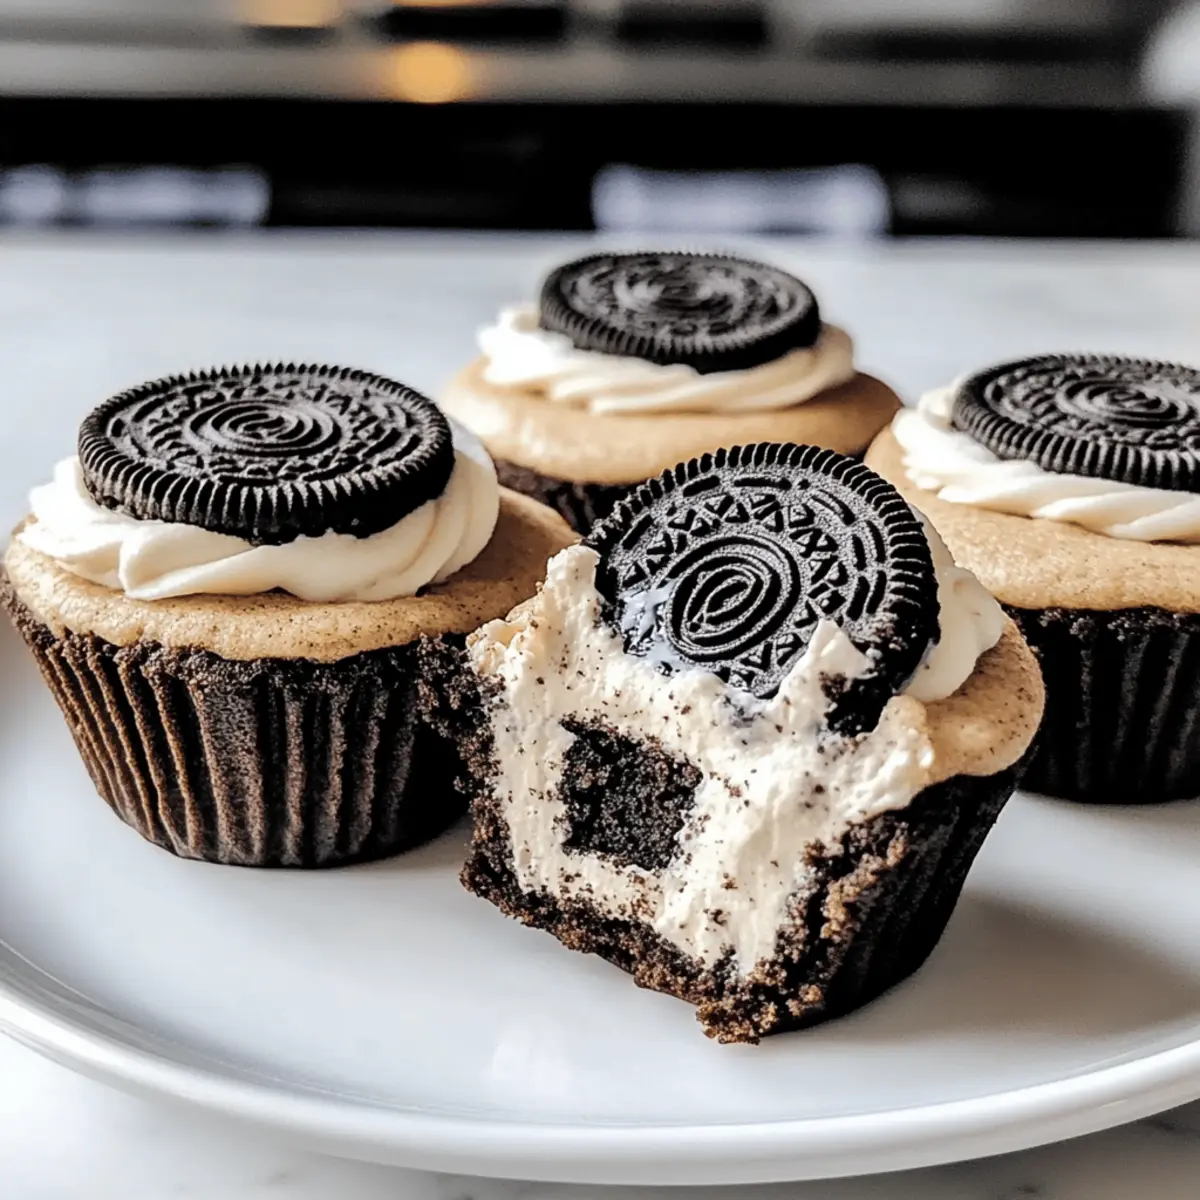
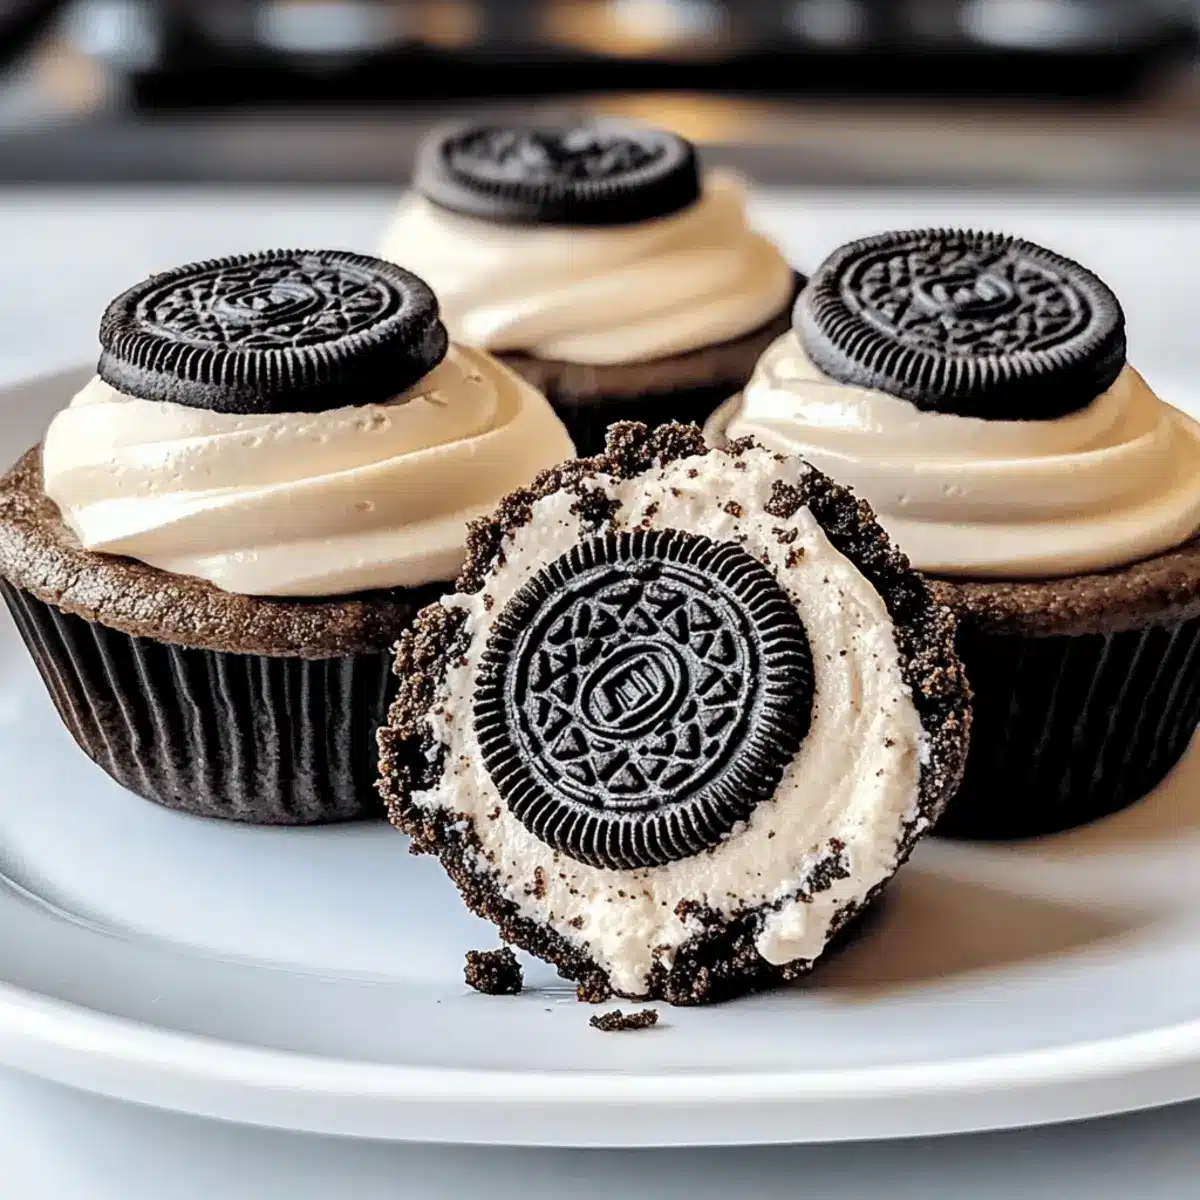
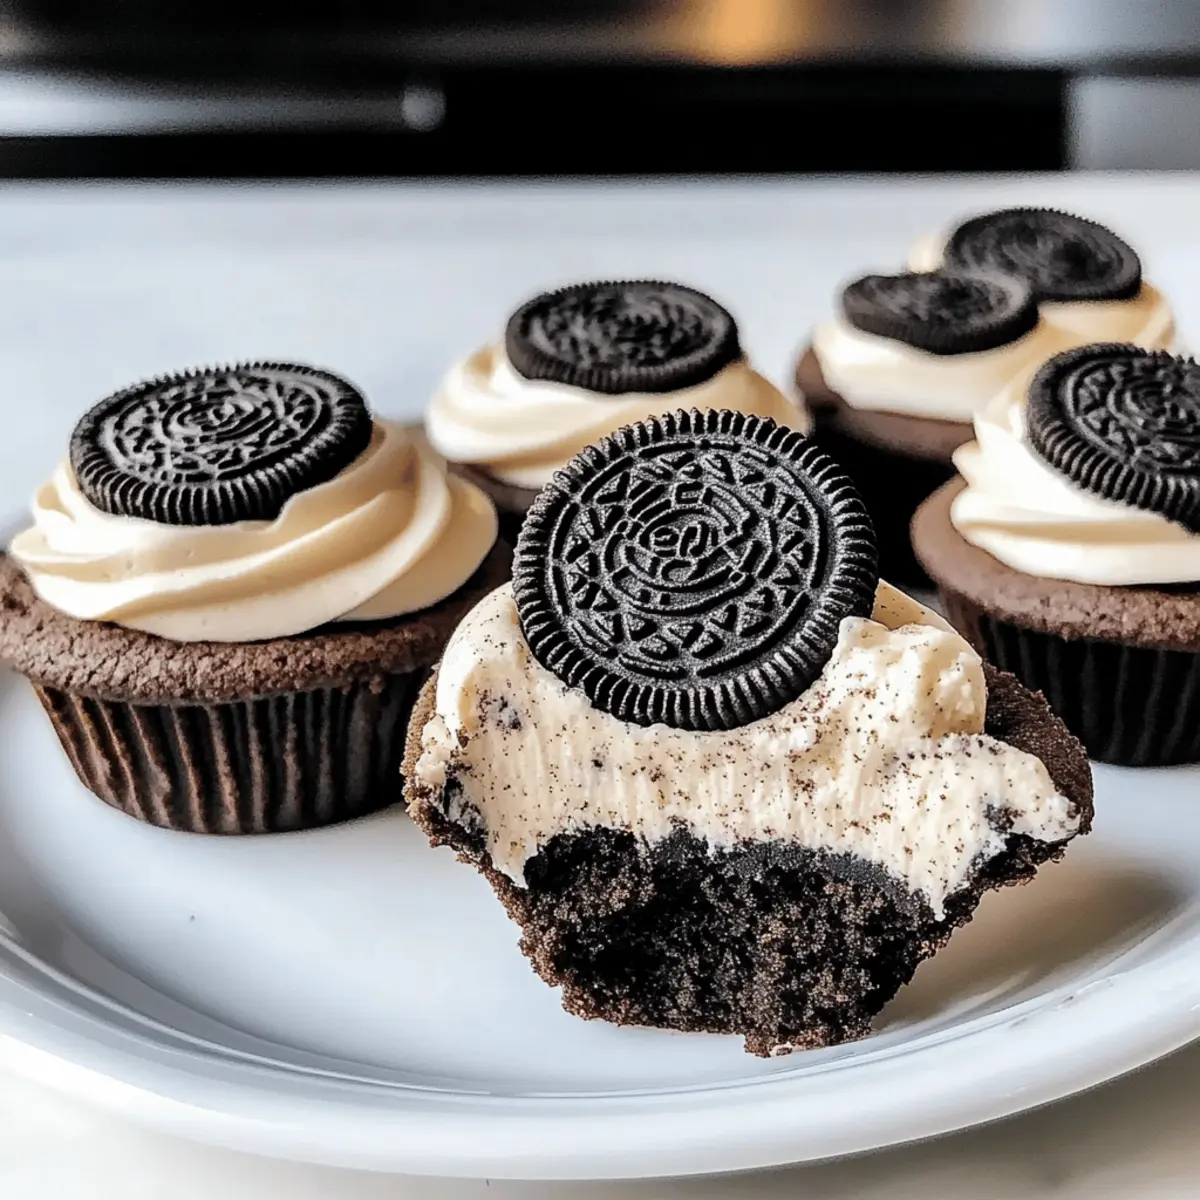
• Whipped Cream – Use store-bought or homemade to adorn your cookie cups nicely.
• Crushed Oreos – Adds visual appeal and extra crunch on top of your delicious creation.
Dive into the deliciousness of these Oreo Cheesecake Cookie Cups and delight every palate at your next gathering!
Step‑by‑Step Instructions for Oreo Cheesecake Cookie Cups
Step 1: Preheat Oven
Begin by preheating your oven to 350°F (175°C). This step is essential as it ensures that your Oreo Cheesecake Cookie Cups bake instantly and evenly. While the oven heats, gather your ingredients, and prepare your muffin tin with cupcake liners to make the filling process easier.
Step 2: Prepare Cookie Crust
Next, take your Oreos and crush them into fine crumbs using a food processor or a plastic bag and a rolling pin. In a mixing bowl, combine the Oreo crumbs with melted unsalted butter until fully incorporated, resembling wet sand. Press this mixture firmly into the bottom of each cupcake liner in your muffin tin to create a sturdy crust.
Step 3: Make Cheesecake Filling
In a large mixing bowl, beat the softened cream cheese and sugar together with an electric mixer until smooth and fluffy, about 2-3 minutes. Add in the sour cream and mix until completely combined and creamy. For an extra layer of flavor, you can fold in some mini chocolate chips before proceeding to the next step.
Step 4: Fill Cups
Now, spoon the delicious cheesecake filling over the prepared Oreo crust, filling each cup nearly to the top. Be careful not to overfill, as this can cause them to overflow during baking. Use a spatula to smooth the tops for an even finish, ensuring that your Oreo Cheesecake Cookie Cups will look delightful when they come out of the oven.
Step 5: Bake
Place the muffin tin in your preheated oven and bake for 15-18 minutes. You’ll know they’re done when the centers are slightly jiggly but not liquid. They will firm up as they cool, so do not overbake, as this can lead to a dry texture rather than the creamy filling you desire.
Step 6: Cool
Once baked, remove the cookie cups from the oven and allow them to cool in the tin for about 10 minutes. Then, carefully transfer them to a wire rack to cool completely. This cooling process is crucial for the cheesecake to set properly. After they’ve cooled, refrigerate them for at least 2 hours for the best texture.
Step 7: Serve
When you’re ready to serve, take out your chilled Oreo Cheesecake Cookie Cups. Top each cup with a dollop of whipped cream and a sprinkle of crushed Oreos to add an extra dimension of flavor and texture. These treats are perfect for sharing, so gather your loved ones and enjoy each delectable bite!
Expert Tips for Oreo Cheesecake Cookie Cups
Room Temperature Cream Cheese: Ensure your cream cheese is at room temperature to avoid lumps when mixing—it creates a smoother filling.
Mind the Fill Level: Don’t overfill your cups; leave a bit of space at the top to prevent overflow while baking.
Cool Before Refrigerating: Allow the cookie cups to cool completely before refrigerating. This step helps set the creamy texture of your Oreo Cheesecake Cookie Cups.
Check for Jiggliness: Bake until the centers are just slightly jiggly. This ensures a perfect, creamy consistency—overbaking can lead to dryness.
Customization is Key: Feel free to substitute ingredients like Greek yogurt for sour cream or chocolate chips for a personal touch!
What to Serve with Oreo Cheesecake Cookie Cups
Imagine the delight as you whisk away for a delightful gathering, showcasing the rich, creamy flavors of your cookie cups alongside complementary treats.
-
Fresh Berries: Juicy strawberries, raspberries, or blueberries provide a refreshing contrast that brightens up the cookie cups’ rich flavor.
-
Chocolate Ganache: Drizzling warm chocolate ganache over the cookie cups adds an indulgent layer that any chocolate lover will adore.
-
Vanilla Ice Cream: A scoop of creamy vanilla ice cream enhances the dessert experience, delivering a classic pairing with a temperature contrast that melts in your mouth.
-
Coffee or Espresso: A steaming cup of coffee or espresso pairs beautifully, balancing out the sweetness while providing a cozy vibe.
-
Whipped Cream: A dollop of freshly whipped cream adds a light, fluffy element that enhances the dessert’s overall texture and taste.
-
Caramel Sauce: Drizzling caramel over your cookie cups adds a sweet, buttery touch, making every bite even more irresistible.
-
Citrus Salad: A refreshing citrus salad offers a zesty twist, cutting through the richness of the cheesecake for a bright finish.
Elevate your dessert table by matching these delightful accompaniments with your Oreo Cheesecake Cookie Cups!
Make Ahead Options
These Oreo Cheesecake Cookie Cups are fantastic for busy home cooks who want to save time without sacrificing flavor! You can prepare the cookie crust and cheesecake filling up to 24 hours in advance. Just crush the Oreos and mix them with melted butter, then store the crust in an airtight container at room temperature. The cheesecake filling can be mixed and refrigerated for maximum freshness. When you’re ready to bake, simply fill the prepped crusts with the chilled filling and pop them in the oven. This way, you’ll enjoy delicious, creamy cookie cups with minimal effort, leaving you free to savor the moment with your guests!
Oreo Cheesecake Cookie Cups: Customization Ideas
Feel free to explore your creativity with these Oreo Cheesecake Cookie Cups, crafting them to perfectly suit your taste buds!
-
Chocolate Cookie Variation: Swap Oreos for chocolate chip or peanut butter cookies to create a fun and unique twist on the crust. The flavor combination is delightful and sure to impress.
-
Dairy-Free Option: Use dairy-free cream cheese and coconut whipped cream for the filling and topping, making these cookie cups vegan-friendly without sacrificing flavor.
-
Sugar-Free Version: Substitute regular sugar with a suitable sugar alternative like erythritol or monk fruit sweetener to cater to sugar-restricted diets. Enjoy guilt-free sweetness!
-
Add Some Zest: Incorporate lemon or orange zest into the filling for a refreshing citrus twist that brightens up the rich cheesecake flavor.
-
Spicy Touch: Experiment by adding a sprinkle of cayenne pepper or cinnamon to the cream cheese filling. This intriguing blend gives your dessert a warm, subtle kick!
-
Nutty Crunch: Fold in some crushed nuts, like pecans or walnuts, into the cheesecake filling for an added crunchy texture that beautifully contrasts with the creaminess.
-
Mini Chocolate Treat: If you’re a chocolate lover, mix in mini chocolate chips or chunks into the cheesecake filling for extra gooey chocolate deliciousness. A true treat for the senses!
-
Fruity Delight: Top with fresh berries or drizzle with caramel sauce for a gorgeous, sweet finishing touch. These additions brighten the dessert and create a stunning presentation!
No matter which variation you choose, your Oreo Cheesecake Cookie Cups will still be the star of any gathering! If you’re looking for more variations, you might enjoy the delightful Strawberry Crunch Cheesecake or the rich flavors of Biscoff Cookie Butter. Happy baking!
Storage Tips for Oreo Cheesecake Cookie Cups
Room Temperature: Allow the cookie cups to cool completely before storing, as warm treats can cause condensation in the container.
Fridge: Store leftover Oreo Cheesecake Cookie Cups in an airtight container in the refrigerator for up to 5 days to maintain freshness and flavor.
Freezer: For longer storage, these cookie cups can be frozen for up to 2 months. Wrap each cup individually in plastic wrap and place them in a resealable freezer bag.
Reheating: When ready to enjoy, simply remove from the fridge or freezer and microwave for 10-15 seconds to achieve a lovely creamy texture before serving.
Oreo Cheesecake Cookie Cups Recipe FAQs
How do I choose the right Oreos?
Absolutely! When selecting Oreos for your crust, look for ones that are fresh and free from any visible signs of damage, like dark spots or cracks. You can also explore flavored Oreos, such as mint or peanut butter, for a unique spin!
What’s the best way to store leftover cookie cups?
It’s best to store your Oreo Cheesecake Cookie Cups in an airtight container in the refrigerator. They will stay fresh for up to 5 days. Just ensure they are completely cooled before sealing them up to prevent condensation.
Can I freeze Oreo Cheesecake Cookie Cups?
Yes, indeed! For freezing, wrap each cooled cookie cup individually in plastic wrap and place them in a resealable freezer bag. They can be frozen for up to 2 months. When ready to enjoy, thaw them in the fridge overnight and microwave briefly for about 10-15 seconds—just until they’re creamy again.
What should I do if my cheesecake filling is lumpy?
This is a common issue! To avoid lumps in your filling, always use room-temperature cream cheese and beat it thoroughly before adding other ingredients. If you do end up with lumps, running the filling through a fine-mesh sieve can help smooth things out before you use it.
Can I modify this recipe for dietary restrictions?
Very much so! If you’re looking for alternatives, you can swap out regular cream cheese for a non-dairy or low-fat version, use sugar alternatives like stevia, or substitute sour cream with Greek yogurt. You can even make the crust gluten-free by using gluten-free chocolate cookies instead of Oreos.
What if I don’t have mini chocolate chips?
No worries! If you don’t have mini chocolate chips on hand, feel free to skip them altogether, or chop standard chocolate chips into smaller pieces. Alternatively, you could use dried fruit or nuts for unique textures and flavors!
Oreo Cheesecake Cookie Cups: Your New Favorite Dessert Delight
Ingredients
Equipment
Method
- Preheat your oven to 350°F (175°C). Prepare your muffin tin with cupcake liners.
- Crush Oreos into fine crumbs and mix with melted butter. Press into the bottom of each cupcake liner.
- In a large bowl, beat cream cheese and sugar until smooth. Add sour cream and mix until creamy. Fold in chocolate chips if using.
- Spoon the cheesecake filling over the crust, filling nearly to the top.
- Bake for 15-18 minutes until centers are slightly jiggly. Allow to cool in the tin for 10 minutes before transferring to a wire rack.
- Refrigerate for at least 2 hours before serving.
- Top with whipped cream and crushed Oreos before serving.
Leave a Reply