
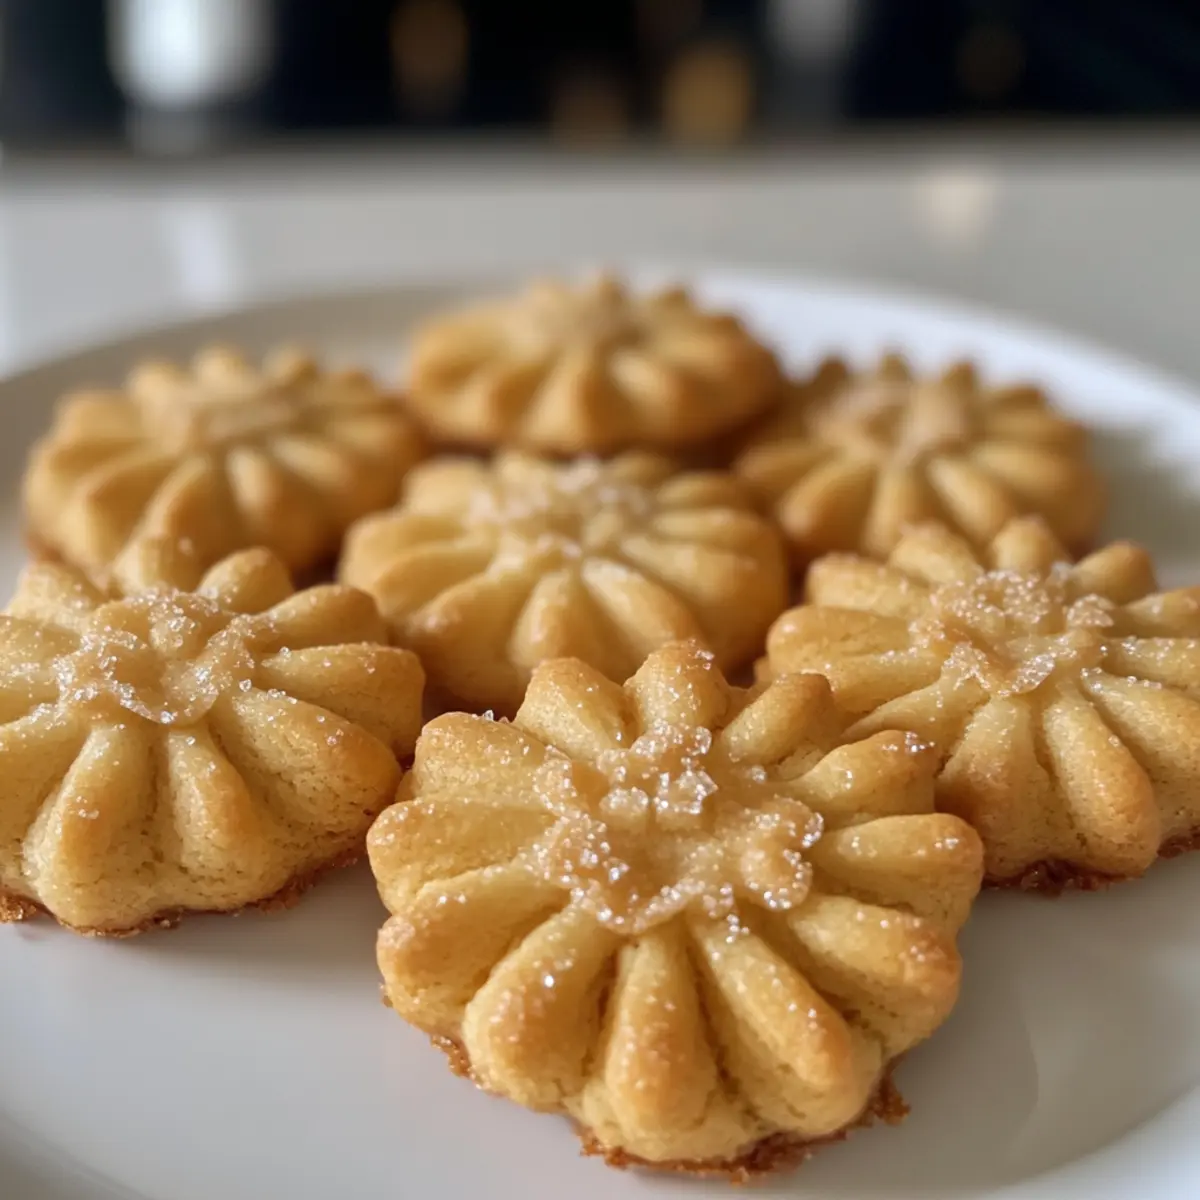
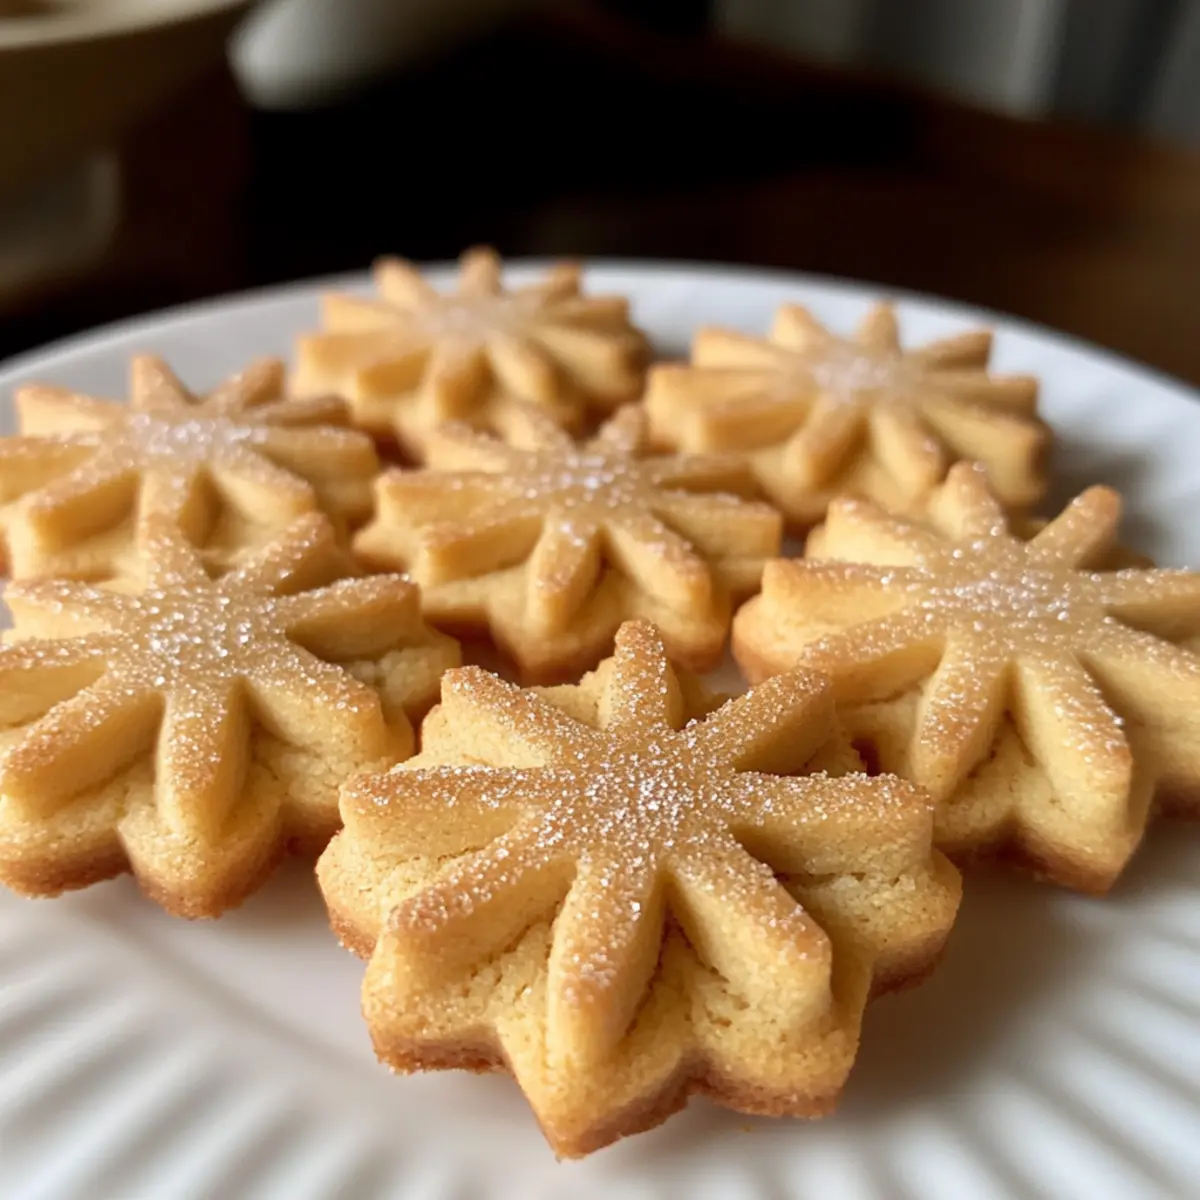
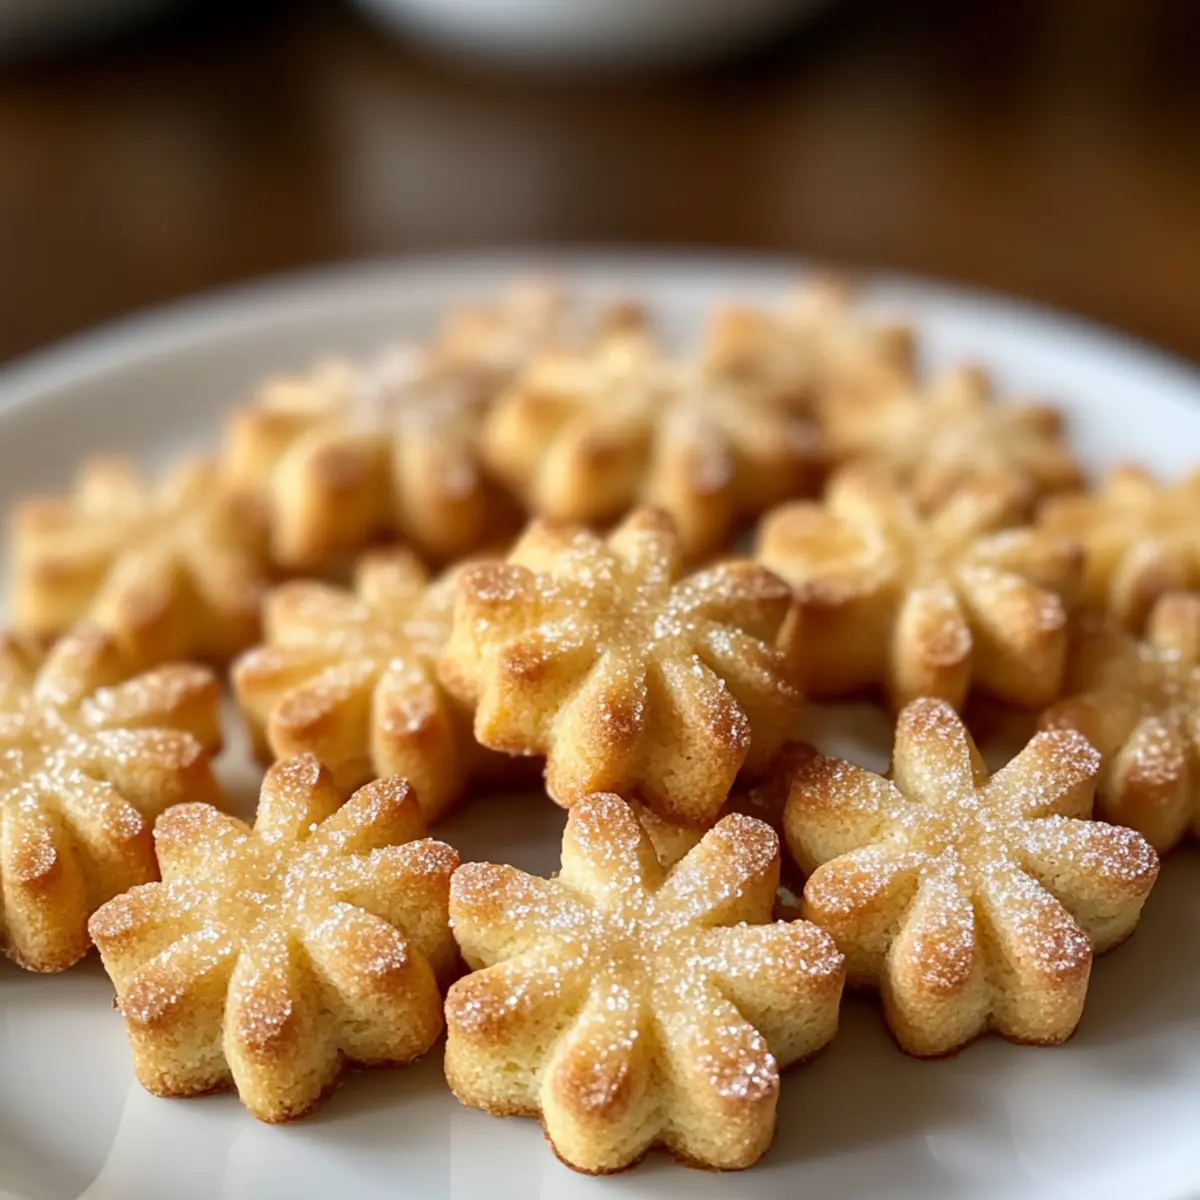
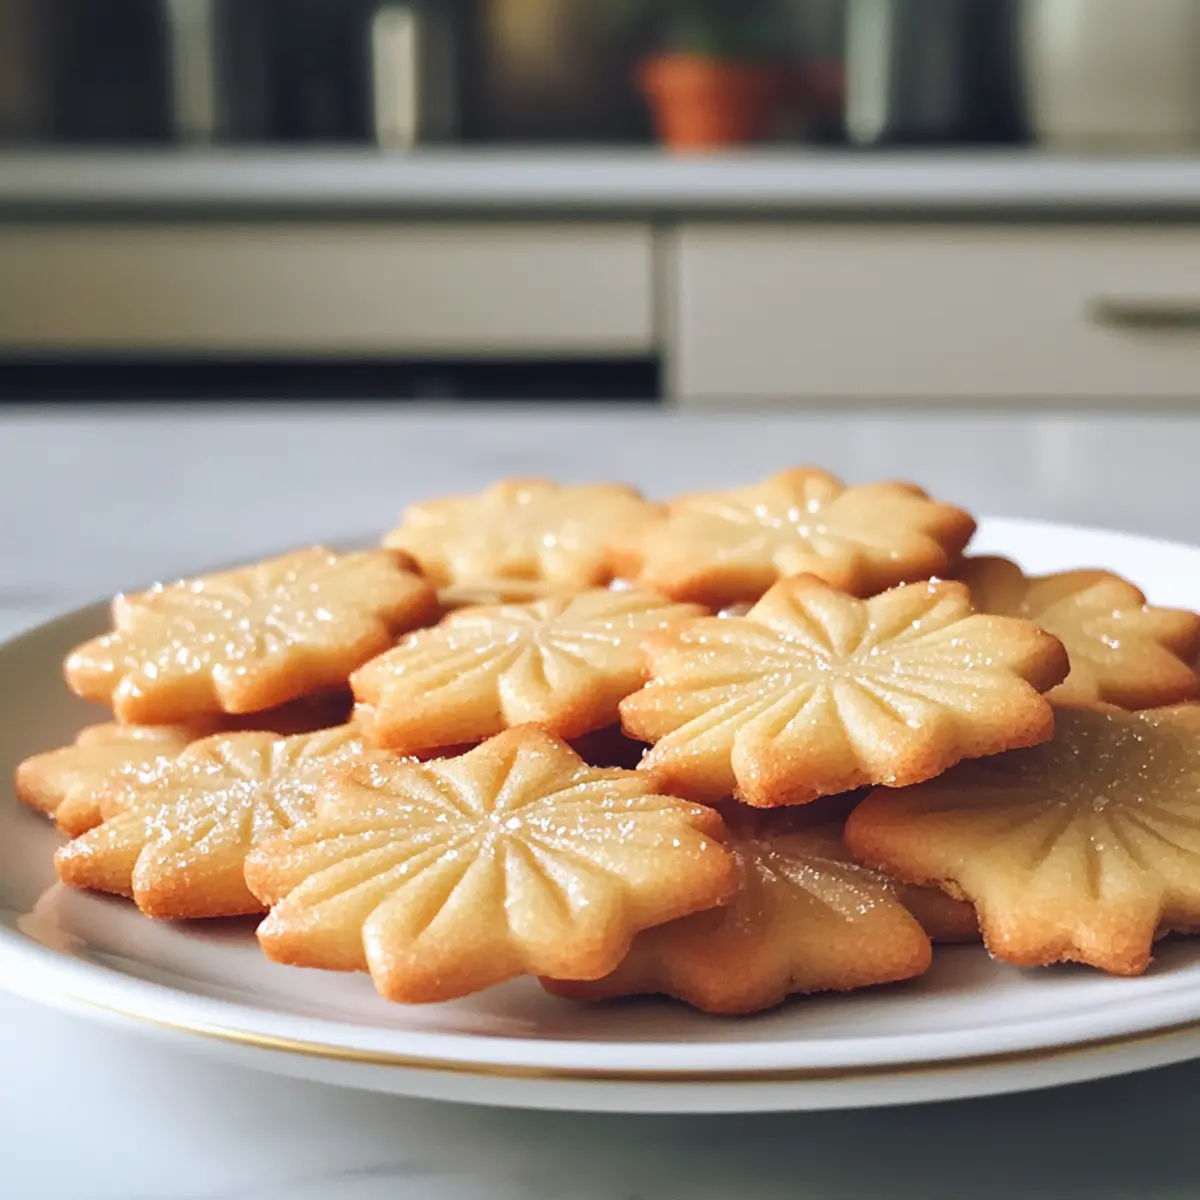
Stepping into my kitchen feels like opening a cherished family photo album, each recipe a snapshot of warmth and tradition. Today, I’m eager to share one of my favorites: melt-in-your-mouth Danish Butter Cookies. These delightful morsels are not just a holiday classic, but also incredibly simple to whip up with just seven ingredients. The best part? They’re well-suited for gifting and creating sweet memories with loved ones. Whether enjoyed with a cozy cup of tea or showcased on a festive platter, these cookies balance rich buttery flavor with a light, crumbly texture that will have everyone reaching for seconds. Curious about how to make these nostalgic treats? Let’s dive into the recipe together!
Why Are Danish Butter Cookies So Special?
Nostalgic Treat: These cookies evoke memories of cozy family gatherings, making each bite a delightful journey back in time.
Irresistible Flavor: Buttery, rich, and subtly sweet, they strike the perfect balance to satisfy your cravings without overwhelming your palate.
Easy to Make: With just seven simple ingredients, you can whip them up quickly—perfect for busy holiday schedules!
Perfect for Gifting: Beautifully piped and topped with coarse sugar, they make for stunning homemade gifts, sure to impress friends and family.
Versatile Shapes: Get creative! Pipe them into various shapes to match the occasion, or try adding a hint of lemon zest or almond extract for a twist.
Pair these delightful cookies with a warm cup of tea and perhaps some Chocolate Oat Cookies for a sweet afternoon treat!
Danish Butter Cookies Ingredients
For the Cookie Dough
- European salted butter (1 cup / 227 g) – Provides rich flavor and creamy texture; if unsalted, add ¼ teaspoon salt.
- Granulated sugar (½ cup / 100 g) – Sweetens the cookie; stick to this for that traditional Danish butter cookie taste.
- Salt (⅛ teaspoon) – Enhances flavor, but feel free to omit if using salted butter.
- Egg yolks (2) – Add moisture and richness; ensure they are at room temperature for the best results.
- Vanilla extract (2 teaspoons / 10 g) – Introduces warm, sweet notes; using pure extract makes all the difference.
- Whole milk (1 tablespoon / 15 g) – Helps soften the dough for piping; add a little more if needed for a workable texture.
- All-purpose flour (2 cups / 220 g) – Provides the cookie structure; you may adjust by using only all-purpose flour if desired.
- Cake flour (½ cup / 50 g) – Softens texture for that melt-in-your-mouth experience; you can skip it if you prefer a denser cookie.
For Decorating
- Coarse sugar – Sprinkle on top before baking for that lovely finishing touch; it adds a delightful crunch!
Step‑by‑Step Instructions for Danish Butter Cookies
Step 1: Prepare for Chilling
Clear a space in your refrigerator; you’ll need it for chilling the shaped Danish Butter Cookies. Line a baking sheet with parchment paper to ensure the cookies do not stick. Pipe the cookies directly onto the prepared sheet, then slide it into the refrigerator for 20-30 minutes. This chilling step helps the cookies maintain their shape while baking.
Step 2: Cream the Mixture
In a stand mixer fitted with the paddle attachment, add the European salted butter. Beat the butter on medium speed until it’s smooth and creamy, usually about 2-3 minutes. Slowly sprinkle in the granulated sugar and salt, continuing to mix until the mixture becomes light and fluffy—this should take another 3-4 minutes. This step is essential for incorporating air for a tender texture in your Danish Butter Cookies.
Step 3: Mix in Eggs and Flavoring
Next, add the room-temperature egg yolks, vanilla extract, and whole milk to the butter mixture. Beat on low speed just until everything is fully incorporated and smooth, which should take about 1-2 minutes. The goal is to create a cohesive batter that’s rich and aromatic—your kitchen will start to smell amazing!
Step 4: Combine Dry Ingredients
In a separate bowl, whisk together the all-purpose flour and cake flour until evenly mixed. Gradually add this flour mixture to the wet butter mixture in two parts, gently mixing on low speed until just combined. Be careful not to overmix; the dough should be soft and slightly sticky, perfect for piping into shapes for your Danish Butter Cookies.
Step 5: Pipe Cookies
Transfer the prepared dough to a piping bag fitted with a star tip. This helps create those lovely, ornate shapes characteristic of Danish Butter Cookies. Pipe the dough onto the lined baking sheet, making 2-inch rounds or decorative rosettes, ensuring enough space between each cookie to allow for spreading. Once piped, return the baking sheet to the refrigerator for an additional chill to set the shapes.
Step 6: Bake
Preheat your oven to 350°F (175°C). Once the oven is ready, remove the chilled cookies from the refrigerator and sprinkle coarse sugar on top of each one for added texture. Bake the Danish Butter Cookies for 10-15 minutes, watching closely for when the edges turn lightly golden. This is the perfect visual cue that they’re done baking. Let the cookies cool on the sheet for about 5 minutes before transferring them to a wire rack to cool completely.
What to Serve with Melt in Your Mouth Danish Butter Cookies?
These delicious cookies are more than just a treat; they’re the perfect sweet addition to any festive gathering or cozy afternoon snack.
-
Rich Hot Chocolate: The creamy, chocolatey goodness pairs beautifully with the buttery richness of the cookies, creating a cozy experience.
-
Fresh Berries: A side of juicy strawberries or raspberries adds a refreshing contrast to the cookies’ crumbly texture and enhances the sweetness.
-
Spiced Chai Latte: The warm spices in chai complement the buttery flavor, bringing an aromatic touch that elevates your snacking experience.
-
Whipped Cream: A dollop of freshly whipped cream introduces a light and airy element, perfect for balancing the cookies’ richness.
-
Orange Zest Cookies: For a delightful twist, offer a plate of these alongside your Danish Butter Cookies; their citrusy brightness harmonizes wonderfully.
-
Almond Milk: The nutty flavor of almond milk enhances the cookies’ buttery notes and provides a dairy-free option for those who prefer it.
-
Gelato: A scoop of vanilla or pistachio gelato pairs exquisitely with the buttery cookies, turning them into an indulgent dessert duo.
-
Cranberry Sauce: A small serving of tart cranberry sauce adds a festive touch and balances the cookies’ sweetness, ideal for holiday gatherings.
Expert Tips for Danish Butter Cookies
- Temperature Matters: Ensure your butter and eggs are at room temperature to achieve a smooth mixture and better texture in your Danish Butter Cookies.
- Don’t Overmix: It’s tempting, but avoid using high speed after adding flour; mix just until combined to keep them tender.
- Watch the Oven: Keep a close eye on your cookies, as baking time can differ based on their shape and size; look for a light golden edge.
- Precision in Measurement: Use a kitchen scale or the fluff-and-level method for flour to prevent adding too much, leading to a denser cookie.
- Chill for Shape: Don’t skip the chilling steps; it helps maintain the beautiful shapes of your piped Danish Butter Cookies during baking.
Storage Tips for Danish Butter Cookies
Room Temperature: Store your Danish Butter Cookies in an airtight container at room temperature for up to 5 days. This keeps them fresh and maintains their delightful texture.
Fridge: If you want to extend their freshness, consider placing the container in the fridge. They can last up to 1 week in this cool environment, but allow them to come to room temperature before serving for the best flavor.
Freezer: For longer storage, freeze the cookies for up to 3 months. Place them in a single layer in an airtight freezer-safe container to prevent sticking. Thaw before enjoying!
Reheating: If you’d like to enjoy them warm, reheat frozen cookies in a preheated oven at 300°F (150°C) for about 10 minutes. This will revive that melt-in-your-mouth experience!
Make Ahead Options
These Danish Butter Cookies are perfect for busy home cooks looking to save time during the hectic holiday season! You can prepare the cookie dough and refrigerate it for up to 24 hours before baking, ensuring the flavors meld beautifully while maintaining their quality. For an even longer prep option, shape the cookies and freeze them for up to 3 months—just pipe them onto parchment-lined baking sheets and place them directly into the freezer. When you’re ready to bake, there’s no need to thaw—just bake them straight from the freezer for delicious results! This way, you’ll have freshly-baked cookies on hand with minimal effort when the moment calls for a sweet treat.
Danish Butter Cookies Variations
Feel free to explore your creativity with these delightful variations!
-
Flavored Extracts: Add almond or hazelnut extract for a nutty twist. Just a teaspoon can transform your cookies into new favorites!
-
Citrus Zing: Fold in lemon or orange zest for a refreshing citrus flavor, brightening up the buttery goodness.
-
Nutty Crunch: Sprinkle in chopped nuts like hazelnuts or pecans for added texture and richness. They’ll give each bite even more character!
-
Chocolate Drizzle: For a touch of indulgence, drizzle melted chocolate over cooled cookies. Let your imagination run wild with dark, white, or milk chocolate!
-
Spiced Version: Add a pinch of cinnamon or nutmeg to the dough for a warm, cozy flavor, perfect for the colder months.
-
Tea Pairing: Serve alongside a homemade chai or herbal tea, making your cookie experience even more comforting. You might love to pair it with a delightful slice of Biscoff Cookie Butter!
-
Gluten-Free Option: Use a gluten-free flour blend instead of all-purpose and cake flour if you’re accommodating special diets. These cookies can be just as delicious for everyone!
These variations can truly elevate your Danish Butter Cookies while creating unforgettable moments with family!
Danish Butter Cookies Recipe FAQs
What kind of butter should I use for Danish Butter Cookies?
I highly recommend using European salted butter for its rich flavor and creamy texture. However, if you only have unsalted butter, just add ¼ teaspoon of salt to the mixture. This ensures you still achieve that authentic buttery taste in your cookies!
How should I store Danish Butter Cookies after baking?
Store your Danish Butter Cookies in an airtight container at room temperature for up to 5 days to keep them fresh. If you’d like to extend their shelf life, placing them in the fridge allows them to stay good for up to a week. Just make sure to allow them time to come to room temperature before indulging for the best flavor and texture!
Can I freeze Danish Butter Cookies? If so, how?
Absolutely! You can freeze your Danish Butter Cookies for up to 3 months. For the best results, lay them in a single layer in an airtight, freezer-safe container to prevent sticking. When you’re ready to enjoy, simply thaw them at room temperature, or if you prefer them warm, reheat in a preheated oven at 300°F (150°C) for about 10 minutes to regain that delightful melt-in-your-mouth texture.
What if my dough is too sticky to pipe?
If your cookie dough feels too sticky, it’s likely due to the temperature of your ingredients—ensure the butter is soft but not melted, and the egg yolks are room temperature. If the dough remains sticky, try adding a tablespoon more of all-purpose flour until a workable consistency is achieved. Just remember, avoid overmixing to keep that tenderness!
Are there any allergy considerations for Danish Butter Cookies?
Yes, since this recipe contains eggs and wheat, those with egg allergies or gluten sensitivities should be cautious. Unfortunately, this recipe isn’t gluten-free. For those with dietary restrictions, consider using egg substitutes like flax eggs and a gluten-free flour blend, but note that the texture may vary.
How long can I refrigerate shaped cookies before baking?
You can refrigerate your shaped Danish Butter Cookies for up to 2 days before baking them. Just be sure to keep them covered or in an airtight container to prevent them from drying out or absorbing any odors from the fridge. This advance preparation is fantastic for holiday baking!
Delicious Danish Butter Cookies That Melt in Your Mouth
Ingredients
Equipment
Method
- Clear a space in your refrigerator; line a baking sheet with parchment paper for chilling the shaped cookies.
- Beat the European salted butter until smooth and creamy, then gradually add the granulated sugar and salt, mixing until light and fluffy.
- Add the egg yolks, vanilla extract, and whole milk; beat until fully incorporated and smooth.
- Whisk together all-purpose flour and cake flour, then gradually mix it into the butter mixture until just combined, forming a soft, slightly sticky dough.
- Transfer the dough to a piping bag fitted with a star tip and pipe onto the lined baking sheet in 2-inch rounds.
- Preheat your oven to 350°F (175°C), sprinkle coarse sugar on each cookie, and bake for 10-15 minutes until the edges are lightly golden.
Leave a Reply