
I’ll never forget the first time I dined on a sticky hoisin chicken dish—it was a flavor explosion that transported me straight to the vibrant streets of Asia. This 4-Ingredient Sticky Hoisin Chicken captures that same magic right in your own kitchen. With its sweet and spicy glaze, this quick and easy recipe is perfect for busy weeknights or casual gatherings, making it a lifesaver for anyone tired of fast food. You’ll be amazed by how just a handful of ingredients can come together to create a restaurant-quality meal that’s both satisfying and wonderfully simple. Ready to elevate your dinner game with this delightful, one-pan dish? Let’s dive into how you can whip up this sticky sensation in no time!

Why is Sticky Hoisin Chicken a Must-Try?
Simplicity at Its Best: With just four ingredients, this dish makes home cooking a breeze, even for the busiest of schedules.
Bold, Flavorful Taste: The combination of hoisin sauce, honey, and sriracha creates a vibrant glaze, delivering a delightful balance of sweet and spicy flavors.
Family-Friendly Option: This recipe is sure to please both adults and kids, making it a fantastic choice for family dinners or gatherings.
One-Pan Wonder: Quick clean-up is guaranteed, as everything cooks in a single pan—more time enjoying your meal!
Versatile Pairing: Serve it over coconut rice or alongside vegetables for a wholesome, satisfying meal. If you’re looking for more Asian-inspired dishes, check out our Garlic Parmesan Chicken for an elegant twist.
Sticky Hoisin Chicken Ingredients
• Get ready to create magic in your kitchen!
For the Glaze
- Hoisin Sauce – Provides a sweet, tangy flavor and acts as the primary sauce. Substitution: Teriyaki sauce can be used but will alter the flavor profile.
- Sriracha – Adds spice and heat, complementing the sweetness of the hoisin sauce. Adjustment: For less heat, use a smaller amount or omit entirely.
- Honey – Enhances sweetness and helps in caramelization. Note: Maple syrup can be substituted for a vegan alternative.
For the Chicken
- Boneless Chicken Thighs – Juicy and flavorful; perfect for absorbing the sauce. Substitution: Chicken breasts are an alternative, but they may dry out more quickly during cooking.
Step‑by‑Step Instructions for Sticky Hoisin Chicken
Step 1: Marinate the Chicken
Begin by placing the boneless chicken thighs in a large bowl or zip-top bag. Pour in the hoisin sauce and coat the chicken evenly. For optimal flavor, let them marinate for 15 to 30 minutes. If you’re in a rush, even a shorter marination will still impart a delicious taste.
Step 2: Heat the Pan
While the chicken marinates, preheat a large skillet over medium-high heat. Allow the pan to get hot for about 2-3 minutes before proceeding. You’ll know it’s ready when it’s shiny and a drop of water sizzles when added.
Step 3: Sear the Chicken
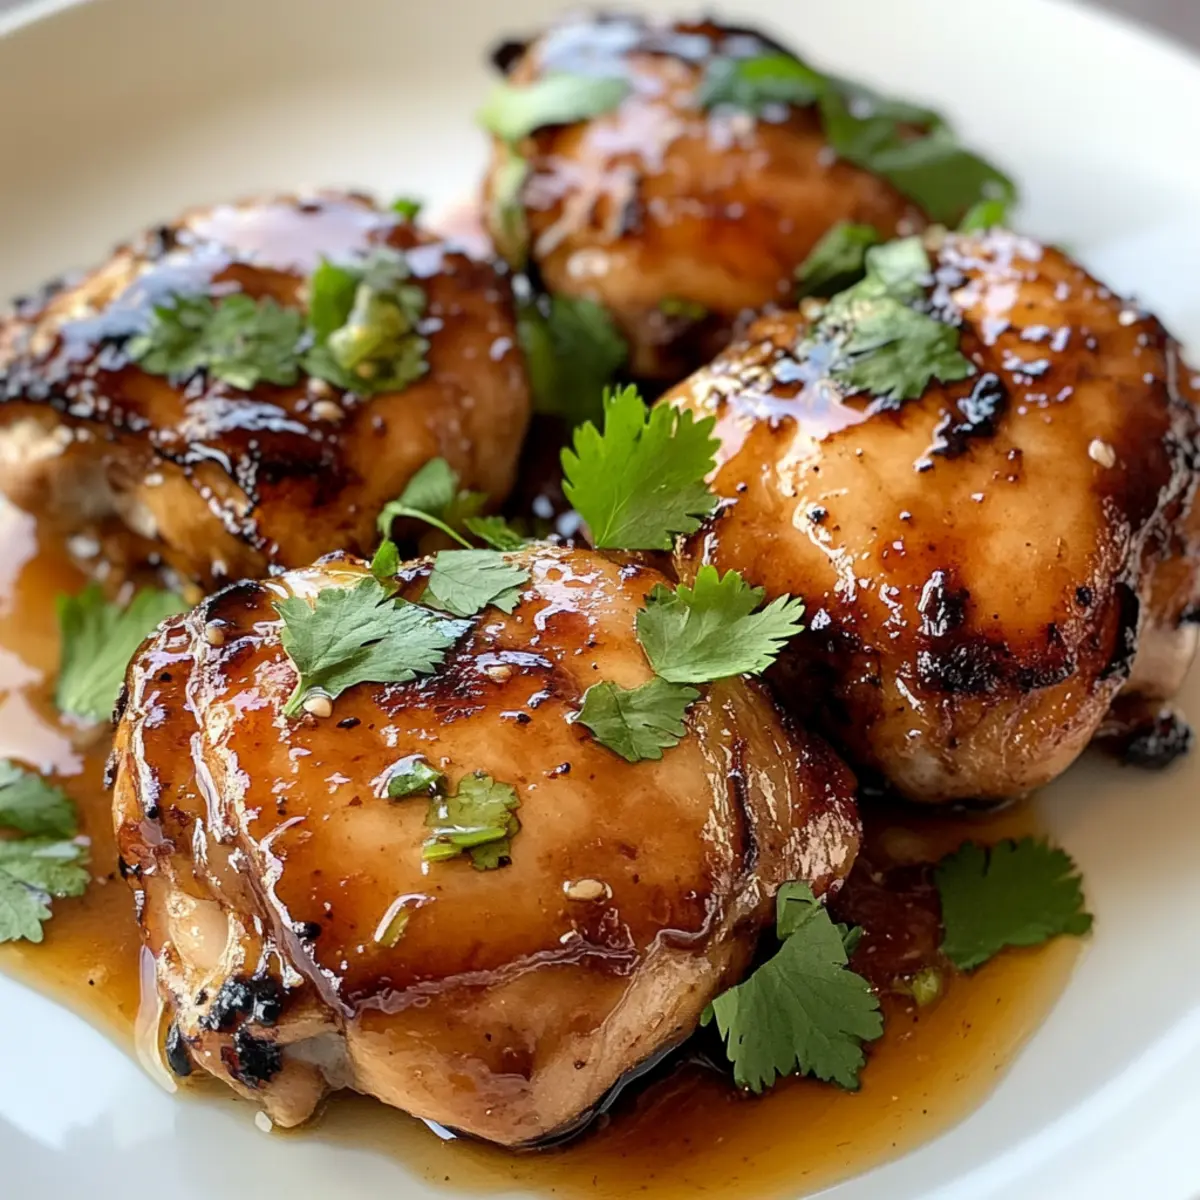
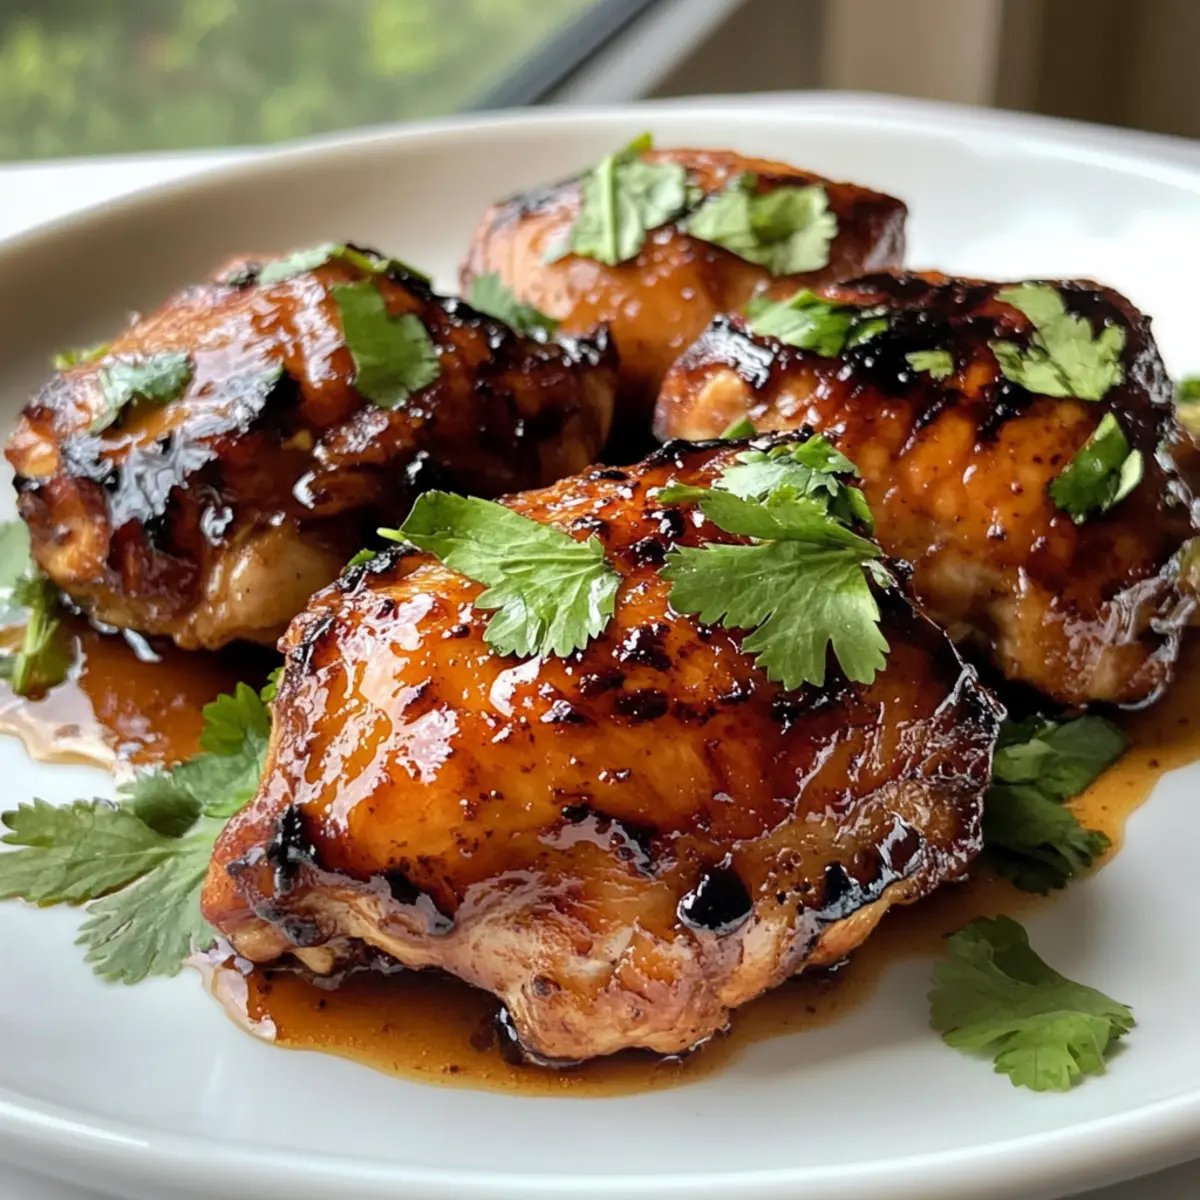
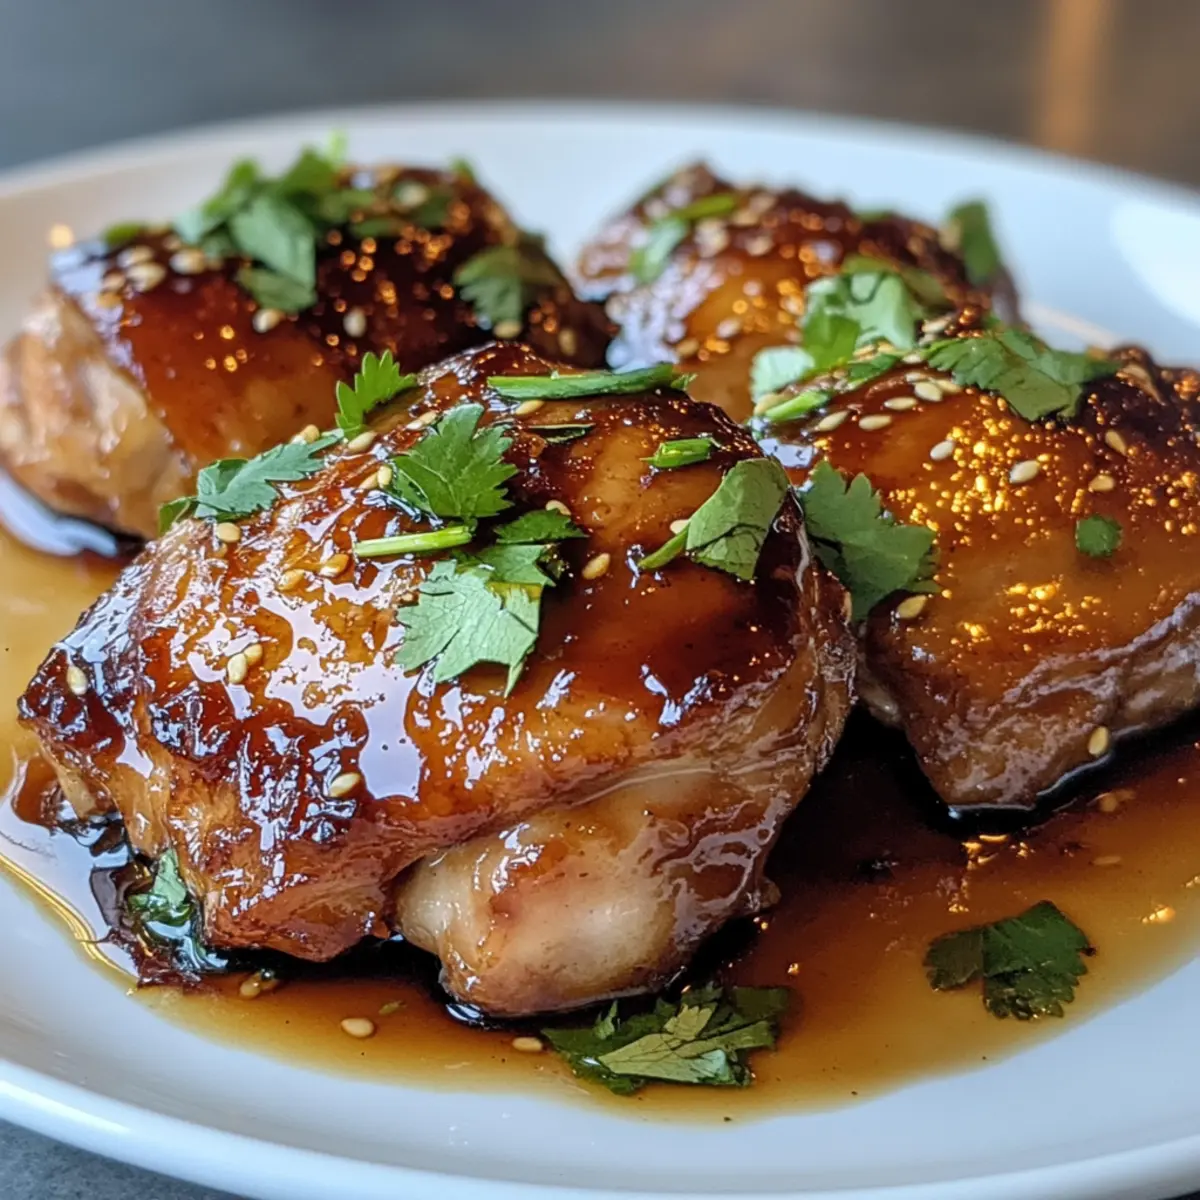
Once the pan is hot, add the marinated chicken thighs to the skillet, ensuring they’re not overcrowded. Cook them for about 6-7 minutes per side, keeping an eye out for a deep golden-brown color and a caramelized surface. This gives the sticky hoisin chicken its signature glossiness.
Step 4: Glaze the Chicken
In the last few minutes of cooking, brush a light layer of additional hoisin sauce over the chicken. This extra glaze allows the sauce to sticky beautifully, further enhancing the flavor. Continue cooking until the chicken is fully cooked through and reaches an internal temperature of 165°F (75°C).
Step 5: Rest and Serve
Once done, remove the chicken from the skillet and let it rest for a few moments on a cutting board. This resting time helps retain the juices. Slice the chicken, serve it over rice or veggies, and enjoy the delightful flavors of your homemade Sticky Hoisin Chicken!
Expert Tips for Sticky Hoisin Chicken
- Perfect Marination Time: Letting the chicken marinate for 15-30 minutes deepens flavor. If short on time, even a quick 5-minute soak works wonders.
- Avoid Overcrowding: Cook the chicken thighs in batches if necessary. Overcrowding the pan can lead to steaming rather than searing.
- Monitor Cooking Temperature: High heat is key to caramelizing the chicken and achieving that glossy finish. Keep the heat consistent throughout the cooking process.
- Check Doneness: Always use a meat thermometer to ensure the chicken reaches an internal temperature of 165°F (75°C) for safe consumption without drying it out.
- Try Variations: Feel free to add your favorite vegetables while cooking for added nutrition; just be mindful of cooking times. Enjoy your Sticky Hoisin Chicken adventure!
Make Ahead Options
These Sticky Hoisin Chicken thighs are perfect for busy weeknights, allowing you to prep in advance for stress-free meals! You can marinate the chicken in hoisin sauce up to 24 hours ahead, letting the flavors deeply infuse. Simply place the marinated chicken in an airtight container and refrigerate until you’re ready to cook. Additionally, you can mix the glaze and store it separately for up to 3 days to streamline your cooking process. When it’s time to serve, heat a skillet, sear the chicken, and brush on that extra glaze for maximum stickiness. This way, you’ll enjoy restaurant-quality results with minimal effort, even on the busiest nights!
Sticky Hoisin Chicken Variations & Substitutions
Feel free to get creative with this recipe and tailor it to your taste buds!
-
Vegetable Boost: Add bell peppers or snap peas to the pan for extra nutrition and color, making each bite more vibrant. These veggies will soak up the sweet and spicy flavors beautifully, enhancing the overall dinner experience.
-
Coconut Rice: Serve your sticky hoisin chicken over fluffy coconut rice for a delightful tropical twist. The creamy rice pairs nicely with the glaze, creating a comforting combination that feels like a little escape to paradise.
-
Spicy Kick: Elevate the heat by mixing in red pepper flakes or a splash of extra sriracha. This small adjustment can transform the dish, providing a lovely warmth that keeps you coming back for more.
-
Vegan Twist: Swap the chicken for firm tofu or tempeh, and marinate in the same hoisin sauce. This plant-based version is just as delicious and ensures everyone can enjoy the flavors, whether they’re vegetarian or not.
-
Crispy Texture: For a crunchy contrast, pan-fry some coated panko breadcrumbs and sprinkle them over the finished chicken. This added texture truly enhances the overall dish and makes it even more satisfying.
-
Garnish Wonders: Top your sticky hoisin chicken with sliced green onions or sesame seeds for a pop of flavor and presentation. The garnish adds both color and that extra dash of deliciousness that makes homemade meals special.
-
Different Sauces: If you’re feeling adventurous, try swapping the hoisin sauce with teriyaki for a sweeter, silkier glaze. Just be prepared for a slightly different flavor profile! Alternatively, consider using a sweet chili sauce for a brighter sauce experience.
For more delightful chicken dishes that also bring a smile to the table, explore our Cheesy Chicken Broccoli or the comforting flavors of Butter Chicken Cozy. Enjoy experimenting!
How to Store and Freeze Sticky Hoisin Chicken
Fridge: Store leftovers in an airtight container for up to 3 days. Ensure the chicken has cooled down before sealing to maintain freshness.
Freezer: For longer storage, place the chicken in a freezer-safe container or bag, and freeze for up to 3 months. Be sure to label the container with the date.
Reheating: To enjoy your Sticky Hoisin Chicken, thaw it overnight in the fridge if frozen, then reheat in the oven at 350°F (175°C) for about 15-20 minutes, or microwave until heated through.
Room Temperature: Avoid leaving the chicken out for more than 2 hours to prevent bacterial growth. Always store leftovers promptly.
What to Serve with Sticky Hoisin Chicken
Creating a delightful meal around your sticky hoisin chicken is simple and satisfying, elevating your dining experience to new heights.
-
Steamed Broccoli: This crisp, vibrant vegetable adds a fresh crunch that beautifully complements the sticky sweetness of the chicken.
-
Coconut Rice: The subtle sweetness of coconut rice creates a perfect base that balances the bold flavors of the hoisin glaze. A hint of tropical vibes makes each bite comforting.
-
Asian Slaw: A tangy, crunchy slaw with cabbage, carrots, and sesame dressing offers a refreshing contrast, enhancing the overall meal. It’s light and invigorating!
-
Grilled Zucchini: The smoky, tender texture of grilled zucchini complements the chicken’s rich glaze, bringing a wonderful depth of flavor to your plate.
-
Fried Rice: Savory fried rice serves as a hearty side that soaks up the chicken’s juices, offering a satisfying and flavorful experience.
-
Mango Salad: This sweet and juicy salad introduces a refreshing flair to the meal, balancing the savory chicken with its bright, tropical notes.
-
Chilled Green Tea: Pair your dish with a glass of chilled green tea to cleanse the palate between bites, enhancing your overall dining delight.
-
Chocolate Mousse: For dessert, a smooth chocolate mousse provides a rich, velvety finish to your flavorful meal, ensuring a sweet conclusion to your feast.
-
Crispy Egg Rolls: These crispy delights introduce a satisfying crunch that pairs wonderfully with the soft chicken, making for a delightful appetizer before the main event.
Sticky Hoisin Chicken Recipe FAQs
How do I select the best hoisin sauce for this recipe?
Absolutely! Look for a hoisin sauce that is thick and glossy, featuring a rich deep color. A good hoisin sauce should have a balance of sweetness and saltiness; check for any additives or preservatives if you prefer a more natural ingredients list. If you can, taste a bit before buying to ensure it’s to your liking!
How should I store leftover Sticky Hoisin Chicken?
For best results, store any leftover Sticky Hoisin Chicken in an airtight container in the fridge for up to 3 days. Always allow the chicken to cool to room temperature before sealing it to keep it fresh. If you find you’re not going to finish it in that timeframe, you can freeze it to extend its shelf life.
Can I freeze Sticky Hoisin Chicken, and if so, how?
Certainly! To freeze your Sticky Hoisin Chicken, allow it to cool completely, then place it in a freezer-safe container or a heavy-duty freezer bag. Make sure to remove as much air as possible to prevent freezer burn—this can be done by pressing out excess air before sealing. Label the bag with the date, and it will keep well for up to 3 months. When you’re ready to enjoy it, thaw it overnight in the fridge before reheating.
What should I do if my chicken isn’t caramelizing properly?
Very! If your chicken isn’t caramelizing, it could be due to a few reasons. First, ensure your pan is hot enough before adding the chicken. A good indicator is when a drop of water sizzles on contact. Secondly, avoid overcrowding the pan, as this can cause the chicken to steam rather than sear. Cook in batches if necessary, allowing each piece enough space to breathe. Lastly, make sure you’re using enough hoisin sauce while glazing; this will help achieve that beautiful sticky finish.
Are there any dietary considerations I should be aware of?
Yes! If you or someone you’re serving has allergies, be sure to check the ingredients in your hoisin sauce and sriracha, as some brands may contain soy, sesame, or gluten. For those looking for a healthier twist, you can substitute honey with maple syrup for a vegan option. If serving to pets, keep in mind that ingredients like garlic in some sauces could be harmful, so it’s best to keep this dish out of their reach.
Sticky Hoisin Chicken That Will Wow Your Taste Buds
Ingredients
Equipment
Method
- Marinate the Chicken: Place the boneless chicken thighs in a large bowl or zip-top bag. Pour in the hoisin sauce and coat evenly. Marinate for 15 to 30 minutes.
- Heat the Pan: Preheat a large skillet over medium-high heat for about 2-3 minutes until hot.
- Sear the Chicken: Cook the marinated chicken thighs for 6-7 minutes per side until golden-brown and caramelized.
- Glaze the Chicken: Brush a light layer of additional hoisin sauce over the chicken in the last few minutes of cooking.
- Rest and Serve: Remove the chicken and let it rest for a few moments before slicing and serving over rice or veggies.
Leave a Reply