
Every time I pull open my fridge, I’m struck by a moment of inspiration. That’s how this recipe for Cheesy Garlic Chicken Wraps came to life—a symphony of flavors and textures that can turn a simple meal into a delicious experience. In just 21 minutes, you can whip up a customizable dish that’s perfect for any night of the week. Whether you’re juggling a busy schedule or simply craving a new comfort food, these wraps deliver on all fronts—they’re kid-friendly and adaptable to various dietary preferences, making them a true crowd-pleaser. Plus, with options ranging from succulent shrimp to hearty black beans, everyone at your table will find a satisfying version. What will you add to your wrap to make it truly yours?
Why Are Cheesy Garlic Chicken Wraps a Must-Try?
Quick and Easy: In just 21 minutes, you can have a delicious meal ready to serve, making it perfect for weeknight dinners.
Customizable Goodness: Choose your protein—chicken, shrimp, turkey—or even go vegetarian with black beans or chickpeas for diverse flavor profiles that suit every palate.
Crowd-Pleasing Appeal: Kids and adults alike will love the cheesy goodness and the satisfying crunch, ensuring nothing gets left on the plate.
Fresh and Flavorful: The combination of veggies, creamy filling, and savory garlic creates a refreshing taste that elevates these wraps above your average meal.
For more family-friendly options, don’t miss out on my Cheesy Chicken Broccoli or Garlic Parmesan Chicken recipes!
Cheesy Garlic Chicken Wraps Ingredients
Perfectly tasty and quick to assemble!
For the Filling
- Cooked Chicken – Shredded tenderness; substitute with cooked shrimp or turkey for variety.
- Shredded Mozzarella Cheese – Adds creaminess and a savory flavor.
- Cream Cheese – Softened for a rich texture that binds the filling.
- Mayonnaise – Adds moisture to the filling, making it irresistibly creamy.
- Minced Garlic – Essential for a robust garlic flavor in these Cheesy Garlic Chicken Wraps.
- Italian Seasoning – Provides a savory depth to the filling, enhancing the overall taste.
- Salt – Enhances overall flavor, bringing all ingredients together.
- Black Pepper – Adds a gentle spiciness to keep your taste buds interested.
For Assembly
- Flour Tortillas – Soft base for the filling; any large size works beautifully.
- Fresh Spinach Leaves – Adds freshness and nutrition to brighten every bite.
- Diced Tomatoes – Provides juiciness, balancing the richness of the filling.
- Sliced Green Onions – Adds a crunchy texture and light onion flavor, perfect for finishing touches.
Feel free to mix and match to make this wrap your own!
Step‑by‑Step Instructions for Cheesy Garlic Chicken Wraps
Step 1: Prepare the Filling
In a large bowl, combine the shredded cooked chicken, mozzarella cheese, softened cream cheese, mayonnaise, minced garlic, Italian seasoning, salt, and black pepper. Use a spatula to mix until the filling is smooth and well-combined. This creamy mixture will be the heart of your Cheesy Garlic Chicken Wraps, so ensure all ingredients are blended thoroughly and evenly.
Step 2: Assemble the Wraps
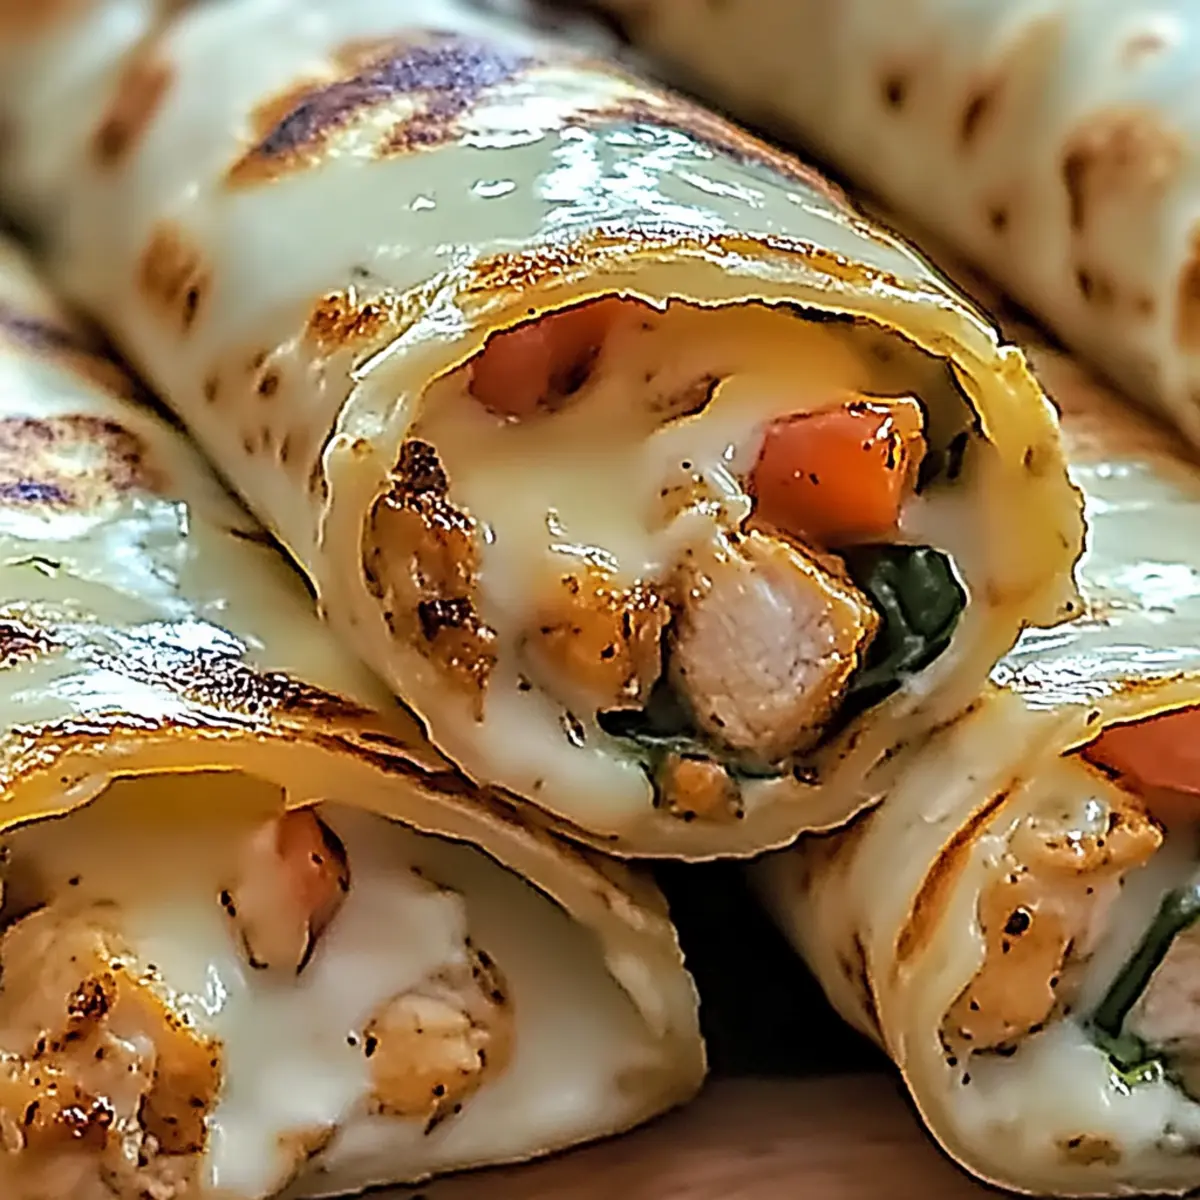
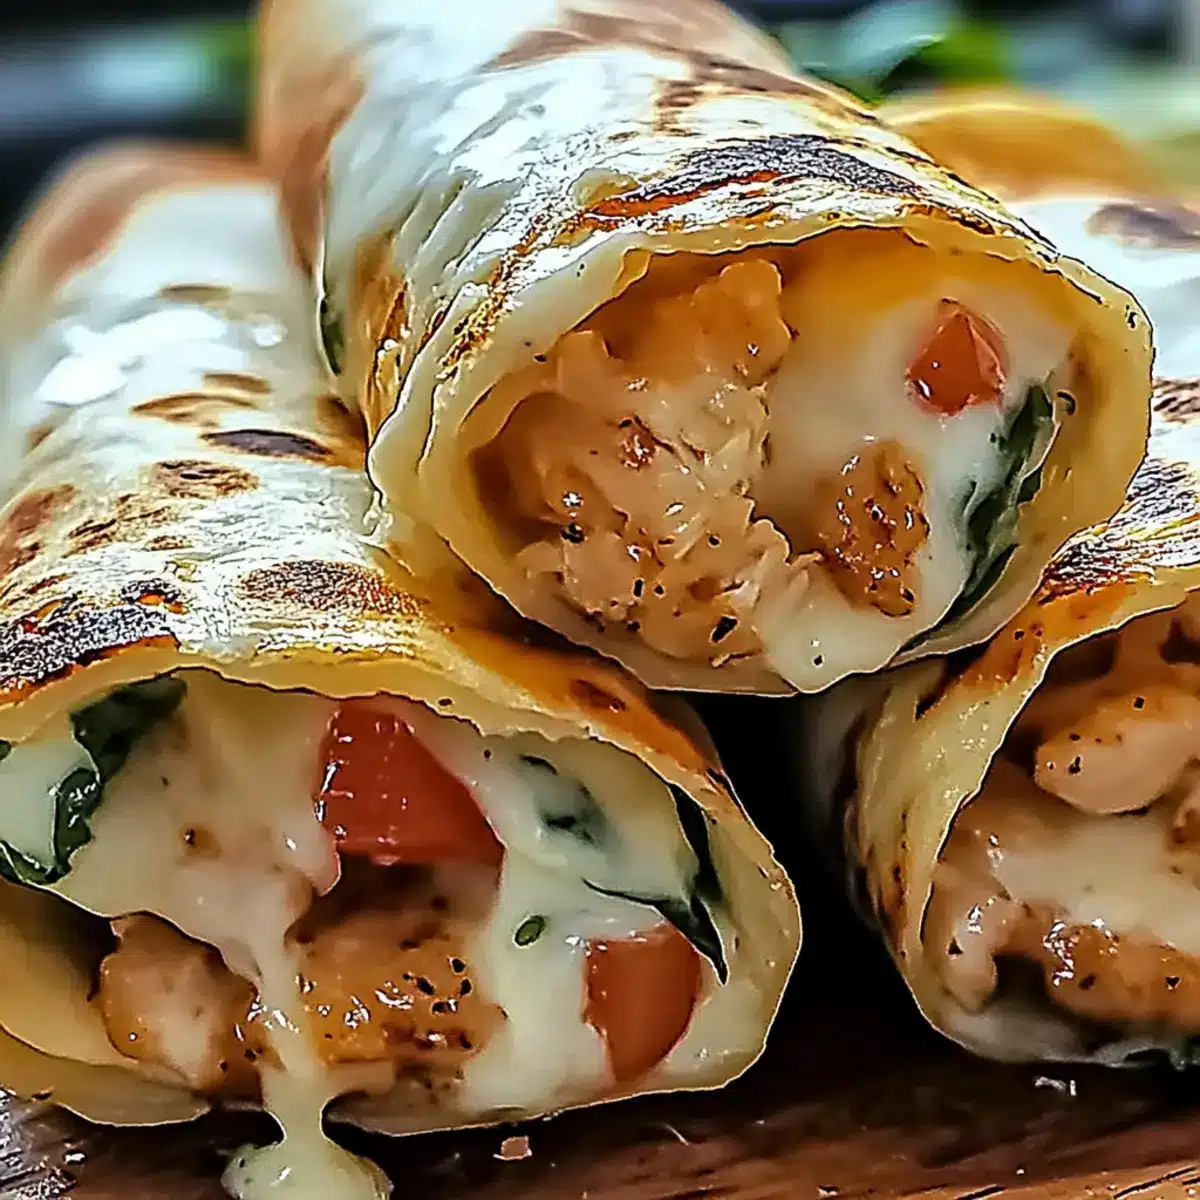
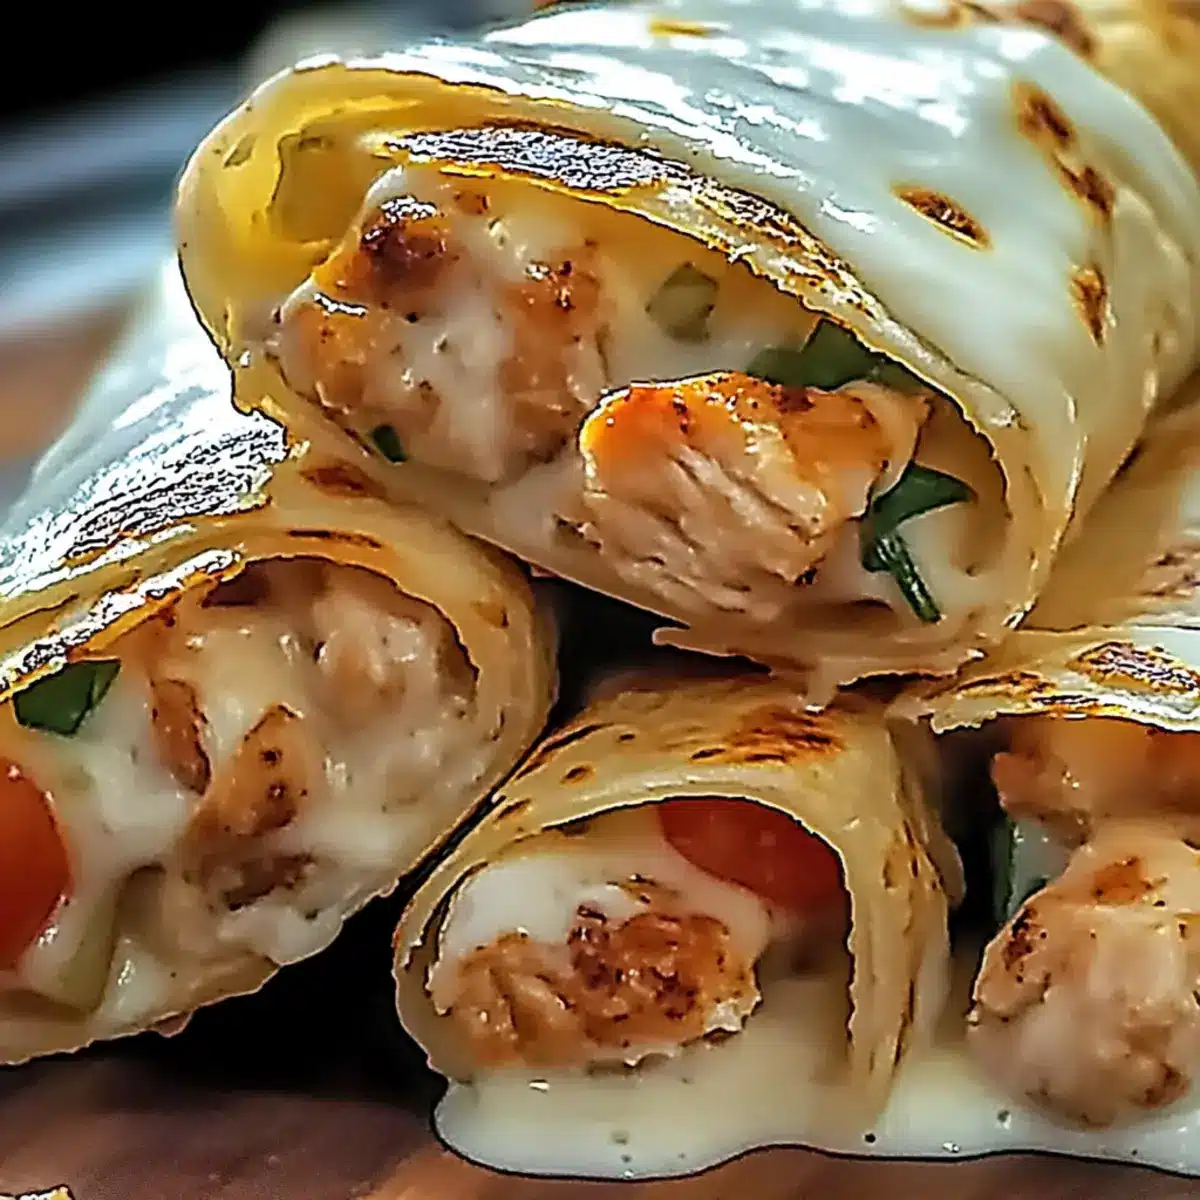
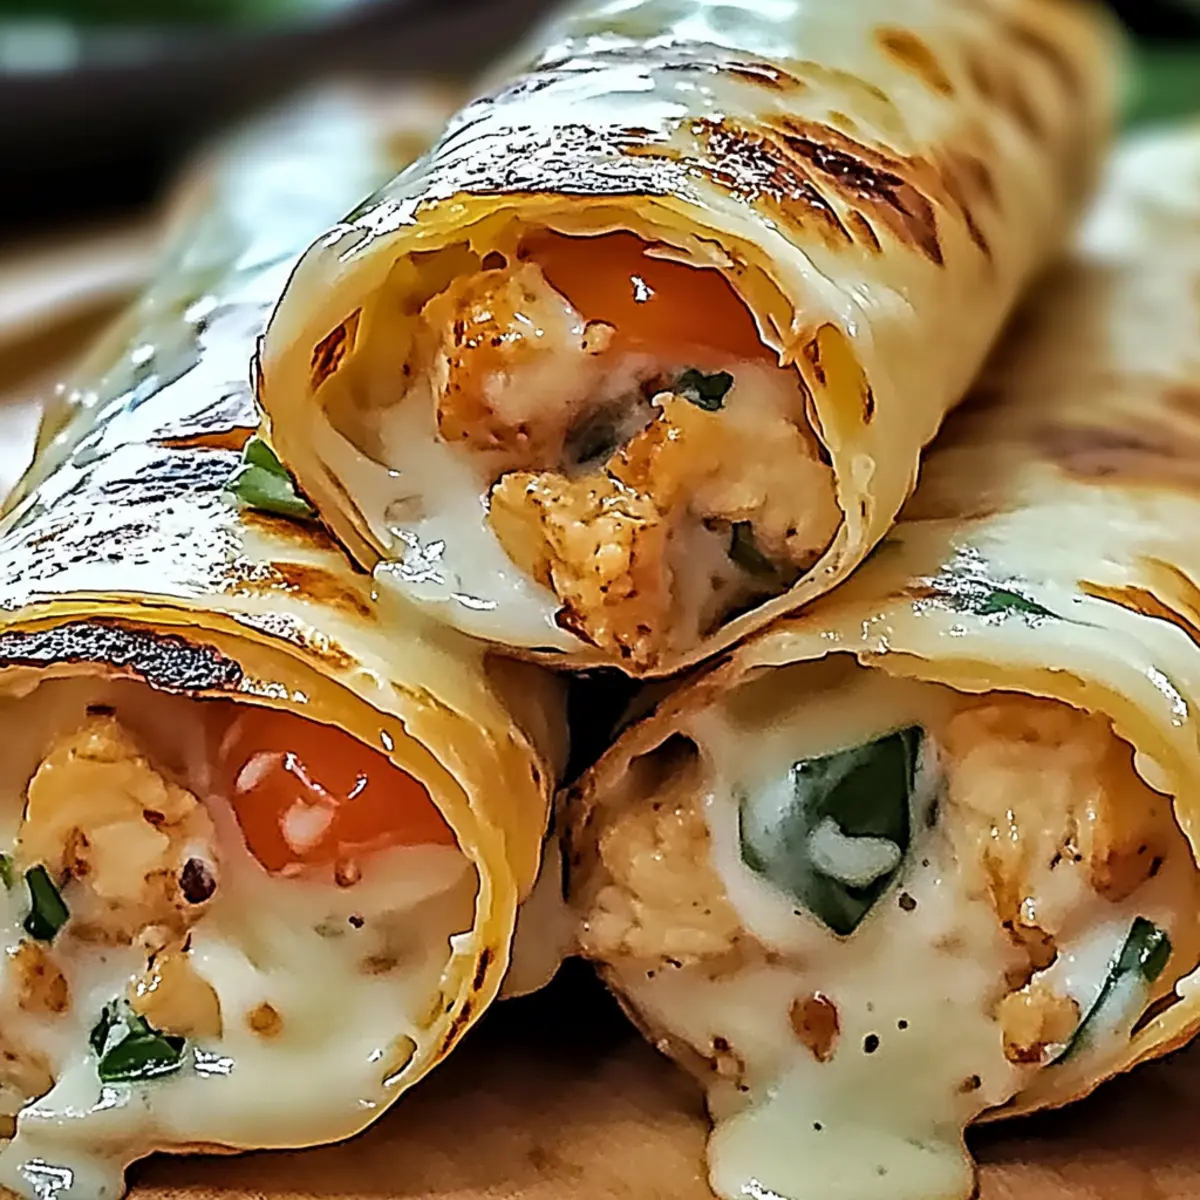
Layout your flour tortillas on a clean, flat surface. Evenly spread the creamy chicken filling across each tortilla, leaving about an inch of space on the edges. Top the filling with fresh spinach leaves, diced tomatoes, and sliced green onions for an added crunch and freshness. This balance of flavors will enhance your wraps and make them truly delightful.
Step 3: Fold and Roll
Carefully fold the sides of each tortilla inward to enclose the filling, then roll tightly from the bottom to secure all the ingredients. Make sure the wraps are sealed well to prevent any filling from escaping during cooking. Aim for a snug roll that keeps everything intact, making your Cheesy Garlic Chicken Wraps easy to flip later.
Step 4: Crisp the Wraps
Heat a non-stick skillet over medium heat. Once hot, place the wraps seam-side down in the skillet. Cook for about 2-3 minutes until the bottoms turn golden brown and crispy. Keep an eye on them to prevent burning, then flip the wraps carefully and cook the other side for an additional 2-3 minutes. This step adds that delightful crunch we all love!
Step 5: Serve
Remove the Cheesy Garlic Chicken Wraps from the skillet and let them cool for a minute before slicing them in half diagonally. This not only makes them easier to handle but also showcases the delicious filling inside. Serve them warm accompanied by your favorite dipping sauces for a fantastic meal that family and friends will rave about.
How to Store and Freeze Cheesy Garlic Chicken Wraps
Fridge: Store leftover wraps in an airtight container for up to 3 days to keep them fresh. Reheat in a skillet for the best texture.
Freezer: These wraps can be frozen for up to 2 months. To maintain flavor, wrap each one tightly in plastic wrap and then foil.
Reheating: For optimal taste and crunch, reheat frozen wraps in a skillet over medium heat for about 5-7 minutes, flipping halfway through.
Make-Ahead: Prepare the filling up to 24 hours in advance, store it in the fridge, and assemble the Cheesy Garlic Chicken Wraps just before cooking for best results.
Cheesy Garlic Chicken Wraps Variations & Substitutions
Feel free to make these Cheesy Garlic Chicken Wraps your own by adding personal touches that excite your taste buds!
-
Seafood Twist: Substitute chicken with cooked shrimp for a delightful seafood version, adding a light touch to your wraps.
Shrimp pairs beautifully with garlic, bringing that coastal flavor right to your kitchen. -
Turkey Delight: Swap chicken for shredded turkey for a heartier, leaner option that’s just as delicious.
Perfect for using up leftovers, turkey brings a rich flavor that complements the creamy filling. -
Vegetarian Option: Use black beans or chickpeas for a meatless meal that’s both nutritious and satisfying.
This swap provides protein and texture, making these wraps a fulfilling choice for everyone. -
Heat it Up: Add sliced jalapeños or crushed red pepper flakes to the filling for a spicy kick that warms the soul.
If you enjoy a little heat, don’t hesitate to spice things up—it’ll make your wraps unforgettable! -
Flavored Tortillas: Opt for spinach or sun-dried tomato tortillas to enhance flavor and presentation, turning a regular wrap into something special.
The added colors elevate not only the taste but also the visual appeal of your meal. -
Creamy Avocado: Mix in some diced avocado for an extra layer of creaminess that perfectly complements the garlic.
Avocado adds healthy fats and a luxurious texture, making every bite feel indulgent. -
Cheese Lovers: Boost the cheesy factor by adding some crumbled feta or sharp cheddar to the filling for a tangy flavor.
Cheese is always a crowd-pleaser, and these additions can make your wraps even more irresistible! -
Fresh Herbs: Incorporate fresh herbs like cilantro or parsley for a burst of freshness that brightens the whole dish.
Fresh herbs bring both color and flavor, enhancing your Cheesy Garlic Chicken Wraps!
Experimenting with these variations can transform your dinner into a new experience, so let your creativity shine! If you’re hungry for more flavor-packed meals, check out my Chicken Kofta Garlic or Honey Garlic Chicken recipes!
Expert Tips for Cheesy Garlic Chicken Wraps
-
Cool the Filling: Let the chicken mixture cool slightly before spreading on tortillas to prevent tearing. A little patience pays off in presentation!
-
Don’t Overfill: A common mistake is adding too much filling, which leads to soggy wraps. Keep the filling modest to maintain that perfect texture.
-
Tightly Roll: Ensure the wraps are rolled tightly and seam-side down in the skillet. This method keeps the filling secure while cooking, resulting in delicious Cheesy Garlic Chicken Wraps.
-
Use Fresh Ingredients: Fresh veggies and quality cheeses elevate the flavor immensely. Choosing the best ingredients ensures that every bite is bursting with taste.
-
Experiment with Variations: Feel free to swap proteins or add spice with jalapeños! Customizing these wraps makes them a versatile dish for everyone at the table.
Make Ahead Options
Cheesy Garlic Chicken Wraps are a fantastic choice for busy home cooks looking to save time during the week! You can prepare the chicken filling up to 24 hours in advance; simply mix the shredded chicken, cheeses, mayonnaise, and spices, then store it in an airtight container in the refrigerator. To maintain freshness, assemble the wraps just before serving—this ensures the tortillas stay crispy. If you want to make even more ahead, leftovers can be kept in the fridge for up to 3 days or frozen for up to 2 months. When ready to enjoy, crisp the assembled wraps in a skillet for that golden-brown finish, resulting in a meal that’s just as delicious as when freshly made!
What to Serve with Cheesy Garlic Chicken Wraps
Transform your dinner table into a delightful feast with these perfect accompaniment ideas that truly elevate your meal experience.
-
Crispy Sweet Potato Fries: The sweet, crispy texture adds a delightful contrast, enhancing the savory flavor of your wraps. These irresistible golden fries are a family favorite!
-
Fresh Garden Salad: A light and refreshing salad with vibrant greens and a tangy dressing provides a perfect balance to the richness of the wraps. Toss in some cherry tomatoes, cucumbers, and a zesty vinaigrette.
-
Creamy Coleslaw: This crunchy side brings in a sweet and tangy element, complementing the cheesy filling with its crispness and creaminess. It’s a classic pairing that everyone loves.
-
Roasted Vegetables: Seasoned and roasted seasonal vegetables add color and nutrition while their natural sweetness contrasts beautifully with the savory cheesy wraps.
-
Stuffed Avocado: Cut an avocado in half and fill it with a zesty salsa or fresh pico de gallo for an added layer of flavor. This creamy addition brings an extra boost of healthy fats to your meal.
-
Chilled Lemonade or Iced Tea: A refreshing drink like homemade lemonade or iced tea cleanses the palate between bites and enhances the overall dining experience. Serve it ice-cold for the best taste!
Each of these accompaniments offers a unique texture or flavor twist, creating a well-rounded meal that everyone at the table will enjoy!
Cheesy Garlic Chicken Wraps Recipe FAQs
What type of chicken should I use in the Cheesy Garlic Chicken Wraps?
Absolutely! I recommend using cooked shredded chicken for the best texture and flavor. You can easily swap it for cooked shrimp, turkey, or even go vegetarian with black beans or chickpeas, depending on your preferences.
How should I store leftover Cheesy Garlic Chicken Wraps?
For maximum freshness, store leftovers in an airtight container in the refrigerator for up to 3 days. When you’re ready to reheat, pop them in a skillet over medium heat for about 3-5 minutes until they’re warm and crispy again.
Can I freeze Cheesy Garlic Chicken Wraps?
Yes, these wraps can be frozen for up to 2 months! To do this, wrap each individual wrap tightly in plastic wrap and then again in aluminum foil to prevent freezer burn. When you’re ready to enjoy, simply reheat them in a skillet for about 5-7 minutes over medium heat, flipping halfway through for even crispness.
What if my wraps are falling apart when I’m assembling them?
The more the merrier! To prevent tearing, make sure the filling is cool before spreading it on the tortillas, and don’t overfill them. Another tip is to lay your tortilla flat and ensure you’re rolling it tightly from the bottom—this makes a huge difference in keeping everything together.
Are these wraps suitable for kids with dairy allergies?
If you’re concerned about dairy, you can easily modify the recipe to be dairy-free. Simply use a dairy-free cream cheese and shredded cheese alternative. This way, everyone in the family can enjoy the delightful flavors of your Cheesy Garlic Chicken Wraps!
Cheesy Garlic Chicken Wraps: Quick Comfort Food Made Easy
Ingredients
Equipment
Method
- In a large bowl, combine the shredded cooked chicken, mozzarella cheese, softened cream cheese, mayonnaise, minced garlic, Italian seasoning, salt, and black pepper. Mix until smooth.
- Layout your flour tortillas on a clean surface. Spread the creamy chicken filling across each tortilla, leaving about an inch of space on the edges. Top with spinach, diced tomatoes, and sliced green onions.
- Fold the sides of each tortilla inward to enclose the filling, then roll tightly from the bottom.
- Heat a non-stick skillet over medium heat. Cook the wraps seam-side down for 2-3 minutes until golden brown, then flip and cook the other side for another 2-3 minutes.
- Remove wraps from the skillet, let cool for a minute, slice in half diagonally, and serve warm.
Leave a Reply