
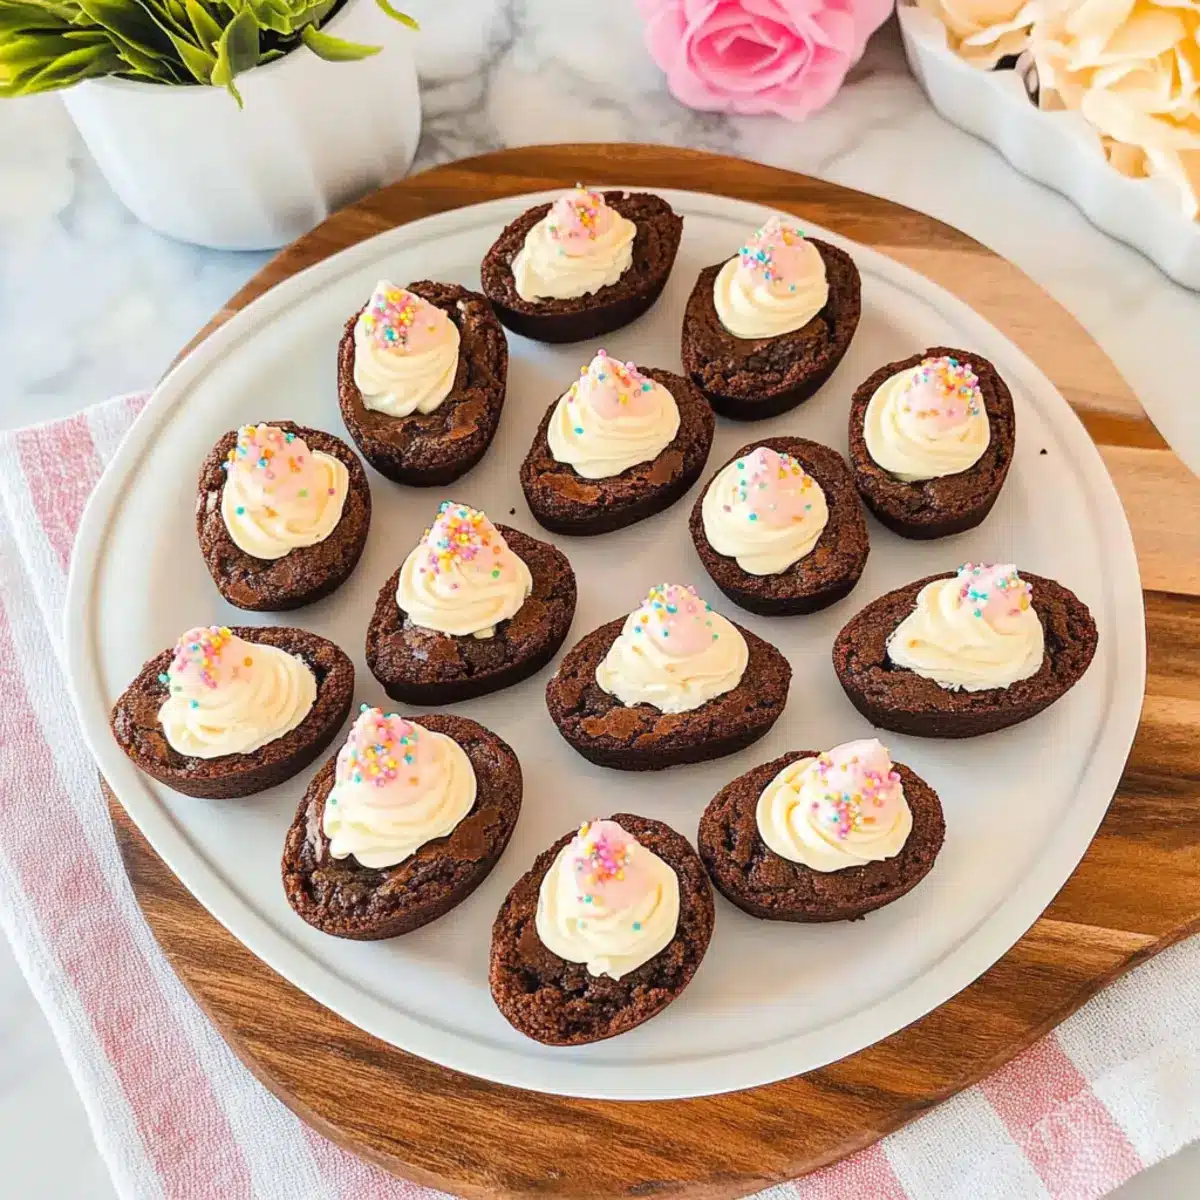
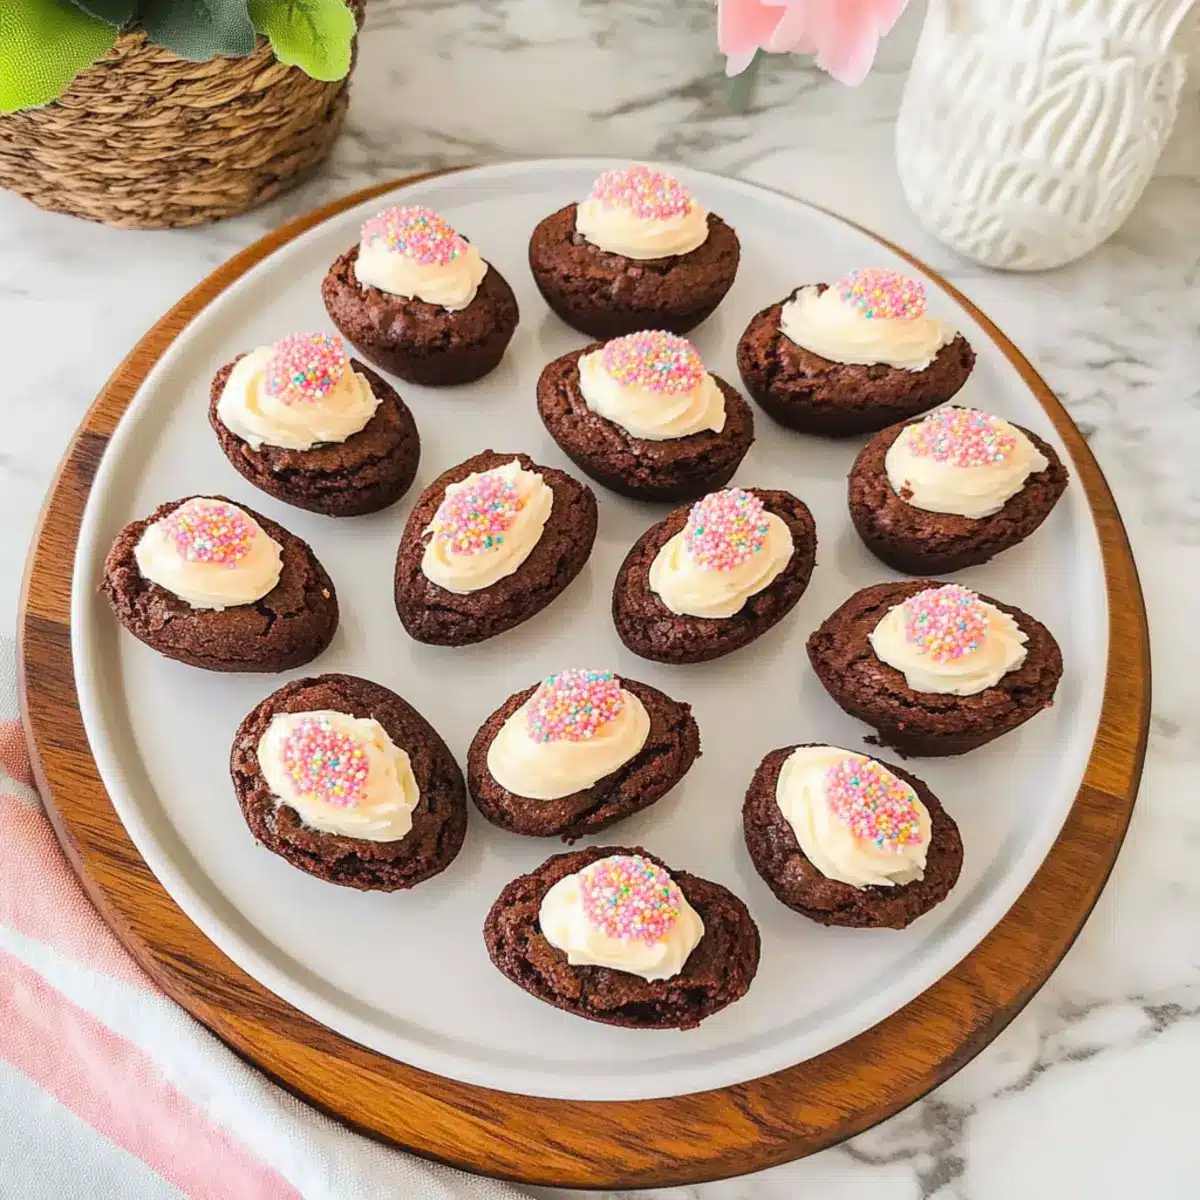
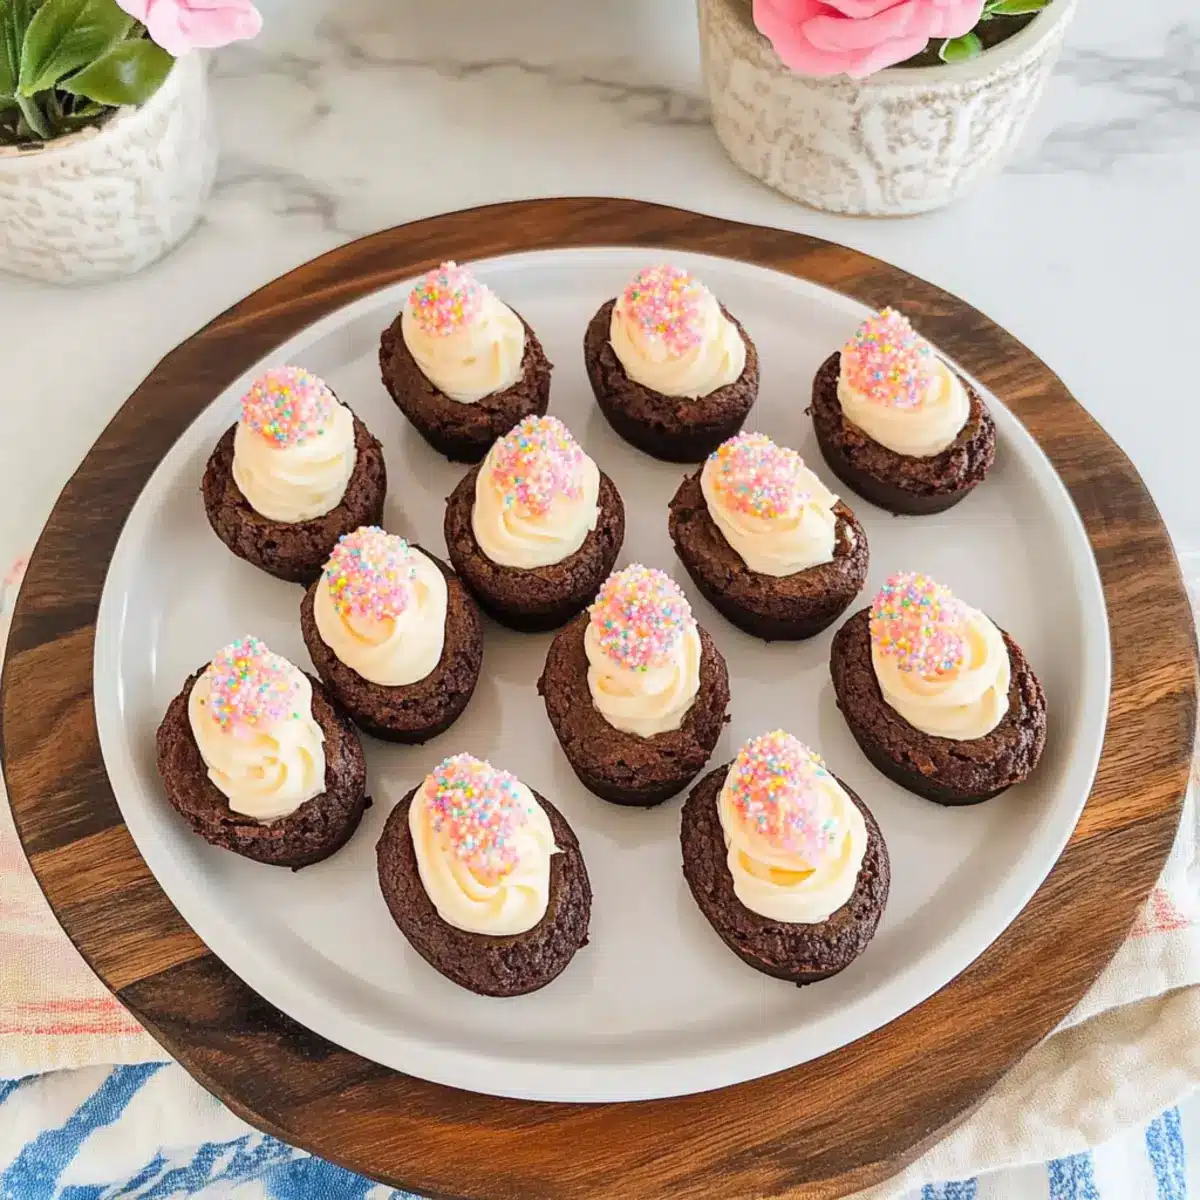
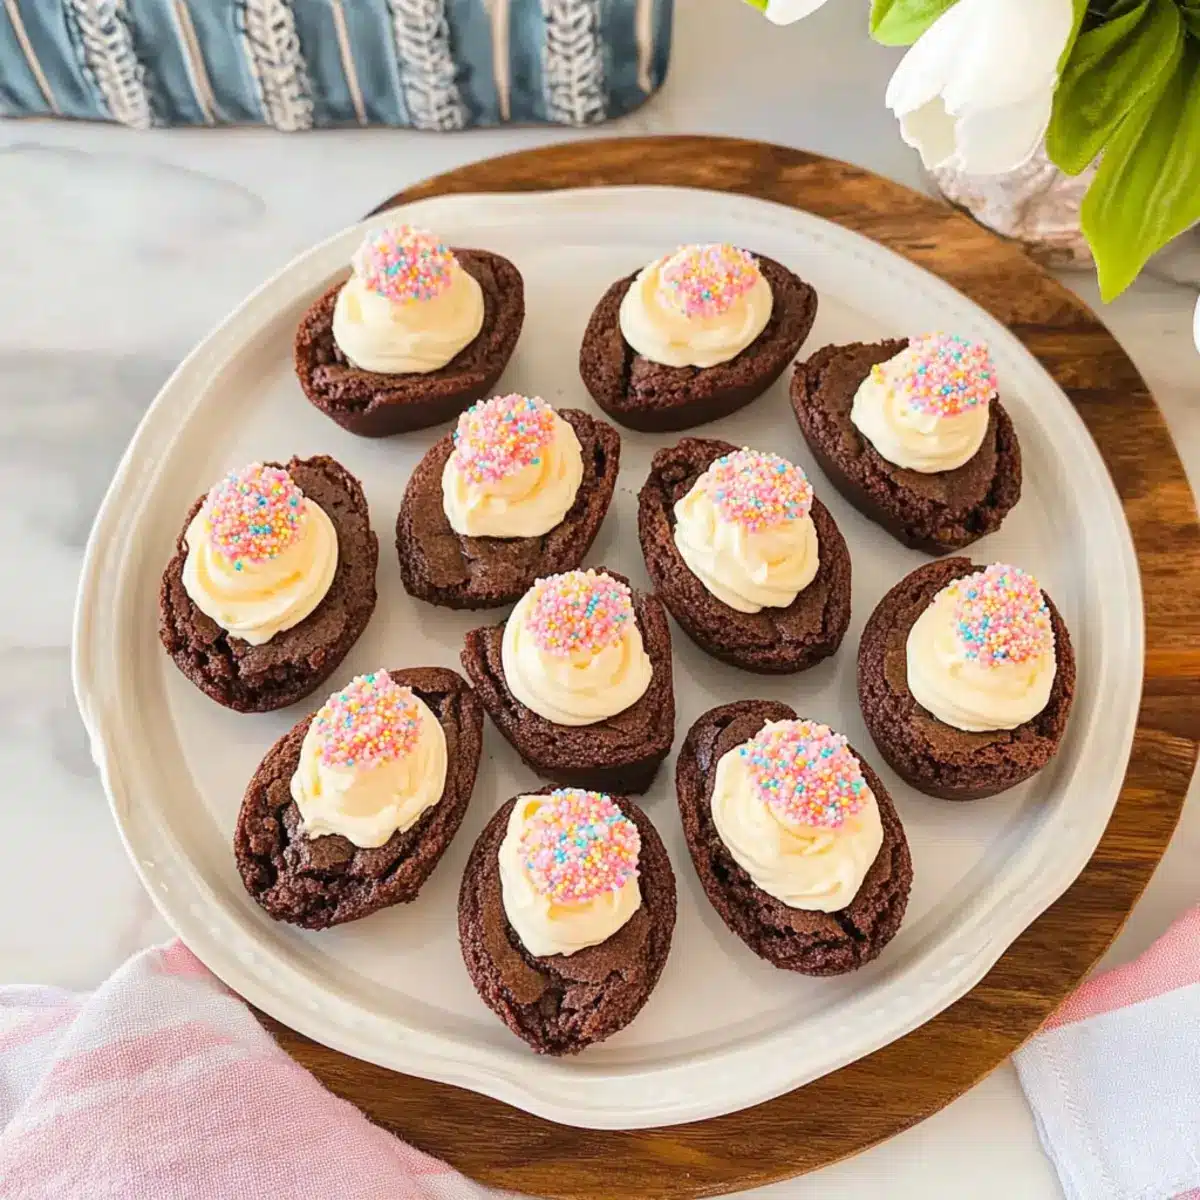
As spring rolls in, our kitchens blossom with vibrant flavors and festive treats. These Easter Deviled Brownies offer a delightful twist on tradition—sweet, fudgy brownies magically transformed to resemble everyone’s favorite deviled eggs! With just a boxed brownie mix at the helm, this easy recipe requires minimal prep and is perfect for getting little hands involved in the fun. Not only are these treats adorable and kid-friendly, but they also make for a budget-friendly dessert that’ll brighten any Easter gathering. Imagine the delight on your loved ones’ faces as they bite into these whimsical morsels, coated in creamy vanilla frosting and adorned with playful sprinkles. Ready to add a sprinkle of joy to your celebration? Let’s hop into this fun recipe together!
Why Are These Brownies So Fun?
Uniquely Festive: These Easter Deviled Brownies bring a playful spin to conventional desserts, making them the star of your spring celebrations. Easy Preparation: Utilizing a boxed brownie mix, this recipe is perfect for busy bakers or first-timers, ensuring delicious results without stress. Kid-Friendly Fun: Get the little ones involved by allowing them to help decorate these whimsical treats! Impressive Presentation: With their fun shape and vibrant frosting, these brownies promise to wow your guests and add color to any dessert table. For more delightful ideas, check out these Deviled Strawberries Cheesecake which also bring a creative twist to classic flavors!
Easter Deviled Brownies Ingredients
Get ready to create these delightful treats!
For the Brownies
• Fudgy Brownie Mix – This serves as the base for a rich, chocolatey flavor. You can use any standard brownie mix as a substitute.
• Eggs – Essential for binding the ingredients together; use the number indicated on the box.
• Oil – Adds moisture; follow package instructions for best results.
• Water – Helps create the batter consistency; refer to the brownie mix packaging.
For the Frosting
• Vanilla Frosting – Provides sweetness and mimics the look of deviled egg yolks; a cream cheese frosting can add a tangy twist.
For Decoration
• Festive Sprinkles – Use pastel or gold sprinkles to enhance the Easter theme and make your brownies pop.
Step‑by‑Step Instructions for Easter Deviled Brownies
Step 1: Preheat the Oven
Begin by preheating your oven to the temperature specified on your brownie mix package, typically around 350°F (175°C). This ensures the oven is perfectly hot for baking. While the oven warms, gather your ingredients and equipment, including a mixing bowl and spatula, setting the stage for making your delightful Easter Deviled Brownies.
Step 2: Prepare the Brownie Batter
In a mixing bowl, combine the brownie mix, eggs, oil, and water according to the package instructions. Using a spatula, stir until the ingredients are just combined and the batter is smooth, taking care not to overmix. The consistency should be thick yet pourable, emanating a delicious chocolate aroma that promises rich flavors, essential for your Easter Deviled Brownies.
Step 3: Prep the Molds
Lightly spray your egg-shaped silicone molds with nonstick spray to ensure easy removal after baking. This step is crucial as it prevents the brownies from sticking to the molds. Ensure the molds are arranged on a baking sheet for easy transport to and from the oven, as they will hold the luscious brownie batter like a special Easter treat.
Step 4: Fill the Molds
Carefully fill each mold cavity with the brownie batter, ensuring to only fill them about ¾ full. This will allow for proper rising without overflowing. As you fill the molds, take a moment to appreciate how your Easter Deviled Brownies will transform, resembling the classic deviled egg shape everyone loves.
Step 5: Bake the Brownies
Place the filled molds in the preheated oven and bake according to the package instructions, typically for 20-25 minutes. A visual cue for doneness is when the tops appear set, and a toothpick inserted into the center comes out with just a few moist crumbs. Keep an eye on them as they bake to avoid overcooking, which could alter their fudgy texture.
Step 6: Create Cavities
Once baked, remove the brownie molds from the oven and while still warm, use a tablespoon to gently press a small cavity into the center of each brownie. This step is vital for mimicking the yolk of a deviled egg. Allow the brownies to cool in the molds for a few minutes before carefully transferring them to a wire rack to cool completely.
Step 7: Frost the Brownies
Once the brownies have cooled completely, it’s time to frost! Using a piping bag, pipe the vanilla frosting into the cavities you’ve created, mimicking the yolks of deviled eggs. The frosting should be smooth and luscious, filling each cavity beautifully and adding visual delight to your Easter Deviled Brownies.
Step 8: Add Festive Sprinkles
To finish off, sprinkle festive decorations atop the frosted brownies. Choose pastel or gold sprinkles to enhance the Easter theme, making your treats not only delicious but also visually appealing. Each sprinkle adds a touch of fun, ensuring these Easter Deviled Brownies are ready to impress your guests and delight your family.
Easter Deviled Brownies Variations & Substitutions
Feel free to get creative and make these delightful brownies your own with these fun ideas!
- Homemade Brownies: Swap out the boxed mix for a homemade thick brownie recipe, ensuring it remains fudgy.
- Cream Cheese Frosting: Use cream cheese frosting in place of vanilla for a tangy twist that mirrors classic deviled egg flavors.
- Colorful Frostings: Experiment with vibrant colored frostings to enhance the visual appeal—think pinks, greens, or purples for a fun spring celebration.
- Alternative Sprinkles: Try using edible glitter or chocolate shavings for a different decorative flair—your brownies will be show-stoppers!
- Nutty Addition: Fold in chopped nuts like walnuts or pecans into the brownie batter for a delightful crunch.
- Berry Burst: Top your brownies with fresh raspberries or strawberries for a fruity freshness that complements the sweetness.
- Fillings Galore: For added surprise, fill the cavity with different fillings like peanut butter or caramel—just as appealing as the frosting!
- Spice It Up: If you’re feeling adventurous, add a pinch of cayenne or a dash of cinnamon to the brownie batter for a subtle kick.
For more fun and whimsical desserts, you might also love making some Deviled Strawberries Cheesecake. Each of these variations adds a unique touch, promising joy for your family during this festive season!
Tips for the Best Easter Deviled Brownies
- Warm Pressing: Ensure to press the cavity into the brownies while they are still warm for clear indentations that replicate the look of deviled eggs.
- Cool Completely: Allow the brownies to cool entirely before adding frosting; this prevents the frosting from melting and losing its shape.
- Perfect Piping: Use a star piping tip for frosting to achieve a professional-looking swirl and enhance the overall appearance of your Easter Deviled Brownies.
- Storage Know-How: Store frosted brownies at room temperature up to three days; refrigerate if it’s warm, and freeze unfrosted brownies for up to two months for future fun!
Storage Tips for Easter Deviled Brownies
- Room Temperature: Store frosted Easter Deviled Brownies in an airtight container for up to 3 days. If your kitchen is warm, it’s best to refrigerate them to maintain freshness.
- Freezer: Unfrosted brownies can be frozen for up to 2 months. Wrap them tightly in plastic wrap and place them in an airtight container to prevent freezer burn.
- Thawing: When ready to frost, simply thaw the unfrosted brownies at room temperature for a few hours. Once thawed, pipe your delicious frosting and add festive sprinkles for that special touch!
- Make-Ahead: For convenience, consider baking the brownies 1–2 days ahead and storing them unfrosted in an airtight container until you’re ready to decorate and serve.
Make Ahead Options
These Easter Deviled Brownies are perfect for busy home cooks looking to save time during the celebration! You can bake the brownies up to 2 days in advance and store them unfrosted in an airtight container at room temperature. This method ensures they remain soft and fudgy. When you’re ready to serve, simply frost them on the day of your gathering to keep the frosting fresh and visually appealing. If needed, you can even freeze the unfrosted brownies for up to 2 months—thaw them completely, and then add your frosting and festive sprinkles right before serving. This way, you’ll have delightful Easter Deviled Brownies ready to impress your family and friends!
What to Serve with Easter Deviled Brownies
These whimsical brownies can effortlessly elevate your springtime gatherings when paired with delightful choices that enhance their festive charm.
-
Fresh Fruit Salad: A vibrant mix of berries and citrus adds a refreshing contrast to the rich chocolate and creamy frosting.
-
Vanilla Ice Cream: The creamy, cold sweetness beautifully complements the fudgy brownies, creating a comforting and indulgent dessert experience.
-
Mint Chocolate Chip Milkshake: This cool, minty drink offers a delightful flavor pairing, bringing a whimsical twist to your Easter celebration.
-
Coffee or Espresso: A robust coffee enhances the chocolate flavor, offering a delightful contrast to the sweetness of the brownies.
-
Chocolate Dipped Strawberries: These fruit treats echo the chocolate theme while adding a fresh, juicy element to your dessert spread.
-
Carrot Cake Slices: Classic and seasonal, moist carrot cake harmonizes with the festive spirit of the brownies while providing a unique flavor profile.
-
Lemonade or Iced Tea: Bright and refreshing beverages cut through the richness, providing a perfect palate cleanser for your guests.
-
Peanut Butter Cups: Bridging nutty sweetness and chocolate, these candies make a playful addition that echoes the fun theme of your Easter Deviled Brownies.
Easter Deviled Brownies Recipe FAQs
What type of brownie mix should I use?
You can use any standard fudgy brownie mix for these Easter Deviled Brownies, and I highly recommend a mix that emphasizes a rich chocolate flavor. If you’re feeling adventurous, a homemade thick brownie recipe can work too, but make sure it’s not overly cakey!
How should I store the frosted brownies?
Store your frosted Easter Deviled Brownies in an airtight container at room temperature for up to 3 days. If your kitchen temperatures are warm, it’s safest to refrigerate them to maintain their freshness and avoid melting the frosting.
Can I freeze these brownies?
Absolutely! Unfrosted brownies can be frozen for up to 2 months. Simply wrap each brownie tightly in plastic wrap and place them in an airtight container. When you’re ready to enjoy them, thaw the brownies at room temperature for a few hours before adding the frosting.
What if my brownies don’t have clear indentations after pressing?
If your brownies didn’t create clear indentations, it might be that you pressed the cavities too late or didn’t press hard enough while they were warm. Next time, make sure to press the cavities while they’re still warm and use a tablespoon to create a deeper indent, ensuring they resemble the ‘yolk’ of a deviled egg!
Are there any dietary considerations for these brownies?
If you’re serving these brownies to people with dietary restrictions, consider using an egg substitute like flaxseed meal or unsweetened applesauce if you need them to be egg-free. Additionally, for those with gluten allergies, look for gluten-free brownie mixes available at most grocery stores. Always check the ingredient labels to avoid allergens like nuts!
Easter Deviled Brownies That Will Wow Your Guests
Ingredients
Equipment
Method
- Preheat your oven to the temperature specified on your brownie mix package, typically around 350°F (175°C).
- In a mixing bowl, combine the brownie mix, eggs, oil, and water according to the package instructions. Stir until just combined.
- Lightly spray your egg-shaped silicone molds with nonstick spray.
- Carefully fill each mold cavity with the brownie batter, ensuring to fill them about ¾ full.
- Place the filled molds in the preheated oven and bake according to the package instructions, typically for 20-25 minutes.
- Remove the brownie molds from the oven and, while still warm, use a tablespoon to gently press a small cavity into each brownie.
- Once the brownies have cooled completely, pipe the vanilla frosting into the cavities.
- Sprinkle festive decorations atop the frosted brownies.
Leave a Reply