
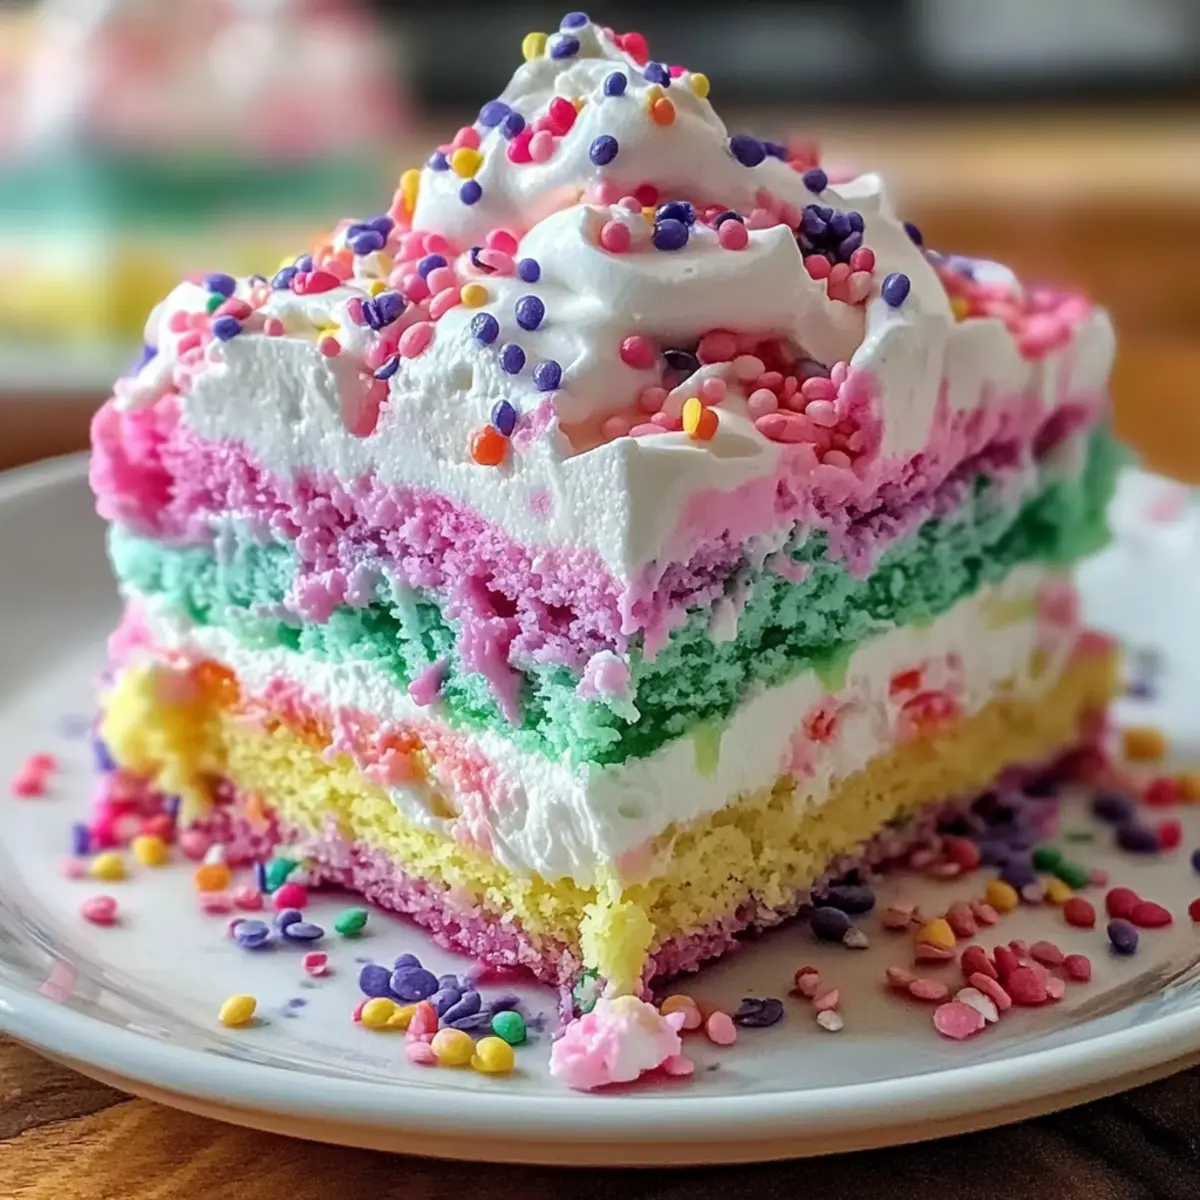
As I flipped through my recipe box, I stumbled upon a colorful gem: the Easter Poke Cake. This deliciously moist creation features cheerful pastel swirls and a creamy vanilla pudding soaking into every slice, topped with a light layer of fluffy Cool Whip. Not only is this cake a feast for the eyes, but it is also an incredibly easy, kid-friendly dessert that will shine at your Easter brunch or spring potluck. Imagine cutting into a cake that’s not just packed with sweetness but also invites creativity with every bite! And if you’re feeling adventurous, you can easily swap in different pudding flavors, like lemon or pistachio, to match your mood. Ready to bring a little springtime cheer to your table? Let’s dive into this delightful recipe that promises to captivate everyone!

Why is Easter Poke Cake a Must-Try?
Vibrant Colors: The Easter Poke Cake is an eye-catching dessert that adds a pop of cheer to any gathering! Easy to Make: Even novice bakers can whip this up with minimal fuss, making it perfect for families. Kid-Friendly Fun: It’s a great way to engage little ones in the kitchen while creating sweet, pastel swirls. Versatile Flavor: With options like lemon or pistachio pudding, you can customize this cake to fit any occasion. Crowd Pleaser: This dessert is sure to impress guests at your Easter brunch or spring potluck, ensuring every slice disappears fast! Creative Toppings: Feel free to experiment with sprinkles or fresh fruit for that extra festive touch.
Easter Poke Cake Ingredients
For the Cake
- Boxed white cake mix – Provides the structure and sweetness; yellow cake mix can be used as a substitute.
- Eggs – Binds the cake and adds moisture; feel free to substitute with an egg replacement for a vegan option.
- Oil – Adds richness and moisture; applesauce offers a lighter alternative.
- Water – Hydrates the mix; consider using milk for an extra creamy touch.
For the Swirls
- Gel food coloring – Creates beautiful pastel colors; liquid food coloring is an option but may yield softer hues.
For the Pudding
- Instant vanilla pudding – Infuses flavor and moisture that soaks into the cake; lemon or pistachio pudding can be swapped for a twist.
- Cold milk – Used to make the pudding; any milk—dairy or non-dairy—works well here.
For the Topping
- Cool Whip – Adds a fluffy, creamy texture; substitute with homemade whipped cream or a dairy-free version if preferred.
- Easter sprinkles or decorations – A fun way to enhance presentation; optional yet recommended for a festive flair.
Now that you have all the ingredients, you’re ready to create your stunning Easter Poke Cake that will delight taste buds and leave everyone in awe!
Step‑by‑Step Instructions for Easter Poke Cake
Step 1: Preheat the Oven
Start by preheating your oven to 350°F (175°C) and greasing a 9×13-inch baking dish with cooking spray or butter. This step is essential to ensure your Easter Poke Cake doesn’t stick to the pan, allowing for easy release once baked. Set aside the greased dish as you prepare your cake batter, eager for the colorful magic to unfold.
Step 2: Prepare the Cake Batter
In a mixing bowl, combine the boxed white cake mix with the eggs, oil, and water according to the package instructions. Mix everything until the batter is smooth and creamy, aiming for a consistency free of lumps. This should take about 2-3 minutes with an electric mixer on medium speed, ensuring each ingredient integrates perfectly for a tender cake base.
Step 3: Add Color to the Batter
Once your batter is smooth, divide it into 3-4 separate bowls, depending on how many pastel colors you want to create. Add gel food coloring to each bowl, mixing gently until you achieve your desired pastel shades. Be careful not to overmix, as you want those beautiful colors vibrant and distinct for your Easter Poke Cake’s stunning appearance.
Step 4: Create the Beautiful Swirls
With your colorful batters ready, spoon them alternately into the prepared baking dish. After adding all the colors, gently swirl them together using a knife or a skewer. This step requires a light hand to create a lovely marbled effect without completely blending the colors, making the Easter Poke Cake visually appealing as it bakes.
Step 5: Bake the Cake
Place the prepared cake batter in the oven and bake for 28-32 minutes, or until a toothpick inserted in the center comes out clean. As it bakes, your kitchen will fill with the lovely scent of sweet cake. Keep an eye on it in the final minutes to prevent overbaking; it should be golden on top and spring back when gently pressed.
Step 6: Poke the Holes
Once the cake has baked, remove it from the oven and let it cool in the pan for 15-20 minutes. After cooling, take the handle of a wooden spoon and poke holes about every inch across the surface of the cake. This is a crucial step for your Easter Poke Cake, as it allows the pudding mixture to seep in, infusing the cake with creamy vanilla goodness.
Step 7: Prepare the Pudding Mixture
In a separate bowl, whisk together the instant vanilla pudding and cold milk until well combined and slightly thickened. This should take about 2 minutes. The pudding will help layer even more flavor into the cake, so make sure it is mixed thoroughly for an even consistency before pouring over the poked cake.
Step 8: Pour the Pudding Over the Cake
Carefully pour the prepared pudding mixture evenly over the cooled cake, ensuring it fills the holes you created. Use a spatula if necessary to spread it out. You’ll notice the pudding soaking into the cake, which is exactly what you want for a moist Easter Poke Cake that’s bursting with flavor!
Step 9: Chill the Cake
Place the cake in the refrigerator to chill for at least 2 hours, but ideally overnight. Chilling helps the pudding set and enhances the flavors, making each slice even more delightful. Cover the cake loosely with plastic wrap to keep it fresh while it cools, creating anticipation for the delicious treat to come.
Step 10: Add the Topping
When you’re ready to serve, spread a generous layer of Cool Whip over the chilled cake. Use a spatula for smooth coverage, and feel free to get creative! Decorate with colorful sprinkles or fresh fruits to elevate the presentation of your vibrant Easter Poke Cake, making it a festive centerpiece for your gathering.
Step 11: Serve and Enjoy
Keep the decorated cake chilled until you’re ready to slice and serve. When it’s time, cut generous squares to allow everyone to enjoy the moist goodness of the cake layered with creamy pudding. Every slice is a celebration of flavor and color, making your Easter Poke Cake the highlight of the dessert table!

Expert Tips for the Best Easter Poke Cake
- Mix Colors Gently: Be cautious not to overmix the batter after adding food coloring; this helps maintain distinct pastel swirls in your Easter Poke Cake.
- Pudding Timing: Work quickly when pouring the pudding over the cake to ensure it seeps into the holes evenly—this step is vital for maximum flavor!
- Chill for Flavor: Allow the cake to chill for at least 2 hours, but overnight is best. This enhances the flavors and ensures a perfectly set pudding layer.
- Creative Toppings: Don’t hesitate to experiment with toppings! Fresh fruits or festive sprinkles can personalize your Easter Poke Cake while adding an extra burst of flavor.
- Check for Doneness: Use a toothpick to test for doneness before removing the cake from the oven. It should come out clean, indicating a perfectly baked treat.
Easter Poke Cake Variations & Substitutions
Feel free to explore exciting twists on this delightful dessert to suit your taste and creativity!
-
Lemon Pudding: Swap the vanilla pudding for lemon pudding for a zesty, citrusy flavor that brightens each bite.
-
Pistachio Pudding: Try using pistachio pudding for a nutty, unique twist that adds both flavor and a hint of green for a festive look.
-
Almond Milk: Replace regular milk with almond milk in the pudding for a nutty flavor. This substitution enhances the overall dish while keeping it dairy-free.
-
Applesauce Substitute: Use applesauce instead of oil to create a lighter version of the cake without sacrificing moisture.
-
Dairy-Free Topping: Replace Cool Whip with a dairy-free whipped topping to accommodate those avoiding dairy, while still giving that fluffy finish that everyone loves.
-
Chocolate Swirls: Add cocoa powder to some of the cake batter for delicious chocolate swirls that bring a rich flavor dimension to your Easter Poke Cake.
-
Fruity Toppings: Consider using fresh strawberries or berries as a topping instead of sprinkles for a healthier and refreshing addition.
-
Spice it Up: Add cinnamon or nutmeg to the cake batter for a warm, spiced flavor that is perfect for spring gatherings.
Whether you pick a fruity topping or get adventurous with nuts, feel free to check out my other recipes like Chai Cake Decadent and Toffee Crunch Cake for more inspiration!
Make Ahead Options
These colorful Easter Poke Cakes are perfect for meal prep, allowing you to spend less time in the kitchen when the celebration arrives! You can prepare the cake base up to 24 hours in advance and refrigerate it covered to maintain freshness. The pudding can also be made ahead; just whisk it together up to 2 days before serving and store it in the fridge. Once you’re ready to serve, simply poke the holes in the cooled cake, pour over the prepared pudding, and chill for at least 2 hours, or overnight if you have the time. This way, you’ll ensure that the flavors meld beautifully and that each slice is just as delicious as if freshly made!
How to Store and Freeze Easter Poke Cake
Fridge: Keep your Easter Poke Cake in an airtight container or covered with plastic wrap in the refrigerator for up to 3-4 days. This will maintain its moisture and flavor.
Freezer: If you want to freeze it, slice the cake and wrap each piece tightly in plastic wrap, then place in a zip-top bag or airtight container. It will keep well for up to 2 months.
Thawing: To enjoy your frozen Easter Poke Cake, transfer the desired slices to the fridge the night before serving. This allows them to thaw gradually while maintaining their fluffy texture.
Reheating: If you prefer a warm slice, place it in the microwave for about 15-20 seconds. Just enough to take the chill off without compromising its creamy pudding goodness!
What to Serve with Easter Poke Cake?
Elevate your festive gathering by pairing this delightful treat with a variety of sides and drinks that enhance its sweet wonder.
- Fresh Berries: Juicy strawberries or blueberries add a tart burst that balances the cake’s sweetness, creating a refreshing bite.
- Creamy Vanilla Ice Cream: A classic scoop complements the moist cake, adding creaminess that melts beautifully with each forkful.
- Spring Salad: Crisp mixed greens adorned with citrus segments and a light vinaigrette provide a vibrant, fresh contrast to the cake.
- Lemonade Punch: A tangy, sparkling drink adds a lively element to your table, perfectly quenching thirst while enhancing the cake’s fruity notes.
- Chocolate-Covered Almonds: For an indulgent touch, these offer a crunchy texture and nutty richness, beautifully contrasting the soft cake.
- Mini Carrot Cupcakes: Bring in a different sweet treat while keeping with the spring theme, making for a fun variety for your guests!
Imagine the joy of satisfying both sweet and savory cravings while celebrating the season, making every gathering memorable!

Easter Poke Cake Recipe FAQs
How do I select ripe ingredients?
Absolutely! For a moist and delicious cake, choose fresh eggs with no cracks, and check the expiration date on your boxed cake mix. Using room temperature eggs will help create a lighter texture in your Easter Poke Cake. If you’re using fruit for decoration, select berries that are vibrant in color and firm to the touch.
How should I store leftovers?
Store your Easter Poke Cake in an airtight container or cover it with plastic wrap in the refrigerator. It will stay fresh for up to 3-4 days. Keeping it chilled helps maintain its moisture and flavor while, of course, keeping the delicious pudding intact!
Can I freeze my Easter Poke Cake?
Absolutely! To freeze your Easter Poke Cake, slice it into individual portions and tightly wrap each piece in plastic wrap. Then, place the wrapped slices in a zip-top bag or an airtight container. Your cake can be frozen for up to 2 months. When you’re ready to enjoy it again, simply thaw the slices in the fridge overnight for a perfectly textured dessert.
What if my pudding doesn’t set properly?
Very! If your pudding doesn’t set, it might be that the milk wasn’t cold enough or it was mixed too slowly. For a perfectly set pudding, whisk the instant pudding with cold milk vigorously for about 2 minutes until it thickens. If you find your pudding still isn’t thick enough, you can always add an extra tablespoon of pudding mix and whip it again.
Are there any dietary considerations I should be aware of?
Certainly! For those with allergies, verify that your boxed cake mix is free of gluten and other allergens, as these can vary by brand. Additionally, if you’re preparing this dessert for someone with lactose intolerance, you can substitute the Cool Whip with a dairy-free version or homemade whipped coconut cream.
Easter Poke Cake: A Fun, Moist, and Colorful Delight!
Ingredients
Equipment
Method
- Preheat your oven to 350°F (175°C) and grease a 9x13-inch baking dish.
- Combine the boxed white cake mix with the eggs, oil, and water according to package instructions until smooth.
- Divide the batter into 3-4 bowls and add gel food coloring to each bowl.
- Spoon the colored batters alternately into the baking dish and create swirls using a knife or skewer.
- Bake for 28-32 minutes, or until a toothpick inserted comes out clean.
- Cool the baked cake for 15-20 minutes, then poke holes with the handle of a wooden spoon.
- Whisk together the instant pudding and cold milk until thickened.
- Pour the pudding mixture over the cooled cake and ensure it fills the poked holes.
- Chill the cake in the refrigerator for at least 2 hours, ideally overnight.
- Spread a layer of Cool Whip over the chilled cake and decorate with sprinkles or fruits.
- Serve chilled and enjoy your delectable Easter Poke Cake!
Leave a Reply