
Walking into a cozy kitchen enveloped in the warm aroma of melting chocolate and sweet caramel is like stepping into a hug. Today, I’m excited to share my Ultimate Twix-Style Cookies, an indulgence that brings the iconic candy bar to life right on your baking sheet. With a rich buttery shortbread base and a gooey caramel layer topped with luscious chocolate, these cookies are a delightful pick-me-up for any occasion. They’re incredibly easy to whip up, making them a perfect weekend project whether you’re an experienced baker or just starting out. Plus, they’re a guaranteed crowd-pleaser! Who wouldn’t want to dive into a cookie that’s as comforting as it is delicious? Curious about how to create this sweet treat that’s sure to steal the show? Let’s get started!
Why Are These Cookies So Irresistible?
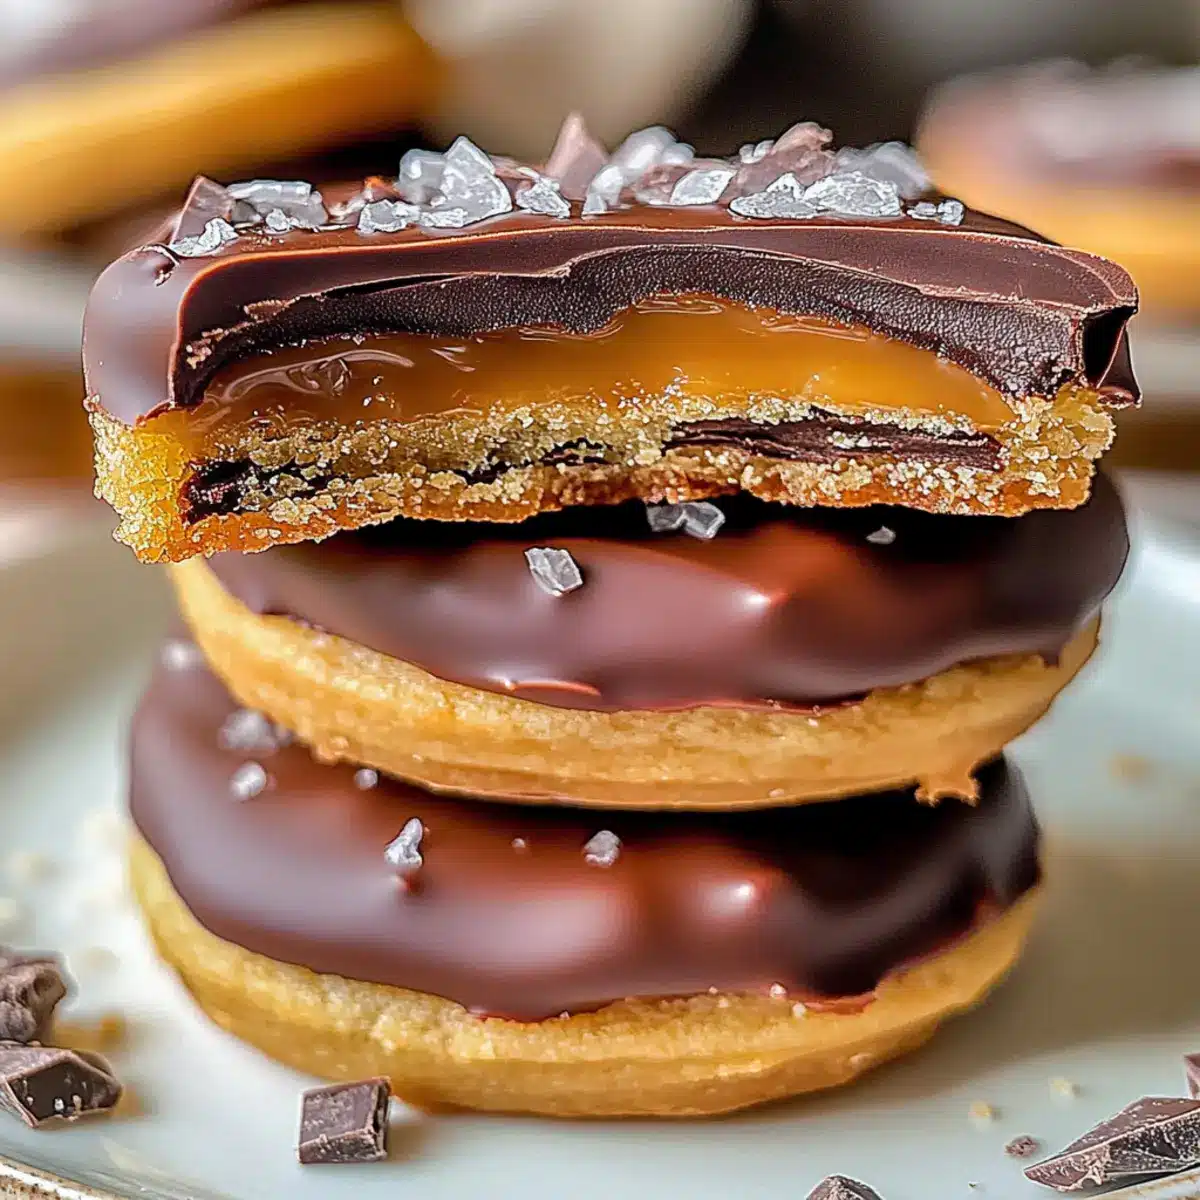
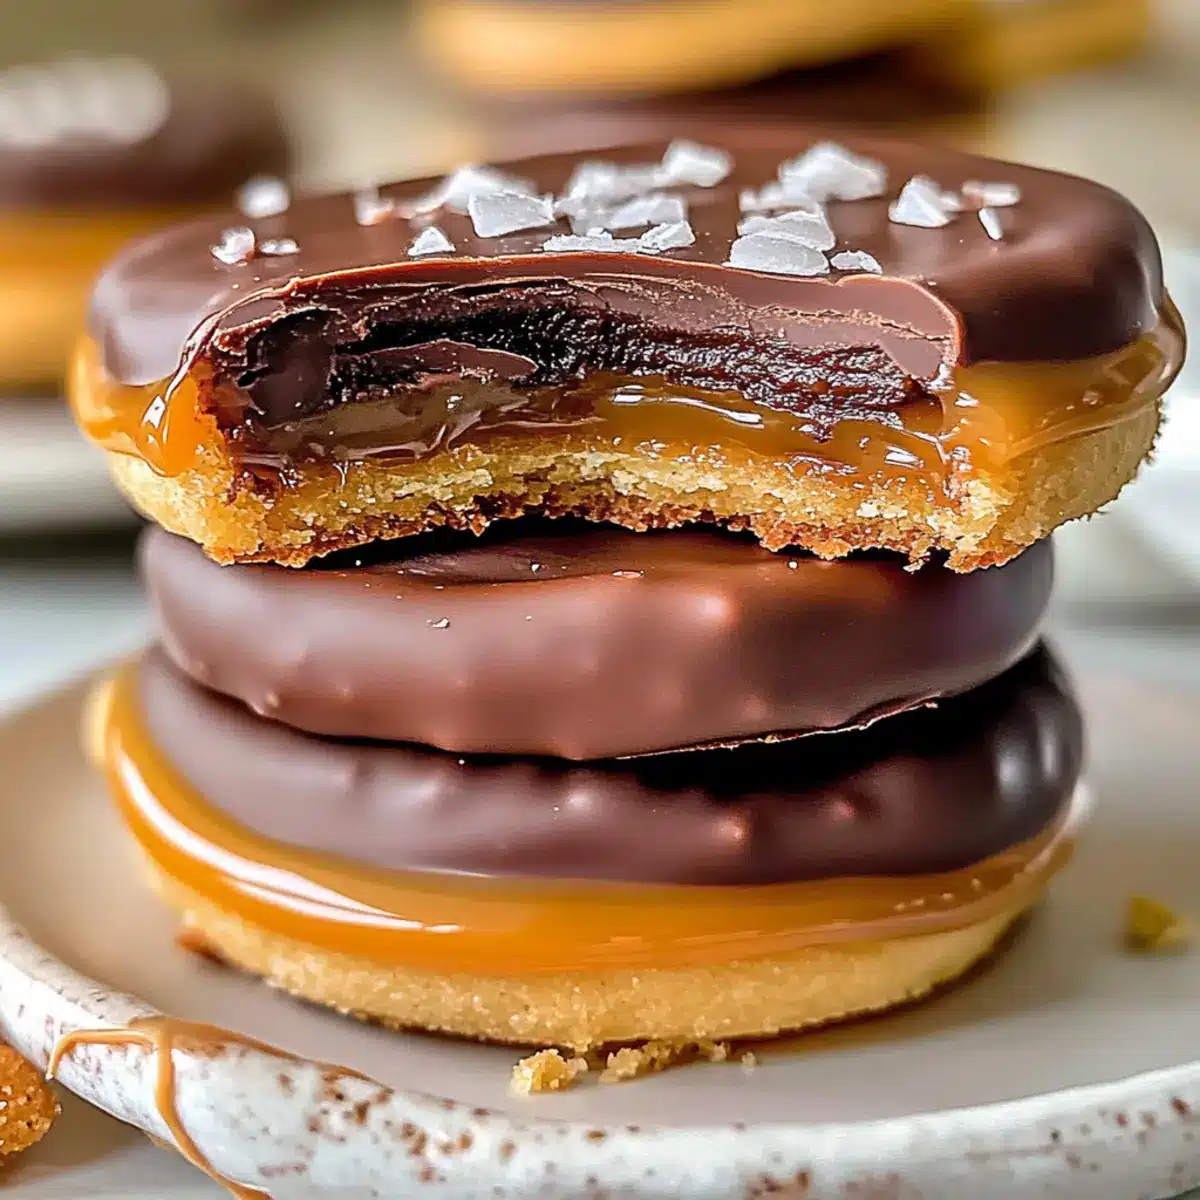
Decadent Layers: These cookies feature a sublime combination of buttery shortbread, chewy caramel, and rich chocolate—a trio that creates pure bliss in every bite.
Quick to Make: Even if you’re short on time, this recipe is a breeze, allowing you to whip up a batch in just over 30 minutes!
Perfect for Sharing: Friends and family will adore them at gatherings, making them a surefire hit at parties or casual get-togethers.
Customizable Delight: Feeling adventurous? Try variations like dark chocolate or a sprinkle of sea salt, or check out my Chocolate Oat Cookies for another tasty twist.
Simple Ingredients: You likely already have most of the ingredients in your pantry, making it easy to seize the moment and bake!
Get ready for a delightful baking experience with these Twix-Style Cookies that are sure to become a new favorite.
Twix-Style Cookies Ingredients
• Here’s everything you need to create these delightful cookies!
For the Cookie Base
- Unsalted Butter – Adds richness and moisture; swap with margarine for a non-dairy option.
- Granulated Sugar – Sweetens and adds texture; can be replaced with coconut sugar for deeper flavor.
- Brown Sugar – Contributes moisture and a slight caramel taste; use dark brown sugar for more sweetness.
- Eggs – Binds ingredients and helps with leavening; substitute with flax eggs for a vegan version.
- All-Purpose Flour – Forms the structure; a gluten-free flour blend can be used for a gluten-free version.
- Baking Powder – Acts as a leavening agent for a light texture; ensure it’s fresh for best results.
- Salt – Balances the sweetness; omit if using salted butter.
For the Topping
- Chocolate Chips – Adds richness on top; choose dark or white chocolate based on your preference.
- Caramel Sauce – Creates the signature chewy layer; opt for store-bought or homemade, whichever you prefer.
These Twix-Style Cookies promise to be a fantastically indulgent treat, melding sweet, salty, and buttery goodness that’ll leave everyone wanting more!
Step‑by‑Step Instructions for Ultimate Twix-Style Cookies
Step 1: Preheat Oven
Begin by preheating your oven to 350°F (175°C). While the oven warms up, take a baking sheet and line it with parchment paper, which will prevent the cookies from sticking and ensure easy cleanup later. This step is crucial for achieving that perfect, slightly crisp base for your Twix-Style Cookies.
Step 2: Cream Together
In a large mixing bowl, cream together 1 cup of unsalted butter with ¾ cup of granulated sugar and ¾ cup of brown sugar. Use a hand mixer on medium speed until the mixture becomes light and fluffy, about 3-4 minutes. Then, add in 2 eggs one at a time, mixing well after each addition, to ensure a well-combined batter that holds all those lovely flavors.
Step 3: Mix Dry Ingredients
In a separate bowl, whisk together 2 cups of all-purpose flour, 1 teaspoon of baking powder, and a pinch of salt. Gradually add this dry mixture to the wet ingredients, mixing until just combined. Be careful not to overmix—the dough should be soft and slightly sticky, perfect for forming those incredible layers in your Twix-Style Cookies.
Step 4: Shape Cookies
Using a cookie scoop or tablespoon, drop generous amounts of dough onto the prepared baking sheet, spacing them about 2 inches apart. With your thumb or the back of a spoon, make an indent in the center of each dough mound, creating a little nest for the gooey caramel layer. This step is where each cookie starts to take on its delightful Twix-Style shape.
Step 5: Bake
Place the baking sheet in your preheated oven and bake for 10–12 minutes, or until the edges of the cookies are golden brown but the centers remain soft. Keep an eye on them—overbaking will lose that lovely, chewy texture that makes these Twix-Style Cookies so irresistible! Once done, remove them from the oven and let them cool slightly.
Step 6: Add Caramel
Once the cookies have cooled for about 5 minutes, carefully spoon your favorite caramel sauce into the indents you created earlier. Allow the caramel to fill the spaces fully; this adds that sweet, chewy layer that is reminiscent of the beloved candy bar. It’s essential to do this while the cookies are still warm so that the caramel adheres beautifully.
Step 7: Finish with Chocolate
In a microwave-safe bowl, melt 1 cup of chocolate chips in 30-second intervals, stirring in between, until smooth and glossy. Drizzle the melted chocolate over each cookie using a spoon or a piping bag for an elegant touch. Allow the chocolate to set completely before serving, which may take about 30 minutes, ensuring those luscious layers of your Twix-Style Cookies are perfectly intact.
Expert Tips for Twix-Style Cookies
-
Chill the Dough: Allowing the cookie dough to chill for at least 30 minutes can prevent spreading, resulting in thicker, perfectly shaped Twix-Style Cookies.
-
Tempering Chocolate: Melt chocolate slowly and avoid overheating to ensure a smooth drizzle. If it seizes, try adding a little vegetable oil to help restore its consistency.
-
Measuring Matters: For the best results, measure your ingredients precisely using a kitchen scale. Too much flour can lead to dry cookies.
-
Caramel Creation: If using homemade caramel, ensure it’s not too runny by allowing it to cool slightly before adding to cookies, so it holds up better when baked.
-
Experimenting with Flavor: Enhance your Twix-Style Cookies by adding vanilla or almond extract to the dough for an extra layer of flavor your family will love.
-
Storing Tips: To keep cookies fresh longer, store them in an airtight container with a slice of bread inside; it helps maintain their softness!
What to Serve with Ultimate Twix-Style Cookies
Indulge in a delightful dessert experience that perfectly complements the rich chocolate and caramel of your cookies.
-
Fresh Berries: A mix of strawberries, blueberries, and raspberries adds a refreshing burst of flavor that balances the sweetness.
-
Vanilla Ice Cream: A scoop of creamy vanilla ice cream contrasts beautifully with the cookie’s textures, creating a dreamy combination.
-
Coffee or Espresso: The rich, bold flavors of coffee enhance the chocolate, making every bite feel indulgent and complete. It’s a classic pairing to awaken your senses!
-
Cold Milk: A glass of chilled milk is a timeless choice that softens the indulgence of the cookies and brings back nostalgic memories.
-
Caramel Latte: Elevate the coffee experience with a caramel latte, echoing the flavors of the Twix-Style Cookies while providing a comforting warmth.
-
Sea Salted Chocolate Bark: The crunch of chocolate bark sprinkled with sea salt offers an enjoyable contrast that will entice every chocolate lover.
-
Nutty Biscotti: The crunchy texture of almond or hazelnut biscotti is a delightful contrast to the soft cookies, ideal for dipping into coffee.
-
Chocolate Milkshake: For a truly decadent treat, a chocolate milkshake will amplify the rich flavors of your cookies and delight every sweet tooth!
How to Store and Freeze Twix-Style Cookies
Room Temperature: Store your Twix-Style Cookies in an airtight container at room temperature for up to 5 days. This keeps them fresh and soft for those snack cravings!
Fridge: For extended freshness, place the cookies in the fridge, where they can last up to 2 weeks. Wrap them tightly to prevent drying.
Freezer: For long-term storage, wrap cookies individually in plastic wrap and place them in a freezer-safe bag; they’ll stay delicious for up to 3 months.
Reheating: When ready to enjoy from the freezer, let them thaw at room temperature or microwave for 10-15 seconds for that fresh-baked feel!
Make Ahead Options
These Ultimate Twix-Style Cookies are perfect for busy home cooks looking to save time! You can prepare the cookie dough up to 24 hours in advance by wrapping it tightly in plastic wrap and refrigerating it. This not only enhances the flavors but also helps maintain the dough’s structure. Additionally, you can bake the cookies and let them cool completely before adding the caramel and chocolate; they can be stored in an airtight container for up to 3 days. When you’re ready to enjoy, simply reheat the cookies slightly in the microwave to bring back that warm, gooey goodness before adding the toppings. With these make-ahead options, you’ll have a delicious treat ready with minimal effort!
Twix-Style Cookies Variations & Substitutions
Customize your Twix-Style Cookies to suit every craving and occasion—each variety brings a delightful twist to this classic treat!
-
Dairy-Free: Substitute unsalted butter with margarine or coconut oil for a dairy-free option. These alternatives ensure a rich texture without compromising flavor.
-
Coconut Sugar: Swap granulated sugar with coconut sugar for a deeper flavor and slight caramel notes. This tweak not only enhances sweetness but adds a unique twist to your cookies.
-
Gluten-Free: Use a gluten-free flour blend in place of all-purpose flour for a gluten-free version. Enjoying these treats can be inclusive and just as delightful!
-
Nuts Galore: Mix in crushed nuts like pecans or walnuts for added crunch. This brings in delightful layers of texture, amplifying the overall cookie experience.
-
Flavor Burst: Add a teaspoon of almond or vanilla extract to the dough for an enhanced flavor profile. This small touch can elevate your cookies, making them even more irresistible.
-
Salted Caramel: Use a pinch of sea salt on top of the caramel layer for a delightful sweet-salty contrast. This twist creates a sophisticated flavor dimension that tantalizes the taste buds.
-
Chocolate Variety: Opt for dark chocolate chips instead of semi-sweet for a more intense chocolate experience. Alternatively, white chocolate can add a sweeter note to balance the caramel.
-
Spicy Kick: Add a pinch of cinnamon or cayenne pepper to the dough for a hint of warmth. This unexpected twist will surprise and delight those who take a bite!
These small changes can make a big difference in your baking adventures! If you’d love to explore even more cookie recipes, check out my Gluten-Free Chocolate Oat Cookies or indulge in the simple pleasure of Chocolate Oat Cookies. Happy baking!

Twix-Style Cookies Recipe FAQs
How do I choose ripe ingredients?
Absolutely! For the best Twix-Style Cookies, use fresh unsalted butter and eggs free from any off-putting odors. If your butter is too soft or too hard, it can affect the dough’s texture, so aim for a cool room temperature. As for the eggs, ensure they are fresh and at room temperature for optimal blending into the batter.
What’s the best way to store my cookies?
These cookies can be stored in an airtight container at room temperature for up to 5 days. If you want to preserve their freshness longer, refrigerate them for up to 2 weeks. Make sure they are wrapped tightly to prevent any drying out—trust me, no one wants a dry cookie!
Can I freeze the Twix-Style Cookies?
Yes, indeed! To freeze your delicious Twix-Style Cookies, wrap each cookie individually in plastic wrap and then place them into a freezer-safe bag. They can be frozen for up to 3 months. When you’re ready to indulge, simply let them thaw at room temperature or microwave for 10-15 seconds for that fresh-baked feel!
What if my cookies spread too much while baking?
Very! If you notice your cookies spreading more than expected, try chilling the dough for at least 30 minutes before baking. Additionally, ensure that you’re measuring your ingredients accurately—too much flour can lead to a dry texture, causing them to spread. Remember, a little extra prep goes a long way!
Can I make adjustments for dietary restrictions?
Absolutely! If you’re looking to make vegan Twix-Style Cookies, substitute the eggs with flax eggs (1 tablespoon flaxseed meal mixed with 2.5 tablespoons water per egg) and use a non-dairy butter substitute. If someone has nut allergies, be cautious with any toppings or additional mix-ins. Always check labels to ensure safety, especially when baking for little ones or guests with sensitivities.
How do I know when my cookies are done baking?
Keep an eye on your Twix-Style Cookies while they’re in the oven! They’re done when the edges are a lovely golden brown, and the centers remain slightly soft. If they look overbaked, you might lose that delightful chewy texture that makes these cookies so special! A gentle press in the center should bounce back slightly, indicating they’re just right.

Twix-Style Cookies That Melt in Your Mouth Every Time
Ingredients
Equipment
Method
- Preheat your oven to 350°F (175°C) and line a baking sheet with parchment paper.
- Cream together 1 cup of unsalted butter, 3/4 cup of granulated sugar, and 3/4 cup of brown sugar in a large mixing bowl until light and fluffy, about 3-4 minutes. Add 2 eggs one at a time, mixing well after each addition.
- In a separate bowl, whisk together 2 cups of all-purpose flour, 1 teaspoon of baking powder, and a pinch of salt. Gradually add this to the wet ingredients, mixing until just combined. The dough should be soft and slightly sticky.
- Drop generous amounts of dough onto the prepared baking sheet, spacing them about 2 inches apart. Create an indent in the center of each dough mound for the caramel.
- Bake for 10–12 minutes or until the edges are golden brown and the centers remain soft. Remove from the oven and let them cool slightly.
- Spoon your favorite caramel sauce into the indents of the cookies while still warm.
- Melt 1 cup of chocolate chips in a microwave-safe bowl in 30-second intervals, stirring in between, until smooth. Drizzle over each cookie and allow to set for about 30 minutes.
Leave a Reply