
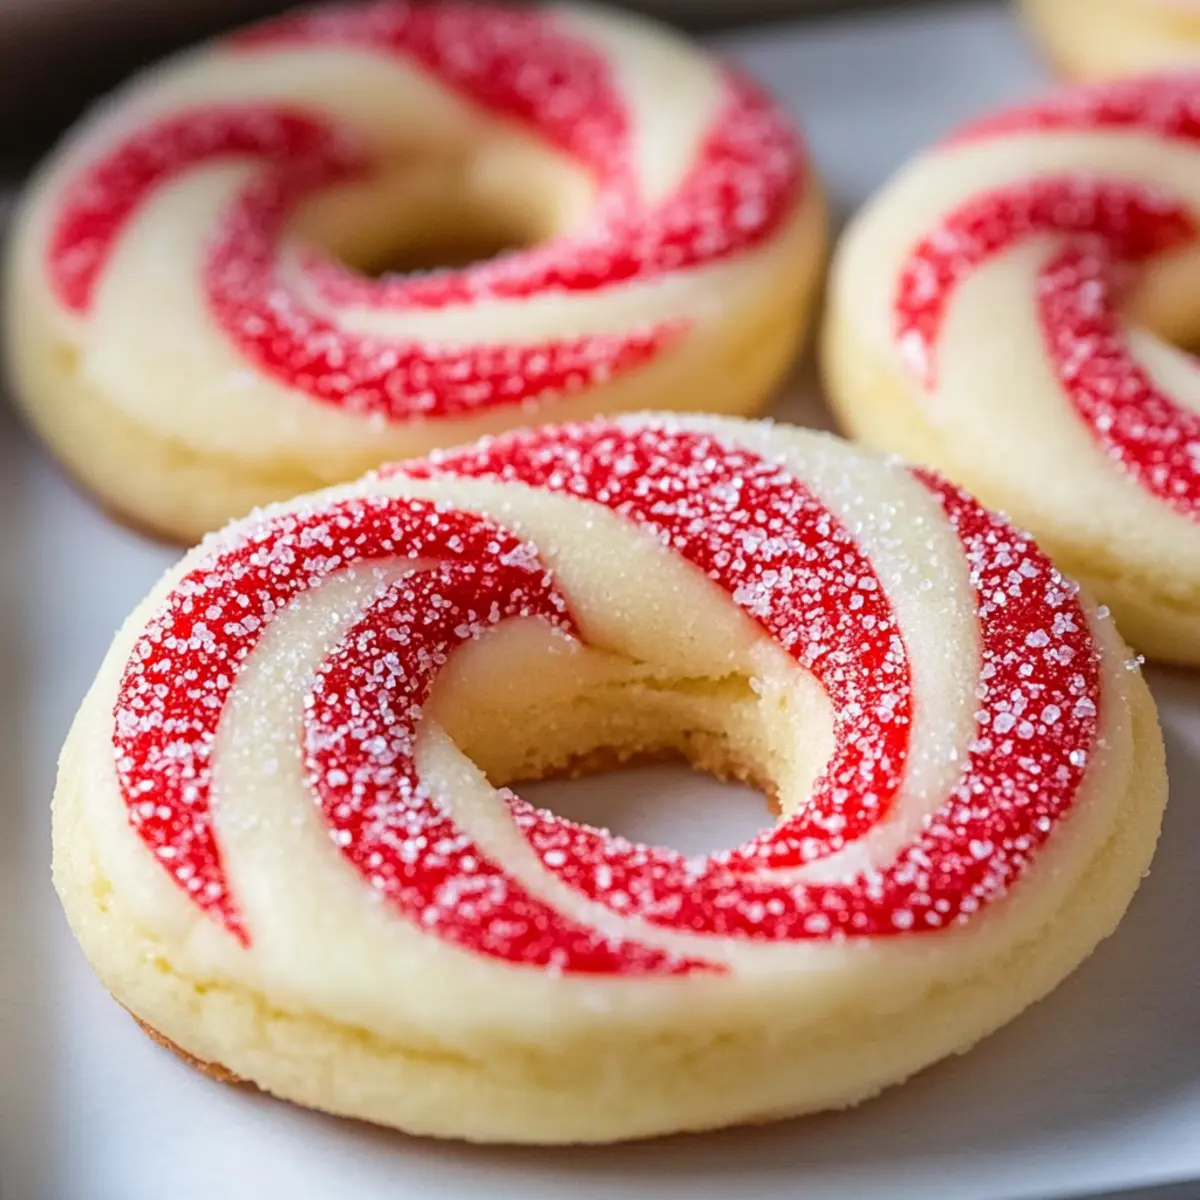
As the first melty flakes of winter snow begin to blanket the ground, the aroma of holiday baking fills my kitchen with warmth and cheer. There’s something undeniably magical about crafting these Festive Candy Cane Cookies, where a buttery peppermint base becomes a canvas for whimsical red-and-white swirls. Not only are these holiday cookies a showstopper for cookie exchanges, but their easy preparation makes them perfect for baking days with the family. And let’s not forget—they’re also freezer-friendly, so you can whip up a batch ahead of time and bring a bit of nostalgia to your gatherings. Ready to impress your loved ones and fill your home with irresistible peppermint goodness? Let’s dive into this delightful recipe!
Why Are Candy Cane Cookies So Irresistible?
Sweet, Festive Delight: These Candy Cane Cookies bring the joyful spirit of the holidays right to your kitchen with their signature peppermint flavor and delightful red-and-white swirls.
Kid-Friendly Fun: Easy and fun to make, they are perfect for little hands to help twist and shape—creating memories while baking!
Make-Ahead Magic: These cookies are freezer-friendly, meaning you can bake now and enjoy fresh treats later.
Versatile Variations: Adapt the flavors by trying different extracts, or create a gluten-free version for everyone at your gathering.
Impressive Presentation: With their beautiful appearance, they make a stunning addition to any dessert table or cookie exchange, sure to wow your guests!
Unleash your holiday spirit with more festive delights like Chocolate Oat Cookies or explore some Gluten-Free Flour options for your baking adventures!
Candy Cane Cookies Ingredients
For the Dough
- Unsalted Butter – Ensures a rich, buttery flavor and soft texture; you can substitute margarine for a dairy-free option.
- Granulated Sugar – Sweetens the cookies and contributes to their light, airy texture; using brown sugar can add a caramel essence.
- Large Egg – Binds the ingredients together and adds moisture; alternatively, a flax egg works well for a vegan twist.
- Vanilla Extract – Elevates the flavor of the cookies; consider almond extract for a unique variation.
- Peppermint Extract – Gives the cookies their signature holiday flavor; use sparingly, as it’s quite potent.
- All-Purpose Flour – Forms the backbone of the cookie structure; a gluten-free blend can be substituted for a gluten-free option.
- Salt – Balances the sweetness of the cookies; this ingredient doesn’t require any substitutions.
For the Decoration
- Red Gel Food Coloring – Adds a festive touch without altering the dough’s consistency; avoid liquid food coloring to prevent stickiness.
- Granulated Sugar (for rolling) – Provides a sweet sparkle and final touch to the cookies; no need for substitutions here.
Create these Candy Cane Cookies and watch them become a cheerful centerpiece for any holiday gathering!
Step‑by‑Step Instructions for Candy Cane Cookies
Step 1: Prepare Dough
In a large mixing bowl, cream together 1 cup of unsalted butter and 1 cup of granulated sugar until the mixture is light and fluffy, about 3-5 minutes. Beat in 1 large egg, then add 1 teaspoon of vanilla extract and 1 teaspoon of peppermint extract. Gradually blend in 2 ¾ cups of all-purpose flour and ½ teaspoon of salt until a soft dough forms, making sure everything is evenly combined.
Step 2: Color Dough
Once your dough is ready, divide it in half and set one portion aside. In the other half, add red gel food coloring, starting with a few drops and mixing thoroughly until you achieve a vibrant red hue. Aim for even coloring here; the dough should have a consistent shade throughout, which will create beautiful swirls in your Candy Cane Cookies.
Step 3: Chill Dough
Wrap both the plain and colored dough in plastic wrap and place them in the refrigerator. Allow the dough to chill for at least 30 minutes; this step is crucial as it helps prevent the cookies from spreading too much during baking. During this time, preheat your oven to 350°F (175°C) and line multiple baking sheets with parchment paper for easy cleanup.
Step 4: Shape Cookies
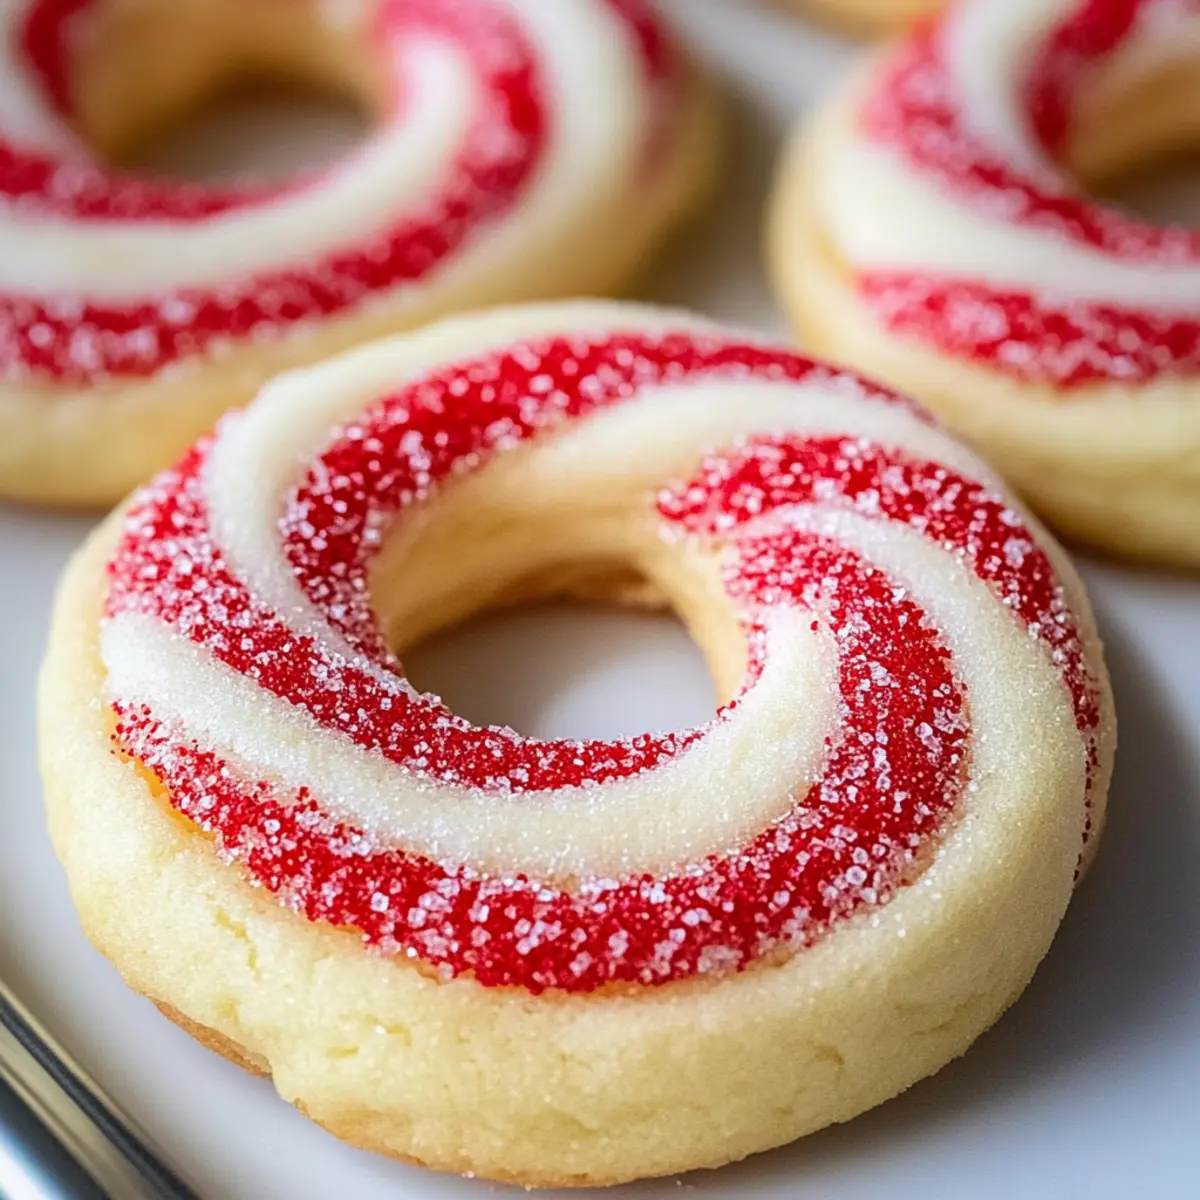
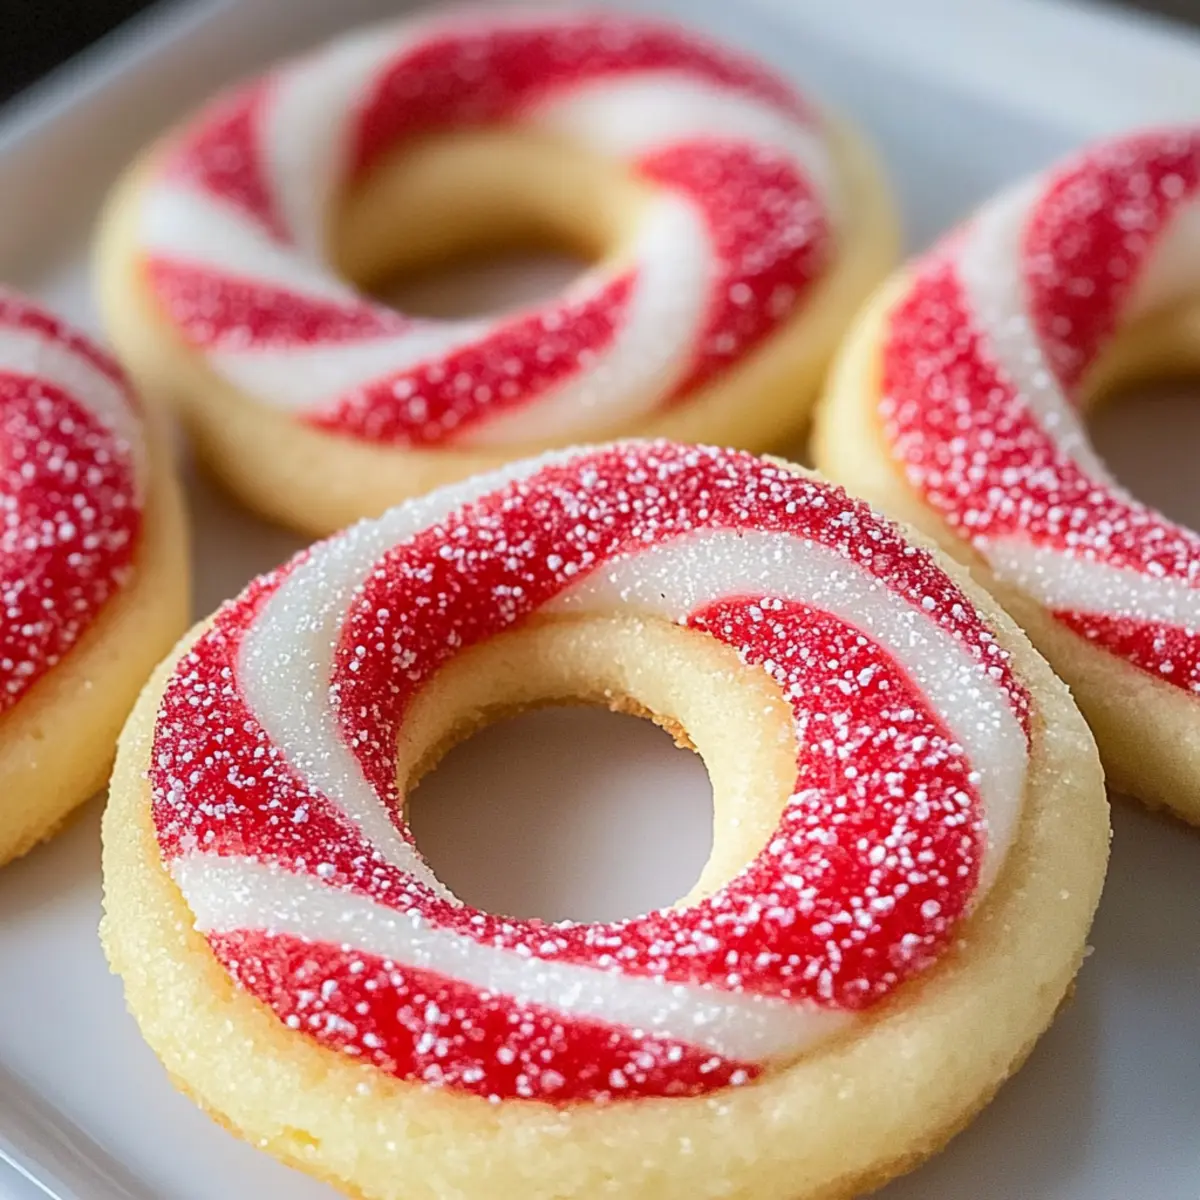
After chilling, remove the dough from the refrigerator. Take 1 teaspoon each of the red and plain dough and roll them into 4-inch ropes. Twist the two ropes together to form a candy cane shape or a ring shape if you prefer an easier option. Press the ends firmly to seal them, ensuring they hold their form during baking, which enhances the visual appeal of your Candy Cane Cookies.
Step 5: Coat and Bake
Roll each shaped cookie in granulated sugar to give them a sweet sparkle before placing them on your prepared baking sheets, spacing them about 2 inches apart. Bake the cookies in the preheated oven for 8-10 minutes, or until they are just set and lightly golden on the bottoms. Keep a close eye on them to ensure they remain soft and tender, achieving the perfect festive treat.
Step 6: Cool Cookies
Allow the Candy Cane Cookies to rest on the baking sheet for 5 minutes after removing them from the oven. This resting time allows them to firm up slightly. Afterward, carefully transfer the cookies to a wire rack to cool completely. Once cooled, they will be ready to share, bringing joy and nostalgic flavors to your holiday gatherings.
Make Ahead Options
These Candy Cane Cookies are perfect for busy holiday schedules, allowing you to prep delightful treats in advance! You can prepare the dough up to 24 hours ahead by following the initial steps and chilling the wrapped dough in the refrigerator. For longer storage, you can freeze the unbaked cookie shapes for up to 3 months; just ensure they’re well-wrapped to prevent freezer burn. When you’re ready to enjoy, bake from frozen, adding a minute or two to the cooking time for best results. This way, you’ll have fresh, festive cookies with minimal effort, ready to brighten any gathering!
Storage Tips for Candy Cane Cookies
-
Room Temperature: Store your Candy Cane Cookies in an airtight container at room temperature for up to 5 days to maintain their deliciousness and texture.
-
Fridge: If you prefer a longer shelf life, you can refrigerate the cookies; wrap them tightly to prevent drying out and consume within a week.
-
Freezer: For extended storage, freeze baked cookies for up to 2 months. Arrange them in a single layer on a baking sheet to harden before transferring to a zip-top bag, removing excess air.
-
Reheating: When ready to enjoy, thaw cookies in the fridge or at room temperature. You can warm them in the oven at 350°F (175°C) for about 5 minutes to restore their melt-in-your-mouth texture.
What to Serve with Festive Candy Cane Cookies
Create the perfect holiday atmosphere with delightful pairings that complement the sweetness of these festive treats.
-
Rich Hot Cocoa: This creamy beverage enhances the peppermint flavor, creating a warm and cozy combination perfect for winter evenings.
-
Velvety Cream Cheese Frosting: Spread a layer on top of a brownie or cake for an indulgent dessert that pairs remarkably with the cookie’s minty notes.
-
Fresh Berries: The tartness of raspberries or strawberries cuts through the sweetness, adding a refreshing contrast to your cookie platter.
-
Peppermint Latte: Enjoy a seasonal twist with this classic coffee drink; its bold espresso and smooth milk balance the sweet crunch of the cookies beautifully.
-
Vanilla Ice Cream: A scoop of this creamy classic adds a comforting chill, turning your cookies into an easy and delightful dessert sandwich.
-
Candied Nuts: Crunchy sweets like spiced pecans or caramelized almonds bring texture and a touch of saltiness that works well with the cookie’s sweetness.
-
Holiday Spice Punch: Serve up a fruity punch infused with cinnamon and clove to deliver a hint of spice that pairs harmoniously with the peppermint flavor.
-
Gingerbread Cookies: Continue celebrating the season with these festive delights, where the warm flavors of ginger complement the fresh mint beautifully.
These pairings promise to elevate your holiday gatherings, making merriment and memories that last long after the cookies are gone!
Expert Tips for Candy Cane Cookies
-
Perfect Consistency: Keep an eye on your dough—don’t overmix! Overworking it can make your Candy Cane Cookies tough instead of tender.
-
Chill, Chill, Chill: Allowing the dough to chill helps set the shape. Skipping this step can lead to cookies that spread too much while baking.
-
Coloring Method: Use gel food coloring for vibrant swirls. Liquid food coloring can alter the texture and consistency of your dough, leading to unideal results.
-
Cookie Size: For consistent baking, use a kitchen scale to portion out your dough. Uniform sizes ensure even baking and delightful presentation.
-
Watch the Oven: Keep a close eye on your cookies as they bake. They should be just set and golden on the bottoms—not overly browned.
-
Storage Tips: To maintain freshness, store your Candy Cane Cookies in an airtight container. They’ll stay delicious for up to 5 days!
Candy Cane Cookies Variations & Substitutions
Feel free to tailor these delightful Candy Cane Cookies to your taste and dietary needs, making them even more special!
- Dairy-Free: Substitute unsalted butter with margarine or coconut oil for a dairy-free version.
- Vegan: Replace the egg with a flax egg (1 tbsp ground flaxseed + 2.5 tbsp water) for a delicious vegan treat. It binds the ingredients perfectly!
- Gluten-Free: Use a gluten-free flour blend that contains xanthan gum, ensuring the cookies still have that delightful chewy texture.
- Flavor Boost: Try adding ½ teaspoon of almond extract in place of the vanilla for an exciting twist that complements the peppermint beautifully.
- Peppermint Alternatives: For a unique flavor profile, substitute peppermint extract with crushed candy canes for a delightful crunch.
- Cocoa Variation: Mix in 1/4 cup of unsweetened cocoa powder to create a chocolate version of these festive cookies—you’ll end up with a beautifully marbled treat!
- Nutty Addition: Fold in some finely chopped walnuts or pecans for added crunch and a subtle nutty flavor that pairs well with peppermint.
- Shape Options: Roll into traditional candy cane shapes or try making bite-sized rounds—perfect for gifting and sharing at gatherings!
Explore even more festive baking delights, like our Chocolate Oat Cookies for a chewy chocolatey treat or check out this gluten-free option for your baking adventures!

Candy Cane Cookies Recipe FAQs
What kind of butter should I use for Candy Cane Cookies?
I recommend using unsalted butter for the perfect balance of flavor and structure. If you’re looking for a dairy-free option, margarine will work well too!
How should I store my Candy Cane Cookies?
To keep your Candy Cane Cookies fresh, store them in an airtight container at room temperature for up to 5 days. If you’d like to extend their shelf life, you can refrigerate them for about a week, but make sure they’re tightly wrapped to avoid drying out.
Can I freeze Candy Cane Cookies?
Absolutely! You can freeze baked Candy Cane Cookies for up to 2 months. Arrange the cookies in a single layer on a baking sheet to harden, then transfer them to a zip-top bag, removing as much air as possible to avoid freezer burn.
What if my dough is too sticky while shaping the cookies?
If you find your dough is sticky and hard to work with, try chilling it longer in the refrigerator—at least an hour can do wonders. If it remains sticky after chilling, sprinkle a little extra flour on your hands and work surface to help with shaping.
Are there any dietary considerations I should be aware of?
Yes! For a vegan option, replace the large egg with a flax egg (1 tablespoon ground flaxseed mixed with 2.5 tablespoons of water). For those with gluten sensitivities, you can substitute all-purpose flour with a 1:1 gluten-free flour blend. Always check your extract labels for any potential allergens as well.
How can I tell if my Candy Cane Cookies are baked perfectly?
Watch closely while baking! The cookies should be just set and lightly golden on the bottoms—soft to the touch but not too brown. If they look softly puffed and slightly shiny on top, they’re ready to be pulled from the oven!
Candy Cane Cookies with a Melt-in-Your-Mouth Peppermint Twist
Ingredients
Equipment
Method
- Cream together the unsalted butter and granulated sugar until light and fluffy, about 3-5 minutes. Beat in the egg, then add vanilla and peppermint extracts.
- Divide the dough in half. In one half, add red gel food coloring until you achieve a vibrant red hue.
- Wrap both portions of dough in plastic wrap and chill in the refrigerator for at least 30 minutes.
- Remove the dough from the refrigerator, roll 1 teaspoon each of the red and plain dough into 4-inch ropes, twist them together.
- Roll the shaped cookies in granulated sugar, place them on prepared baking sheets, and bake for 8-10 minutes until just set.
- Allow cookies to rest on the baking sheet for 5 minutes, then transfer to a wire rack to cool completely.
Leave a Reply