
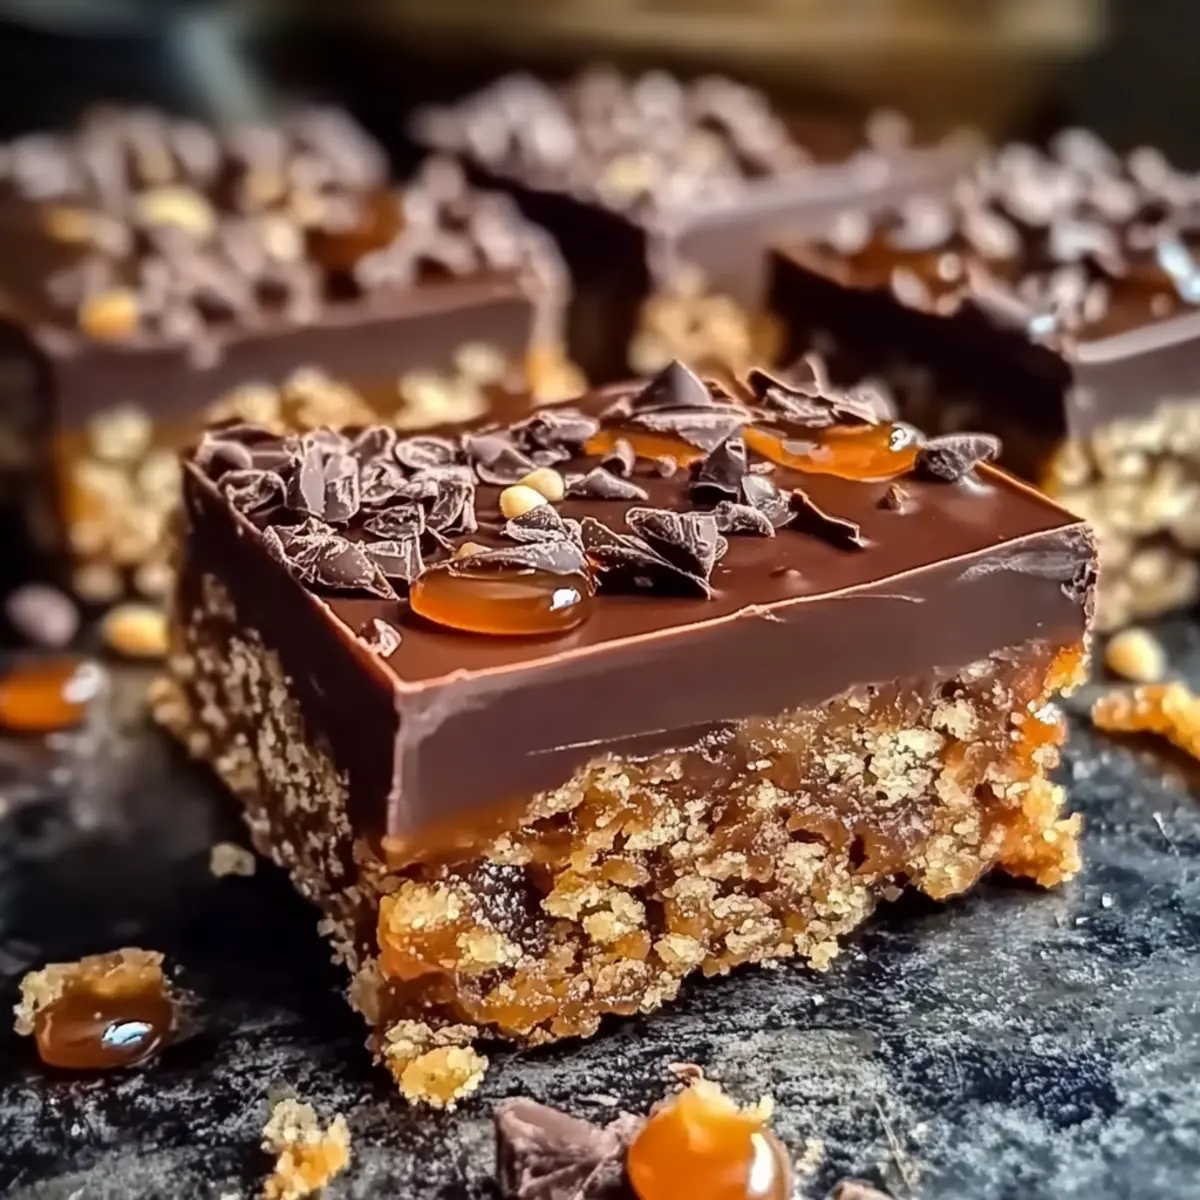
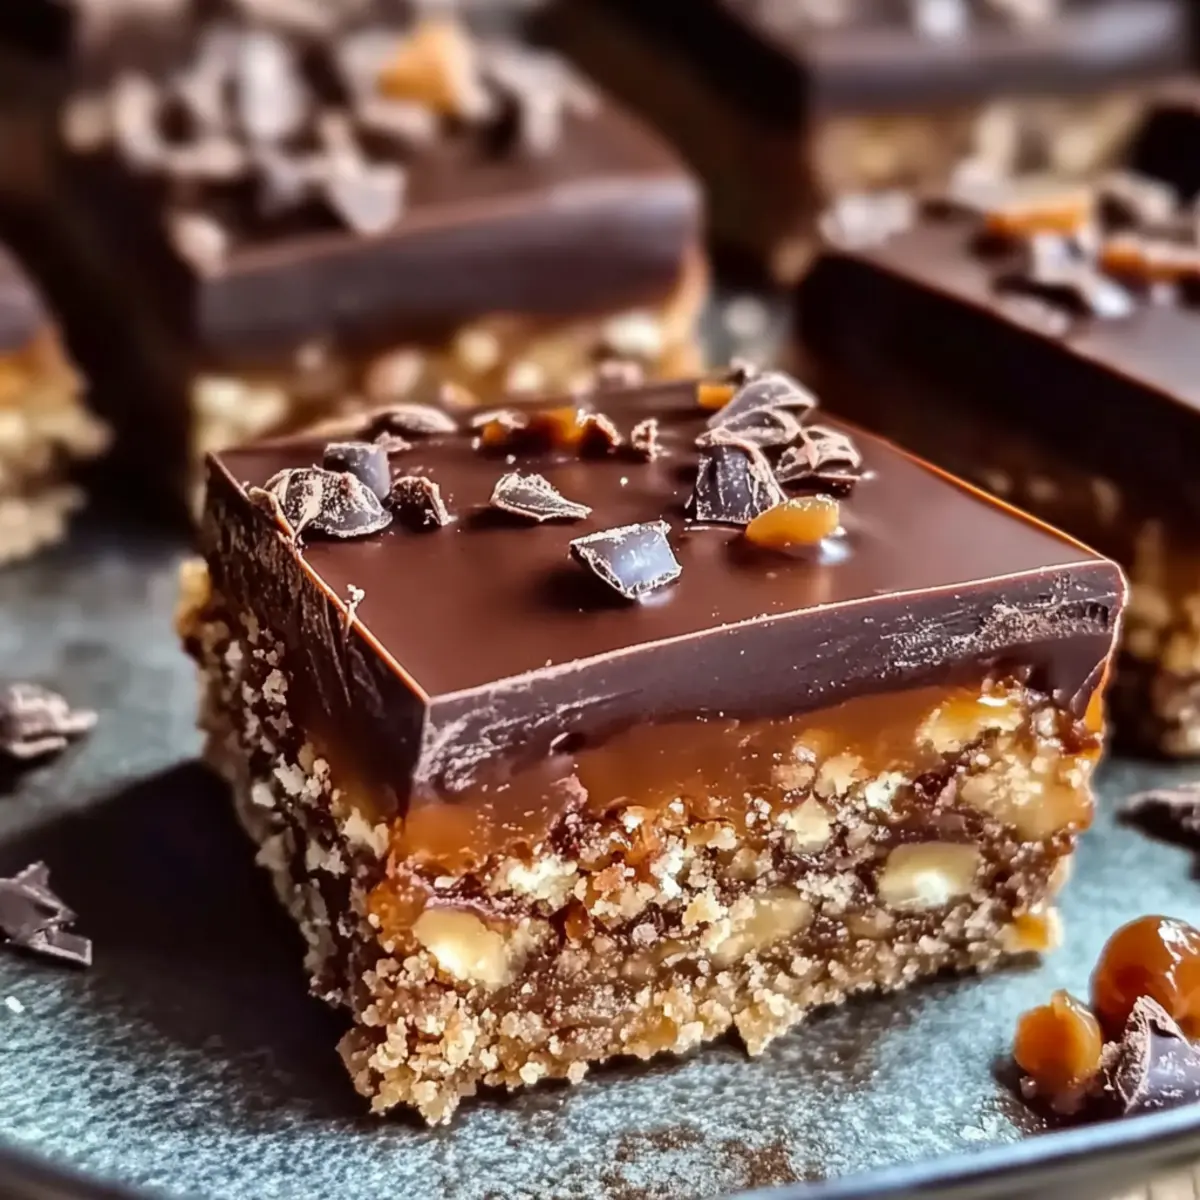
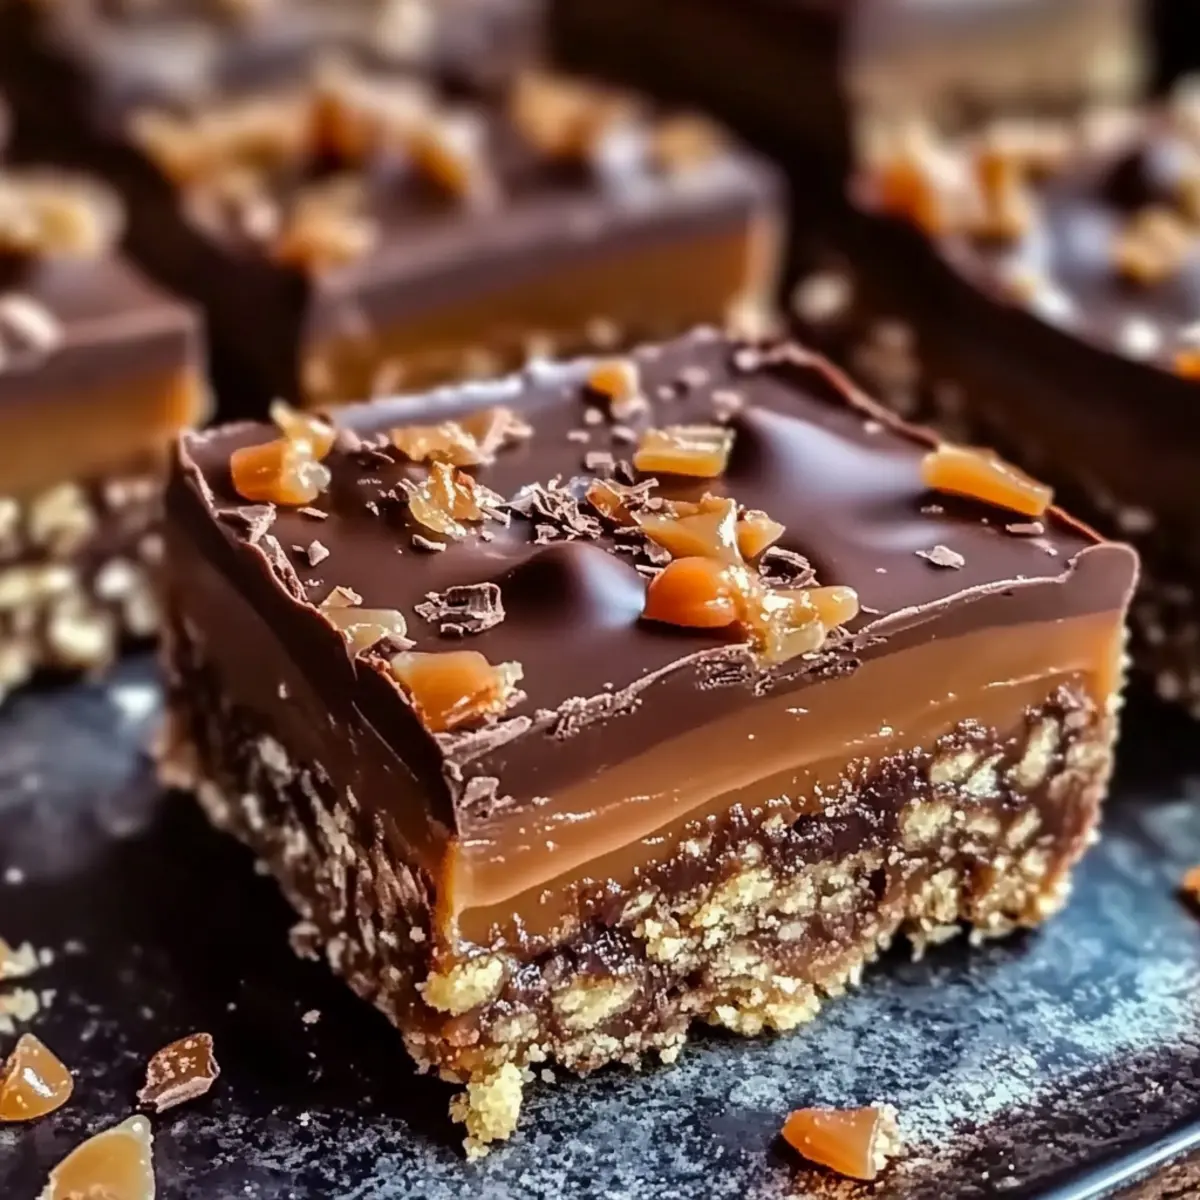
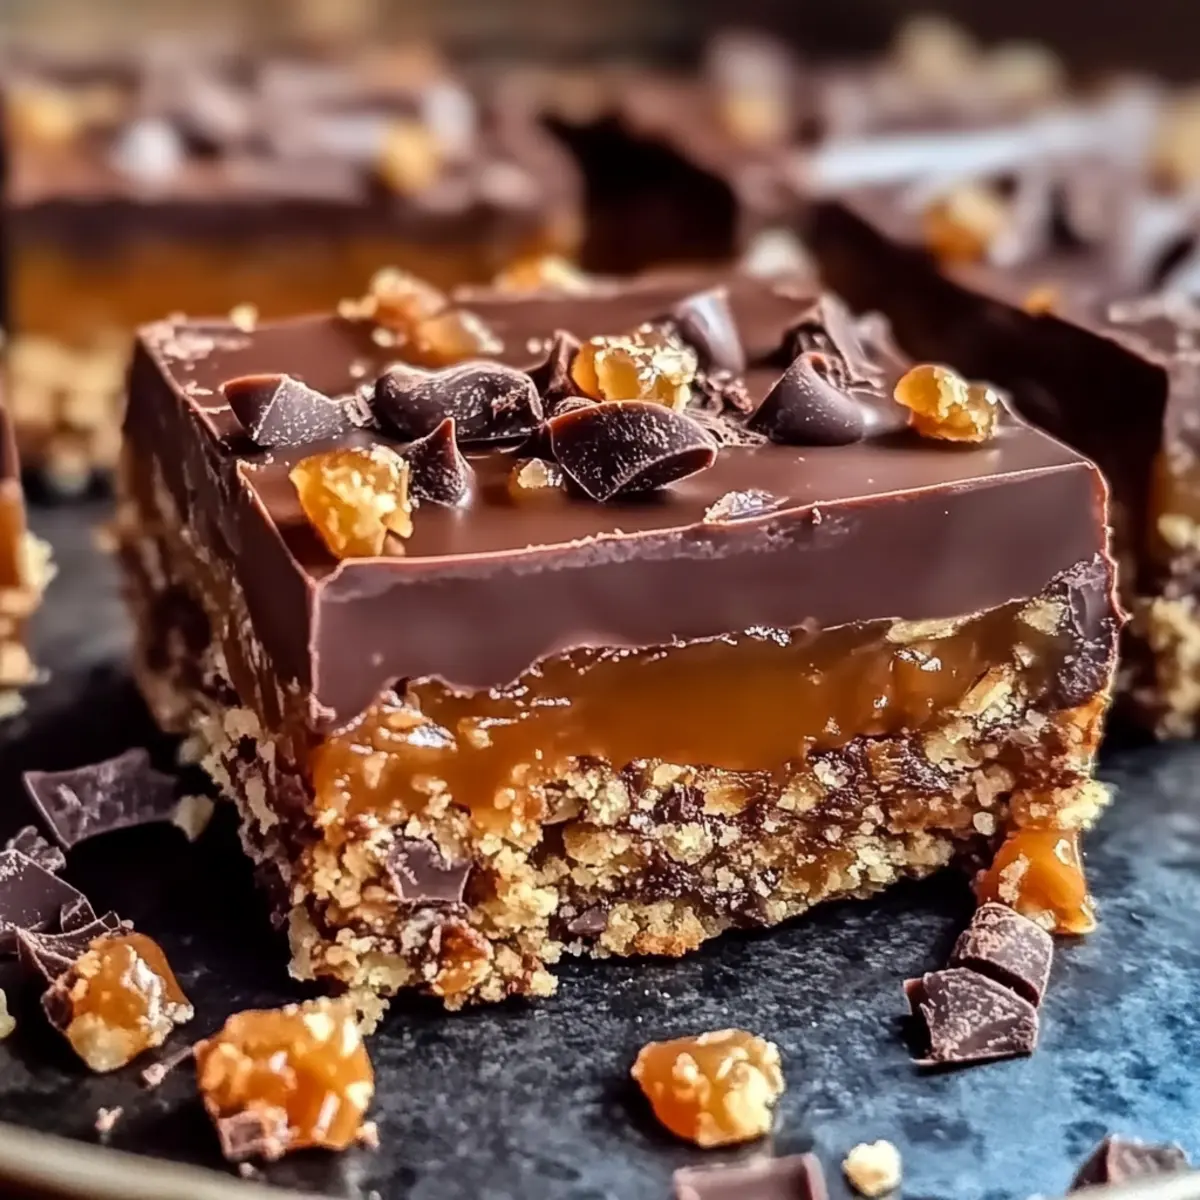
Amid the hustle and bustle of everyday life, we all have those moments that call for a treat—and this is where my Irresistible Caramel Chocolate Crunch Bars come in. With their heavenly layers of buttery crunch, gooey caramel, and silky chocolate, these bars are a sweet escape you can whip up in no time. One of my favorite perks is that they require no baking, making them perfect for busy afternoons when you crave a quick dessert. Plus, they’re a guaranteed crowd-pleaser for any occasion, be it a cozy movie night or a festive potluck. What’s not to love about a snack that combines such delightful textures and flavors in a flash? Ready to dive in and create this delicious treat?
Why are Caramel Chocolate Crunch Bars a must-try?
No-Bake Convenience: These bars are easy to make without turning on the oven, perfect for warm days or busy schedules.
Irresistible Layers: Imagine biting into crunchy goodness, melting caramel, and rich chocolate—all in one bar!
Customizable Options: Whether you’re craving a nutty topping or a vegan twist, this recipe adapts effortlessly to your preferences.
** crowd-Pleasing Treat:** These bars are sure to impress at any gathering, making them your go-to dessert choice. Enjoy them solo or with a scoop of ice cream, and if you’re looking for more sweet ideas, check out our Strawberry Crunch Cheesecake for a delightful variation!
Caramel Chocolate Crunch Bars Ingredients
• Let’s gather everything you need for these delightful bars!
For the Crust
- Butter – Provides a rich flavor and helps bind the crust. Substitution Note: Use margarine for a dairy-free option.
- Graham Crackers/Saltines – Serve as the crunchy base, adding texture and a hint of salt. Optional Substitution: Try gluten-free crackers as a substitute.
For the Filling
- Caramel Sauce – Acts as the gooey filling, adding sweetness and moisture. Prep Note: Can use store-bought or homemade caramel for your Caramel Chocolate Crunch Bars.
- Chocolate (milk, dark, or semi-sweet) – Ties the bars together with a smooth topping. Substitution Note: Choose dark chocolate for a richer taste.
For Toppings
- Crunchy Toppings (chopped peanuts, pretzels, toffee bits) – Adds an extra satisfying crunch. Variation Idea: Switch peanuts for almonds or trail mix for added variety.
Step‑by‑Step Instructions for CARAMEL CHOCOLATE CRUNCH BARS
Step 1: Preheat and Prepare
Begin by preheating your oven to 350°F (175°C). While it’s warming up, line a 9×13 baking pan with parchment paper, leaving some overhang for easy removal later. This ensures your Caramel Chocolate Crunch Bars are easy to lift out once set and simplifies cleanup.
Step 2: Make the Crust
In a medium mixing bowl, melt butter until completely liquid. Then, mix it with the crushed graham crackers or saltines until fully combined, forming a sandy consistency. Press this mixture firmly into the prepared baking pan, creating an even layer to form the crust. Aim for a compact base that serves as the foundation of your delicious bars.
Step 3: Cook the Caramel
On medium heat, pour the caramel sauce into a saucepan. Stir continuously as the sauce cooks until it thickens to a golden hue—this should take about 5-7 minutes. Once ready, remove it from the stovetop and quickly pour the gooey caramel layer over the crust, spreading it evenly. Allow it to cool slightly before moving to the next step.
Step 4: Melt the Chocolate
In a microwave-safe bowl, break the chocolate into small pieces and microwave in 30-second intervals, stirring in between until completely melted and smooth. Pour the melted chocolate over the caramel layer, gently spreading it to cover the entire top. This will create a luscious finish for your Caramel Chocolate Crunch Bars.
Step 5: Add Crunchy Toppings
Before the chocolate sets, sprinkle your choice of crunchy toppings—such as chopped peanuts, pretzels, or toffee bits—over the surface. Make sure the toppings stick by gently pressing them into the chocolate. This extra layer adds delightful texture to your Caramel Chocolate Crunch Bars.
Step 6: Bake the Crust
Transfer the baking pan into the preheated oven and bake the crust for about 10-12 minutes, or until it turns a beautiful golden brown. Keep an eye on it, as baking is only to firm up the crust, not to cook the caramel and chocolate, so avoid overbaking.
Step 7: Chill the Bars
After baking, remove the pan from the oven and allow it to cool slightly at room temperature. Then, refrigerate for at least 2 hours, letting the bars set firmly. This chilling time is crucial for achieving clean cuts once you slice your Caramel Chocolate Crunch Bars into squares.
Step 8: Slice and Serve
Once chilled and set, lift the bars out using the parchment overhang and place them on a cutting board. Use a sharp knife to cut them into even squares or rectangles. Your Caramel Chocolate Crunch Bars are now ready to be served and enjoyed—a sweet combo that’s sure to impress!
What to Serve with Caramel Chocolate Crunch Bars
Indulge your senses by creating the perfect meal around these rich, sweet bars that delight everyone.
-
Fresh Berries: A handful of juicy strawberries or raspberries adds a bright, tangy contrast to the rich sweetness of the bars. The natural acidity balances the caramel perfectly.
-
Vanilla Ice Cream: This classic pairing enhances every bite with a creamy, cool element that melts beautifully into the warm chocolate.
-
Chilled Milk: A glass of cold milk brings a nostalgic, comforting touch, making these bars feel like a childhood treat. It’s a delightful way to wash down the sweetness!
-
Roasted Nuts: Serve a side of lightly salted roasted almonds or cashews for a crunchy, savory counterpart that complements the bars’ sweetness.
-
Coffee or Espresso: Enjoy these bars with a cup of your favorite brew. The bitterness of coffee balances the sweetness while enhancing the chocolate flavors.
-
Chocolate Sauce Drizzle: Elevate your serving presentation by drizzling a little chocolate sauce over the bars. This extra touch of indulgence will wow anyone at the table.
-
Coconut Whipped Cream: Light and airy, a dollop of coconut whipped cream brings a tropical flair that contrasts beautifully with the dense caramel and chocolate layers.
-
Fruit Salad: A refreshing fruit salad, tossed with a hint of lime, adds a bright, zesty flavor that cuts through the richness, making it a well-rounded treat.
-
Brownie Bites: For the ultimate chocolate lover’s platter, include fudgy brownie bites. This adds an extra layer of chocolatey goodness that friends won’t be able to resist!
CARAMEL CHOCOLATE CRUNCH BAR Variations
Feel free to get creative and make these Caramel Chocolate Crunch Bars your own with these delightful twists!
- Dairy-Free: Swap butter for margarine and use dairy-free chocolate for a vegan-friendly version that still delivers decadent flavor.
- Gluten-Free: Substitute graham crackers or saltines with gluten-free crackers, so everyone can enjoy this tasty treat without worry.
- Nut-Free: For a nut-free option, simply replace nuts with seeds like sunflower seeds or omit them altogether for a simpler crunch.
- Spiced Delight: Add a dash of cinnamon or cayenne to the caramel sauce for a warm, unexpected twist that adds complexity to the bars.
- Double Trouble: Consider doubling the recipe and using two pans, making more bars for larger gatherings—everyone will want seconds!
- Crunchy Twists: Experiment with different crunchy toppings! Opt for crushed pretzels, toffee bits, or even a mix of your favorite snack foods for added variety.
- Frozen Treats: Freeze the bars for a refreshing dessert. They become a delightful frozen treat perfect for warm weather!
If you’re seeking more indulgent recipes, try our Vegan Chocolate Mousse for a rich, dairy-free dessert, or you can’t go wrong with High Protein Chocolate Chia Pudding for a healthier option to enjoy.
Make Ahead Options
These Caramel Chocolate Crunch Bars are perfect for meal prep enthusiasts looking to save time! You can prepare the crust and caramel layer up to 24 hours in advance. Simply follow the recipe until the caramel is poured over the crust, then cover the pan with plastic wrap and refrigerate. To maintain quality, make sure to let the bars chill for at least 2 hours after layering, allowing all flavors to meld beautifully. When you’re ready to serve, simply melt the chocolate and add the toppings before chilling again until set. This way, your bars will be just as delicious, offering you stress-free indulgence for busy days!
Expert Tips for Caramel Chocolate Crunch Bars
- Patience Pays Off: Allow the bars to chill fully in the fridge for at least two hours; this ensures clean cuts and a better texture when slicing.
- Substitution Insights: For a dairy-free version of these Caramel Chocolate Crunch Bars, use vegan butter and dairy-free chocolate.
- Avoid Sogginess: Make sure the crust is well-pressed in the pan; this prevents it from becoming too soft after adding the caramel layer.
- Layer Wisely: Spread the caramel evenly over the crust before adding chocolate; it creates a delightful balance and ensures a perfect bite.
- Topping Alternatives: Get creative with toppings! Use crushed cookies or seeds if you’re looking for nut-free options for your Caramel Chocolate Crunch Bars.
Storage Tips for Caramel Chocolate Crunch Bars
- Room Temperature: These bars can be left out for up to 2 hours during gatherings without losing their deliciousness. Make sure they’re in a cool spot to maintain texture.
- Fridge: Store your Caramel Chocolate Crunch Bars in an airtight container in the fridge for up to 1 week, preserving their sweet freshness and delightful crunch.
- Freezer: For longer storage, slice and wrap individual bars tightly in plastic wrap before placing them in a freezer-safe container. They can last in the freezer for up to 2 months.
- Reheating: If you prefer them a bit warm, microwave for about 10-15 seconds. This will slightly soften the chocolate and caramel, making for a delightful treat.
Caramel Chocolate Crunch Bars Recipe FAQs
What type of crackers should I use for the crust?
You can use graham crackers or saltines for the crust. If you prefer a gluten-free option, try substituting with gluten-free crackers. The crunchy base adds texture and a hint of salt that perfectly complements the caramel and chocolate layers.
How long can I store my Caramel Chocolate Crunch Bars?
These delicious bars can be kept in an airtight container in the fridge for up to one week. For even longer storage, they can be frozen for up to 2 months. Just be sure to wrap them tightly in plastic wrap before placing them in a freezer-safe container to maintain their texture and flavor.
Can I freeze Caramel Chocolate Crunch Bars?
Absolutely! To freeze, slice the bars and wrap each piece tightly in plastic wrap. Then, place them in a freezer-safe container. When you’re ready to enjoy them, just take out the desired amount and let them defrost in the fridge overnight or microwave for about 10-15 seconds for a warm treat.
What should I do if my caramel is too runny?
If your caramel sauce ends up too runny, don’t worry! Simply return it to the stovetop over medium heat, stirring continuously until it thickens, which usually takes about 5-7 minutes. This will give your Caramel Chocolate Crunch Bars that gooey consistency we all love!
Are there any dietary considerations I should keep in mind?
Yes, for a dairy-free version, substitute the butter with vegan margarine and use dairy-free chocolate. If you’re catering to nut allergies, you can replace the crunchy toppings with seeds like sunflower seeds or simply omit them altogether—your bars will still be delightful!
What if I don’t have parchment paper?
No problem! If you don’t have parchment paper, you can grease the baking pan with a little butter or oil to prevent the bars from sticking. Just be sure to cover the bottom and sides well to make it easier to remove the bars once they set.
Sweet Caramel Chocolate Crunch Bars You Can't Resist
Ingredients
Equipment
Method
- Preheat your oven to 350°F (175°C) and line a 9x13 baking pan with parchment paper.
- Melt butter in a medium mixing bowl and mix it with crushed graham crackers or saltines until combined. Press this mixture into the baking pan to form the crust.
- In a saucepan, cook caramel sauce over medium heat until it thickens to a golden hue, about 5-7 minutes. Pour over the crust.
- Melt chocolate in a microwave-safe bowl in 30-second intervals, stirring until smooth. Pour over the caramel layer and spread evenly.
- Sprinkle crunchy toppings over the chocolate layer and gently press them in.
- Bake the crust for about 10-12 minutes until golden brown.
- Allow the pan to cool slightly, then refrigerate for at least 2 hours to set.
- Once set, lift the bars out using the parchment overhang and cut into squares or rectangles.
Leave a Reply