
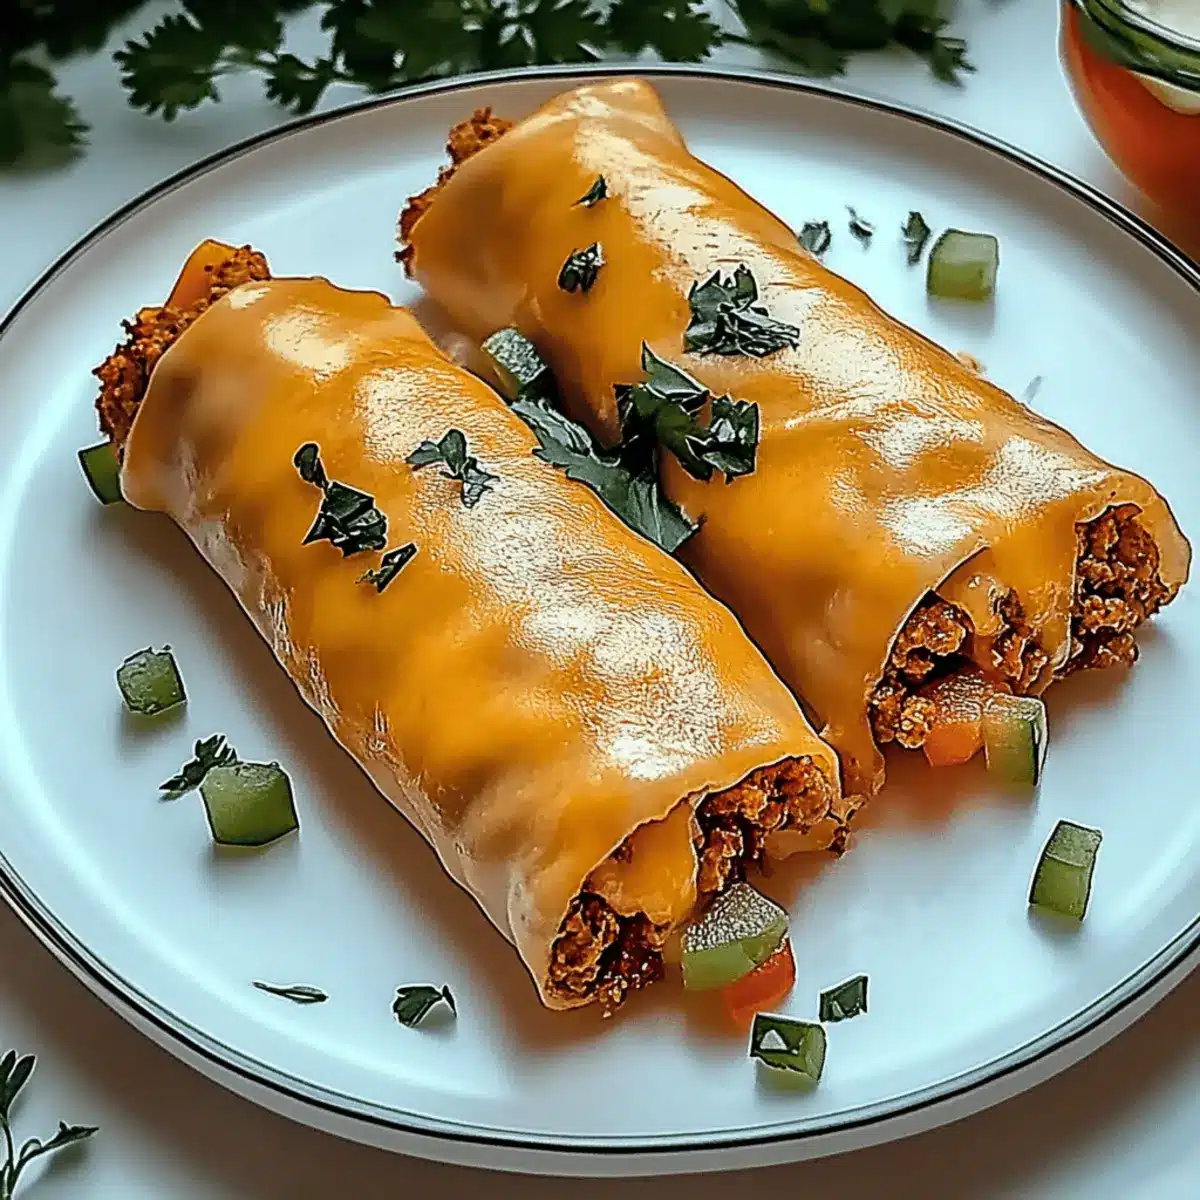
As I took a bite of the golden, crispy Cheesy Taco Stick, I couldn’t help but smile at the explosion of flavors that danced across my palate. This quick and easy recipe blends the gooey richness of melted cheese with seasoned beef—all wrapped in flaky pastry—for a delight that’s perfect for busy weeknights. Within just 35 minutes, you can create these customizable treats that cater to every taste, whether you’re in the mood for a meaty feast or a delicious vegetarian twist. Plus, they’re freezer-friendly, making them a go-to option for snack attacks and last-minute gatherings. Ready to elevate your snacking game? Let’s dive into this irresistible recipe!
Why Are Cheesy Taco Sticks a Must-Try?
Crowd-Pleaser: These delightful snacks are sure to impress your friends and family, as everyone loves the irresistible combination of cheese and taco flavors.
Quick & Easy: With just 35 minutes from start to finish, you can whip these up even on a busy weeknight.
Customizable Goodness: Tailor the filling to suit any dietary preference—swap meat for beans for a vegetarian delight or mix in your favorite vegetables!
Freezer-Friendly: Make a big batch and freeze unbaked sticks for snacking at a moment’s notice, just like with my Loaded Potato Taco Bowls.
Perfect for Dipping: Serve warm with salsa, guacamole, or queso for added flavor—because who doesn’t love a tasty dip?
You’ll find these Cheesy Taco Sticks to be a go-to recipe in your home. They make snacking not only delicious but also a fun experience!
Cheesy Taco Sticks Ingredients
For the Filling
- Ground Beef or Ground Turkey/Chicken – The star ingredient providing rich flavor and protein; feel free to substitute with plant-based meat for a vegetarian option.
- Taco Seasoning – Adds zesty spice; you can always whip up a homemade blend for a healthier twist!
- Water – Essential for mixing the seasoning into the meat while keeping it tender and moist.
- Red Onion – Introduces a sweet crunch; shallots can be an excellent substitute if you prefer a milder flavor.
- Green Bell Pepper – Adds a fresh and crunchy texture; red or yellow peppers can replace it for added sweetness.
- Fresh Cilantro or Parsley – Brings a fresh herbaceous note; feel free to omit if herbs aren’t your thing.
For the Pastry
- Refrigerated Crescent Roll Dough or Puff Pastry – These form the crispy outer layer; the flaky texture is a must for that crunchy satisfaction!
For the Cheese Filling
- Shredded Cheddar Cheese (or Pepper Jack) – Provides a cheesy richness that pairs perfectly with the filling; mix different cheeses for delicious variety.
- Shredded Mozzarella Cheese (or Gouda/Fontina) – Melts beautifully to create that gooey, melty goodness; optional substitutes are welcome!
For Assembly
- Large Egg – Used for the egg wash to give that golden, inviting finish; omit for a vegan twist!
With these ingredients, you’ll be well on your way to crafting mouthwatering Cheesy Taco Sticks that are not only crowd-pleasers but also easy to customize based on your preferences!
Step‑by‑Step Instructions for Cheesy Taco Sticks
Step 1: Preheat the Oven
Begin by preheating your oven to 375°F (190°C). While the oven heats up, line a baking sheet with parchment paper to prevent sticking and make cleanup a breeze. This will ensure your Cheesy Taco Sticks come out perfectly cooked and ready to enjoy.
Step 2: Brown the Meat
In a large skillet over medium heat, add ground beef or your choice of ground turkey/chicken. Cook for about 5-6 minutes, stirring occasionally, until the meat is nicely browned and crumbles apart easily. Once done, drain any excess grease to keep your filling from becoming too oily.
Step 3: Add Seasoning
Next, sprinkle your taco seasoning over the browned meat. Pour in the water and stir to combine everything thoroughly. Let it simmer for about 2-3 minutes, allowing the flavors to meld beautifully while keeping the mixture moist. You’ll know it’s ready when the liquid has slightly reduced.
Step 4: Prepare the Dough
Unroll your refrigerated crescent roll dough or puff pastry onto a clean surface. Press the seams together firmly to form a solid rectangle. This will be the crispy outer layer of your Cheesy Taco Sticks, so take care to create an even surface for ideal rolling.
Step 5: Assemble the Filling
Spread the seasoned beef mixture evenly over the rolled-out dough, ensuring you leave a small border around the edges. This step is crucial as it prevents the filling from leaking out while baking and helps create a delightful hand-held snack.
Step 6: Add Cheese and Veggies
Sprinkle a generous amount of shredded cheddar and mozzarella cheese over the beef filling. Then, add diced red onion and green bell pepper for extra flavor and freshness. Customize this step by mixing in any favorite veggies for your Cheesy Taco Sticks to suit your taste.
Step 7: Roll the Dough
Starting from the wide end, roll the dough tightly around the filling, keeping it as snug as possible. Pinch the seams and edges to seal securely and prevent the filling from escaping during baking. This ensures each bite remains packed with cheesy, meaty goodness.
Step 8: Brush with Egg Wash
Carefully place your rolled Cheesy Taco Sticks seam side down onto the prepared baking sheet. In a small bowl, beat the egg and then brush it evenly over the top of each stick for a golden finish. This will help create that irresistible crispy crust we all love.
Step 9: Bake the Cheesy Taco Sticks
Pop the baking sheet into your preheated oven and bake for 12-15 minutes, or until the tops are golden brown and bubbling. Keep an eye on them towards the end to ensure they achieve that perfect level of doneness while emitting a delicious aroma.
Step 10: Cool and Serve
Once baked, remove the Cheesy Taco Sticks from the oven and allow them to cool for a few minutes. This makes handling easier when slicing them into individual servings. Serve warm with your favorite salsa, guacamole, or creamy queso for a delightful snack or appetizer experience.
What to Serve with Cheesy Taco Sticks
Elevate your snack time with delightful accompaniments that will enhance the flavors of your cheesy creation.
-
Fresh Salsa: A bright burst of tomatoes, onions, and cilantro adds a refreshing contrast to the cheesy richness. It’s the perfect dip for a flavor-packed bite!
-
Guacamole: Creamy, smooth, and rich in flavors, guacamole brings a buttery texture that beautifully balances the crunchy, flaky taco sticks. Every scoop is a delicious embrace of taste!
-
Creamy Queso Dip: This warm and cheesy dip is utterly addictive! Its silky texture enhances each bite of the taco sticks, making every moment of indulgence even more blissful.
-
Mexican Street Corn Salad: Bursting with flavors of charred corn, lime, and cilantro, this salad provides a vibrant, fresh note to your meal. It also adds a delightful crunch that complements the chewy taco sticks.
-
Crisp Green Salad: Toss together some refreshing greens with a zesty vinaigrette to bring a light, crunchy element to the table. This will beautifully balance the rich and cheesy flavor of the taco sticks.
-
Margaritas: Sip on a classic margarita or a fruity variation! This invigorating drink features zesty citrus that cuts through the creaminess of the cheese, making every bite of your cheesy taco sticks an experience to savor.
Pairing these flavorful sides and drinks will create a delightful spread that’s sure to please friends and family alike!
Expert Tips for Cheesy Taco Sticks
- Meat Mastery: Ensure the beef is fully cooked but not dry; drain any excess grease to maintain a tender filling.
- Seam Sealing: Pinch dough seams tightly to avoid any filling leaks during baking, ensuring a beautifully presented snack.
- Cheese Customization: Experiment with mixing different cheeses, such as sharp and mild, to enhance the flavor of your Cheesy Taco Sticks.
- Vegetarian Delight: For a veggie option, substitute beef with black beans or a plant-based alternative, omitting the egg wash if desired.
- Baking Time Caution: Keep an eye on the sticks towards the end of baking—remove them once they’re golden brown and bubbling for best results.
Cheesy Taco Sticks Variations
Feel free to make these delightful Cheesy Taco Sticks your own with a few simple tweaks that will tantalize your taste buds!
- Vegetarian Delight: Replace ground beef with black beans or diced vegetables for a hearty vegetarian option. You’ll still enjoy the same cheesy goodness without the meat!
- Spicy Kick: Add diced jalapeños or a sprinkle of chipotle powder to the filling for an extra layer of heat. This will satisfy anyone who loves a bit of spice in their snacks!
- Sweetness Swap: Substitute bell peppers with zucchini or corn for a sweet crunch that complements the savory flavors beautifully. Each bite will be a delightful surprise!
- Dairy-Free Option: Use plant-based cheese varieties to create a totally dairy-free Cheesy Taco Stick that everyone can enjoy. You won’t miss the cheese with this creamy alternative!
- Low-Calorie Version: Swap ground beef for ground turkey or chicken for a lighter take while still packing in the flavor. Pair it with a fresh salsa for an even healthier touch!
- Herb Infusion: Experiment by adding fresh herbs like oregano or cilantro into the filling for a lovely burst of freshness. It’s a simple way to elevate the flavor profile!
- Cheese Variety: Mix different types of cheese like Gouda or Fontina and blend them for a unique flavor combination. This twist adds another dimension of taste to each stick!
- Elevate with Dips: Create a dipping sauce, like a smoky chipotle crema, to serve alongside your Cheesy Taco Sticks. It adds an exciting twist and enhances the snacking experience!
With these tasty variations, you’ll have endless options to enjoy your Cheesy Taco Sticks, making them perfect for any occasion!
Make Ahead Options
These Cheesy Taco Sticks are a fantastic option for meal prep, allowing you to save precious time during busy weeknights! You can prepare the filling (meat, veggies, and cheese) and store it in the refrigerator for up to 3 days. Simply assemble the sticks just before baking for piping hot, fresh results. Alternatively, you can roll and freeze unbaked Cheesy Taco Sticks for up to 2 months. For the best flavor and texture, ensure they are wrapped tightly to prevent freezer burn. When you’re ready to bake, just add an extra 5-10 minutes to the cooking time if baking from frozen, and you’ll enjoy delicious, cheesy goodness with minimal effort!
How to Store and Freeze Cheesy Taco Sticks
Fridge: Store leftover Cheesy Taco Sticks in an airtight container in the refrigerator for up to 3 days. Reheat them in the oven at 350°F (175°C) for 8-10 minutes until heated through.
Freezer: Assemble unbaked Cheesy Taco Sticks and place them on a baking sheet. Freeze for up to 2 months. Once frozen, transfer to a zip-top bag and bake directly from frozen, adding 5-10 minutes to the cooking time.
Reheating: To maintain crispiness, reheat in the oven rather than the microwave. Bake at 350°F (175°C) for about 10 minutes, ensuring they are thoroughly warmed.
Make-Ahead Tips: For a quick snack option, prep Cheesy Taco Sticks in advance and store them unbaked in the freezer. This makes it easy to satisfy unexpected cravings anytime!

Cheesy Taco Sticks Recipe FAQs
How do I select the best ingredients for my Cheesy Taco Sticks?
Absolutely! For the freshest flavors, look for lean ground beef or ground turkey without excessive fat. When choosing vegetables, opt for firm bell peppers and onions without any soft spots. If you’re going vegetarian, make sure the plant-based meat looks vibrant and fresh for the best texture and taste!
What’s the best way to store leftover Cheesy Taco Sticks?
I recommend placing leftover Cheesy Taco Sticks in an airtight container and storing them in the refrigerator for up to 3 days. To reheat, pop them in the oven at 350°F (175°C) for about 8-10 minutes; this keeps the outer layer crispy while warming the filling through.
Can I freeze Cheesy Taco Sticks for later use?
Definitely! To freeze, assemble the unbaked Cheesy Taco Sticks and place them on a baking sheet. Freeze until firm, then transfer them to a zip-top bag. They can be stored this way for up to 2 months. Bake them straight from the freezer, adding an extra 5-10 minutes to the cooking time for delicious results!
What should I do if my dough is leaking while baking?
Very often, leaks occur if the dough is not sealed properly. To fix this, pinch the seams tightly before cramming the filling inside, ensuring a secure seal. If it still happens, don’t worry too much—just enjoy the cheesy goodness that comes out as a tasty dip alongside your Cheesy Taco Sticks!
Are Cheesy Taco Sticks safe for everyone in the family, including pets?
For a safe treat, keep any seasonings and onions out of reach of pets, as they can be harmful to dogs and cats. If anyone in your household has dairy allergies, consider using plant-based cheese alternatives to make these Cheesy Taco Sticks a delightful and safe option for everyone.
Can I make Cheesy Taco Sticks ahead of time for a party?
Absolutely! You can prepare the Cheesy Taco Sticks in advance and assemble them but skip the baking. Store them in the refrigerator for up to a day before baking, or freeze them for longer storage. Just follow the baking instructions when you’re ready to serve; your guests will love the fresh-out-of-the-oven aroma!
Melt-in-Your-Mouth Cheesy Taco Sticks for Easy Snacking
Ingredients
Equipment
Method
- Preheat your oven to 375°F (190°C) and line a baking sheet with parchment paper.
- In a large skillet over medium heat, brown the ground beef or turkey for about 5-6 minutes. Drain excess grease.
- Sprinkle taco seasoning over the meat, pour in water, stir, and let simmer for 2-3 minutes.
- Unroll the pastry dough onto a clean surface and press seams together to form a rectangle.
- Spread the seasoned meat mixture over the dough, leaving a border around the edges.
- Sprinkle cheddar and mozzarella cheese over the filling, then add diced onion and green bell pepper.
- Roll the dough tightly around the filling, sealing seams securely.
- Place Cheesy Taco Sticks seam side down on the baking sheet. Beat the egg and brush it over the top.
- Bake in the preheated oven for 12-15 minutes until golden brown.
- Cool for a few minutes, slice, and serve warm with salsa, guacamole, or queso.
Leave a Reply