
Amid the whirl of holiday preparations, I found myself in a delicious battle: how to create a festive treat that doesn’t take hours of slaving in the kitchen. Enter Christmas bars, my secret weapon for celebrating the season without the hassle! These delightful squares combine rich chocolate with fluffy marshmallows and can be ready in just 45 minutes. What I love most is their incredible versatility; you can easily customize them to fit any dietary preference—from nut-free to vegan—making them perfect for gatherings where everyone can enjoy. Plus, they store beautifully, ensuring you have a tasty treat on hand for spontaneous holiday visits. Curious about how to make your own festive batch? Let’s dive into the delightful world of Christmas bars!

Why Are Christmas Bars a Must-Make?
Quick and Easy: These Christmas bars come together in just 45 minutes, perfect for anyone short on time yet longing for festive flavors.
Customizable Delight: With options for nut-free, gluten-free, and even vegan versions, these bars cater to a variety of dietary needs, ensuring everyone can indulge.
Storage Friendly: They’re easily stored, keeping fresh for up to a week or frozen for three months, ideal for unexpected guests.
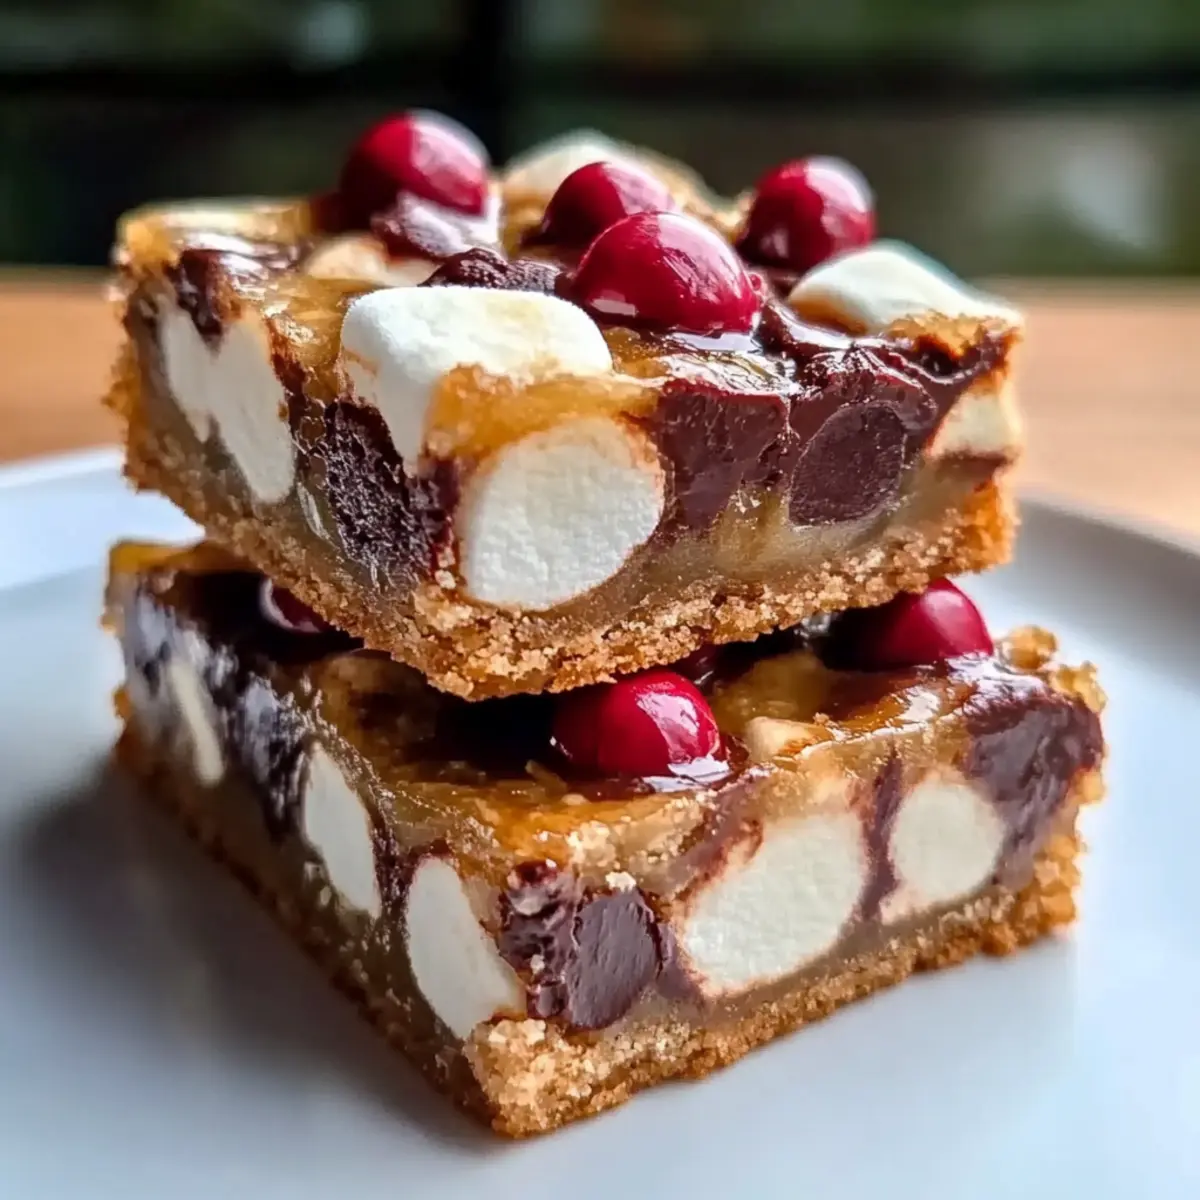
Crowd-Pleasing Flavor: The rich chocolate combined with gooey marshmallows offers a flavor showdown that will leave your guests wanting more.
Whether you’re serving them with hot cocoa or pairing them with ice cream, these bars are truly a versatile treat sure to be a holiday hit!
Christmas Bars Ingredients
For the Base
- Graham Cracker Crumbs – Provides a sweet, crunchy base; substitute with crushed gluten-free graham crackers for a gluten-free option.
- Unsweetened Cocoa Powder – Adds a deep chocolate flavor; opt for high-quality cocoa for the best taste.
- Powdered Sugar – Sweetens and gives a smooth texture, essential for the melt-in-your-mouth quality of the bars.
- Unsalted Butter, melted – Binds all ingredients together and adds richness; substitute with coconut oil for a dairy-free version.
- Sweetened Condensed Milk – Contributes moisture and sweetness, vital for a chewy texture.
For the Mix-ins
- Mini Marshmallows – Provide a fluffy, chewy element, evenly distributed throughout the bars; regular marshmallows can be used, but they may not distribute as well.
- Chocolate Chips – Enhance the chocolate flavor; choose between dark, milk, or white chocolate chips depending on your preference.
- Chopped Nuts (optional) – Adds crunch; walnuts or pecans work well—omit for nut-free versions.
Embrace the joy of making Christmas bars this holiday season and let your creative spirit shine with these delightful and customizable ingredients!
Step‑by‑Step Instructions for Festive Christmas Bars with Rich Chocolate and Cheerful Marshmallows
Step 1: Preheat the Oven
Begin by preheating your oven to 350°F (175°C) to prepare for baking the Christmas bars. This ensures an even bake, creating that perfect chewy texture. While the oven heats, gather your mixing bowls and a 9×13 inch baking pan for the next steps.
Step 2: Mix Dry Ingredients
In a large mixing bowl, combine graham cracker crumbs, unsweetened cocoa powder, and powdered sugar. Whisk these dry ingredients together until they’re well mixed and no clumps remain. This will create a uniform base for your Christmas bars, setting the stage for their rich chocolate flavor.
Step 3: Add Wet Ingredients
Next, stir in the melted unsalted butter and sweetened condensed milk into your dry mix. Use a spatula to combine until the mixture is thick and sticky. This step is crucial for binding all the components together, making sure every bite of your Christmas bars is deliciously rich.
Step 4: Fold in Mix-ins
Now, gently fold in the mini marshmallows, chocolate chips, and any optional chopped nuts. Use a spatula to incorporate these mix-ins evenly without overmixing, as you want those marshmallows and chocolate to be well-distributed throughout the batter for the best flavor in every square.
Step 5: Spread and Bake
Pour the mixture into your greased 9×13 inch baking pan, smoothing the top evenly with a spatula. Bake in the preheated oven for 25-30 minutes until the edges are set and the center feels slightly firm to the touch. This will ensure that your Christmas bars have a delightful chewy texture.
Step 6: Cool and Cut
Once baked, remove the pan from the oven and allow the bars to cool completely in the pan. This process will take about 30 minutes. Once cooled, cut them into squares to serve. Proper cooling is essential to prevent crumbling and ensures each piece holds its shape, showcasing your festive Christmas bars beautifully.

Expert Tips for Perfect Christmas Bars
-
Butter Blessing: Ensure your unsalted butter is fully melted; this creates a smooth mixture essential for the rich texture of your Christmas bars.
-
Parchment Magic: Line your baking pan with parchment paper for easy removal and cleanup. It also prevents sticking, making it simpler to cut into perfect squares.
-
Cool Down: Allow your bars to cool completely in the pan before cutting. This prevents crumbling and ensures clean, beautiful edges for serving.
-
Mix-in Variations: Don’t hesitate to mix it up! Try adding dried fruits or flavored chips for a unique twist to your Christmas bars.
-
Even Distribution: Gently fold in mix-ins like chocolate chips and marshmallows to help them spread evenly, maximizing flavor with every bite.
-
Storage Know-How: To keep your Christmas bars fresh, store them in an airtight container at room temperature or freeze for up to three months for a delightful treat anytime.
Christmas Bars: Variations & Substitutions
Feel free to get creative with your Christmas bars; there are so many delicious ways to customize this festive treat!
-
Nut-Free: Omit chopped nuts and add extra chocolate chips for a rich, nutty flavor without the nuts.
-
Gluten-Free: Substitute crushed gluten-free graham crackers or almond flour to make these bars suitable for gluten-sensitive guests.
-
Vegan: Replace melted butter with coconut oil and use a homemade vegan sweetened condensed milk for a dairy-free delight.
-
Mint Chocolate Twist: Add a dash of peppermint extract to your batter for a refreshing, holiday-inspired flavor that’s sure to uplift.
-
Fruit and Nut Medley: Toss in a handful of dried cranberries or cherries along with nuts for a chewy, flavorful surprise in every bite.
-
Extra Chocolate: For true chocolate lovers, feel free to swap in dark chocolate chips or add cocoa nibs for a crunchier texture and deeper flavor.
-
Marshmallow Variations: Experiment with flavored marshmallows, like strawberry or caramel, for a unique twist that adds a pop of unexpected sweetness.
-
Heated Option: Add a pinch of cayenne or a dash of chili powder to the mix for an exciting heat that contrasts beautifully with the sweetness.
If you’re feeling adventurous, consider checking out a delightful side of hot cocoa or one of my favorite vegan sweetened condensed milk recipes to accompany your Christmas bars!
Make Ahead Options
These festive Christmas bars are a dream for busy home cooks looking to save time during the bustling holiday season! You can prepare the base mixture, combining the graham cracker crumbs, cocoa powder, and melted butter, up to 24 hours in advance. Simply refrigerate it in an airtight container to maintain freshness. When you’re ready to bake, stir in the mini marshmallows and chocolate chips, then spread it into your greased pan and bake as directed. For ultimate convenience, you can also bake the bars a couple of days ahead and store them at room temperature in an airtight container for up to one week. This way, you can focus on enjoying the festivities while having a delicious treat ready to share!
What to Serve with Festive Christmas Bars?
Indulge in the warmth of the holidays as you discover delightful pairings to complement these scrumptious treats.
- Hot Cocoa: The rich creaminess of hot cocoa beautifully balances the chocolatey sweetness of the Christmas bars, making for a cozy pairing.
- Vanilla Ice Cream: A scoop of vanilla ice cream will add a cool contrast to the bars’ chewy texture while enhancing their sweet flavor.
- Spiced Apple Cider: Serve hot with a dash of cinnamon, this beverage brings a festive warmth, perfectly complementing the rich chocolate.
For an elevated dessert experience, try pairing the Christmas bars with a drizzle of caramel or a sprinkle of sea salt to enhance the flavors. Dust the bars with powdered sugar for an elegant presentation that adds a festive touch to your holiday gatherings!
Storage Tips for Christmas Bars
-
Room Temperature: Store your Christmas bars in an airtight container for up to 1 week at room temperature, keeping them fresh and chewy—perfect for last-minute snacking.
-
Fridge: For longer freshness, keep the bars in the refrigerator in an airtight container. They can last up to 2 weeks, although the texture may become firmer.
-
Freezer: Freeze your Christmas bars to enjoy them later! Wrap tightly in plastic wrap and place them in an airtight container for up to 3 months. Thaw at room temperature before serving.
-
Reheating: If you prefer a warm treat, gently reheat frozen bars in the microwave for about 10-15 seconds, just until they’re slightly warm and the chocolate becomes melty.

Christmas Bars Recipe FAQs
What kind of graham cracker crumbs should I use for Christmas bars?
You can use regular graham cracker crumbs for a classic taste, but if you’re looking for a gluten-free option, I recommend using crushed gluten-free graham crackers or almond flour. Both alternatives work wonderfully, keeping the bars flavorful and allowing everyone to enjoy them!
How should I store my Christmas bars to keep them fresh?
Store your Christmas bars in an airtight container at room temperature for up to 1 week. If you want them to last longer, you can refrigerate them to maintain freshness, which allows them to stay good for up to 2 weeks, although they may be a bit firmer in texture.
Can I freeze Christmas bars, and if so, how?
Absolutely! You can freeze your Christmas bars for up to 3 months. Just wrap them tightly in plastic wrap, then place them in an airtight container to protect against freezer burn. When you’re ready to indulge again, simply thaw at room temperature for about an hour, and they’ll be as delectable as fresh!
What if my Christmas bars crumble when I cut them?
If your bars crumble when cutting, it might be due to not allowing them to cool completely in the pan. Make sure to let them cool for at least 30 minutes. When they’re cool, use a sharp knife and cut slowly for cleaner edges. You can also try refrigerating them briefly prior to cutting for better results.
Are there any dietary considerations I should keep in mind for Christmas bars?
Yes indeed! You can easily make nut-free or gluten-free versions by choosing appropriate substitutes, like leaving out the nuts or using gluten-free graham crackers. For a vegan option, swap the butter for coconut oil and opt for a dairy-free sweetened condensed milk. Always check labels for potential allergens like nuts and dairy if you have guests with dietary restrictions.
What can I pair with my Christmas bars for serving?
I love serving Christmas bars with hot cocoa or spiced apple cider for a cozy treat! You could also go indulgent by pairing them with vanilla ice cream. For presentation, dust with powdered sugar or arrange them on a festive platter with mint leaves or berries for a beautiful touch!
Irresistibly Chewy Christmas Bars for Your Holiday Gatherings
Ingredients
Equipment
Method
- Preheat your oven to 350°F (175°C). Gather mixing bowls and a 9x13 inch baking pan.
- In a large mixing bowl, combine graham cracker crumbs, unsweetened cocoa powder, and powdered sugar. Whisk until well mixed.
- Stir in the melted unsalted butter and sweetened condensed milk until thick and sticky.
- Gently fold in the mini marshmallows, chocolate chips, and any optional chopped nuts.
- Pour the mixture into your greased baking pan, smoothing the top. Bake for 25-30 minutes until edges are set.
- Allow the bars to cool completely in the pan for about 30 minutes before cutting into squares.
Leave a Reply