
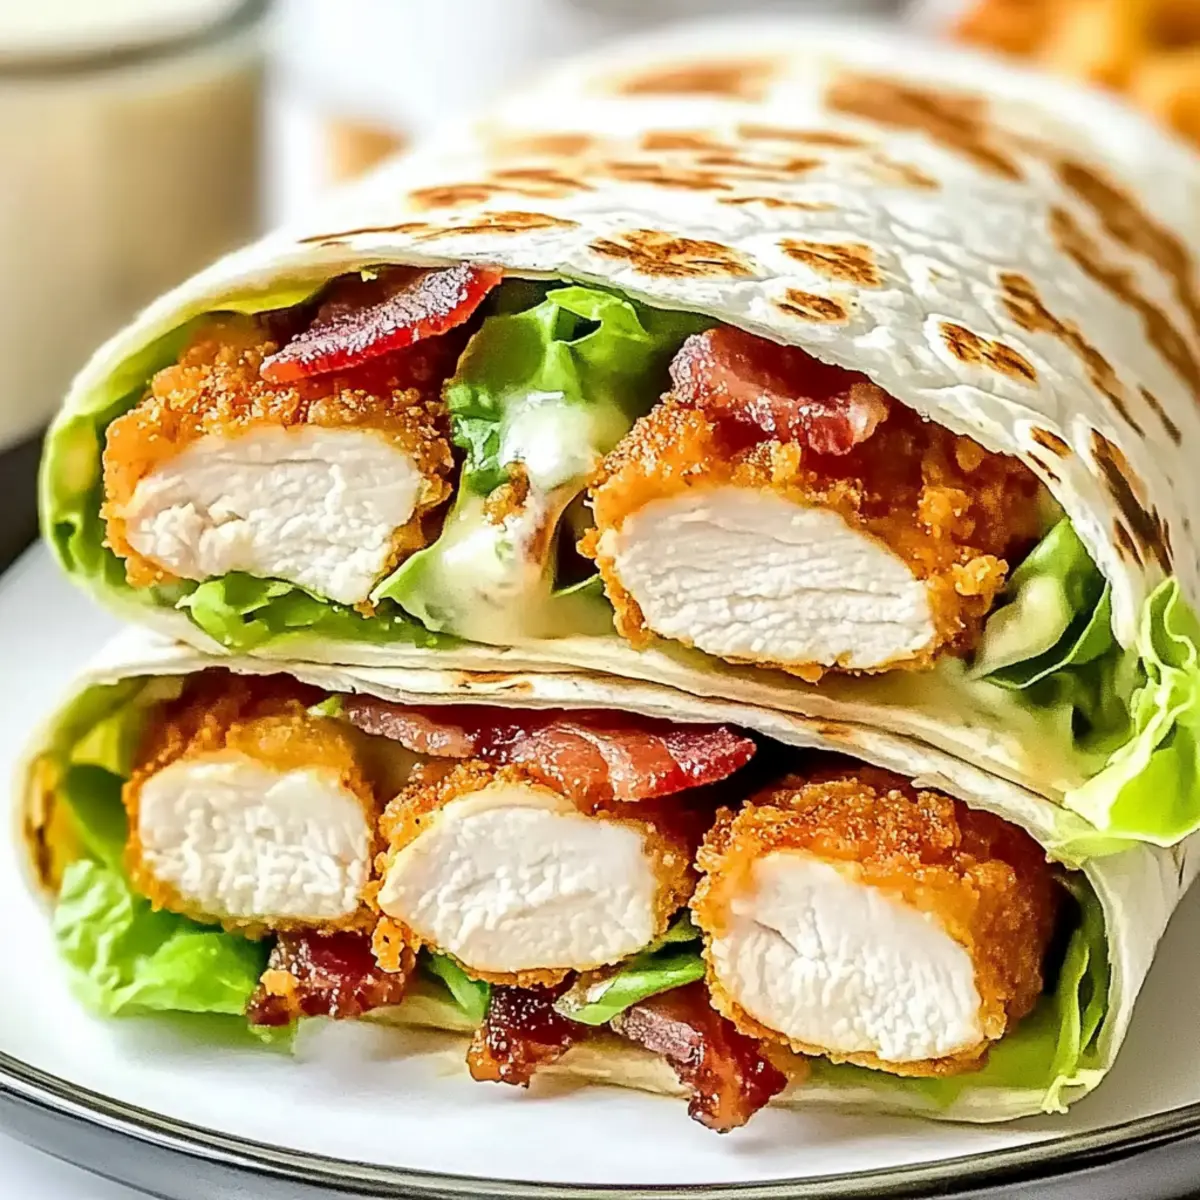
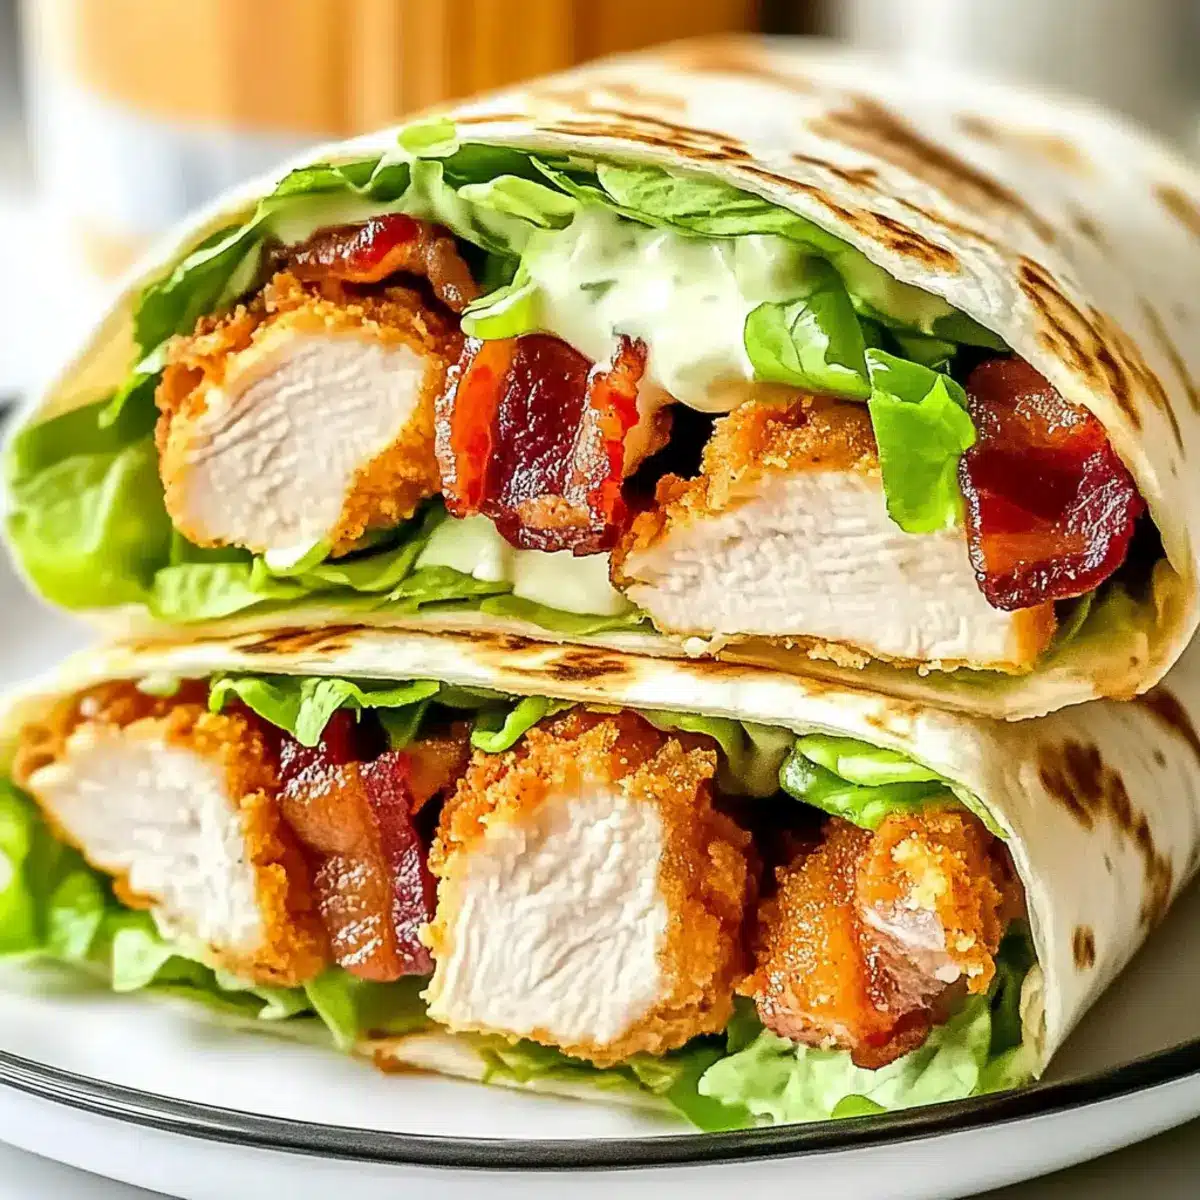
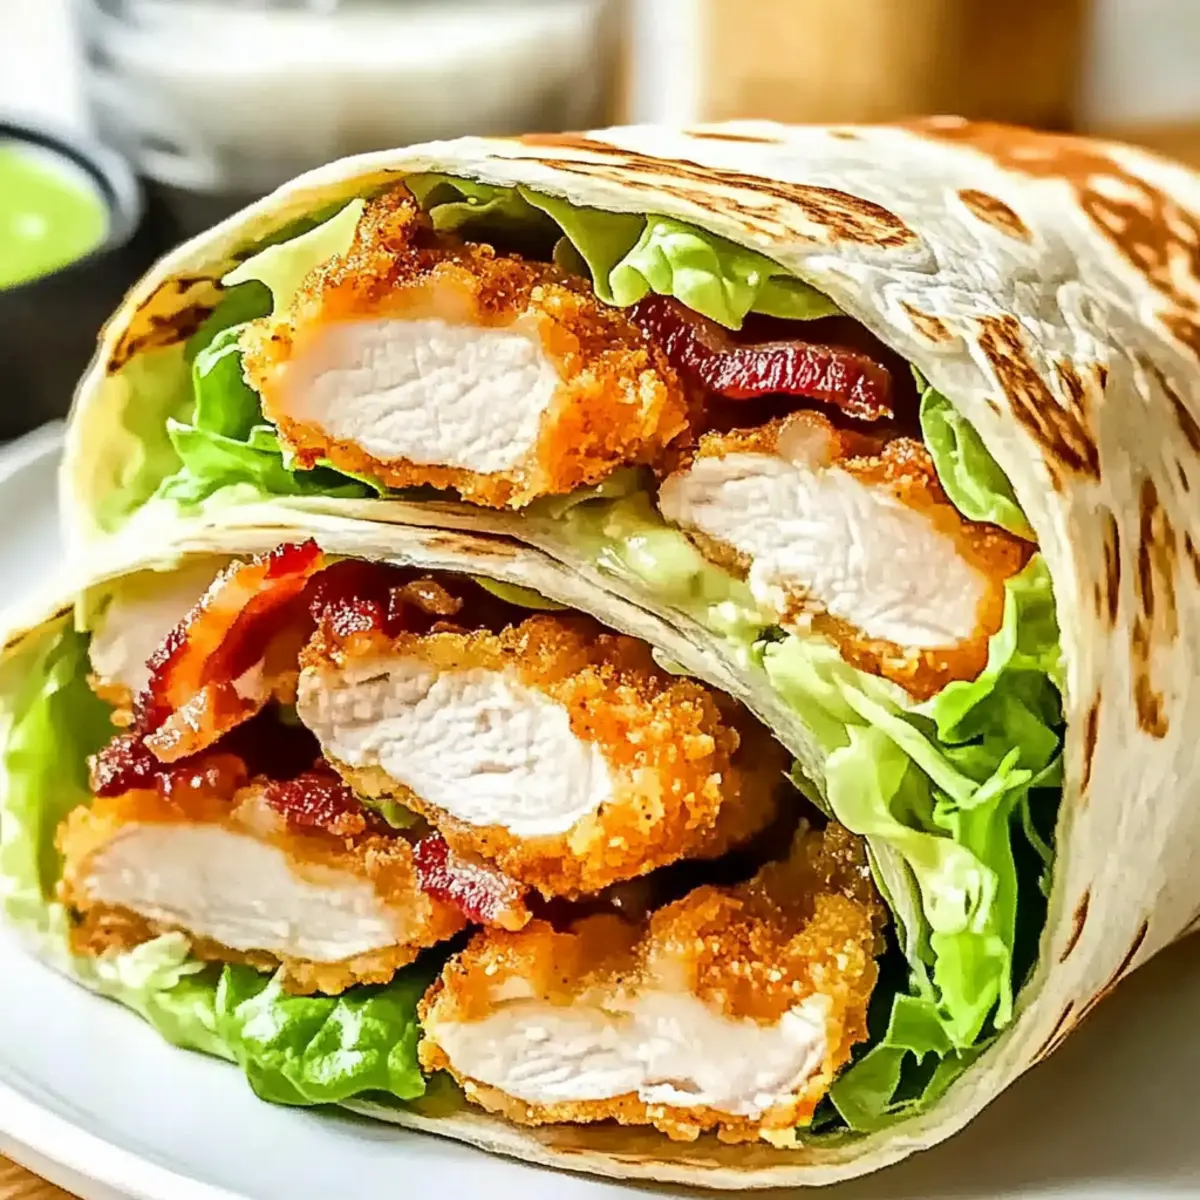
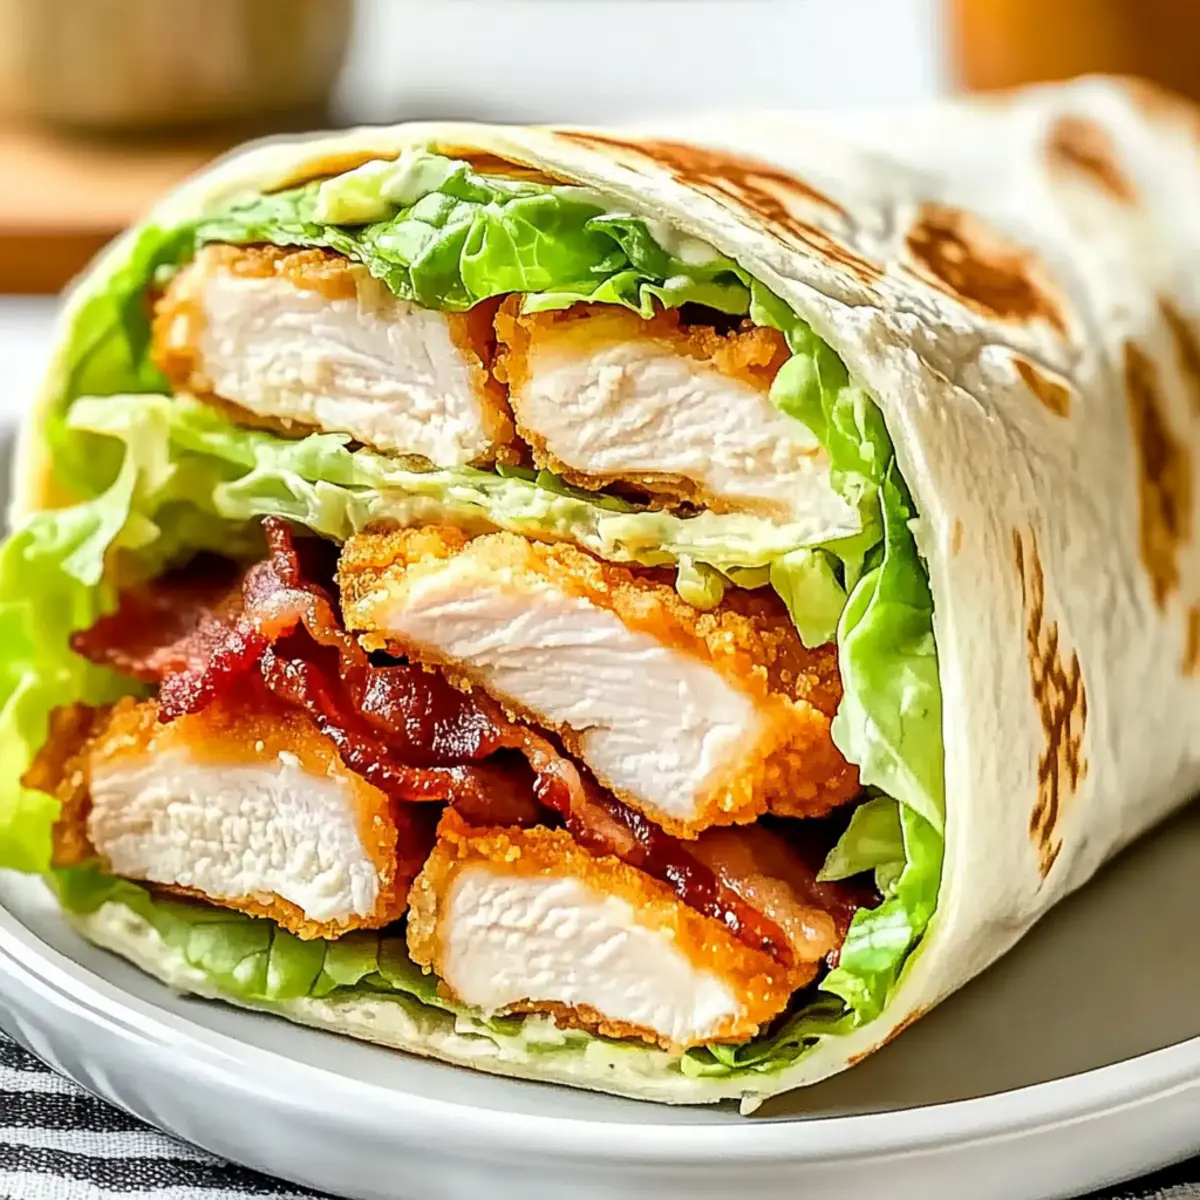
As I unwrapped the warm tortilla, the aroma of smoky bacon and crispy chicken filled the kitchen, instantly brightening my evening. There’s something truly satisfying about preparing a quick meal that feels like a cozy hug, and the Crispy Chicken Bacon Ranch Wrap does just that. Ready in under 30 minutes, this wrap offers the perfect solution for busy nights, whether you’re whipping up dinner for your family or enjoyed as a hearty lunch. What I love most is its customizable nature—feel free to toss in your favorite greens or crank up the spice for an extra kick! Trust me; once you roll these delicious flavors together, you’ll find yourself reaching for this recipe often. Are you ready to savor the crunch and comfort of your new favorite wrap? Let’s dive into the how-to!
Why is this wrap a must-try?
Quick and Easy: In just 30 minutes, you can enjoy a delicious homemade meal that competes with your favorite takeout!
Mouthwatering Ingredients: The combination of crispy chicken, smoky bacon, and creamy ranch dressing creates an irresistible flavor explosion that your taste buds will thank you for.
Versatile and Customizable: Whether you prefer vibrant greens or a spicy kick, this wrap can easily be adapted to suit any palate, making it perfect for family dinners.
Crowd-Pleasing Appeal: Kids and adults alike will love this wrap, ensuring it becomes a staple at your dinner table.
Perfect for Meal Prep: Cook chicken and bacon ahead of time, and you’ll have a quick lunch option ready to go, much like my Bang Bang Chicken or Ranch Chicken Crock.
Get ready to elevate your mealtime experience with this amazing wrap!
Crispy Chicken Bacon Ranch Wrap Ingredients
For the Wrap
- Flour Tortillas – Use burrito-size to ensure you can fill it generously.
- Crispy Chicken Tenders – Provides the delightful crunch you’re after; opt for homemade for extra flavor.
- Crispy Bacon – Thick-cut is recommended for that perfect smoky flavor that balances the wrap.
For the Freshness
- Shredded Romaine Lettuce – Adds a refreshing crunch; feel free to substitute with spinach or kale for a twist.
- Shredded Cheddar Cheese – Enhances creaminess and flavor; consider Monterey Jack for something different.
For the Dressing
- Ranch Dressing – This is the flavor star of your wrap; homemade or store-bought both work well!
Let the ingredients come together for a perfect Crispy Chicken Bacon Ranch Wrap that brings joy to your dinner table!
Step‑by‑Step Instructions for Crispy Chicken Bacon Ranch Wrap
Step 1: Cook the Chicken
Preheat your oven to 425°F (220°C). Arrange crispy chicken tenders on a baking sheet lined with parchment paper and bake for 15-20 minutes, or until they turn golden brown and reach an internal temperature of 165°F (74°C). For a homemade option, pan-fry the chicken in a skillet over medium heat until crispy and cooked through, about 4-5 minutes per side.
Step 2: Cook the Bacon
While the chicken is baking, cook thick-cut bacon in a skillet over medium heat. Sauté for 6-8 minutes, flipping occasionally, until the bacon is crispy and rendered. Once done, transfer the bacon to a paper towel-lined plate to drain the excess fat, ensuring your Crispy Chicken Bacon Ranch Wrap stays delightful and crunchy.
Step 3: Warm the Tortillas
Increase the flexibility of your tortillas by warming them gently. Place them in the microwave for 15-20 seconds or heat in a skillet for about 30 seconds on each side. Choose burrito-sized tortillas for your crispy chicken bacon ranch wrap, as they will hold the ample filling nicely without tearing.
Step 4: Assemble the Wrap
Now it’s time to create your crispy chicken bacon ranch wrap masterpiece! Lay a warm tortilla flat and start layering with a generous amount of shredded romaine lettuce, followed by crispy chicken tenders, crumbled bacon, shredded cheddar cheese, and a drizzle of ranch dressing. Don’t be shy; feel free to get creative with your layering!
Step 5: Customize Your Wrap
Feel free to put your unique spin on the wrap! Add optional toppings such as diced tomatoes, jalapeños, or even sliced cucumbers for an extra crunch and flavor burst. These additions not only enhance the taste of your crispy chicken bacon ranch wrap but also introduce a pleasing freshness to the overall dish.
Step 6: Roll and Toast
To finish, fold in the sides of the tortilla and roll it tightly from the bottom to encase all the delicious fillings. Heat a skillet over medium-high heat and toast the seam-side down for about 1-2 minutes until golden brown. Flip the wrap gently and toast the other side, allowing it to crisp up perfectly, ensuring each bite of your crispy chicken bacon ranch wrap is satisfying.
Crispy Chicken Bacon Ranch Wrap Variations
Feel free to explore these exciting twists that can elevate your Crispy Chicken Bacon Ranch Wrap experience!
-
Gluten-Free: Use gluten-free tortillas or lettuce wraps for an equally delicious and accommodating meal.
-
Spicy Kick: Add sliced jalapeños or a drizzle of sriracha to ignite some heat and make your taste buds dance!
-
Protein Swap: Substitute chicken with shredded rotisserie chicken or grilled shrimp for an exciting change.
-
Veggie Boost: Include other fresh vegetables like diced cucumbers or grated carrots for added crunch and nutrients.
-
Herbed Ranch: Mix in fresh herbs like cilantro or basil into your ranch dressing for a fragrant flavor twist.
-
Cheesy Delight: Experiment with different cheeses such as pepper jack for a creamy, spicy surprise in each bite.
-
Smoky Flavor: Incorporate smoked paprika into the chicken coating to enhance the smoky notes of your bacon.
-
Baked Option: Instead of frying your bacon, try baking it in the oven for a healthier take that still offers delectably crispy results.
The beauty of this wrap is how it invites creativity! How about having it alongside a refreshing salad or some easy-to-prepare crispy sweet potato fries? And if you’re looking for more delicious ideas, try my Cheesy Chicken Broccoli or our favorite Honey Garlic Chicken!
How to Store and Freeze Crispy Chicken Bacon Ranch Wrap
Fridge: Store leftover wraps wrapped tightly in foil or plastic wrap for up to 3 days, ensuring they stay fresh and ready to enjoy.
Freezer: For long-term storage, tightly wrap uncut wraps in plastic wrap or freezer bags for up to 2 months. Thaw in the fridge overnight before reheating.
Reheating: To maintain the delightful crunch of your crispy chicken bacon ranch wrap, reheat in a skillet or toaster oven rather than a microwave, which can make them soggy.
Longer Storage: If you plan to store the wraps for longer, consider assembling them without fresh greens or sauces, adding those just before serving for optimal freshness.
What to Serve with Crispy Chicken Bacon Ranch Wrap
The perfect meal deserves delightful accompaniments, transforming a simple wrap into a feast for your senses.
-
Crispy Sweet Potato Fries: The natural sweetness and crunch of these fries pair beautifully with the savory flavors of the wrap. They’re a family favorite that’s easy to prepare!
-
Classic Coleslaw: Fresh, tangy, and crunchy, coleslaw complements the wrap’s rich ingredients, adding a refreshing contrast that brightens every bite.
-
Garlic Parmesan Roasted Broccoli: This veggie side adds a satisfying crunch and savory flavor, making your meal healthier without sacrificing taste. Plus, it’s a great way to sneak in some greens!
-
Creamy Tomato Soup: A warm bowl of tomato soup brings a comforting element to your meal, enhancing the wrap’s crispy texture with warm, velvety goodness perfect for dipping.
-
Chilled Lemonade: Refreshing and citrusy, this drink cuts through the richness of the wrap, providing a palate-cleansing zing that feels like a summer day in a glass.
-
Chocolate Chip Cookies: For dessert, these soft and chewy cookies add a sweet ending to your meal, creating a lovely balance with the savory flavors of the wrap. A delightful treat for both kids and adults!
Make Ahead Options
These Crispy Chicken Bacon Ranch Wraps are a fantastic make-ahead choice for busy weeknights! You can cook the chicken tenders and bacon up to 3 days in advance, storing them in an airtight container to keep them fresh. Additionally, you can prepare toppings like shredded lettuce and cheese ahead of time for extra convenience; just keep them refrigerated. When you’re ready to serve, simply warm the tortillas briefly (15-20 seconds in the microwave) and assemble your wraps with the prepared ingredients. This way, you’ll have a delicious meal ready in no time, ensuring you enjoy each satisfying bite without the rush!
Expert Tips for Crispy Chicken Bacon Ranch Wrap
Meal Prep Magic: Prepare chicken and bacon ahead—this saves cooking time and makes for a quick meal during busy weekdays.
Prevent Sogginess: Layer wetter ingredients like lettuce in the center to keep your crispy chicken bacon ranch wrap from becoming mushy.
Reheat Right: Always reheat your leftovers in a skillet or toaster oven for that delightful crunch, avoiding the microwave which can make it soggy.
Freezing Friendly: For longer storage, wrap uncut wraps tightly for up to 2 months; remember to thaw in the fridge overnight before reheating.
Customization Bliss: Don’t hesitate to mix up your ingredients! Incorporate other veggies or spice levels to cater to different tastes, making this wrap your own.
Crispy Chicken Bacon Ranch Wrap Recipe FAQs
What type of tortillas should I use for the wrap?
Absolutely! For the best experience, I recommend using burrito-sized flour tortillas. They provide ample space to generously fill with delicious ingredients without tearing. However, if you’re looking for a gluten-free option, you might also enjoy corn or gluten-free flour tortillas.
How should I store leftover wraps?
You can store leftover crispy chicken bacon ranch wraps by wrapping them tightly in foil or plastic wrap for up to 3 days in the fridge. This will help maintain their freshness and flavor until you’re ready to enjoy them again!
Can I freeze the wraps?
Yes! To freeze your crispy chicken bacon ranch wraps, tightly wrap uncut wraps in plastic wrap or place them in freezer bags. They can be stored this way for up to 2 months. To enjoy, simply thaw in the fridge overnight before reheating. This helps to preserve the wrap’s structure while keeping it delicious.
What if my chicken isn’t crispy enough?
If you find your chicken isn’t crispy after baking or frying, there are a few things you can try. First, make sure to spread the chicken tenders out on the baking sheet, allowing for proper airflow. For an extra crunch, you can also coat the tenders in breadcrumbs or panko before baking. If pan-frying, let them cook undisturbed for a few minutes on each side to encourage a good sear.
Are there any dietary considerations for this recipe?
If you or someone you’re serving has dietary restrictions, you can easily modify this wrap! For dairy-free options, use plant-based cheese and ranch dressing. Additionally, if avoiding gluten, opt for gluten-free tortillas. Just make sure to check each ingredient for allergens to ensure they meet your dietary needs.
How do I customize my crispy chicken bacon ranch wrap?
The customization possibilities are endless! You can add diced tomatoes, jalapeños, or even sliced cucumbers for added crunch and nutrients. For spiciness, consider mixing some hot sauce into your ranch dressing or adding spicy peppers. Get creative with your fillings and make it a dish that reflects your taste!
Delicious Crispy Chicken Bacon Ranch Wrap in 30 Minutes!
Ingredients
Equipment
Method
- Preheat your oven to 425°F (220°C). Arrange crispy chicken tenders on a baking sheet lined with parchment paper and bake for 15-20 minutes, or until golden brown and reach an internal temperature of 165°F (74°C).
- Cook thick-cut bacon in a skillet over medium heat for 6-8 minutes until crispy. Transfer to a paper towel-lined plate to drain.
- Warm the tortillas in the microwave for 15-20 seconds or heat in a skillet for about 30 seconds on each side.
- Layer a warm tortilla with shredded romaine lettuce, crispy chicken tenders, crumbled bacon, shredded cheddar cheese, and ranch dressing.
- Add optional toppings like diced tomatoes, jalapeños, or cucumber for extra crunch.
- Fold in the sides of the tortilla and roll tightly from the bottom. Toast seam-side down in a skillet over medium-high heat for 1-2 minutes until golden brown.
Leave a Reply