
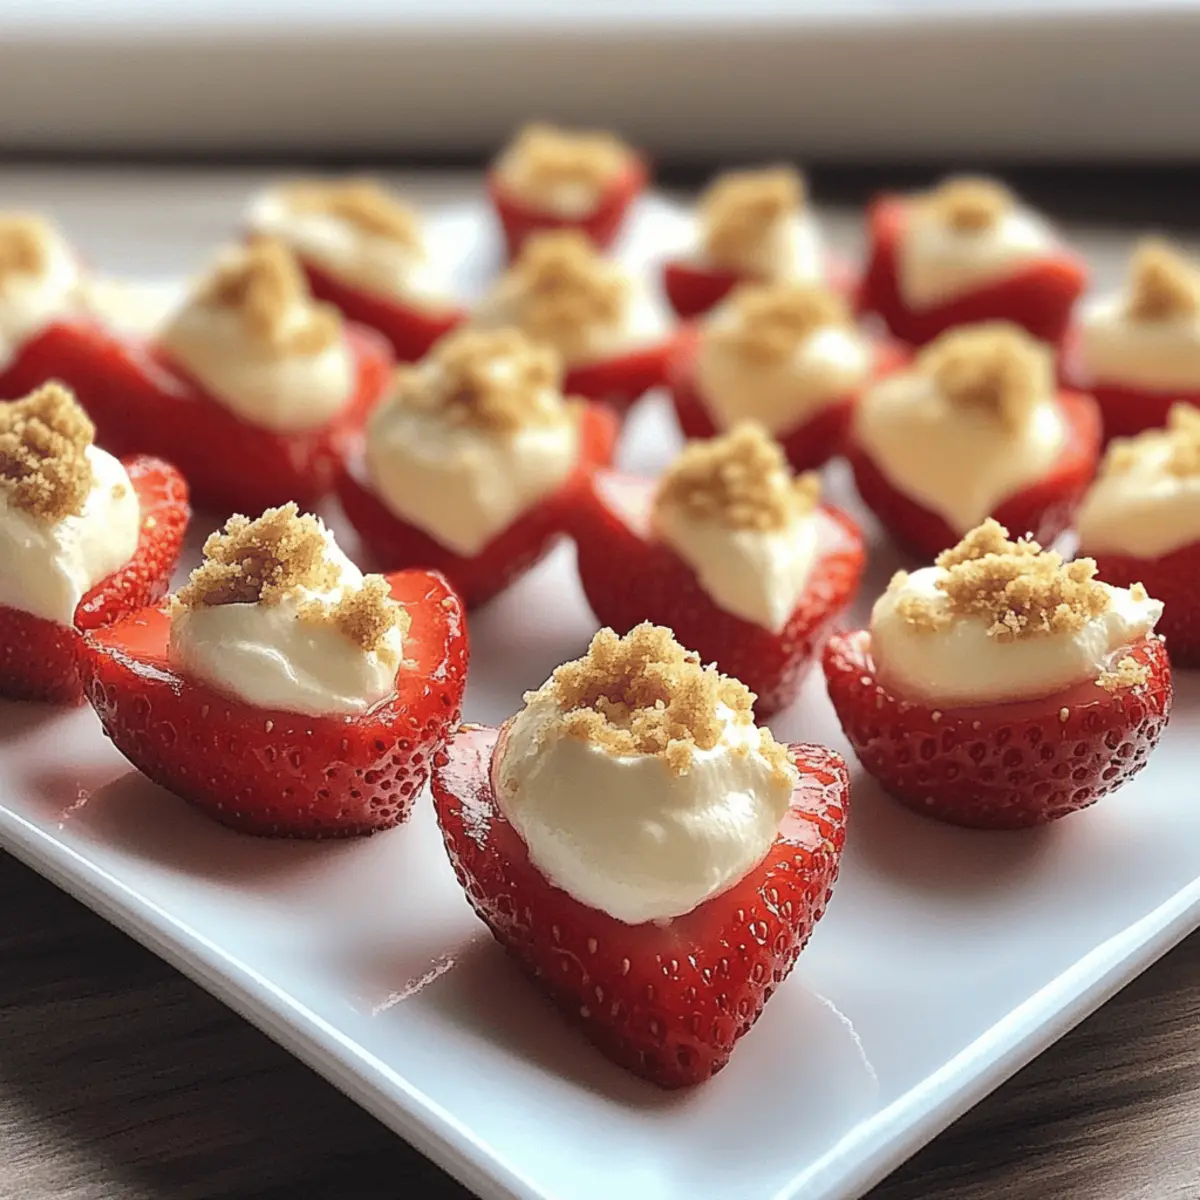
The first bite had me hooked, with the tangy whisper of cheesecake melting seamlessly into the sweetness of ripe strawberries. These Deviled Strawberries with Cheesecake Filling are an unexpected gem that transforms traditional flavors into a stunning finger food, perfect for any gathering. Not only are they a crowd-pleaser, but they’re also quick to whip up, making them ideal for those last-minute party prep moments. With a delightful crunch from the graham cracker topping, every bite is as satisfying as indulging in a slice of strawberry cheesecake—but without the fork! Whether you’re hosting a soirée or just looking to impress your family, these tasty treats are sure to become a staple in your dessert repertoire. Curious about how to make these vibrant bites? Let’s dive into this delicious recipe!
Why are Deviled Strawberries a must-try?
Irresistible Flavor: The delightful blend of creamy cheesecake filling and juicy strawberries creates a perfect harmony of sweetness and tanginess.
Effortless Preparation: With just a handful of basic ingredients, these bites can be assembled quickly, making them an excellent choice for spontaneous gatherings.
Crowd-Pleasing Appeal: They’re a unique twist on traditional desserts, guaranteed to impress your guests and spark cravings among family members, just like Deviled Strawberries Cheesecake.
Versatile Options: Feel free to switch things up with seasonal fruits or substitute toppings; creativity is encouraged here!
Guilt-Free Indulgence: By using low-fat cream cheese or sugar alternatives, you can savor these sweet treats without the guilt.
Deviled Strawberries Ingredients
Here’s everything you need to create your Deviled Strawberries with Cheesecake Filling.
For the Strawberries
- Strawberries – Opt for large, ripe berries to hold all that luscious filling.
For the Cheesecake Filling
- Heavy Whipping Cream – This gives your filling a light and airy texture; feel free to swap in non-dairy options if needed.
- Cream Cheese – Softened for easy mixing, it provides that rich, cheesecake flavor; consider low-fat alternatives if desired.
- Sour Cream – Adds creaminess and a slight tang; Greek yogurt works well as a substitute too!
- White Granulated Sugar – Sweetens the mixture beautifully; you can try a low-carb sweetener for a guilt-free treat.
- Vanilla Extract – Enhances the overall flavor; always choose pure vanilla for the best experience.
- Fresh Lemon Juice – Brightens the flavor for a refreshing bite; optional but highly recommended.
For the Topping
- Graham Cracker Crumbs – These provide the crunchy element reminiscent of classic cheesecake; gluten-free versions are available for those with dietary restrictions.
Step‑by‑Step Instructions for Deviled Strawberries
Step 1: Prepare the Strawberries
Start by washing 12 large, ripe strawberries under cool water and patting them dry. Remove the green stems and slice each berry in half lengthwise. Carefully use a melon baller or a small spoon to hollow out the center of each half, creating a small cavity to hold your heavenly cheesecake filling without any spillage. Set them aside on a serving platter.
Step 2: Whip the Cream
In a mixing bowl, pour 1 cup of heavy whipping cream. Using an electric mixer, beat the cream on medium-high speed for about 5 minutes, or until stiff peaks form. You’ll know it’s ready when the cream forms peaks that stand firmly without collapsing. This airy whipped cream will add a lovely lightness to your deviled strawberries’ cheesecake filling.
Step 3: Mix the Cheesecake Filling
In a separate mixing bowl, combine 8 ounces of softened cream cheese, ½ cup of sour cream, ⅓ cup of white granulated sugar, 1 teaspoon of vanilla extract, and 1 tablespoon of fresh lemon juice. Beat these ingredients together on medium speed until the mixture is perfectly smooth and creamy, which takes about 2-3 minutes. This luscious cheesecake filling is the star of your deviled strawberries.
Step 4: Combine the Cream and Filling
Once your cheesecake mixture is smooth, gently fold the whipped cream into it using a spatula. Start with one-third of the whipped cream to lighten the cream cheese mixture, then gradually fold in the rest. Be careful not to deflate the whipped cream; you want a light and fluffy filling that will perfectly complement the freshness of the strawberries.
Step 5: Fill the Strawberries
Fit a piping bag with a star tip and scoop in the fluffy cheesecake filling. If you don’t have a piping bag, a sturdy zip-top bag with a corner snipped off will work too. Pipe the filling generously into the hollowed-out strawberry halves, allowing the creamy mixture to gently mound over the edges. This step adds a professional touch to your deviled strawberries.
Step 6: Add the Topping
Once all the strawberries are filled, take ½ cup of crushed graham cracker crumbs and sprinkle them atop each deviled strawberry for a delightful crunch. Ensure each berry is beautifully adorned to resemble a mini cheesecake. The graham cracker crumbs not only enhance the flavor but also signify the traditional cheesecake element.
Step 7: Chill and Serve
You can serve these delicious deviled strawberries immediately, or for best results, refrigerate them for about 30 minutes to allow the flavors to meld. This chilling period helps stabilize the filling, making the deviled strawberries even more delightful. Serve them fresh as a refreshing finger food at your next gathering, and watch your guests swoon with delight!
Make Ahead Options
These Deviled Strawberries with Cheesecake Filling are perfect for busy home cooks looking to save time! You can prepare the strawberries by washing and hallowing them up to 24 hours in advance; simply store them in an airtight container with a paper towel to prevent sogginess. Additionally, the cream cheese filling can be made up to 3 days ahead, but be sure to refrigerate it in an airtight container to maintain its luscious texture. When you’re ready to serve, just fill each strawberry half with the prepped cheesecake mixture and sprinkle with graham cracker crumbs for that delightful crunch. This way, you’ll have a stunning dessert ready in minutes while still impressing your guests!
What to Serve with Deviled Strawberries with Cheesecake Filling
These delightful bites can create a fabulous dessert spread that tantalizes the taste buds and impresses at any gathering.
-
Refreshing Mint Tea: This aromatic beverage offers a light, herbal contrast to the sweet indulgence of the strawberries, enhancing the overall experience.
-
Lemon Sorbet: A zesty, icy treat that cleanses the palate between bites, making each strawberry taste even more vibrant and fresh.
-
Mini Fruit Tarts: Their buttery crust and pastry cream complement the creamy filling of the deviled strawberries, creating a delightful textural juxtaposition.
-
Chocolate-Covered Pretzels: The salty-sweet crunch adds a fun twist, engaging your senses and making for an enjoyable snacking experience alongside the sweet strawberries.
-
Whipped Cream: A dollop of freshly whipped cream adds an extra cloud of fluffiness to every bite, marrying beautifully with the cheesecake filling’s smoothness.
-
Sparkling Water with Berries: Infused water visually and tastefully harmonizes with the strawberries, offering a refreshing, non-sweetened option that maintains the meal’s lightness.
-
Cheesecake Bites: These can echo the flavor profiles, providing an additional cheesecake experience without overwhelming guests, keeping the focus on the deviled strawberries.
-
Homemade Chocolate Sauce: A drizzle of rich chocolate sauce can elegantly elevate your strawberries, appealing to those craving a decadent touch.
These pairings will elevate your dessert table and ensure a memorable dining experience that celebrates the joy of homemade treats!
Storage Tips for Deviled Strawberries
Fridge: Store any leftover deviled strawberries in an airtight container in the refrigerator for up to 2 days. This helps maintain freshness while preventing the strawberries from becoming soggy.
Freezer: Although deviled strawberries are best enjoyed fresh, you can freeze the filling for up to 1 month. Just make sure to thaw it in the fridge before refilling strawberries.
Reheating: These delightful bites are meant to be served cold. If you’re replaying the filling from the freezer, let it warm slightly at room temperature before filling fresh strawberries for the best texture.
Preparation Tip: If making ahead, prepare the cheesecake filling and store it separately in the fridge, filling the strawberries just before serving for optimal freshness and presentation.
Expert Tips for Deviled Strawberries
-
Strawberry Selection: Choose large, ripe strawberries for optimal filling capacity. Small strawberries may collapse under the weight of the cheesecake filling.
-
Prevent Sogginess: Prepare strawberries in advance by storing them with a paper towel in an airtight container, which absorbs excess moisture and keeps them fresh.
-
Perfectly Creamy Filling: Ensure your cream cheese is softened before mixing. If it’s too cold, it can create lumps instead of a smooth cheesecake filling.
-
Whipping Cream Technique: Beat heavy whipping cream until stiff peaks form, but avoid overwhipping, which can lead to a grainy texture in the filling.
-
Chilling Time: After filling the strawberries, refrigerate for at least 30 minutes before serving. This allows the flavors to meld beautifully, enhancing the overall taste.
Deviled Strawberries Variations
Feel free to unleash your creativity and customize these delightful bites to suit your taste preferences!
-
Berry Bliss: Swap strawberries for raspberries or blackberries for a tangy twist. Each fruit brings its unique tartness that pairs wonderfully with the cheesecake filling.
-
Nutty Crunch: Replace the graham cracker topping with finely chopped almonds or pecans for an additional crunch. The nuttiness adds a delightful depth of flavor that enhances every bite.
-
Coconut Dream: Use shredded coconut instead of graham cracker crumbs for a tropical flair. This will give your deviled strawberries a chewy texture and sweet aroma that’s simply irresistible.
-
Chocolate Indulgence: Drizzle melted dark chocolate over the filled strawberries for an extra layer of bliss. This twist makes an elegant presentation that will certainly wow your guests!
-
Spiced Up: Add a pinch of cinnamon or nutmeg to the cheesecake filling to warm the flavor profile. These spices can create a cozy, comforting sensation that pairs beautifully with the sweetness of the strawberries.
-
Dairy-Free Delight: Substitute both cream cheese and heavy whipping cream with dairy-free alternatives like cashew cream or coconut cream. This way, everyone can enjoy these treats, regardless of dietary restrictions.
-
Zesty Lift: Incorporate the zest of a lemon or lime into the filling for a burst of citrus. This will elevate the flavors and add a refreshing brightness to every bite.
Don’t forget to explore the extraordinary world of Deviled Strawberries Cheesecake and similar desserts to expand your recipe repertoire! Enjoy the process of making these delicious snacks part of your culinary journey.
Deviled Strawberries with Cheesecake Filling Recipe FAQs
What kind of strawberries should I use for Deviled Strawberries?
Absolutely! For the best results, opt for large, ripe strawberries that can hold a generous amount of filling. Look for strawberries that are firm, bright red, and free from dark spots or signs of overripeness. Bigger berries provide optimal hollow space and a more satisfying bite!
How do I store leftover Deviled Strawberries?
For any leftovers, store them in an airtight container in the refrigerator for up to 2 days. This method helps maintain their freshness and prevents the strawberries from becoming soggy. If you notice any moisture, consider placing a paper towel in the container to absorb excess liquid.
Can I freeze the cheesecake filling for Deviled Strawberries?
Yes! You can freeze the cheesecake filling for up to 1 month. To do this, place the filling in an airtight container or zip-top bag, removing as much air as possible before sealing. When you’re ready to use it, simply thaw it in the refrigerator overnight, and then fill fresh strawberries before serving for the best results.
What should I do if my whipped cream doesn’t form stiff peaks?
No worries, this can happen! If your whipped cream isn’t thickening properly, it may be due to using room temperature cream or not whipping it long enough. Ensure your heavy whipping cream is very cold (even chilled bowls help), and whip it at medium-high speed for 5 minutes or until you see stiff peaks. If it seems grainy or overwhipped, it’s best to start fresh with a new batch.
Are there any dietary substitutions I can make for Deviled Strawberries?
Very! If you have dietary preferences or restrictions, feel free to substitute non-dairy whipping cream for the heavy cream for a dairy-free option. You can also use Greek yogurt instead of sour cream for a tangy twist! Moreover, for a lower-sugar alternative, replace regular sugar with your favorite low-carb sweetener without sacrificing flavor. The versatility of this recipe allows you to cater to various dietary needs while keeping the creaminess delicious!
Can my pet have any ingredients used in Deviled Strawberries?
It’s essential to be cautious. While strawberries are safe for dogs in moderation, we recommend keeping them away from the cheesecake filling as it contains cream cheese, sugar, and other ingredients that may not be suitable for pets. Always check with your veterinarian when introducing new human food to your furry friends!
Deviled Strawberries: Irresistibly Creamy Cheesecake Delight
Ingredients
Equipment
Method
- Wash the strawberries, remove the stems, slice in half, and hollow out the center.
- In a mixing bowl, whip the heavy cream until stiff peaks form.
- In a separate bowl, mix cream cheese, sour cream, sugar, vanilla extract, and lemon juice until smooth.
- Gently fold the whipped cream into the cheesecake mixture until combined.
- Fill the hollowed strawberries with the cheesecake filling using a piping bag.
- Sprinkle graham cracker crumbs on top of each filled strawberry.
- Refrigerate for about 30 minutes before serving.
Leave a Reply