
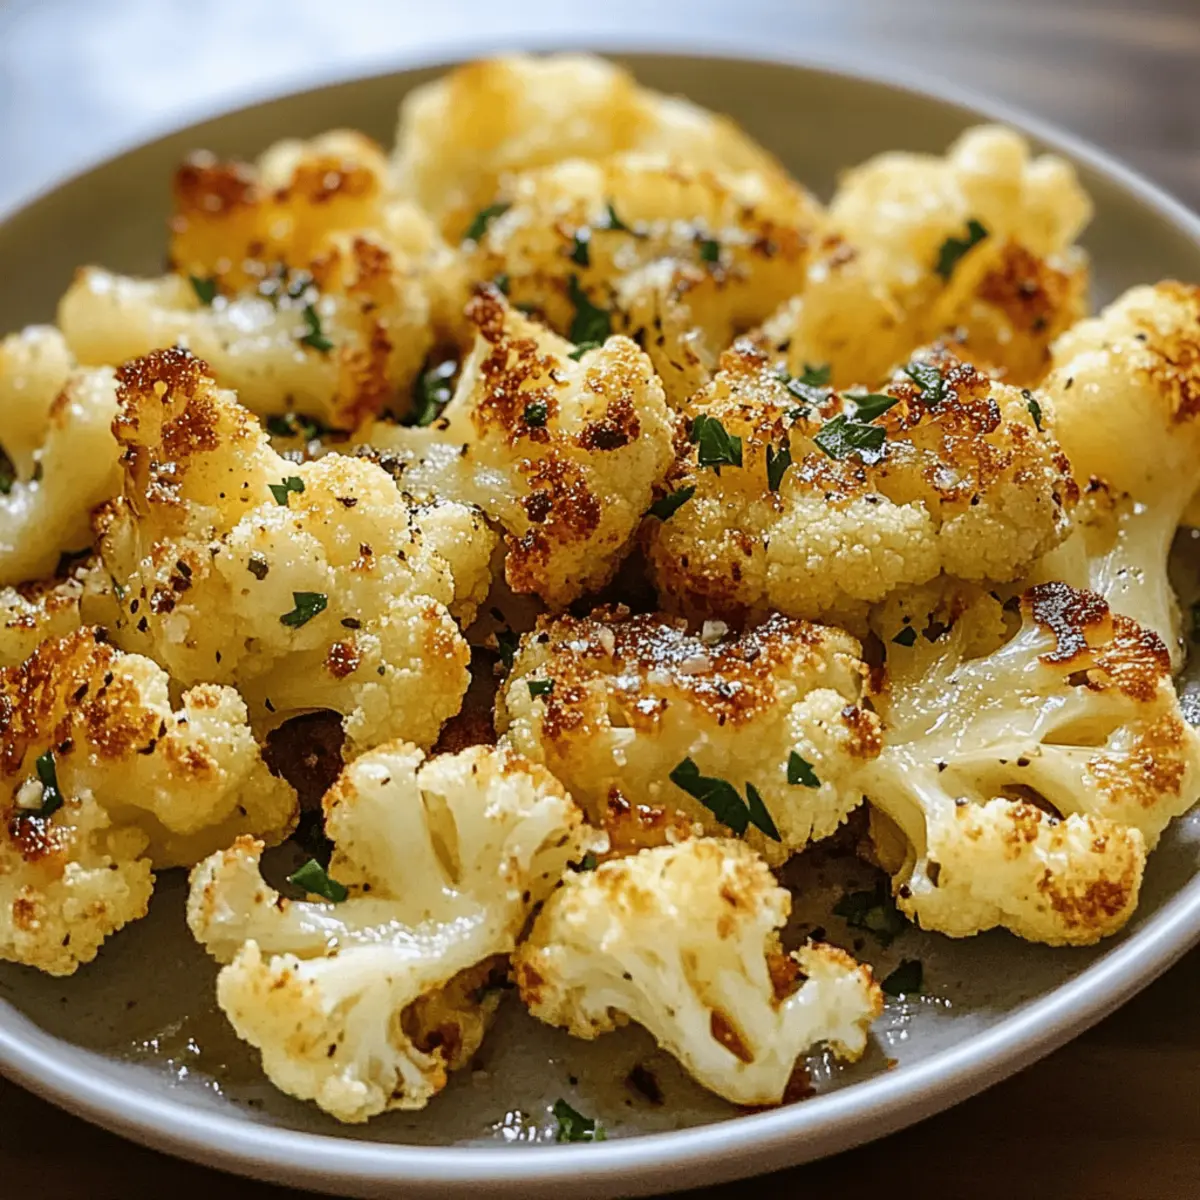
A whiff of garlic wafts through the air, instantly transporting me to those cozy family dinners where simple sides stole the show. This Garlic Butter Roasted Cauliflower is a game-changer, turning an often-overlooked vegetable into a star player at your table. With its crispy edges and melt-in-your-mouth tenderness, it’s quickly become my go-to recipe for those evenings when I want to impress without spending hours in the kitchen. Not only is it low-carb and gluten-free, but it’s also a fantastic way to elevate your meal while keeping it healthy. Plus, you can easily adapt it to suit any dietary preferences, whether you’re vegan or looking to sprinkle on some cheese for an extra touch. Curious about how to make this showstopper and add a splash of flavor to your weeknight dinners? Let’s dive into this delightful recipe together!
Why Is Garlic Butter Roasted Cauliflower Amazing?
Irresistible Flavor: This recipe transforms a humble vegetable into a flavorful delight with roasted garlic and buttery goodness.
Versatile Side Dish: Perfect for pairing with everything from Chicken Kofta Garlic to grilled fish, it suits any meal.
Easy Preparation: With just a handful of ingredients, even beginner cooks can impress guests without breaking a sweat.
Healthier Choice: Low-carb, vegetarian, and gluten-free, it’s a guilt-free way to enjoy a hearty side.
Quick Cooking Time: Ready in under 30 minutes, this dish brings convenience to your dinner routine—ideal for busy weeknights.
Adaptable Ingredients: Swap in your favorite seasonings or even replace cauliflower with broccoli for a fun twist!
Garlic Butter Roasted Cauliflower Ingredients
For the Cauliflower
- Cauliflower – A medium head cut into florets; it’s the base of the dish and develops a lovely sweetness when roasted.
For the Butter Mixture
- Unsalted Butter – Adds richness and enhances browning for an irresistible flavor; swap for olive oil or vegan butter for a dairy-free option.
- Garlic – Fresh minced garlic infuses the butter with bold flavor; if fresh isn’t available, garlic powder works well too.
Optional Enhancements
- Parmesan Cheese – Adds a cheesy saltiness that enriches the dish; omit for a vegan option or replace with nutritional yeast for a similar effect.
- Lemon Juice – Brings brightness and balances the butter’s richness; while optional, it’s highly recommended for a fresh finish.
For Seasoning
- Salt & Black Pepper – Essential for balancing flavors; adjust to your liking.
- Paprika – Provides mild smokiness and additional depth; try Italian seasoning for an herbal twist instead!
Step‑by‑Step Instructions for Garlic Butter Roasted Cauliflower
Step 1: Preheat the Oven
Begin by preheating your oven to 425°F (220°C). This high temperature is crucial for achieving perfectly roasted cauliflower with a crispy exterior. While the oven heats, prepare a baking sheet by lining it with parchment paper or giving it a light greasing to ensure easy cleanup after roasting.
Step 2: Melt the Butter
In a small saucepan over low heat, melt unsalted butter until it becomes liquid. Add the minced garlic, salt, pepper, and paprika, stirring to combine. Allow the mixture to sit for a couple of minutes; this lets the garlic infuse its bold flavor into the butter, enhancing the overall taste of your Garlic Butter Roasted Cauliflower.
Step 3: Prepare Cauliflower
In a large mixing bowl, take your cauliflower florets and pour the garlic butter mixture over them. Toss the florets gently but thoroughly, ensuring each piece is evenly coated with the rich, flavorful butter. This step is essential for achieving that delectable garlic flavor in every bite of roasted cauliflower.
Step 4: Roast the Cauliflower
Spread the coated cauliflower florets in a single layer onto the prepared baking sheet. Place the sheet in the preheated oven and roast for 25-30 minutes. About halfway through, flip the florets to promote even browning. Look for them to be golden brown with crispy edges and a tender center when done—this is when you’ll know they’re perfectly roasted.
Step 5: Finish the Dish
Once your Garlic Butter Roasted Cauliflower is out of the oven, sprinkle it with Parmesan cheese, if desired, for a tasty, cheesy finish. To enhance the dish even further, drizzle with fresh lemon juice to brighten the rich flavors. Garnish with chopped parsley for a pop of color and extra freshness before serving.
Garlic Butter Roasted Cauliflower Variations
Feel free to make this delightful recipe your own by experimenting with these tasty variations!
-
Broccoli Swap: Replace cauliflower with broccoli florets for a similarly tender and crispy texture.
-
Vegan Option: Use olive oil or vegan butter to replace unsalted butter, creating a delicious dairy-free dish.
-
Cheesy Twist: Add nutritional yeast instead of Parmesan for a dairy-free cheesy flavor that still packs a punch.
-
Garlic Powder: If you’re short on fresh garlic, using garlic powder works in a pinch while still delivering a nice flavor.
-
Spice It Up: Incorporate chili flakes or cayenne pepper to bring a delightful heat to your roasted cauliflower.
-
Herb Infusion: Experiment with fresh herbs like thyme or rosemary for an aromatic twist. The fresh herbs will add a lovely fragrance as they roast.
-
Zesty Finish: Incorporate lime juice instead of lemon juice for a tropical tang that brightens the dish beautifully.
-
Flavor Boost: Enhance the taste with a sprinkle of smoked paprika or a dash of cumin for a warm, earthy flavor.
With these options, your Garlic Butter Roasted Cauliflower can cater to any palate! And if you’re looking to pair these goodies with a savory main, consider trying it alongside Butter Chicken Cozy or Chinese Honey Garlic for an unforgettable meal experience.
What to Serve with Garlic Butter Roasted Cauliflower
A beautifully roasted side dish deserves equally delightful companions to create a harmonious meal experience.
- Creamy Mashed Potatoes: Their rich creaminess contrasts perfectly with the crispy texture of the cauliflower, making each bite a delightful experience.
- Garlic Herb Chicken: Grilled or roasted, the savory flavors of garlic herb chicken perfectly complement the buttery richness of the roasted cauliflower.
- Quinoa Salad: This light and refreshing salad brings a nutty flavor and chewy texture, balancing the richness of the cauliflower while adding fresh ingredients.
- Roasted Salmon: The buttery taste of the salmon pairs beautifully with the garlic flavors of the cauliflower for a well-rounded dinner.
- Steamed Broccoli: A simple, vibrant green side that brings freshness, offering a crunch that pairs nicely with the tender roasted cauliflower.
- Red Wine: A glass of Pinot Noir or Merlot can elevate the meal, balancing flavors and enhancing the buttery garlic profile of the dish.
- Caesar Salad: The crisp romaine, combined with creamy dressing and crunchy croutons, will add a refreshing contrast to the richness of the roasted vegetables.
- Chocolate Mousse: For dessert, a light chocolate mousse offers a sweet indulgence, rounding out the meal with a touch of elegance and richness.
- Lemon Sorbet: A refreshing end, its tartness cleanses the palate after the savory dishes, making it an ideal pairing to end the meal on a bright note.
Expert Tips for Garlic Butter Roasted Cauliflower
- Even Cutting: Ensure cauliflower florets are uniformly sized for consistent roasting and cooking; this avoids soggy or unevenly cooked pieces.
- Don’t Overcrowd: Spread florets out on the baking sheet. Overcrowding leads to steaming instead of roasting, preventing those crispy edges you desire.
- Fresh is Best: Opt for fresh minced garlic instead of garlic powder for a more vibrant flavor. Fresh garlic brings a lively depth that powdered cannot match.
- Check for Crispiness: Keep an eye on the roasting time; every oven is different, and you want that golden-brown color with crispy edges.
- Storage Savvy: Allow cooked garlic butter roasted cauliflower to cool completely before storing in an airtight container to prevent sogginess. Enjoy it within three days for the best quality!
Storage Tips for Garlic Butter Roasted Cauliflower
Fridge: Store leftovers in an airtight container in the refrigerator for up to 3 days. This helps maintain freshness and flavor.
Freezer: For longer storage, freeze the roasted cauliflower in a sealed container or freezer bag for up to 2 months. Thaw in the fridge before reheating.
Reheating: Reheat in an oven preheated to 350°F (175°C) for about 10-15 minutes, or in an air fryer to restore its crispy texture.
Avoid Sogginess: Allow the Garlic Butter Roasted Cauliflower to cool completely before storage to keep its delightful crunch intact.
Make Ahead Options
These Garlic Butter Roasted Cauliflower florets are perfect for busy home cooks seeking to save time during hectic weeknights! You can wash and cut the cauliflower into florets up to 24 hours in advance, storing them in an airtight container in the refrigerator to maintain their freshness. Additionally, the garlic butter mixture can be prepared ahead and stored separately for up to 3 days; simply reheat it before tossing with the cauliflower. When you’re ready to serve, just combine everything and roast the florets as per the original instructions for 25-30 minutes. This way, you’ll still enjoy that delightful garlic butter flavor with minimal effort!
Garlic Butter Roasted Cauliflower Recipe FAQs
How do I choose the right cauliflower?
Absolutely! When selecting cauliflower, look for a medium head with tightly packed florets that are creamy white in color. Avoid heads with dark spots or yellowing, as these indicate over-ripeness. The florets should feel firm and fresh, without any signs of wilting.
What’s the best way to store leftovers?
Very simple! Store any leftover Garlic Butter Roasted Cauliflower in an airtight container in the refrigerator for up to 3 days. This helps lock in freshness and flavor. Just remember to allow it to cool completely before sealing it, so the steam doesn’t lead to sogginess!
Can I freeze Garlic Butter Roasted Cauliflower?
Of course! To freeze your Garlic Butter Roasted Cauliflower, let it cool completely, then place it in a sealed container or a freezer bag, ensuring all the air is removed. You can enjoy it frozen for up to 3 months. When you’re ready to eat, simply thaw it in the refrigerator overnight before reheating in the oven at 350°F (175°C) for 10-15 minutes to regain its crispy texture.
What if my roasted cauliflower isn’t crispy?
No worries! If your Garlic Butter Roasted Cauliflower isn’t crispy, it may be due to overcrowding on the baking sheet. Next time, make sure to roast them in a single layer and give them enough space to breathe. Additionally, check that your oven is well preheated and keep an eye on them towards the end of the roasting time. You can even broil them for the last 2-3 minutes for a delightful crunch!
Is this recipe suitable for people with allergies?
Absolutely! This Garlic Butter Roasted Cauliflower is naturally gluten-free and vegetarian. To cater to dairy-free diets, simply swap the unsalted butter for olive oil or vegan butter and omit the Parmesan cheese. Use nutritional yeast for a cheesy flavor without dairy. Always be sure to double-check your ingredients if you’re cooking for someone with specific allergies.
How can I customize the flavors?
Oh, the more the merrier! You can easily customize this dish by swapping in your favorite spices or herbs. For a touch of heat, consider adding paprika or chili powder. If you fancy a twist, experiment with Italian seasoning or fresh herbs like thyme or rosemary. Enjoy making it your own!
Garlic Butter Roasted Cauliflower That Will Wow Your Taste Buds
Ingredients
Equipment
Method
- Preheat the oven to 425°F (220°C). Prepare a baking sheet with parchment paper or a light greasing.
- Melt unsalted butter in a small saucepan over low heat. Add minced garlic, salt, pepper, and paprika, stirring to combine.
- In a large mixing bowl, pour the garlic butter mixture over the cauliflower florets and toss until evenly coated.
- Spread the cauliflower on the baking sheet in a single layer and roast for 25-30 minutes, flipping halfway through.
- Once done, top with Parmesan cheese and drizzle with lemon juice before serving.
Leave a Reply