
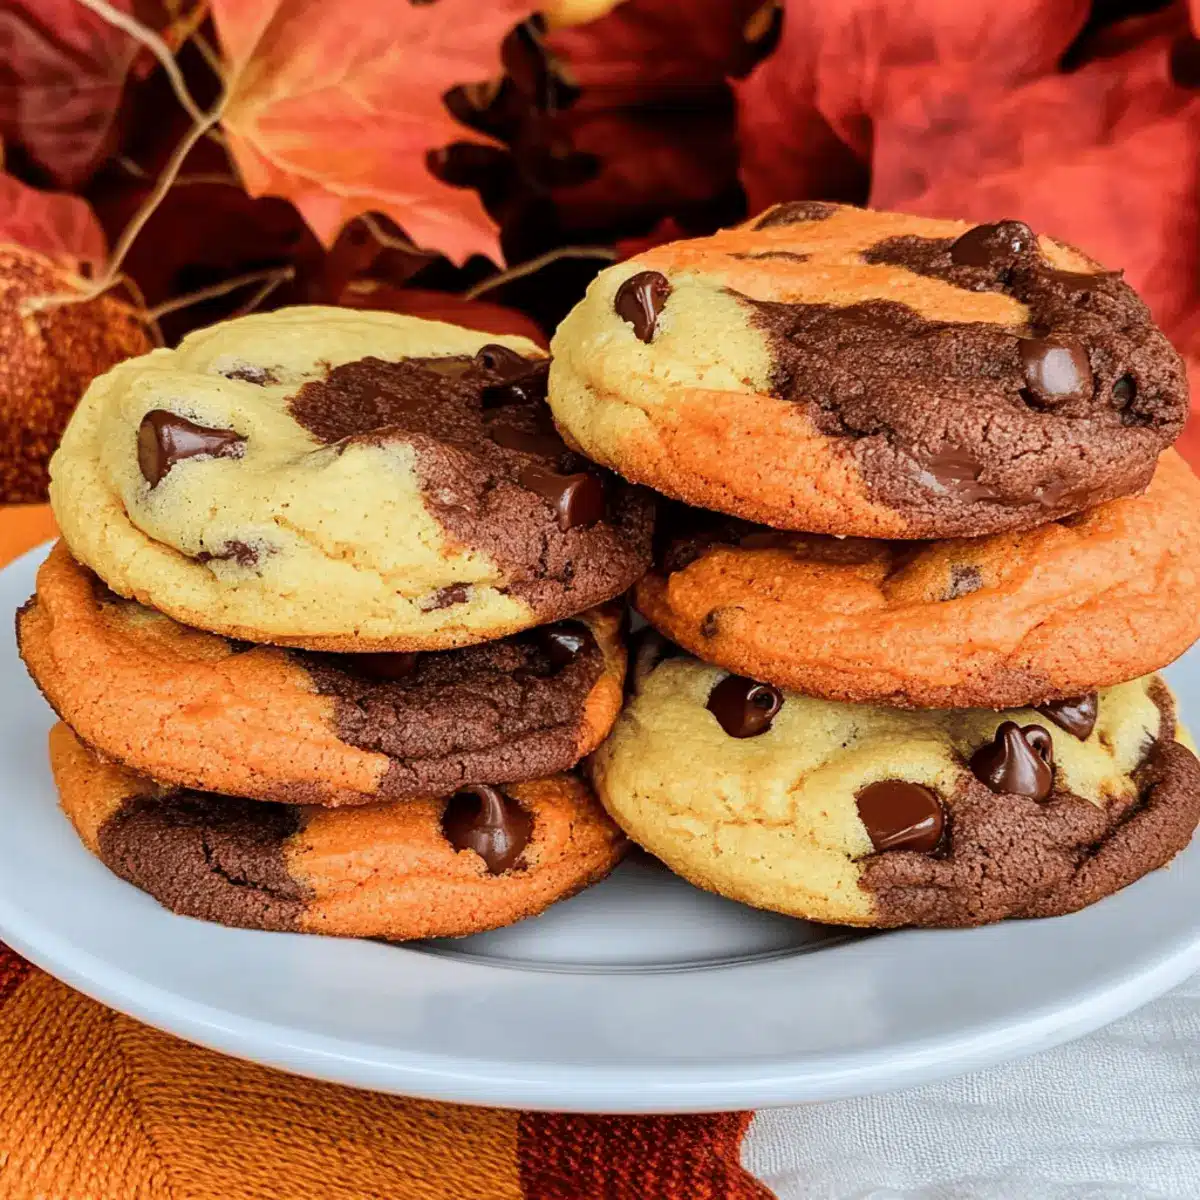
There’s something magical about the crispness of autumn that ignites our senses and invites us into the kitchen. As the leaves transition into stunning hues, I find myself craving baked treats that capture this seasonal vibrancy—like my Harvest Marble Chocolate Chip Cookies. This Fall-themed dessert transforms classic cookies into a colorful delight, perfect for Thanksgiving gatherings or cozy family afternoons. They boast a soft, chewy texture, melting beautifully in your mouth—making them a delightful alternative to traditional pies. Plus, these cookies are quick to whip up and just as enjoyable on a chilly day as they are warm out of the oven. Are you ready to bring a splash of color and flavor to your holiday cookie platter?

Why Are These Cookies So Irresistible?
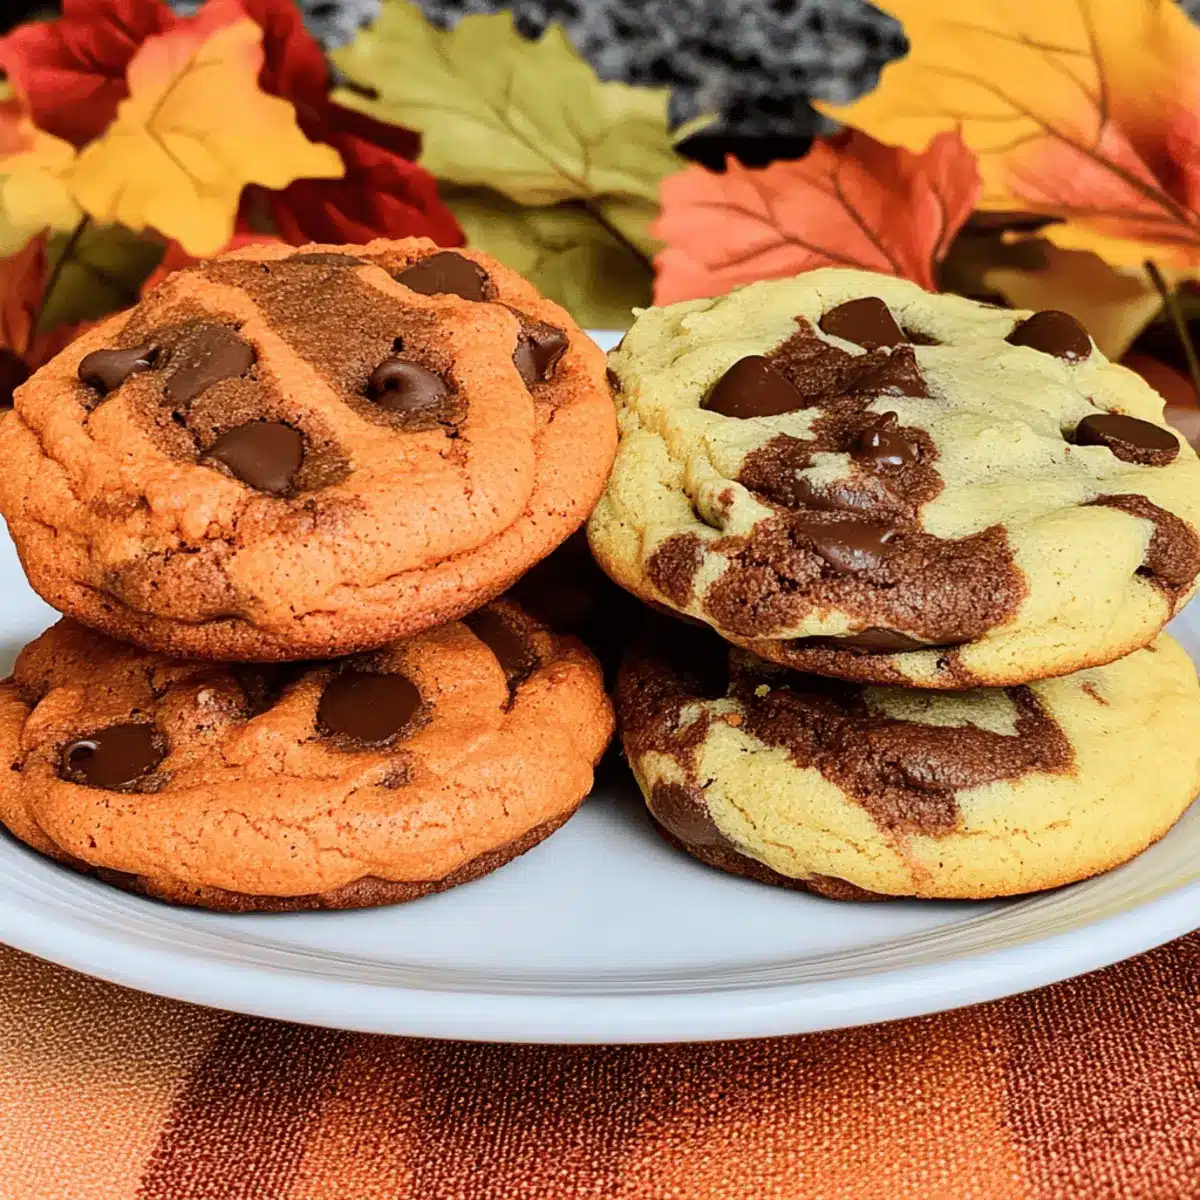
Vibrant Colors: The marbling of orange and brown makes these cookies visually stunning, embodying the essence of Fall.
Soft and Chewy: Each bite offers a delightful combination of a tender interior and a slightly crispy edge that melts in your mouth.
Quick and Easy: This recipe requires minimal effort, making it perfect for busy holiday bakers wanting to impress guests without the fuss.
Versatile Flavor: Swap in white chocolate or butterscotch chips for a unique twist, or add spices like cinnamon for an extra warmth.
Crowd-Pleaser: Whether at Thanksgiving or a family gathering, these cookies are sure to please everyone, offering a refreshing change from typical desserts. For more delicious ideas, check out my Vegan Chocolate Mousse Cake or delightful White Chocolate Raspberry Dream Cake!
Marble Chocolate Chip Cookies Ingredients
• Get ready to create a colorful treat!
For the Cookie Base
- Butter – Provides richness and moisture; use unsalted for precise control over saltiness.
- Granulated Sugar – Adds sweetness and promotes a delightful crisp edge.
- Brown Sugar – Deepens flavor with its caramel notes; substitute with more granulated sugar if needed.
- Eggs – Binds the dough together, ensuring moisture and structure.
- Vanilla Extract – Enhances flavor depth; consider pure vanilla for a more aromatic experience.
- Baking Soda – This leavening agent helps the cookies rise; make sure it’s fresh for optimal results.
- Salt – Essential for balancing sweetness and enhancing overall flavor.
- All-Purpose Flour – Forms the cookie’s structure; can be substituted with a gluten-free blend as needed.
For the Chocolate Swirls
- Nestle Toll House Chocolate Chips – Delivers rich chocolate flavor; swap with dark or milk chocolate to suit your preference.
For the Color
- Food Coloring – Use orange and brown to create an irresistible marbling effect that captures the spirit of Fall.
Dive into the comforting tradition of baking with this marble chocolate chip cookie recipe that you’ll cherish for years to come!
Step‑by‑Step Instructions for Harvest Marble Chocolate Chip Cookies
Step 1: Creaming the Butter and Sugars
In a large mixing bowl, beat together 1 cup of softened butter, ½ cup of granulated sugar, and 1 cup of brown sugar using an electric mixer on medium speed for 2-3 minutes. The mixture should become light and fluffy, a pale golden color, indicating it’s well combined and ready for the next step.
Step 2: Adding the Wet Ingredients
Crack in 2 large eggs and add 2 teaspoons of vanilla extract to the creamed mixture. Mix on medium-high speed for about 3 minutes until the mixture is airy and fully combined. This step ensures the cookies will have a wonderful texture, marrying all the flavors together beautifully in your Harvest Marble Chocolate Chip Cookies.
Step 3: Mixing Dry Ingredients
In a separate bowl, whisk together 1 teaspoon of baking soda, ½ teaspoon of salt, and 3 cups of all-purpose flour. Gradually incorporate this dry mixture into the wet ingredients by mixing on low speed until just combined. Take care not to overmix to keep the cookies tender and soft.
Step 4: Coloring the Dough
Once the dough is mixed, turn it out onto a clean surface and divide it into three equal portions. Wearing gloves, add orange food coloring to one portion and brown food coloring to another, leaving the last portion uncolored. Blend the colors into the dough until you achieve visually appealing vibrant hues reminiscent of autumn.
Step 5: Incorporating the Chocolate Chips
Fold 1 cup of Nestle Toll House chocolate chips into each portion of dough, mixing gently but thoroughly. Each color should now feature lovely pockets of chocolate, adding richness to your colorful Harvest Marble Chocolate Chip Cookies.
Step 6: Forming the Cookie Balls
Preheat your oven to 375°F (190°C). Using a food scale, weigh out 2 oz. of the mixed colored dough and roll them into marble-like cookie balls, using a mix of colors for a beautiful presentation. Place these cookie balls onto a lined baking sheet, ensuring they are spaced apart to allow for spreading.
Step 7: Baking the Cookies
Slightly flatten the cookie balls before placing them in the preheated oven. Bake for 8-10 minutes, watching for the edges to turn golden brown while the centers remain soft. This baking time creates the perfect balance of chewy interiors and crisp edges in your Harvest Marble Chocolate Chip Cookies.
Marble Chocolate Chip Cookies Variations
Get ready to explore delightful twists that will make your Marble Chocolate Chip Cookies uniquely yours!
-
White Chocolate: Substitute chocolate chips with white chocolate for a sweet, creamy contrast that complements the Fall colors wonderfully.
-
Nutty Crunch: Add walnuts or pecans to the dough for a delightful crunch, bringing a rustic touch to your cookies that echoes the season’s warmth.
-
Spicy Flavor: Incorporate a teaspoon of cinnamon or nutmeg for a cozy warmth. The spices evoke the scent of autumn spices—an aromatic addition to this festive treat.
-
Dairy-Free: Use coconut oil or dairy-free butter and dairy-free chocolate chips for a vegan-friendly version of these colorful cookies, ensuring everyone can enjoy them.
-
Pumpkin Spice: Fold in pure pumpkin puree (about ½ cup) for an autumnal twist—both flavor and moisture, turning these cookies into a seasonal celebration!
-
Candied Ginger: Introduce small bits of candied ginger into the dough for a spicy-sweet kick that dances on your palate, perfect for adventurers in flavor.
-
M&M’s: Swap chocolate chips with Fall-colored M&M’s to not only enhance the visual appeal but to give your cookies a fun, crunchy candy surprise with each bite.
-
Coconut Flakes: Add unsweetened shredded coconut to the dough for a chewy, tropical surprise that complements the flavors of chocolate and Fall spices beautifully.
These variations provide an exciting way to customize your marble chocolate chip cookies, and pair wonderfully with a cozy cup of coffee or tea. For more inspiration, check out my delightful High Protein Chocolate Chia Pudding or the classic Chocolate Oat Cookies. Enjoy the baking adventure!
What to Serve with Harvest Marble Chocolate Chip Cookies
Indulging in these colorful cookies invites the perfect opportunity to complete your seasonal spread with delightful pairings.
- Creamy Pumpkin Soup: A warm and silky bowl of pumpkin soup enhances the fall theme, balancing sweet cookies with savory comfort.
- Apple Cider: This classic autumn drink harmonizes wonderfully, its sweetness echoing the flavors of fall from within the cookies.
- Vanilla Ice Cream: A scoop of real vanilla ice cream adds a cool, creamy contrast, enhancing the chewy texture of the cookies with creamy richness.
- Caramel Sauce: Drizzle some rich caramel over your cookies, creating a delightful experience that brings additional sweetness and indulgence to every bite.
Enjoy them alongside a cozy cup of coffee or tea to experience a blissful combination, perfect for chilly evenings or festive gatherings.
How to Store and Freeze Marble Chocolate Chip Cookies
Room Temperature: Store cookies in an airtight container at room temperature for up to 3 days to retain their soft and chewy texture while preventing them from getting stale.
Fridge: For longer freshness, keep the cookies in the fridge in a sealed container for up to 1 week. This helps maintain their flavor and texture, especially in warm climates.
Freezer: Freeze the cookie dough or baked cookies in an airtight container or freezer bag for up to 3 months. If freezing the dough, roll it into balls first for easy baking later on.
Reheating: When ready to enjoy your frozen cookies, bake from frozen at 375°F (190°C) for an additional 2-3 minutes, or microwave for 10-15 seconds to get that freshly baked taste in your Marble Chocolate Chip Cookies!
Make Ahead Options
These Harvest Marble Chocolate Chip Cookies are ideal for meal prep, saving you time during busy fall festivities! You can prepare the cookie dough up to 24 hours in advance. Simply complete the creaming and mixing steps, then wrap the dough tightly in plastic wrap and refrigerate. When you’re ready to bake, take the dough out, let it soften slightly for about 10 minutes, and form the marbled cookie balls as directed. If you prefer, you can also freeze the individual cookie balls for up to 3 months; just bake them straight from the freezer, adding an extra minute or two to the baking time. This way, you’ll have fresh, delicious Harvest Marble Chocolate Chip Cookies whenever you need a cozy treat!
Tips for the Best Marble Chocolate Chip Cookies
-
Room Temperature Butter: Make sure your butter is softened to room temperature for easy creaming, ensuring a smooth and fluffy cookie texture.
-
Don’t Overmix: After adding the flour, mix just until combined to avoid tough cookies. Overmixing can lead to dense, chewy results.
-
Coloring Balance: Experiment with food coloring for vibrant swirls, but remember to keep proportions balanced for a stunning marbled effect without overwhelming the dough.
-
Watch the Oven: Keep a close eye on the cookies while baking; they can shift from perfectly baked to overdone in a matter of minutes.
-
Cooling Time: Let your cookies cool on the baking sheet for a few minutes before transferring them to a wire rack. This helps maintain their chewy texture while they set.
Enjoy baking these delightful Marble Chocolate Chip Cookies, perfect for your Fall festivities!

Harvest Marble Chocolate Chip Cookies Recipe FAQs
How do I choose the best chocolate chips for my cookies?
Absolutely! For the best flavor profile, I recommend using high-quality chocolate chips, like Nestle Toll House, which provide a rich chocolate flavor. If you prefer a decadent taste, dark chocolate chips will enhance the cookies’ sweetness, while milk chocolate offers a classic favorite taste. You could also consider alternatives like butterscotch or white chocolate chips for a unique twist that can complement the marbled colors beautifully.
How should I store my Marble Chocolate Chip Cookies?
You can store your cookies in an airtight container at room temperature for up to 3 days. This keeps them soft and chewy! If you want to keep them fresh even longer, consider refrigerating them; they can last up to 1 week this way. Just ensure they’re sealed tightly to prevent drying out.
Can I freeze cookie dough or baked cookies?
Yes, you can freeze both! For frozen dough, roll the marbled cookie dough into balls and place them in a freezer-safe container or bag. They last up to 3 months. When you’re ready to bake, preheat your oven to 375°F (190°C) and bake the frozen dough balls for an additional 2-3 minutes. Alternatively, if you prefer to freeze baked cookies, store them in an airtight container or freezer bag. They can also last up to 3 months in the freezer!
What do I do if my cookie dough is too dry?
If you find your Marble Chocolate Chip Cookie dough is too dry, it could be due to an excess of flour or not enough moisture. This can happen if you accidentally packed the flour too tightly when measuring. To remedy this, try adding a tablespoon of milk or an extra egg for added moisture. Mix gently until the right consistency is achieved—aim for a soft, pliable dough that holds together but isn’t sticky.
Can I use gluten-free flour in this recipe?
Very! If you or someone you’re baking for has gluten sensitivities, you can absolutely substitute all-purpose flour with a good gluten-free flour blend. Many store-bought blends work great in cookie recipes, but make sure to check the package for a one-to-one substitution ratio. This ensures your Marble Chocolate Chip Cookies remain deliciously soft and chewy while accommodating dietary needs.
What if I don’t have food coloring for the marbling?
Not a problem! If you don’t have food coloring, you can achieve a similar aesthetic by using spices like ground cinnamon or cocoa powder for the brown portion. For a natural orange hue, try adding finely grated carrots or pumpkin puree, although this will slightly affect the cookie texture. Embrace those creative options!
Marble Chocolate Chip Cookies for a Cozy Fall Treat
Ingredients
Equipment
Method
- In a large mixing bowl, beat together butter, granulated sugar, and brown sugar using an electric mixer on medium speed for 2-3 minutes until light and fluffy.
- Add eggs and vanilla extract, then mix on medium-high speed for about 3 minutes until airy and fully combined.
- In a separate bowl, whisk together baking soda, salt, and all-purpose flour. Gradually incorporate this mixture into the wet ingredients on low speed.
- Turn out the dough onto a clean surface and divide into three portions. Add orange food coloring to one portion and brown to another, blending until color is achieved.
- Fold chocolate chips into each portion of dough gently but thoroughly.
- Preheat the oven to 375°F (190°C) and weigh out 2 oz. of mixed colored dough to roll into marble-like cookie balls.
- Slightly flatten cookie balls and bake for 8-10 minutes until edges are golden brown and centers are soft.
Leave a Reply