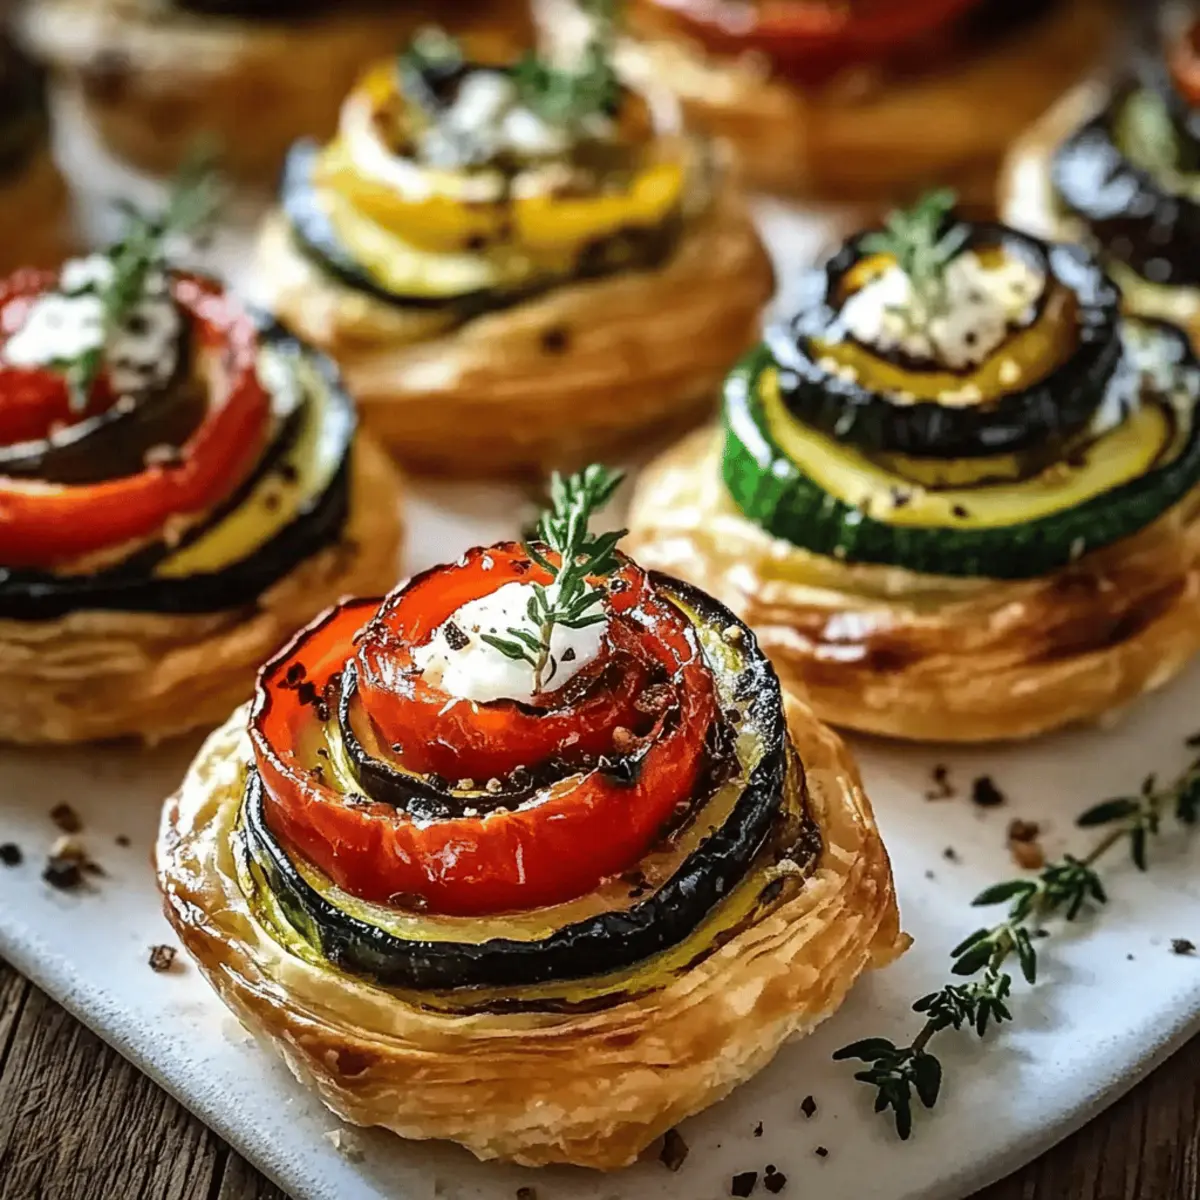
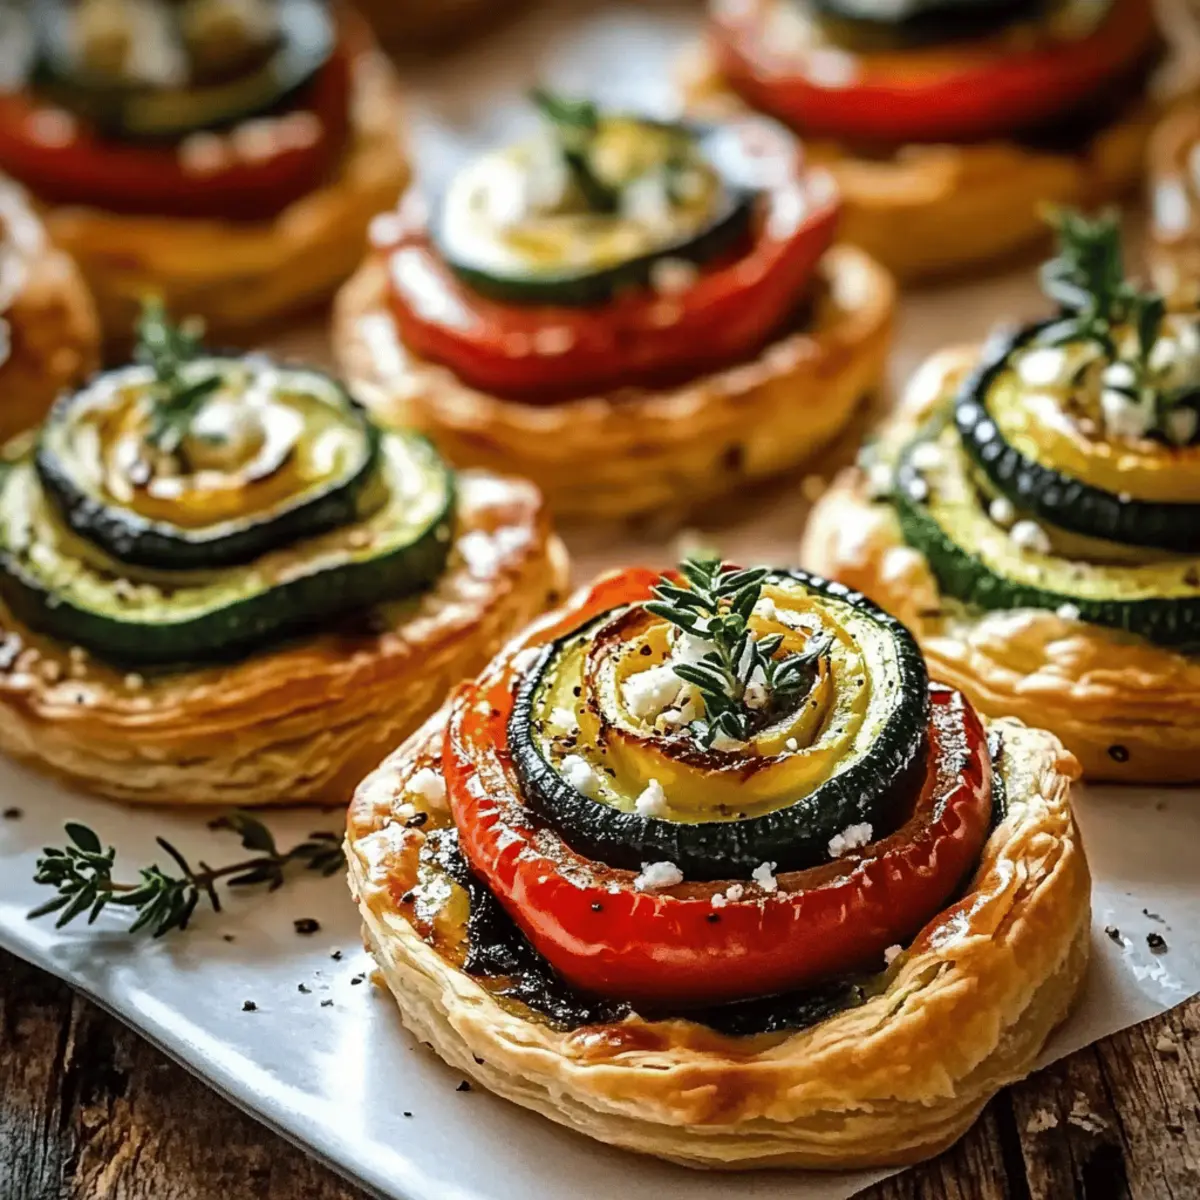
As the autumn leaves start to fall, the urge to gather friends and family around the table grows stronger. That’s when I whip out my go-to recipe: Easy Mini Veggie Tartlets. These beautiful, flaky bites not only charm the eye but also make for a scrumptious appetizer, perfect for any gathering. With minimal prep time and an array of seasonal vegetables to choose from, they’re a fantastic way to impress your guests while keeping things simple. What’s more, you can customize them to fit any dietary preference, making them a versatile option for everyone at the table. So, are you ready to elevate your fall festivities with these delightful tartlets? Let’s dive into the recipe!

Why Are Mini Veggie Tartlets a Must-Try?
Flakiness and Delight: These mini tartlets feature a flaky puff pastry that puffs up perfectly in the oven, creating a delightful texture with every bite.
Simple Preparation: With just a few ingredients, including seasonal vegetables and cheese, making these tartlets is a breeze.
Crowd-Pleasing Dish: Their vibrant colors and delicious flavors make them the ultimate showstopper at any gathering, guaranteed to impress your friends and family.
Customizable and Versatile: Feel free to experiment with your favorite vegetables and cheese options, making them as unique as your taste buds desire.
Healthy and Nutritious: Packed with vitamins and fiber, these tartlets provide a heart-healthy and satisfying option for any meal. They’re perfect as an appetizer or alongside a simple salad for a light lunch. Don’t forget to check out our tips for making your tartlets extra crispy and delicious!
Mini Veggie Tartlets Ingredients
• Here’s what you need to create delightful Mini Veggie Tartlets for your next gathering!
For the Pastry
- Puff Pastry – Use chilled pastry for a beautifully flaky crust that holds shape well.
For the Filling
- Mixed Vegetables (e.g., bell peppers, squash) – Choose seasonal veggies for optimal flavor and nutrition; roasting prior helps concentrate their taste.
- Cream Cheese or Goat Cheese – Provides creaminess to counterbalance the veggies; can swap with ricotta for a lighter option.
- Salt and Pepper – Adjust seasoning according to your veggie selection for enhanced flavor.
- Egg (optional for binding) – Helps keep the filling together, can be omitted for a vegan possibility.
Feel free to get creative with your choice of vegetables and cheese to make these Mini Veggie Tartlets uniquely yours!
Step‑by‑Step Instructions for Mini Veggie Tartlets
Step 1: Preheat Your Oven
Begin by preheating your oven to 375°F (190°C). This ensures your Mini Veggie Tartlets achieve that perfect flaky texture as they bake. While the oven warms up, you can gather your tools, including a baking sheet and a rolling pin, to make the process smooth and efficient.
Step 2: Prepare the Puff Pastry
Roll out the chilled puff pastry on a lightly floured surface until it’s about 1/8 inch thick. Use a round cookie cutter or a glass to cut circles that fit your mini muffin tins. Gently press each circle into the greased tins, making sure to push down the sides to create little pastry shells ready to hold your flavorful filling.
Step 3: Roast the Vegetables
Chop your selected mixed vegetables, such as bell peppers and squash, into small, bite-sized pieces. Spread them evenly on a baking sheet and drizzle with olive oil, salt, and pepper. Roast in the preheated oven for about 15-20 minutes, or until they are tender and slightly caramelized, enhancing their natural sweetness and reducing moisture.
Step 4: Prepare the Filling
In a mixing bowl, combine the roasted vegetables with cream cheese or goat cheese. Mix well until the ingredients are evenly distributed, creating a beautiful filling for your Mini Veggie Tartlets. If you’d like your filling to be firmer, whisk in an egg to help bind it together—this step is optional for a delightful vegetarian treat.
Step 5: Fill the Tartlet Shells
Spoon the creamy vegetable mixture generously into each puff pastry shell, being careful not to overfill them. The filling should sit just below the top of the pastry edge to allow room for puffing up during baking. This ensures that your Mini Veggie Tartlets remain perfectly flaky and don’t spill over.
Step 6: Bake to Perfection
Place the filled tartlet shells in the oven and bake for 18-22 minutes. Watch for the pastry to puff up and turn a lovely golden brown. The enticing aroma of roasted vegetables and baking pastry will fill your kitchen, signaling that these Mini Veggie Tartlets are close to being ready.
Step 7: Cool and Serve
Once baked, remove the tartlets from the oven and allow them to cool for about 5 minutes in the tins. Carefully transfer them to a wire rack to cool slightly before serving. Enjoy your Mini Veggie Tartlets warm for the best texture, or serve them at room temperature for a delightful appetizer that everyone will love.

Expert Tips for Mini Veggie Tartlets
-
Chill the Pastry: Ensure the puff pastry is chilled before use. This keeps it flaky and prevents unwanted melting during baking.
-
Roast to Reduce Moisture: Roast the vegetables thoroughly to enhance flavor and eliminate excess moisture, preventing sogginess in your Mini Veggie Tartlets.
-
Watch Baking Time: Keep a close eye on the tartlets as they bake. They will cook faster than larger tarts, so check them at 15 minutes for perfect golden-brown tops.
-
Avoid Overfilling: Fill each pastry shell just below the top edge to ensure they puff beautifully without spilling over during baking.
-
Season to Taste: Adjust the seasoning based on the vegetables you choose. Fresh, flavorful vegetables are essential for elevating the taste of your Mini Veggie Tartlets!
How to Store and Freeze Mini Veggie Tartlets
Fridge: Store leftover Mini Veggie Tartlets in an airtight container in the fridge for up to 3 days. This keeps them fresh and ready for a quick snack!
Freezer: To freeze, place the cooled tartlets in a single layer on a baking sheet until frozen, then transfer them to a freezer-safe bag. They can be stored for up to 3 months.
Reheating: Reheat frozen Mini Veggie Tartlets by preheating your oven to 300°F (150°C) and baking them for 8-10 minutes. This will help to retain their flaky texture.
Make-Ahead: These tartlets can be prepared a day in advance and refrigerated before baking. This allows for easy entertaining without last-minute stress!
Make Ahead Options
These Mini Veggie Tartlets are ideal for busy home cooks looking to save time while still offering a delightful appetizer! You can prepare the pastry shells and roasted vegetables up to 24 hours in advance. Simply roll out the puff pastry, cut, and press it into muffin tins, then store them in the refrigerator. Roast the vegetables (like bell peppers and squash) ahead of time as well, allowing them to cool before refrigerating them. When you’re ready to impress your guests, just fill the tartlet shells with the creamy vegetable mixture and bake them for 18-22 minutes. This approach not only saves time but also keeps every bite just as delicious and flaky!
What to Serve with Mini Veggie Tartlets
As you prepare your delightful Mini Veggie Tartlets, consider these delicious pairings to create a full meal experience that will enchant your guests.
-
Fresh Garden Salad: A light and crunchy salad with seasonal greens and a zesty vinaigrette complements the rich tartlets, offering a refreshing contrast.
-
Creamy Tomato Soup: This warm, soothing soup brings a comforting element to your meal, perfect for dipping those flaky pastry bites.
-
Roasted Sweet Potatoes: The natural sweetness and crispy texture of roasted sweet potatoes balance the savory tartlets beautifully, making a cozy addition to your dining table.
-
Herbed Quinoa: Packed with protein and flavor, a fluffy quinoa salad with herbs adds a nutritious touch that harmonizes well with the veggie filling.
-
White Wine Spritzer: This light, bubbly drink complements the flavors of the tartlets, enhancing their freshness with a hint of citrus.
-
Apple Pie: Finish the meal with a slice of warm apple pie for dessert, wrapping up the evening with a classic fall flavor that evokes feelings of home.
These pairings will elevate your gathering, ensuring that every bite is as memorable as the last!
Mini Veggie Tartlets: Creative Twists
Invite your inner chef to shine in the kitchen with these delightful variations that add a personal touch to your tartlets.
-
Dairy-Free: Substitute cream cheese with coconut cream or a cashew-based cheese to make these tartlets suitable for lactose-intolerant guests.
Think about the creamy texture and how it enhances the overall flavor profile. Dairy-free options can be just as delicious! -
Zesty Kick: Add some finely chopped jalapeños or a dash of crushed red pepper to the filling for a delightful heat.
Spice things up and create a burst of flavor that complements the veggies beautifully. Your adventurous guests will be thrilled! -
Herb-Infused: Introduce fresh herbs like basil, thyme, or dill to the veggie mix for added aroma and freshness.
A sprinkle of herbs can elevate the taste and make your tartlets feel like a gourmet dish. The aroma will fill your kitchen with warmth! -
Seasonal Swap: Use roasted butternut squash or kale during fall for a seasonal twist.
These vegetables bring a touch of autumn comfort and deepen the flavors of your tartlets. The vibrant colors will also impress your guests! -
Add Protein: For added heartiness, include cooked quinoa or chickpeas in the filling.
This change turns your tartlets into a more filling appetizer, perfect for a light meal. It boosts nutrition while keeping the flavor intact! -
Cheesy Delight: Experiment by mixing different cheeses like feta or cheddar for unique flavor combinations.
These cheeses will melt perfectly and provide a creamy texture that blends beautifully with the veggies. Each bite will be a surprise! -
Vegan Version: Omit the egg or use a flax egg as a binding agent to keep your recipe vegan-friendly.
This swap means more people can enjoy your delicious creations, letting everyone share in the joy of home-cooked goodness!
Feeling inspired? Don’t forget to check out our Quick and Easy Puff Pastry Tips to ensure your tartlet crust is as flaky as can be!

Mini Veggie Tartlets Recipe FAQs
What vegetables work best for Mini Veggie Tartlets?
Absolutely! Seasonal vegetables like bell peppers, zucchini, squash, and spinach are fantastic choices. Roasting them beforehand enhances their flavor and reduces moisture, ensuring your tartlets don’t get soggy.
How should I store leftover Mini Veggie Tartlets?
Store any leftover tartlets in an airtight container in the fridge for up to 3 days. This way, you can enjoy them as a quick snack or appetizer later!
Can I freeze Mini Veggie Tartlets? How?
Yes, you absolutely can! To freeze, let the tartlets cool completely, then place them in a single layer on a baking sheet until frozen. After they’re solid, transfer them to a freezer-safe bag, where they can be kept for up to 3 months. When ready to enjoy, preheat your oven to 300°F (150°C) and bake for 8-10 minutes to regain their crispy texture.
What if my tartlets turn out soggy?
The key here is to properly roast your vegetables beforehand to reduce moisture. If you notice they are still soggy after baking, try adding a bit more cheese to absorb excess liquid and ensure not to overfill your pastry shells. Always bake until the tops are golden brown for that perfect crunch!
Are Mini Veggie Tartlets suitable for vegans?
Absolutely! Just omit the cheese and egg, and you can use vegan cheese alternatives to create a delicious and satisfying filling. Feel free to load up on your favorite roasted vegetables to keep things flavorful!
Can I use frozen puff pastry for my Mini Veggie Tartlets?
I recommend using chilled puff pastry since it’s easier to work with and puffs up beautifully in the oven. While frozen puff pastry could work in a pinch, make sure to thaw and chill it properly before use to achieve that light, flaky texture!

Mini Veggie Tartlets: Flaky Bites Bursting with Flavor
Ingredients
Equipment
Method
- Preheat your oven to 375°F (190°C).
- Roll out the chilled puff pastry to about 1/8 inch thick.
- Chop mixed vegetables into small pieces and roast them with olive oil, salt, and pepper for 15-20 minutes.
- Combine roasted vegetables with cream cheese or goat cheese in a mixing bowl.
- Spoon the mixture into puff pastry shells without overfilling.
- Bake for 18-22 minutes until golden brown.
- Allow to cool for about 5 minutes before serving.

Leave a Reply