
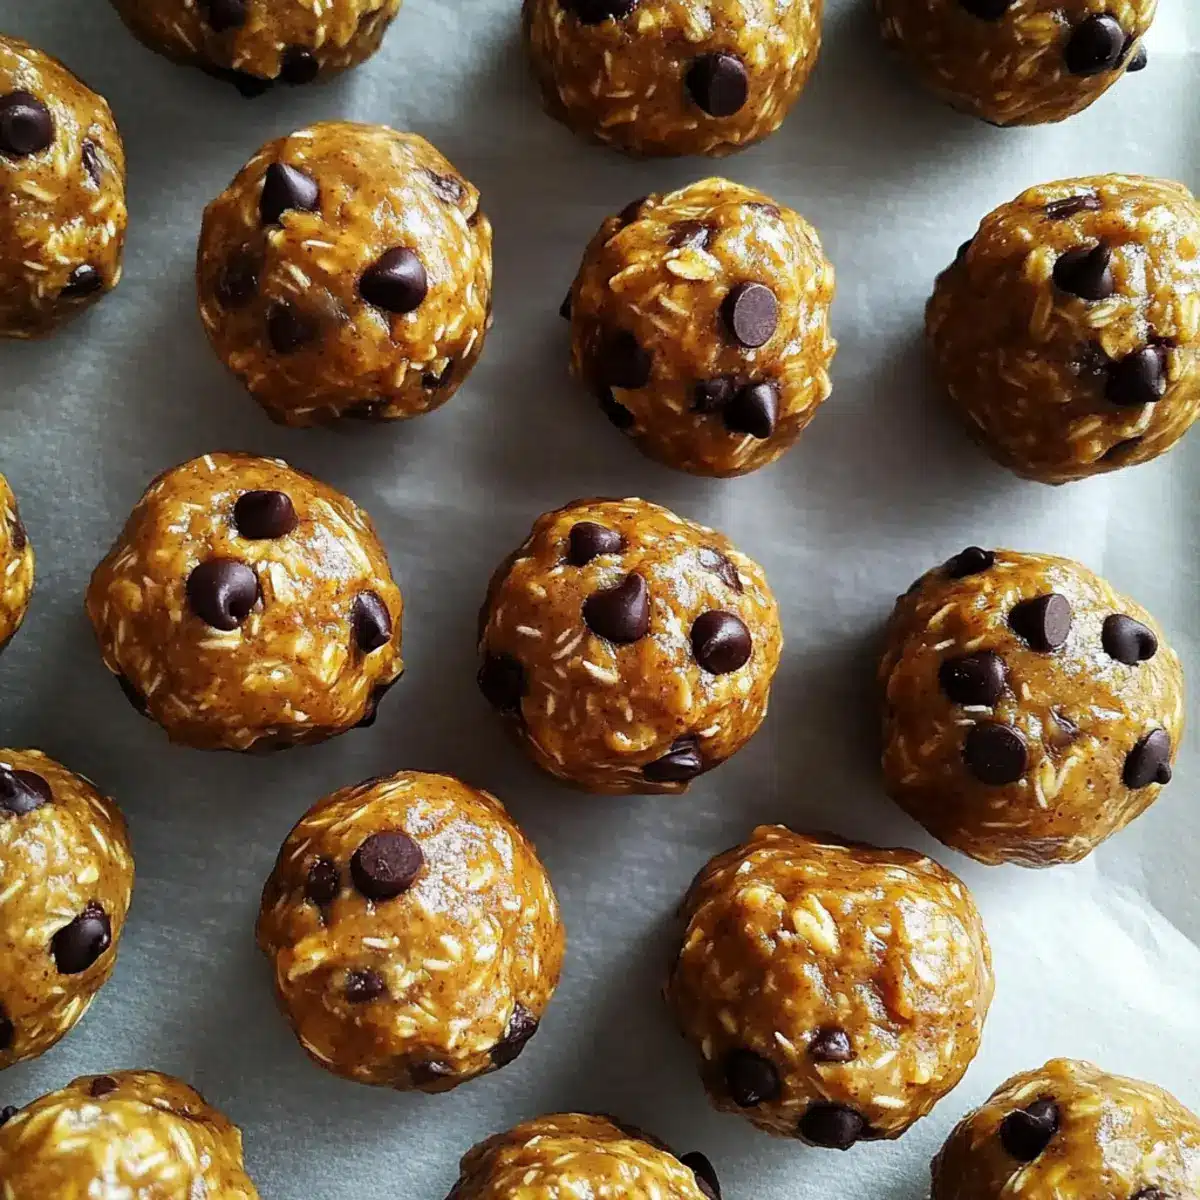
Overheard at a local café, two friends raved about their favorite healthy snacks. “You’ve got to try those no-bake peanut butter energy bites,” one exclaimed, eyes shining with excitement. I couldn’t help but smile, knowing exactly how deliciously satisfying these little gems are. Packed with creamy peanut butter, hearty oats, and bits of rich chocolate, these No-Bake Peanut Butter Energy Bites are not just quick to whip up—taking a mere 5 minutes—but also plant the perfect seed of energy when you need it most. They’re an ideal pick-me-up after a workout, a munch-worthy breakfast on the go, or a delightful treat to unwind with. So why not indulge your taste buds and keep your energy levels high? What fun mix-ins will you try to make them your own?
Why Are No-Bake Peanut Butter Energy Bites a Must-Try?
Quick to prepare, these energy bites only take 5 minutes to make, perfect for busy lifestyles. Nutritious and packed with protein, they fuel your day without the guilt of fast food. Customizable, you can add your favorite mix-ins like chia seeds or dried fruits. No-bake means less mess, making cleanup a breeze! Just like the delightful Baked Churro Bites, these bites are a hit for satisfying cravings while keeping a healthy edge. Enjoy these treats any time of day!
No-Bake Peanut Butter Energy Bites Ingredients
• Ideal for healthy snacking!
For the Base
- Peanut Butter – A rich and creamy base that provides healthy fats; almond butter can serve as a great nut-free swap.
- Oats – These hearty and fibrous ingredients add texture and help bind the bites together; use gluten-free oats for an alternative.
- Honey – This natural sweetener enhances flavor and helps the bites stick; maple syrup is a fantastic vegan substitute.
For the Sweetness
- Chocolate Chips – They bring in that delightful sweetness; consider using dark chocolate for a slightly healthier option or omit for a lower-sugar bite.
Optional Add-Ins
- Chia Seeds – Sprinkle them in for an extra boost of fiber; they’re a great way to enhance nutritional value.
- Ground Flaxseed – Add this for a hit of omega-3 fatty acids.
- Shredded Coconut – Throw in some for added texture and flavor.
- Chopped Dried Cranberries – These offer a touch of extra sweetness and chewiness; perfectly complement the peanut butter!
These No-Bake Peanut Butter Energy Bites are not just easy to make, but they are also incredibly versatile. Enjoy experimenting with various ingredients to find your perfect flavor combination!
Step‑by‑Step Instructions for No-Bake Peanut Butter Energy Bites
Step 1: Combine the Dry Ingredients
In a medium mixing bowl, add rolled oats and chocolate chips, ensuring they are evenly distributed. Stir with a spoon for about 30 seconds, allowing the dry mixture to break up any clumps and minimize sticking. This step lays the foundation for your No-Bake Peanut Butter Energy Bites, creating a delightful texture.
Step 2: Mix in the Wet Ingredients
Spoon in the creamy peanut butter and golden honey, making sure to use a sturdy spatula or spoon for mixing. Combine these ingredients thoroughly for about 1-2 minutes until the mixture is thick, sticky, and holds its shape well. You’ll know it’s ready when everything is well incorporated, creating a deliciously robust flavor base for your energy bites.
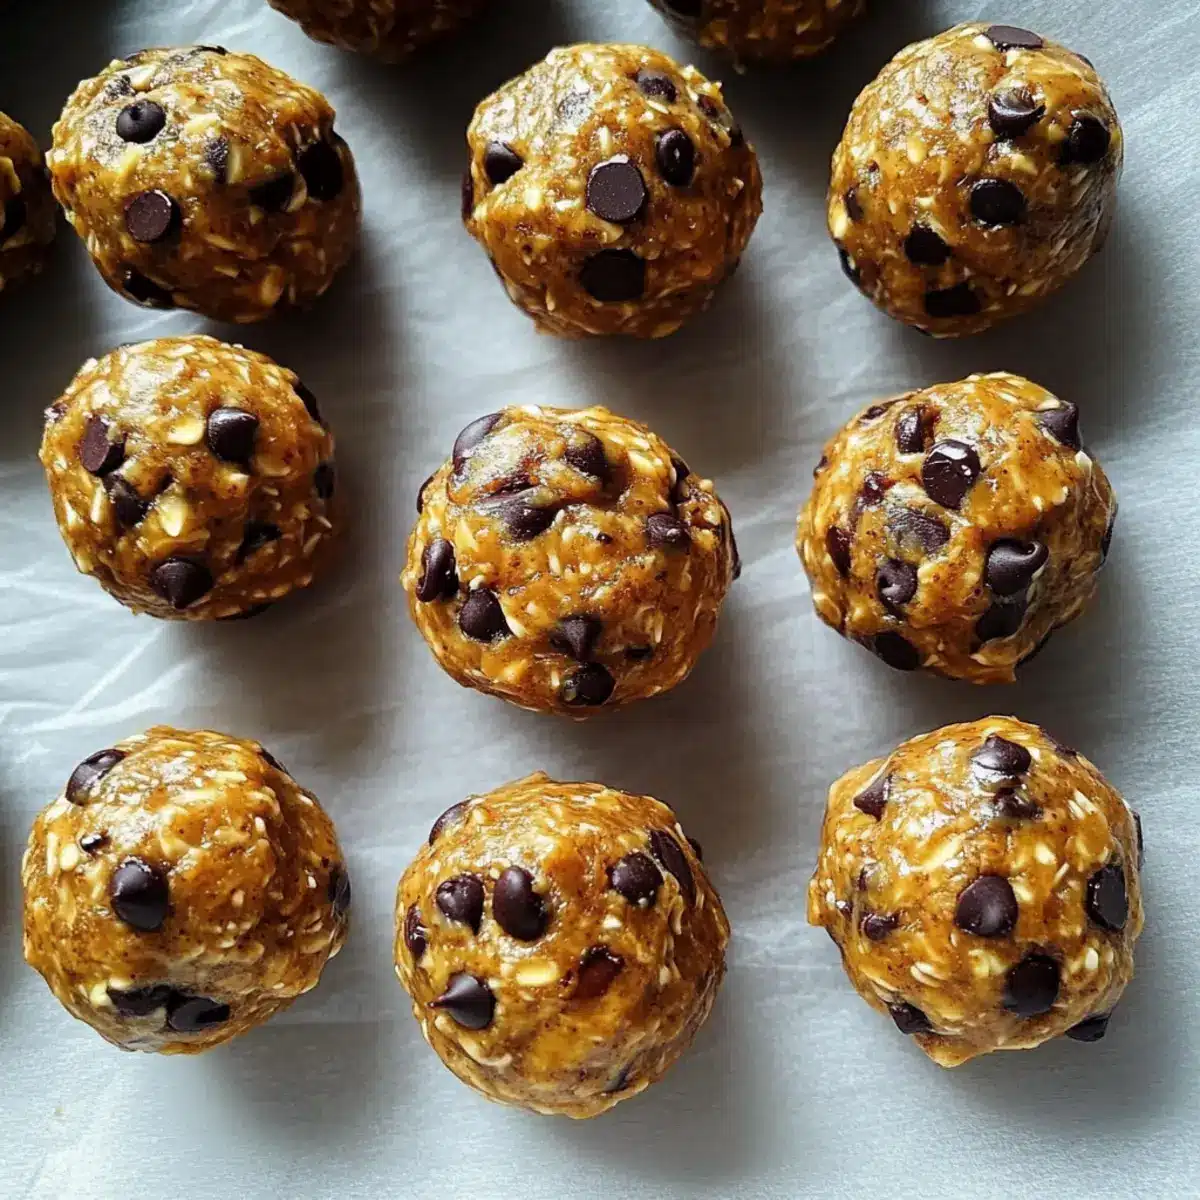
Step 3: Form the Energy Bites
Using a 1-tablespoon measuring spoon, scoop out portions of the mixture and roll them into small balls between your hands. Aim for about 12 uniform bites, ensuring they are firmly packed together to maintain shape. The tactile experience of rolling will tell you they are ready, giving these No-Bake Peanut Butter Energy Bites their signature delightful roundness.
Step 4: Chill for Optimal Texture
To enhance the texture and flavor, place your energy bites on a parchment-lined plate or tray and let them sit in the refrigerator for at least 30 minutes. This helps them firm up nicely, making them easier to handle and eat. As they chill, imagine how satisfying each chewy bite will be when you finally indulge!
Step 5: Store for Freshness
Once cooled, transfer the energy bites into an airtight container or zip-top bag. Keep them stored at room temperature for a few days or pop them into the fridge for longer-lasting freshness. This storage method keeps your No-Bake Peanut Butter Energy Bites delicious and ready to fuel any moment of your day!
Expert Tips for No-Bake Peanut Butter Energy Bites
- Achieve Perfect Consistency: If your mixture appears too dry, add 1-2 teaspoons of water until it becomes thick yet sticky, ensuring your No-Bake Peanut Butter Energy Bites hold together well.
- Chill for Firmness: Refrigerate your energy bites for at least 30 minutes after rolling them to enhance their texture and ensure they’re easier to eat, maximizing enjoyment.
- Easily Doubled: Want more? This recipe doubles beautifully! Just mix your ingredients in a larger bowl and roll out 24 bites for extra snacking pleasure.
- Customize Add-Ins: Experiment with different optional add-ins like chia seeds and shredded coconut to enhance nutritional value and flavor. Just be careful not to overcrowd the mix!
- Storage Savvy: Store your energy bites in an airtight container to maintain freshness. They can last up to a week at room temperature or be refrigerated for even longer enjoyment.
How to Store and Freeze No-Bake Peanut Butter Energy Bites
Room Temperature: Keep energy bites in an airtight container at room temperature for up to 3 days for a convenient snack on the go.
Fridge: For prolonged freshness, store them in the refrigerator, where they’ll last up to 1 week. The cooler environment helps maintain their chewy texture.
Freezer: Freeze leftover energy bites in a single layer on a baking sheet, then transfer to an airtight container for up to 3 months. Thaw at room temperature or enjoy straight from the freezer for a cool treat.
Reheating: There’s no need to reheat; simply enjoy them cold or let them sit out for a few minutes if you prefer a softer bite.
Make Ahead Options
These No-Bake Peanut Butter Energy Bites are perfect for meal prep enthusiasts! You can prepare the mixture up to 24 hours in advance, making them a fantastic option for busy weeknights or last-minute snacks. Simply follow the mixing instructions and roll the bites into balls, then store them in an airtight container or zip-top bag in the refrigerator. This not only helps firm them up but also maintains their freshness. When you’re ready to indulge, just take them out and enjoy! With these simple make-ahead steps, you’ll have delightful, high-protein snacks on hand whenever you need a quick energy boost.
What to Serve with No-Bake Peanut Butter Energy Bites?
These little energy gems are the perfect fuel for your busy day, and pairing them with wholesome sides can elevate your snacking experience.
-
Fresh Fruit Salad: A colorful mix of berries, melons, and citrus adds a refreshing burst of sweetness and hydration. The juicy textures and vibrant flavors contrast beautifully with the chewy energy bites.
-
Greek Yogurt Parfait: Layer creamy Greek yogurt with granola and sliced bananas for a delightful post-workout treat. This combination offers a protein-packed boost that works harmoniously with the energy bites.
-
Nutty Granola: A crunchy mix of oats, nuts, and honey complements the chewy texture of the energy bites. This delightful contrast can satisfy your craving for something crispy and sweet.
-
Veggie Sticks with Hummus: Crisp carrots and celery dipped in rich, savory hummus provide a great crunchy contrast! The earthy flavors pair wonderfully after one of those sweet energy bites, offering a balanced snacking experience.
-
Smoothie Bowl: Blend your favorite fruits with spinach or kale and top with granola and seeds. The creamy consistency and fresh flavors make this a refreshing side that complements the energy bites beautifully.
-
Iced Herbal Tea: A refreshing herbal tea with mint or chamomile will soothe your palate and cleanse the flavor between bites. Sip and savor for a rejuvenating snack experience.
-
Chocolate-Covered Almonds: If you’re looking to indulge a bit more, these morsels make a delightful pairing. Rich chocolate paired with crunchy almonds accentuates the chocolate chips in your energy bites, making every mouthful a true treat.
-
Nut Butter Toast: Spread some almond or cashew butter on whole grain toast, topped with sliced banana or apples. The sweetness and creaminess of the toast harmonize with the energy bites’ texture for a satisfying snack.
No-Bake Peanut Butter Energy Bites Variations
Get ready to make these energy bites uniquely yours with simple swaps and fun additions!
- Nut-Free: Swap peanut butter for sunflower seed butter to create a tasty nut-free version.
- Gluten-Free: Use certified gluten-free oats to keep the recipe friendly for those with gluten sensitivities.
- Vegan Option: Replace honey with maple syrup for a delicious vegan adaptation without sacrificing taste.
- Flavor Boost: Add a pinch of cinnamon or a splash of vanilla extract to elevate the overall flavor profile.
- Extra Crunch: Mix in chopped nuts, such as almonds or walnuts, for an added crunch and wholesome goodness.
For a twist, try adding shredded coconut for a tropical flair. It pairs beautifully with the chocolate chips, creating an enticing texture and flavor bite after bite. If you enjoy experimenting with flavors, consider incorporating dried fruits like cranberries or raisins, which can enhance the sweetness while adding chewiness, reminiscent of my scrumptious Banana Split Cake.
Dive into the fun of customization and create your perfect batch of No-Bake Peanut Butter Energy Bites today!
No-Bake Peanut Butter Energy Bites Recipe FAQs
How do I choose the right peanut butter for this recipe?
Absolutely! I recommend using natural peanut butter made from just peanuts and salt for the best flavor and texture. Avoid brands with added sugars or hydrogenated oils, as they can alter the consistency and health benefits. If you have nut allergies, almond butter or sunflower seed butter can be excellent alternatives.
What’s the best way to store No-Bake Peanut Butter Energy Bites?
Very! Store these delightful bites in an airtight container at room temperature for up to 3 days. If you want them to last longer, refrigerate them for up to 1 week. This helps maintain their chewy texture and fresh taste.
Can I freeze No-Bake Peanut Butter Energy Bites?
Certainly! To freeze, lay the energy bites in a single layer on a baking sheet and freeze for about 1 hour. Once they are solid, transfer the bites to an airtight container or zip-top bag, where they can be stored for up to 3 months. They can be enjoyed straight from the freezer or left to thaw at room temperature for a few minutes.
What should I do if my mixture is too dry?
If you find your mixture isn’t sticking well, don’t worry! Just add 1 to 2 teaspoons of water to the mix and combine thoroughly until the consistency is thick and sticky. This should help bind all the ingredients together, ensuring your bites hold form beautifully.
Are these energy bites suitable for kids and pets?
Definitely! These No-Bake Peanut Butter Energy Bites are a great snack for kids, providing a boost of energy and nutrition. However, be cautious with pets, especially dogs, as peanut butter should be consumed in moderation. Always check for xylitol in peanut butter, as this ingredient can be toxic to pets.
Can I change the sweetener in this recipe?
Yes, indeed! While honey is a fantastic binding agent and adds sweetness, feel free to swap it out for maple syrup for a vegan option. If you prefer a lower sugar version, you can also reduce the amount of sweetener by adding just enough to suit your taste without compromising the texture.
Energize Your Day with No-Bake Peanut Butter Energy Bites
Ingredients
Equipment
Method
- In a medium mixing bowl, combine rolled oats and chocolate chips, stirring for about 30 seconds.
- Add peanut butter and honey, mixing thoroughly for 1-2 minutes until the mixture is thick and holds its shape.
- Scoop out portions and roll into balls, aiming for about 12 uniform bites.
- Place on a parchment-lined plate and chill in the refrigerator for at least 30 minutes.
- Transfer to an airtight container for storage.
Leave a Reply