
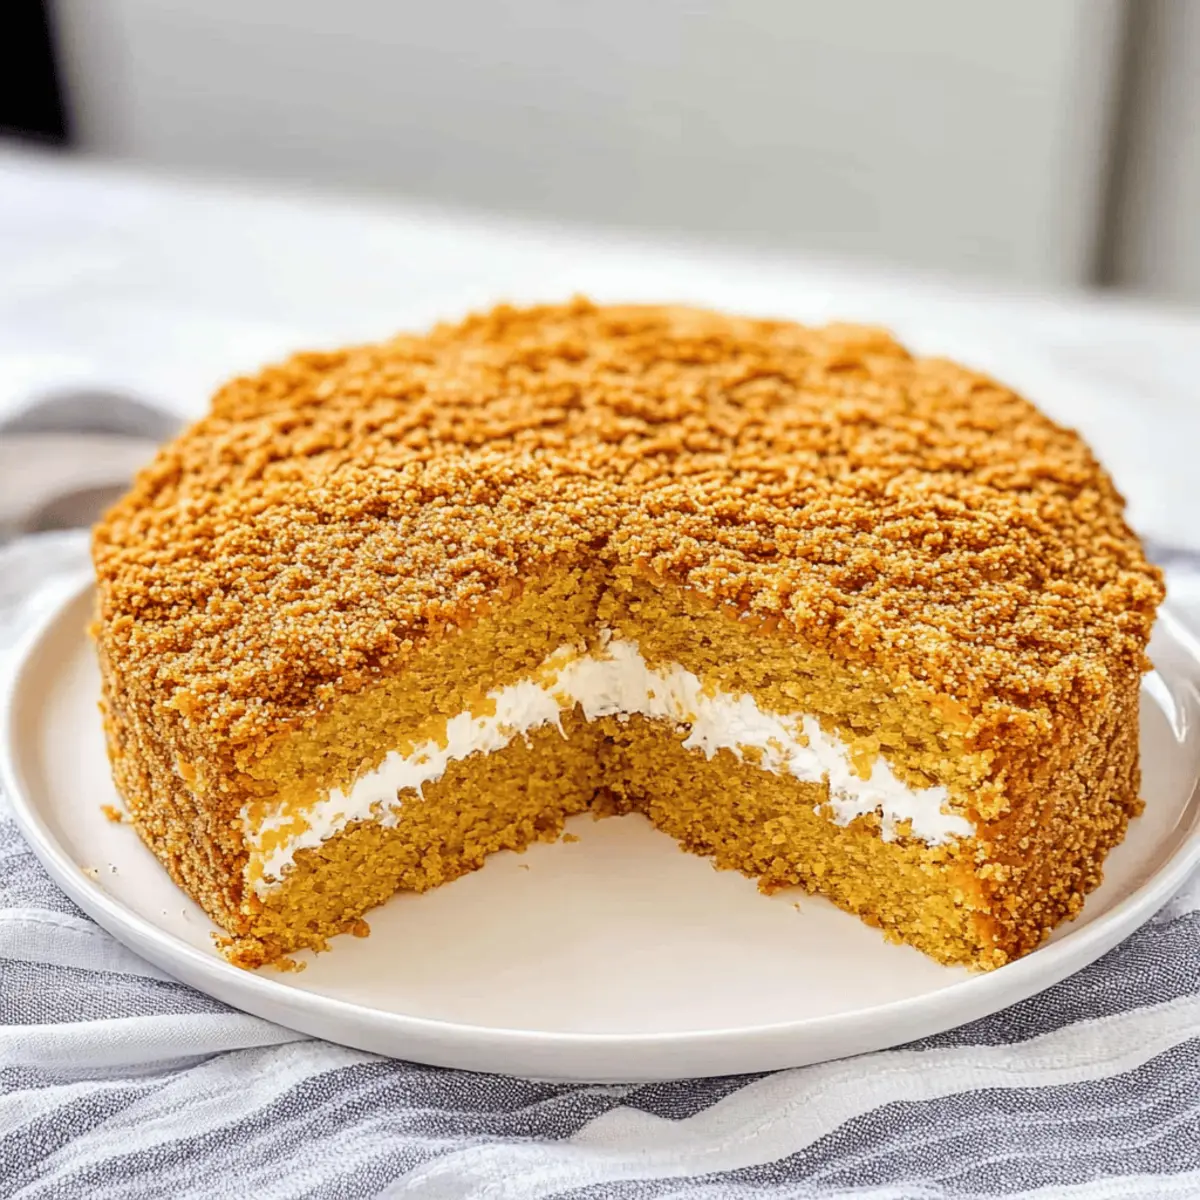
As I stood in my kitchen, the aroma of honey wafted through the air, instantly transporting me to the bustling bakeries of Russia. That’s when I decided to whip up a showstopper: the Russian Honey Cake, or Medovik, a delightful layered dessert that has a way of making any gathering feel special. It’s a charming cake that offers a light sponge texture combined with a creamy, tangy frosting, and don’t worry—prepping this crowd-pleaser is a breeze. You’ll find it not only satisfies those sweet cravings but also allows for a sugar-free twist, making it family-friendly for all ages. Are you ready to create your own masterpiece that looks as wonderful as it tastes? Let’s dive into this Russian classic that’s sure to impress!
Why Is Russian Honey Cake So Special?
Sweet nostalgia: This traditional dessert brings back memories of family gatherings and celebrations, making it a beloved recipe.
Effortless elegance: With its beautiful layered appearance, it impresses guests while being simple enough for beginner bakers.
Versatile options: Choose between a classic or sugar-free twist, catering to everyone’s dietary preferences.
Crowd-pleaser: The delightful combination of honey and tangy sour cream frosting makes it a guaranteed hit at any gathering.
Quick prep time: You can have this showstopper ready in just a couple of hours, leaving you more time to enjoy with family or friends.
Russian Honey Cake Ingredients
For the Cake Layers
• Eggs – Provide structure and moisture; fresh eggs produce a light texture.
• Clover Honey – Adds natural sweetness and moisture; substitute with local or wild honey for varied flavor.
• All-Purpose Flour – Gives structure to the cake; can be replaced with gluten-free flour for a gluten-free option.
• Baking Soda – Acts as a leavening agent when combined with vinegar; ensure freshness for optimal rise.
• White Distilled Vinegar – Reacts with baking soda to create lift; lemon juice can be a substitute.
For the Frosting
• Cool Whip (Thawed) – Provides sweetness and fluffiness in frosting; use homemade whipped cream for a healthier version.
• Sour Cream – Adds creaminess and tang; Greek yogurt can serve as a substitute for a lighter cake.
For the Garnish
• Cake Crumbs – Use leftovers from baking the layers; they lend great texture and decoration.
This delightful Russian Honey Cake is more than just a treat; it’s a warm hug that makes any occasion special!
Step‑by‑Step Instructions for Russian Honey Cake
Step 1: Prepare Oven and Baking Sheet
Begin by preheating your oven to 350°F (175°C). While the oven warms up, take an inverted 18×13-inch baking sheet and line it with parchment paper. This preparation will ensure the layers of your Russian Honey Cake release easily after baking.
Step 2: Make Batter
In a large mixing bowl, beat together the eggs and clover honey for about 2 minutes until the mixture turns light and frothy. Then, dissolve the baking soda in a small amount of white distilled vinegar and stir it into the egg mixture, followed by gradually adding the all-purpose flour until just combined. Be careful not to overmix.
Step 3: Bake Layers
Pour ½ cup of the batter evenly onto the prepared baking sheet, spreading it to cover the corners. Place the baking sheet in the oven and bake for about 7 minutes, or until the edges are lightly golden. Repeat this process until all the batter is used, creating a total of 4 layers.
Step 4: Cool and Cut
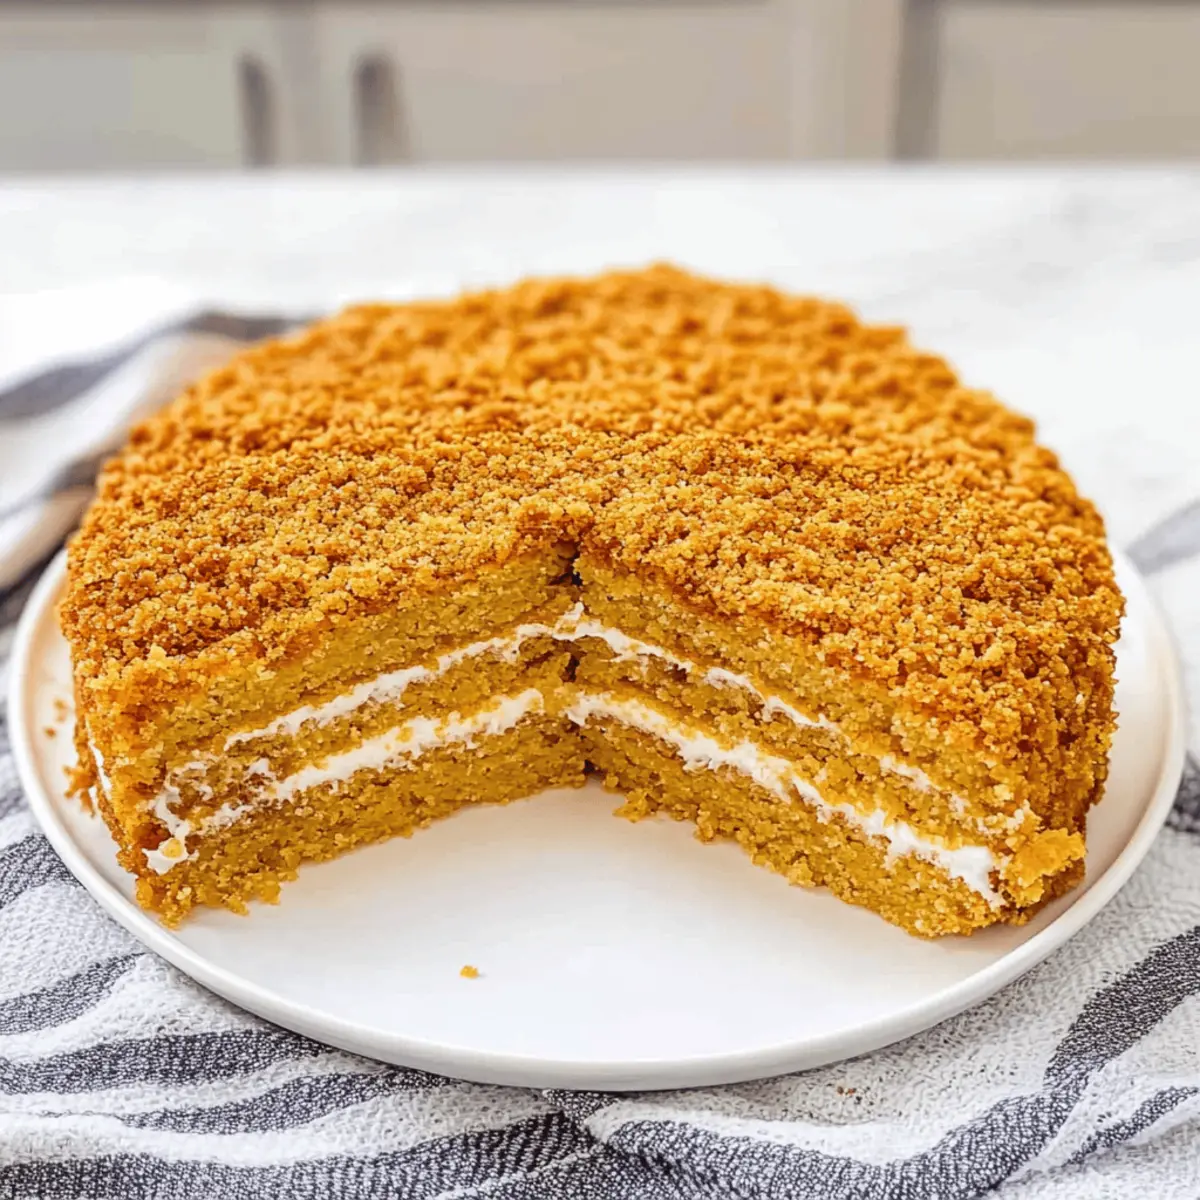
Once baked, remove the layers from the oven and let them cool completely on a wire rack. Carefully peel the parchment paper from the layers, then use a large plate to trace and cut out 8 circles from each cooled layer for your Russian Honey Cake.
Step 5: Make Crumbs
With the leftover cake scraps, preheat your oven to 275°F (135°C). Spread the scraps on a baking sheet and bake for 5-10 minutes until they are crispy. Once cooled, crush these scraps into fine crumbs to use as a garnish for your cake.
Step 6: Prepare Frosting
In a medium bowl, combine the thawed Cool Whip with sour cream, mixing until well blended and creamy. This luscious frosting will complement the layers of your Russian Honey Cake beautifully, balancing the sweetness and adding a tangy touch.
Step 7: Assemble Cake
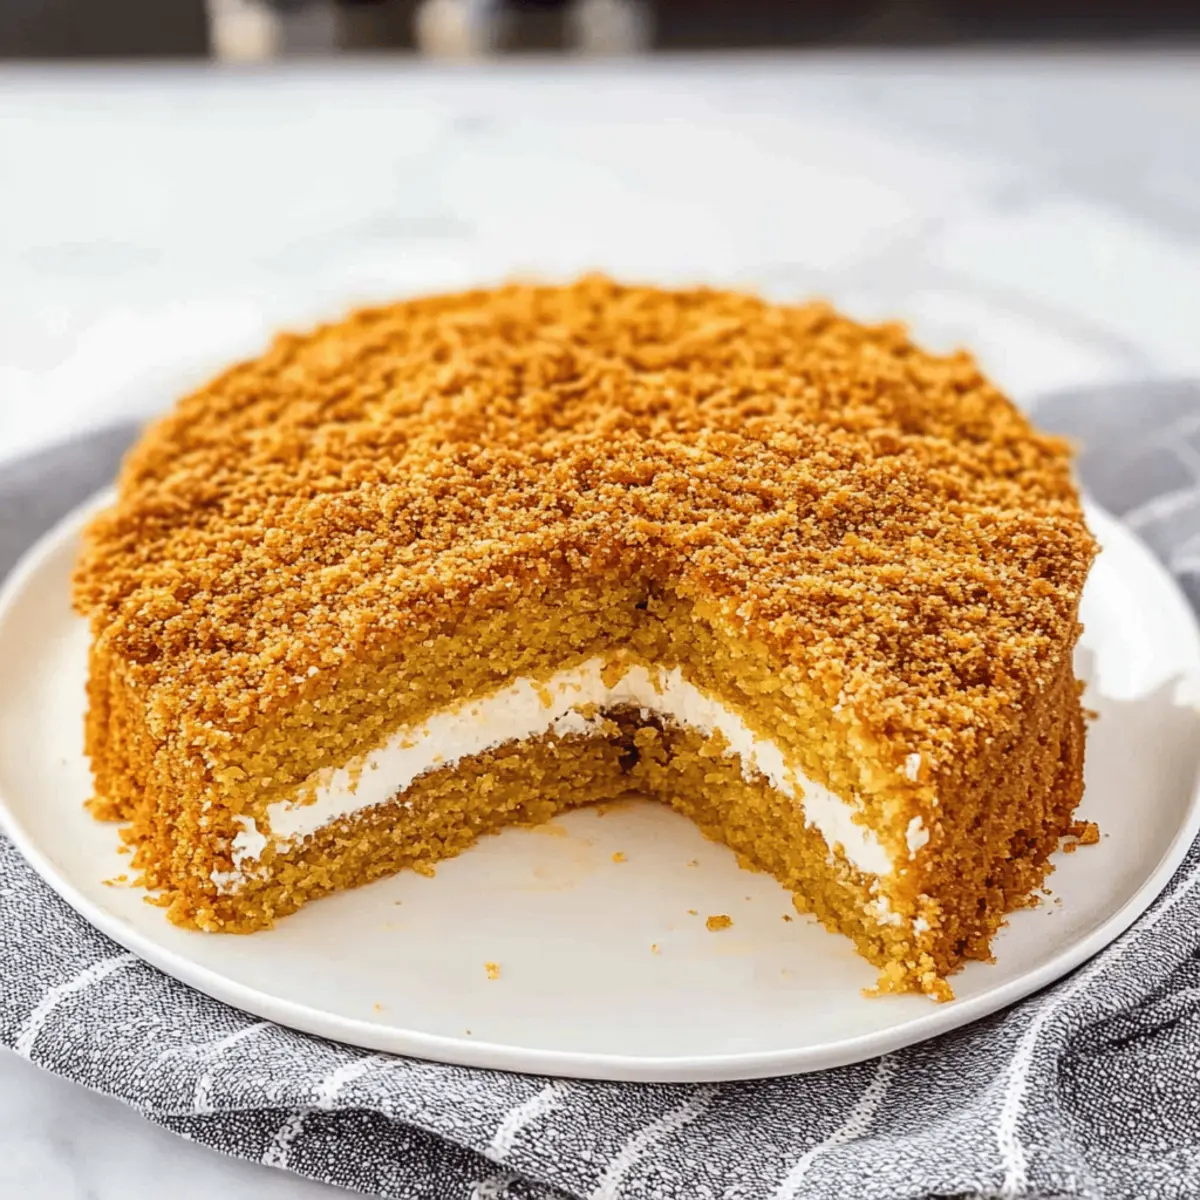
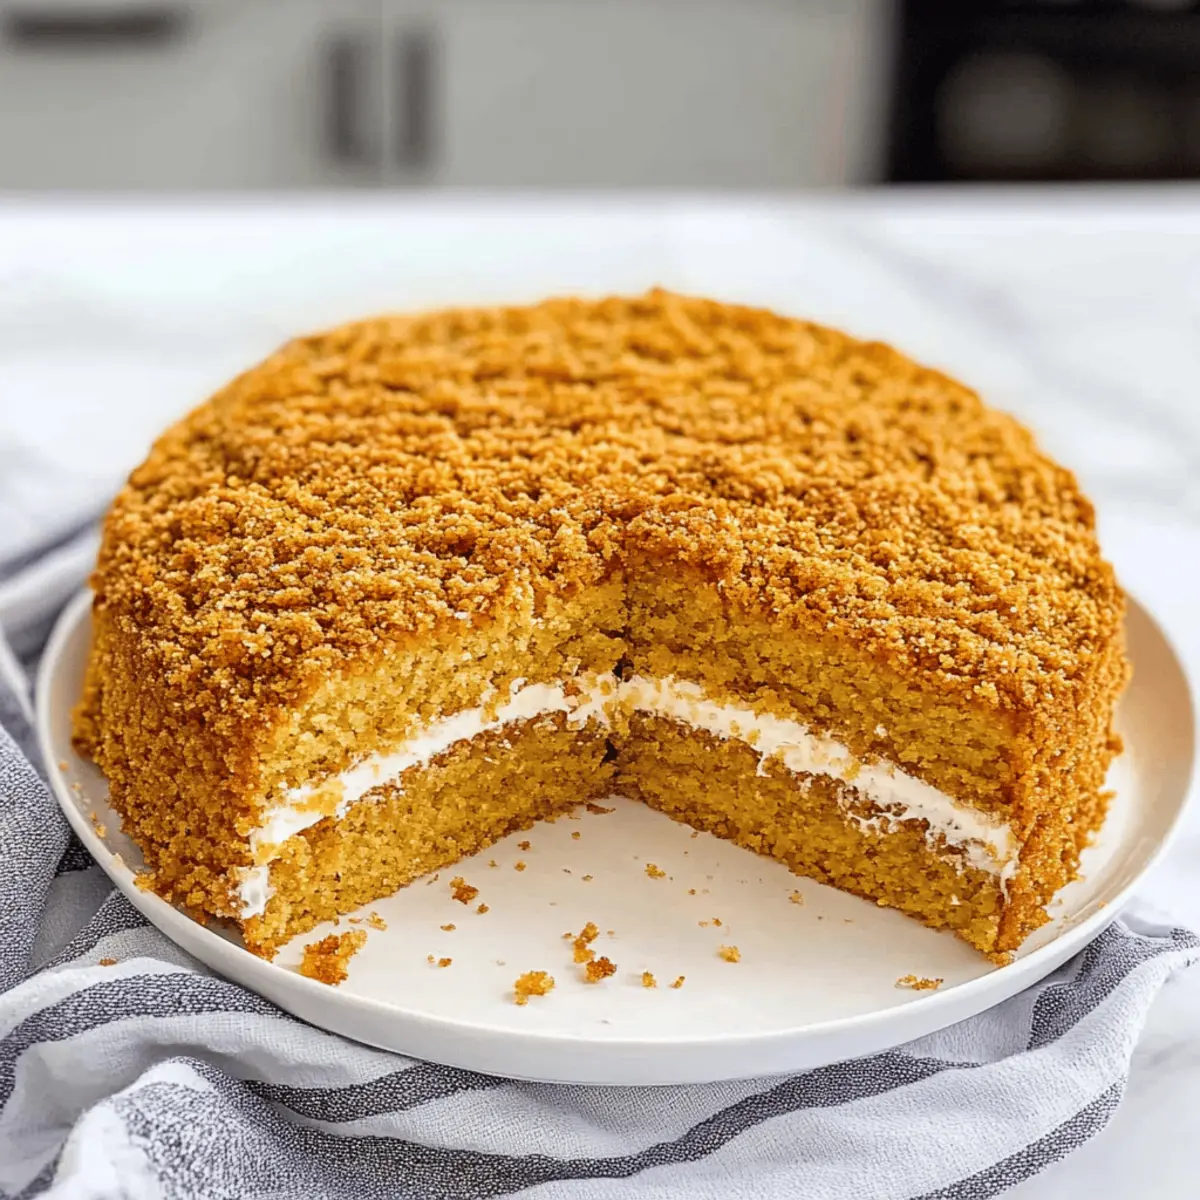
To assemble your Russian Honey Cake, place one round layer on a serving plate. Spread a generous layer of the frosting on top, followed by the next cake circle. Repeat this process until all circles are stacked, then frost the top and sides of the cake. Finally, finish by sprinkling the crushed cake crumbs generously over the top and sides.
Step 8: Chill and Serve
Refrigerate your assembled Russian Honey Cake for at least 1 hour, or overnight if possible, to allow the layers to soak up the flavors and the frosting to set. Once ready to serve, slice it up and indulge in this delightful treat at your next gathering!
What to Serve with Authentic Russian Honey Cake
Imagine this: a lovely gathering where the golden layers of Medovik are the centerpiece, ready to be paired with vibrant sides and sips that dance with flavor.
- Fresh Berries: Juicy strawberries or raspberries add a burst of freshness that beautifully cuts through the creamy frosting.
- Earl Grey Tea: The subtle bergamot fragrance of this tea enhances the honey flavor, creating a soothing tea time experience.
- Greek Yogurt Parfait: Creamy yogurt layered with fruit provides a delightful contrast to the sweet cake, embodying balance in every bite.
- Roasted Nuts: A sprinkle of pistachios or almonds adds a satisfying crunch that harmonizes with the soft cake’s texture.
- Chocolate Espresso Martini: This indulgent drink combines rich chocolate and coffee, elevating the sweet layers of honey cake to a new level of luxury.
- Citrus Salad: A refreshing mix of oranges and grapefruits brings bright acidity, complementing the sweetness of the Russian Honey Cake perfectly.
- Vanilla Ice Cream: A scoop of this classic pairing melts into the layers, enhancing the honey while adding a creamy element.
- Homemade Lemonade: The tangy kick of fresh lemons contrasts beautifully with the cake’s sweetness, making each bite even more delicious.
- Chai Spiced Coffee: Infused with warm spices, this brew melds perfectly with the honey flavors and creates a cozy atmosphere.
- Peanut Butter Cookies: A side of these chewy cookies offers a nostalgic touch and an unexpected flavor twist alongside the dessert.
Let these pairing ideas turn your dessert experience into a delightful feast that everyone will remember!
Storage Tips for Russian Honey Cake
Fridge: Keep the assembled Russian Honey Cake in an airtight container in the refrigerator for up to 3 days. This allows flavors to deepen while ensuring the cake remains moist.
Freezer: For longer storage, freeze the entire cake for up to 3 months. Wrap it tightly in plastic wrap followed by aluminum foil to prevent freezer burn.
Individual Layers: Avoid freezing the individual sponge layers, as they may stick together. It’s best to freeze the assembled cake for optimal texture.
Reheating: If served chilled, the cake can be enjoyed right from the fridge. For a warmer experience, allow it to sit at room temperature for about 30 minutes before serving.
Make Ahead Options
These Russian Honey Cake (Medovik) layers are perfect for meal prep enthusiasts looking to save time during busy weeknights! You can bake the sponge cake layers up to 24 hours in advance, allowing them to cool completely, then store them in an airtight container to maintain moisture and freshness. Additionally, you can prepare the frosting a day ahead and refrigerate it until you’re ready to assemble. When you’re ready to serve, simply layer the cream between the cooled cake circles, frost the outside, and garnish with cake crumbs. This way, you’ll have a beautifully finished dessert with minimal effort, staying just as delicious and impressive!
Expert Tips for Russian Honey Cake
- Keep Layers Thin: Thin layers ensure quicker soaking and a lighter texture. Aim for even ½ inch thickness as you spread the batter.
- Use Fresh Ingredients: Fresh eggs and honey enhance the flavor and texture of your Russian Honey Cake, making it extra delightful.
- Proper Cooling Time: Allow the layers to cool completely before cutting. This prevents crumbling and ensures clean edges.
- Easy Frosting Swap: For a healthier choice, use homemade whipped cream instead of Cool Whip, adding powdered sugar for sweetness if needed.
- Parchment Paper Magic: Using parchment paper helps layers release easily; don’t skip this step to avoid tearing your beautiful cake!
Russian Honey Cake Variations
Feel free to explore these delightful twists to customize your Russian Honey Cake and cater to your family’s taste buds.
- Dairy-Free: Substitute sour cream and Cool Whip with coconut cream for a luscious, dairy-free frosting. The tropical hint adds a delicious twist!
- Gluten-Free: Use gluten-free all-purpose flour in place of regular flour, letting everyone enjoy this lovely dessert without the worry.
- Sugar-Free: Replace traditional honey with your favorite sugar-free honey alternative or sweetener. You’ll still get the sweetness without the guilt!
- Nuts for Crunch: Add crushed walnuts or hazelnuts between layers for an enjoyable savory crunch. This unexpected twist elevates the cake’s texture beautifully.
- Fruit Layers: Consider adding fresh berries or thin slices of fruit between cake layers for added flavor and freshness. Raspberries or strawberries pair wonderfully with honey!
- Spiced Version: Incorporate cinnamon or cardamom into the batter to give it a warm, aromatic flavor. Spice lovers will revel in this cozy twist!
- Chocolate Delight: Drizzle melted chocolate on the top layer before garnishing with crumbs for an indulgent finish.
- Citrus Zest: Stir in some lemon or orange zest into the frosting for a refreshing citrus note that brilliantly complements the honey.
Each variation offers a new way to enjoy this beloved dessert. For a delightful pairing, consider serving your honey cake with a cup of tea alongside a slice of Chai Cake Decadent. Whatever twist you choose, your Russian Honey Cake will surely be a hit!
Russian Honey Cake Recipe FAQs
How do I select the best honey for my Russian Honey Cake?
Absolutely! When choosing honey, look for clover or wild honey as both add unique flavors and moisture to the cake. The fresher and more flavorful the honey, the better your cake will taste. Avoid honey with dark spots or crystallization, which can indicate it’s old.
How should I store my assembled Russian Honey Cake?
To keep your delicious Russian Honey Cake fresh, store it in an airtight container in the refrigerator for up to 3 days. This method helps the flavors meld beautifully and keeps the cake moist. If you’re not planning to enjoy it within that timeframe, freeze it!
Can I freeze the Russian Honey Cake? If so, how?
Very much! Freeze the entire assembled cake for up to 3 months by wrapping it securely in plastic wrap and then in aluminum foil. This prevents freezer burn and keeps it tasting fresh. Just remember to slice or serve it cold after thawing—it’s still delightful that way!
What’s the best way to troubleshoot if my cake layers turn out too thick?
If your layers end up thicker than desired, don’t worry! You can simply bake them a bit longer to ensure they are fully cooked. Alternatively, slice the layers to your preferred thickness once they are cooled. Keep in mind that thinner layers absorb the frosting and flavors better, creating that signature Medovik texture.
Is there a sugar-free option for this Russian Honey Cake?
Absolutely! You can use sugar-free honey substitutes or sugar alternatives like erythritol or stevia in your recipe. Just ensure that any substitute you choose is appropriate for baking and follows the same measurements as sugar to maintain texture and sweetness.
Are there any dietary considerations for serving this cake to pets or people with allergies?
When it comes to pets, avoid giving them any cake, as honey can be harmful to dogs if consumed in large amounts. For allergies, always check for allergens in the ingredients like eggs or dairy. If anyone is dairy-sensitive, you can use coconut cream instead of sour cream to make it a dairy-free delight!
Delightful Russian Honey Cake: A Sweet Family Tradition
Ingredients
Equipment
Method
- Preheat your oven to 350°F (175°C) and line an inverted 18x13-inch baking sheet with parchment paper.
- In a large mixing bowl, beat the eggs and clover honey for about 2 minutes until light and frothy. Dissolve baking soda in vinegar and stir into the egg mixture, then gradually add all-purpose flour until just combined.
- Pour ½ cup of the batter onto the prepared baking sheet and bake for about 7 minutes until edges are lightly golden. Repeat until all batter is used, creating 4 layers.
- Remove baked layers and let them cool completely on a wire rack. Peel parchment paper and cut out 8 circles from each layer.
- Preheat your oven to 275°F (135°C). Spread leftover cake scraps on a baking sheet and bake for 5-10 minutes until crispy. Crush into fine crumbs for garnish.
- Combine thawed Cool Whip and sour cream in a medium bowl until well blended.
- Assemble the cake by placing one layer on a serving plate, spreading frosting, and stacking remaining layers with frosting in between. Frost the top and sides, then sprinkle with crushed cake crumbs.
- Refrigerate the assembled cake for at least 1 hour or overnight before serving.
Leave a Reply