
As I stood in my kitchen, the vibrant purple hue of ube beckoned to me, promising a culinary adventure like no other. Today, I’m excited to share my recipe for Bouncy Chewy Gluten Free Ube Mochi Cake—an enchanting blend of flavors and textures that’s sure to dazzle your taste buds. Made with Filipino purple yam, this delightful cake is not just visually striking; it’s also incredibly easy to whip up, taking only about ten minutes of prep time! The unique bouncy, chewy texture adds a fun twist to traditional desserts, making it a fantastic crowd-pleaser for both family gatherings and quiet nights at home. Plus, being gluten-free means everyone can indulge without worry. Curious about how to create this stunning treat? Let’s dive into the recipe!
Why is this Ube Mochi Cake special?
Delightfully unique: This mochi cake shines with its vibrant purple color and distinct ube flavor, offering a refreshing twist on traditional desserts.
Quick prep time: With only 10 minutes of prep, you’ll be devouring this delightful treat in no time.
Gluten-free goodness: Made with gluten-free ingredients, it’s perfect for gathering friends and family who appreciate delicious, worry-free indulgence.
Bouncy texture: The chewy, bouncy crumb creates an exciting mouthfeel, making each bite a fun experience.
Endless variations: Swap out ube or mix in citrus zest for a personalized touch, allowing you to cater to your flavor preferences!
Whether enjoying it alone or serving it at gatherings, this Ube Mochi Cake is an irresistible dessert that everyone will love!
Ube Mochi Cake Ingredients
For the Batter
- Mochiko Sweet Rice Flour – Provides structure and the signature chewy texture of the mochi cake, being a gluten-free alternative to regular flour.
- Baking Powder – Acts as a leavening agent; ensure it’s fresh for the best rise.
- Kosher Salt – Enhances the flavor and balances the sweetness of the cake.
- Unsalted Butter – Adds richness; use melted and cooled butter for optimal mixing.
- Granulated Sugar – Sweetens the cake and helps in caramelizing for added depth of flavor.
- Eggs – Provide moisture and structure; allow them to reach room temperature before use.
- Ube Halaya Jam – Infuses the cake with ube flavor and color; can be substituted with more ube extract if needed.
- Ube Extract – Amplifies the ube flavor; choose a high-quality extract for authenticity.
- Purple Food Coloring – Enhances vibrancy; optional, adjust based on the desired color intensity.
- Coconut Milk – Adds creaminess and richness; remember to shake well before using.
This blend of ingredients guarantees a delightful Ube Mochi Cake that brings smiles and flavors to your table.
Step‑by‑Step Instructions for Ube Mochi Cake
Step 1: Preheat the Oven
Begin by preheating your oven to 350°F (175°C) while you prepare your baking pan. Line an 8-inch square pan with parchment paper, allowing some overhang for easy removal later. This will provide the perfect base for your bouncy chewy gluten-free Ube Mochi Cake, ensuring even baking.
Step 2: Combine Dry Ingredients
In a small bowl, whisk together 1 cup of mochiko sweet rice flour, 1 teaspoon of baking powder, and 1/4 teaspoon of kosher salt. Mixing these dry ingredients thoroughly before adding them to the wet ingredients ensures an even distribution throughout the cake, enhancing its texture and flavor. Set this mixture aside.
Step 3: Mix Wet Ingredients
In a medium bowl, melt 1/2 cup of unsalted butter and let it cool slightly. Once cooled, whisk in 1 cup of granulated sugar until well combined. Next, add 2 room-temperature eggs one at a time, mixing until fully incorporated. This creates a rich, smooth base for your Ube Mochi Cake.
Step 4: Add Flavorful Ingredients
To the butter and egg mixture, add 1/2 cup of ube halaya jam, 1 teaspoon of ube extract, and a few drops of purple food coloring if desired. Mix these ingredients until they are fully incorporated, then gradually whisk in 1 cup of coconut milk. The combination of flavors will give your cake its distinct ube taste.
Step 5: Combine Wet and Dry Mixtures
Gently fold the dry ingredients into the wet mixture using a spatula. Mix until just combined; be careful not to overmix, as this can affect the cake’s texture. You’re looking for a smooth, thick batter with a slight sheen, indicating it’s ready for baking.
Step 6: Bake the Cake
Pour the batter into the prepared pan, smoothing the top for even cooking. Place the pan in the center of your preheated oven and bake for 48-50 minutes. The cake is done when a skewer inserted into the center comes out with a few crumbs sticking to it, a sure sign of a moist Ube Mochi Cake.
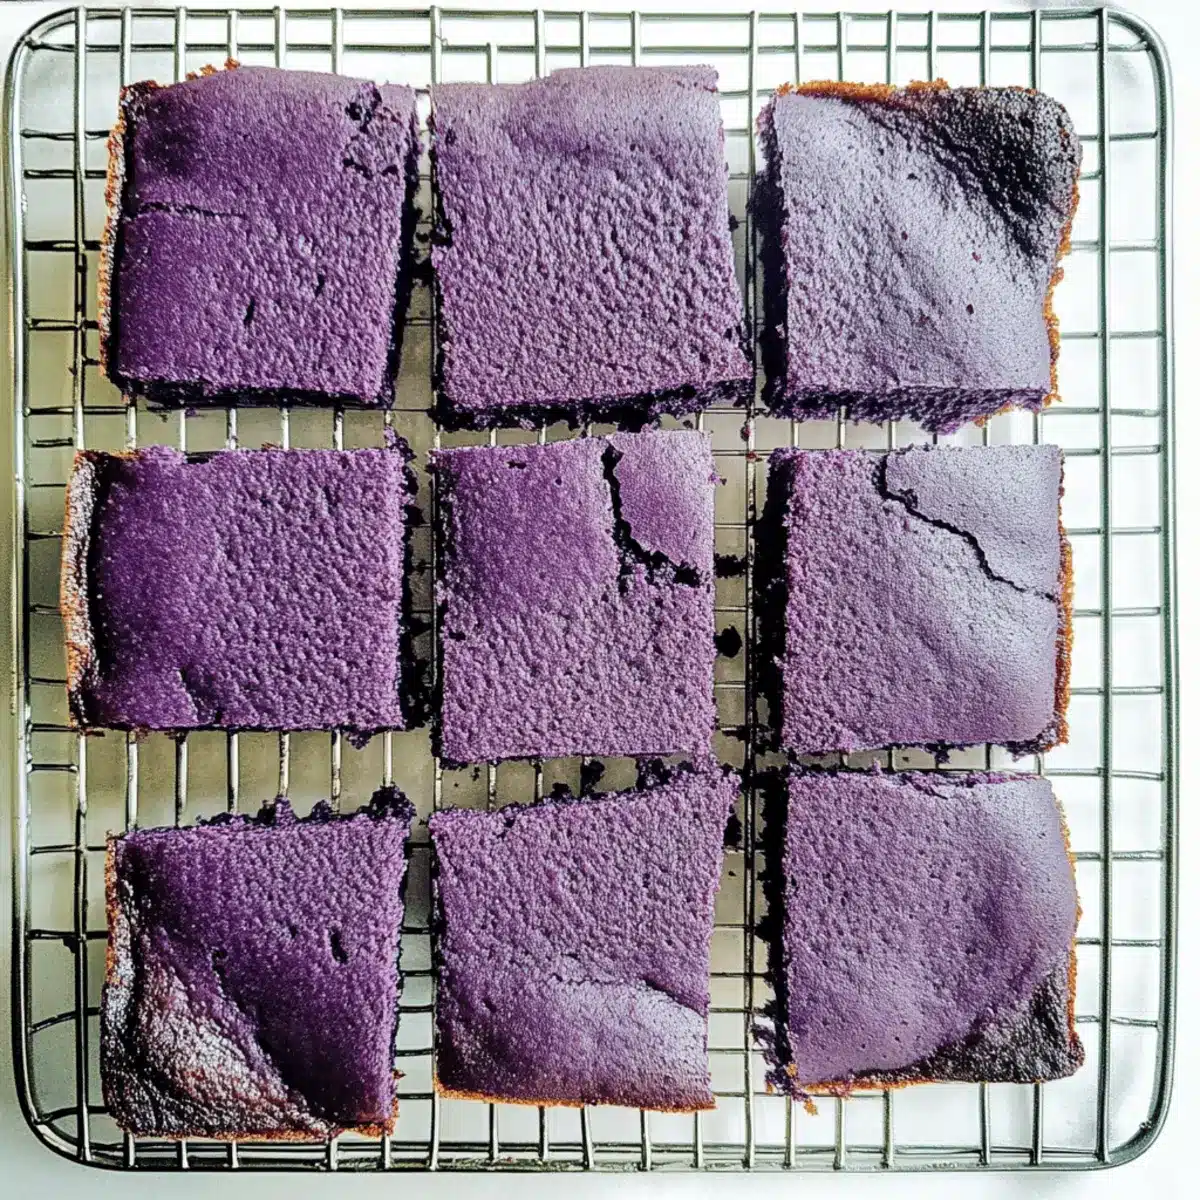
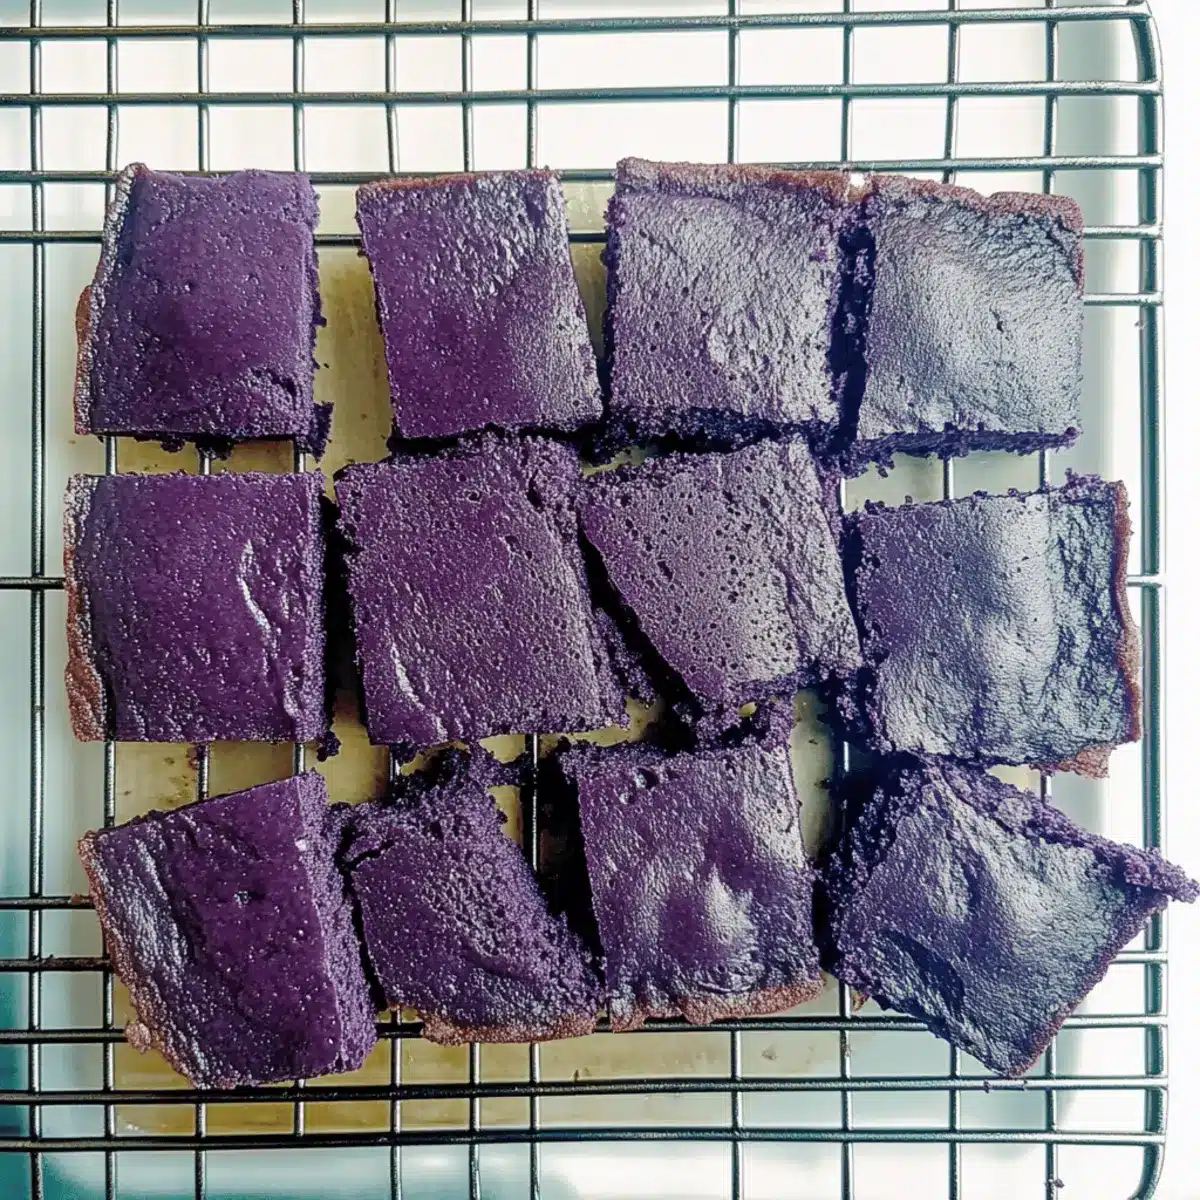
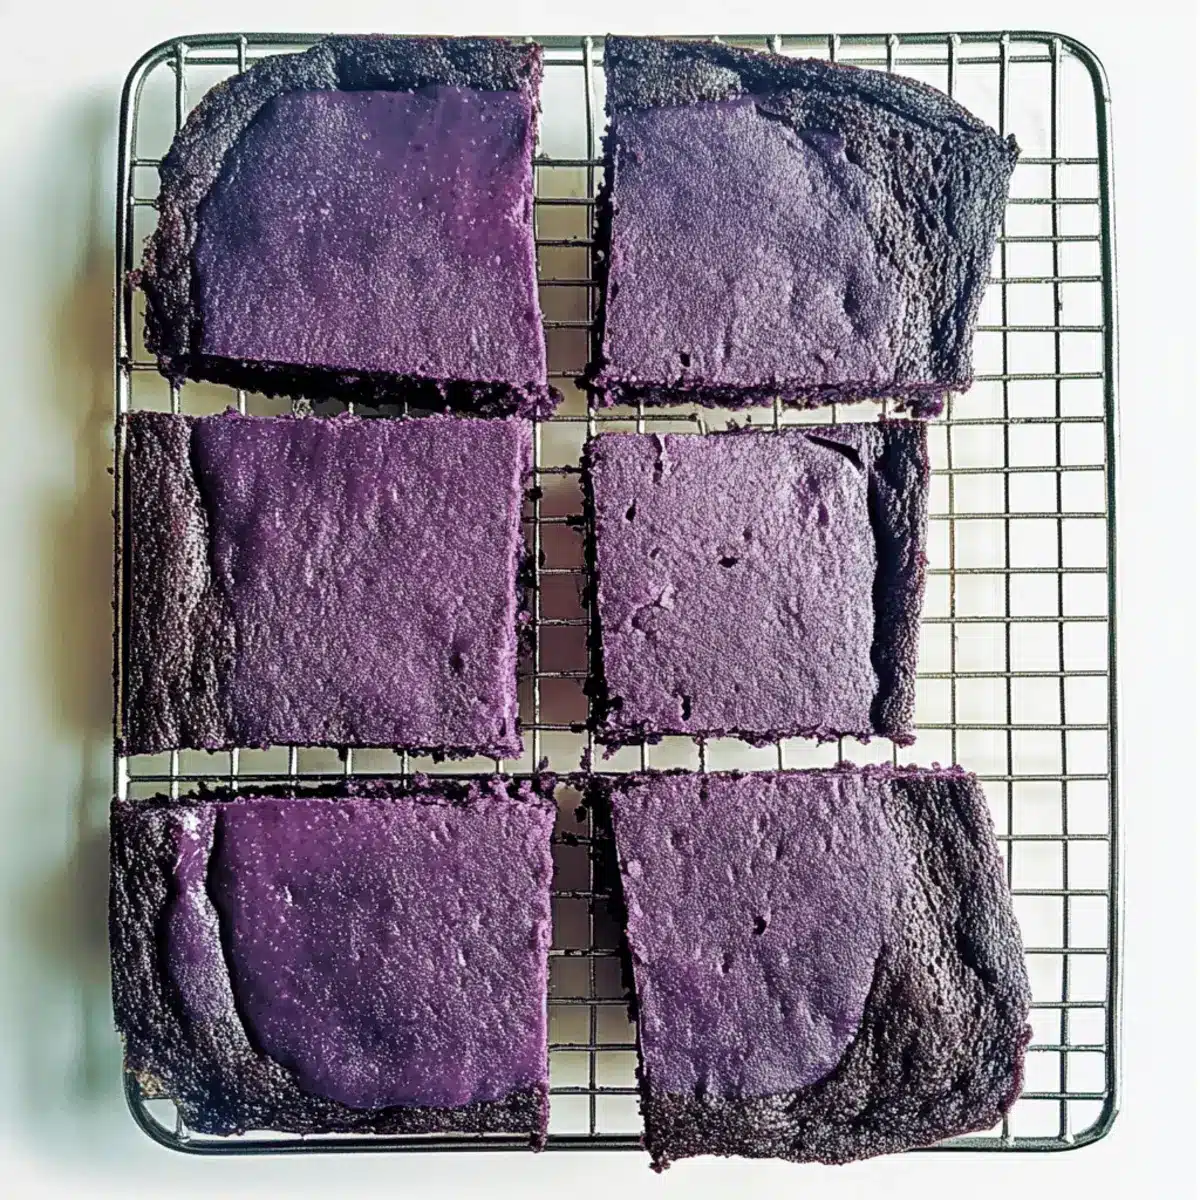
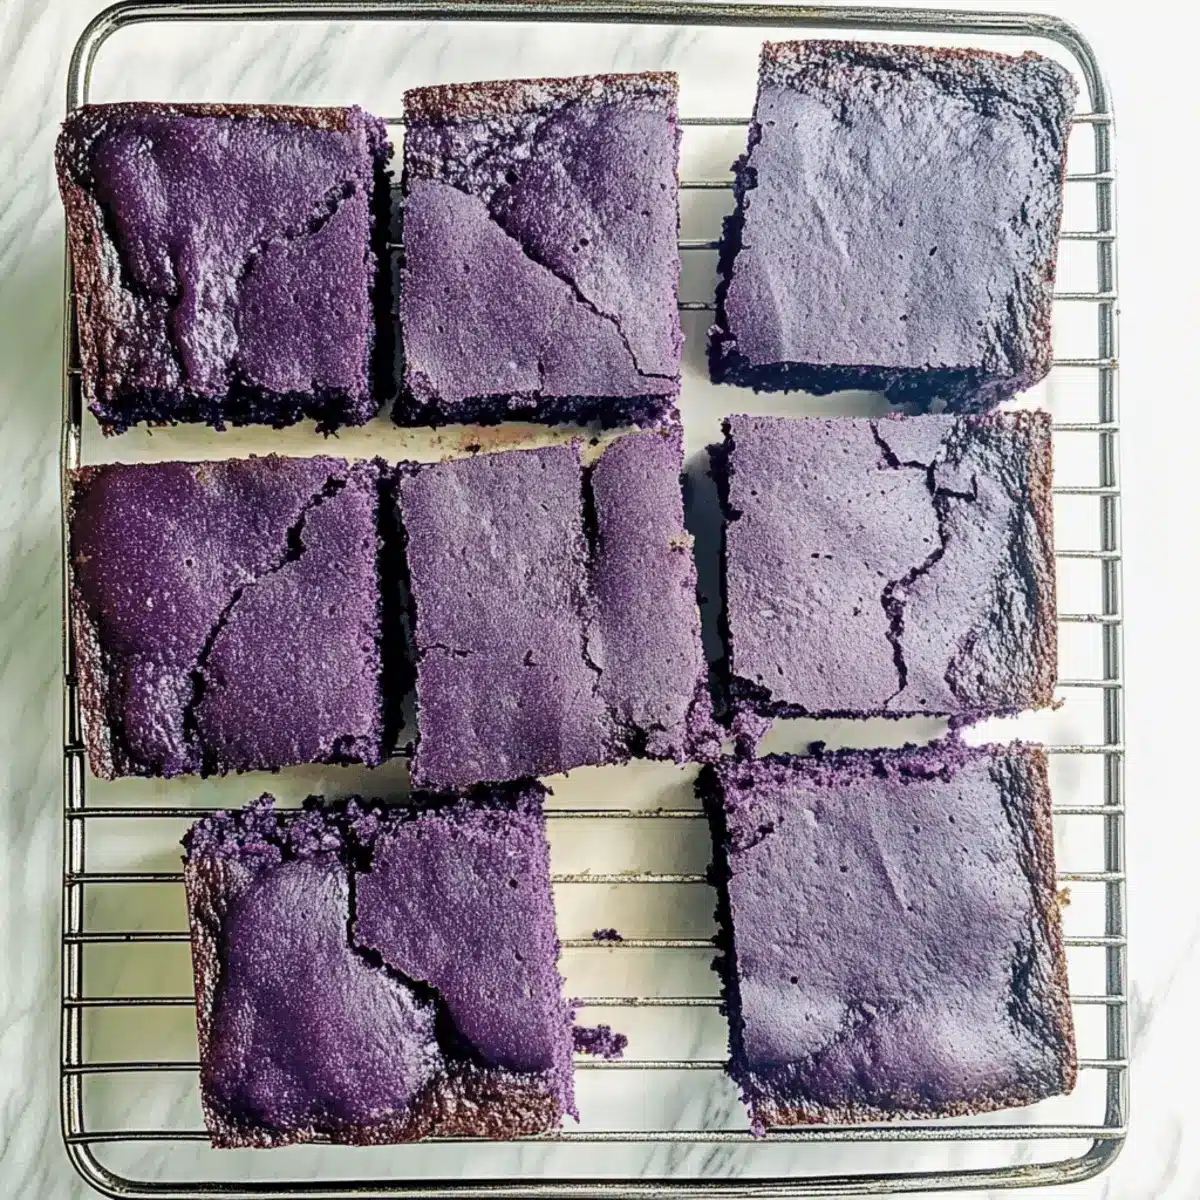
Step 7: Cool and Serve
Once baked, carefully remove the pan from the oven and allow the cake to cool completely on a wire rack. This cooling step is important for setting the texture, making it easier to slice into squares for serving. Once cooled, cut into pieces and enjoy the delightful flavors of your homemade Ube Mochi Cake!
Expert Tips for Ube Mochi Cake
-
Room Temperature Eggs: Ensure your eggs are at room temperature to prevent curdling with the melted butter, achieving a smooth batter for your Ube Mochi Cake.
-
Don’t Overmix: Mix the wet and dry ingredients gently until just combined. Overmixing can lead to a tough cake instead of the desired bouncy texture.
-
Quality Ingredients: Use high-quality ube extract and fresh baking powder for the best flavor and rise in your cake.
-
Cooling Time: Allow the cake to cool completely before slicing. This helps it set properly and maintain its chewy texture.
-
Storage Tips: For the best freshness, enjoy your Ube Mochi Cake the same day. If storing, keep it in an airtight container at room temperature for up to three days.
How to Store and Freeze Ube Mochi Cake
Room Temperature: Store your Ube Mochi Cake in an airtight container at room temperature for up to 3 days to maintain its delightful texture and flavor.
Fridge: If you prefer to extend the shelf life, refrigerate the cake in an airtight container for up to 1 week; however, this may slightly change the texture.
Freezer: For longer storage, wrap the Ube Mochi Cake tightly in plastic wrap and aluminum foil or use a freezer-safe container. It can be frozen for up to 3 months.
Reheating: To enjoy the cake after freezing, thaw it in the fridge overnight and then warm it in the microwave for 10-15 seconds before serving, if desired.
Ube Mochi Cake Variations & Substitutions
Customize your Ube Mochi Cake with these delightful twists, adding your personal touch to this treat!
-
Dairy-Free: Substitute unsalted butter with coconut oil for a rich, dairy-free option that complements the coconut milk.
-
Citrus Zest: Add freshly grated lemon or orange zest to the batter for a refreshing citrus twist, elevating the flavor profile beautifully.
-
Nutty Flavor: Incorporate 1/2 cup of finely chopped nuts, like macadamia or almonds, for an added crunch in each indulgent bite. The mixture of chewy and crunchy delights everyone!
-
Ube Halaya Swap: If ube halaya is unavailable, use a combination of more ube extract and an extra 1/4 cup of sugar for sweetness. This keeps that distinct ube essence.
-
Lower Sugar: Reduce granulated sugar by 1/4 cup for a less sweet cake, allowing the natural flavors of ube to shine through without overwhelming your palate.
-
Chocolate Version: Stir in 1/4 cup of cocoa powder for a mochi cake that beautifully marries ube with the rich flavor of chocolate. The combination is surprising yet delightful!
-
Spicy Kick: Add a pinch of cayenne pepper to the dry ingredients to give your cake a subtle, warm heat that contrasts wonderfully with the sweetness of the ube.
-
Tropical Twist: Replace coconut milk with pineapple juice for a fruity flair, inviting a taste of the tropics into your kitchen. Combine this with toasted coconut flakes on top for an even more vibrant experience!
Feel free to experiment with these variations, and let your creativity guide you in making this Ube Mochi Cake truly yours. Speaking of creativity, if you’re ever feeling adventurous, you might enjoy testing out some other unique dessert recipes that showcase various flavors and techniques!
Make Ahead Options
These delightful Ube Mochi Cakes are perfect for busy home cooks looking to save time during the week! You can prepare the batter up to 24 hours in advance; just cover the bowl tightly with plastic wrap and refrigerate to maintain freshness. For added convenience, you can also measure out and combine all your dry ingredients (mochiko flour, baking powder, and salt) a couple of days ahead—this will make mixing the batter a breeze when you’re ready to bake. When it’s time to bake, simply pour the chilled batter into your prepared pan and follow the instructions as usual. Your Ube Mochi Cake will be just as delicious and ready to impress!
What to Serve with Bouncy Chewy Gluten Free Ube Mochi Cake
Savor the delightful flavors of your ube mochi cake while complementing it with these fantastic pairings, perfect for elevating your dessert experience.
-
Coconut Whipped Cream: A light, fluffy topping that enhances the cake’s richness, offering a tropical twist.
-
Fresh Mango Slices: Juicy mango adds a burst of sweetness, perfectly contrasting the chewy texture of the cake.
-
Chocolate Sauce: Drizzle a silky chocolate sauce for a luscious combination that balances the ube flavor with a hint of richness.
-
Matcha Green Tea: This earthy beverage is a wonderful accompaniment, providing a refreshing counterpoint to the cake’s sweetness.
-
Shredded Coconut: Toasted or untoasted, coconut adds a delightful crunch and enhances the cake’s tropical theme.
-
Vanilla Ice Cream: A scoop of vanilla ice cream serves as a creamy complement, making each bite even more indulgent.
-
Passion Fruit Sauce: Its tangy profile brightens the dessert, creating an exciting flavor contrast with ube’s subtle sweetness.
Imagine enjoying your bouncy chewy gluten-free ube mochi cake alongside these delightful pairings. Each one adds a unique layer of flavor that transforms your treat into a vibrant culinary experience!
Bouncy Chewy Gluten Free Ube Mochi Cake Recipe FAQs
How do I select ripe ube for the cake?
Absolutely! When choosing ube, look for firm, unblemished tubers with a vibrant purple color. Avoid pieces with dark spots or shriveled skin, as these indicate ripeness issues. Selecting good quality ube ensures your cake has that rich, authentic flavor it’s known for.
How should I store leftover Ube Mochi Cake?
Very! Store any leftover Ube Mochi Cake in an airtight container at room temperature if you plan to eat it within 3 days. For longer storage, refrigerate it to extend freshness for up to a week. Just remember, refrigeration might slightly alter the cake’s delightful chewy texture.
Can I freeze Ube Mochi Cake?
Absolutely! To freeze, wrap the cooled cake tightly in plastic wrap, then in aluminum foil, or place it in a freezer-safe container. It can be stored for up to 3 months. When you’re ready to enjoy it, simply thaw it in the fridge overnight and warm it gently in the microwave for 10-15 seconds for that fresh-out-of-the-oven experience.
What should I do if my cake is too dense or gummy?
The key to a perfect Ube Mochi Cake is to avoid overmixing the batter. If you find your cake is too dense, it could be due to overmixing which activates the starches in the mochiko flour too much. Instead, combine wet and dry ingredients gently until just mixed. Also, ensure you have the right proportions of wet to dry ingredients, as too much liquid can create a gummy texture.
Is this cake safe for those with food allergies?
When making Ube Mochi Cake, always check individual ingredient labels for potential allergens. The cake is gluten-free, making it friendly for those avoiding gluten. However, if you’re serving someone with egg allergies, consider using flaxseed meal as an egg substitute (1 tablespoon of flaxseed meal mixed with 2.5 tablespoons of water per egg) to maintain structure while being inclusive of dietary needs.
Delightful Ube Mochi Cake: Bouncy, Chewy, Gluten-Free Treat
Ingredients
Equipment
Method
- Preheat your oven to 350°F (175°C) and line an 8-inch square pan with parchment paper.
- Whisk together the mochiko sweet rice flour, baking powder, and kosher salt in a small bowl. Set aside.
- Melt the unsalted butter and let it cool. Whisk in the granulated sugar until well combined, then add eggs one at a time.
- Add the ube halaya jam, ube extract, and purple food coloring (if using) to the mixture. Gradually whisk in the coconut milk.
- Fold in the dry ingredients into the wet mixture until just combined; avoid overmixing.
- Pour the batter into the prepared pan and bake for 48-50 minutes until a skewer comes out with a few crumbs.
- Allow the cake to cool completely on a wire rack before slicing into squares and serving.
Leave a Reply