
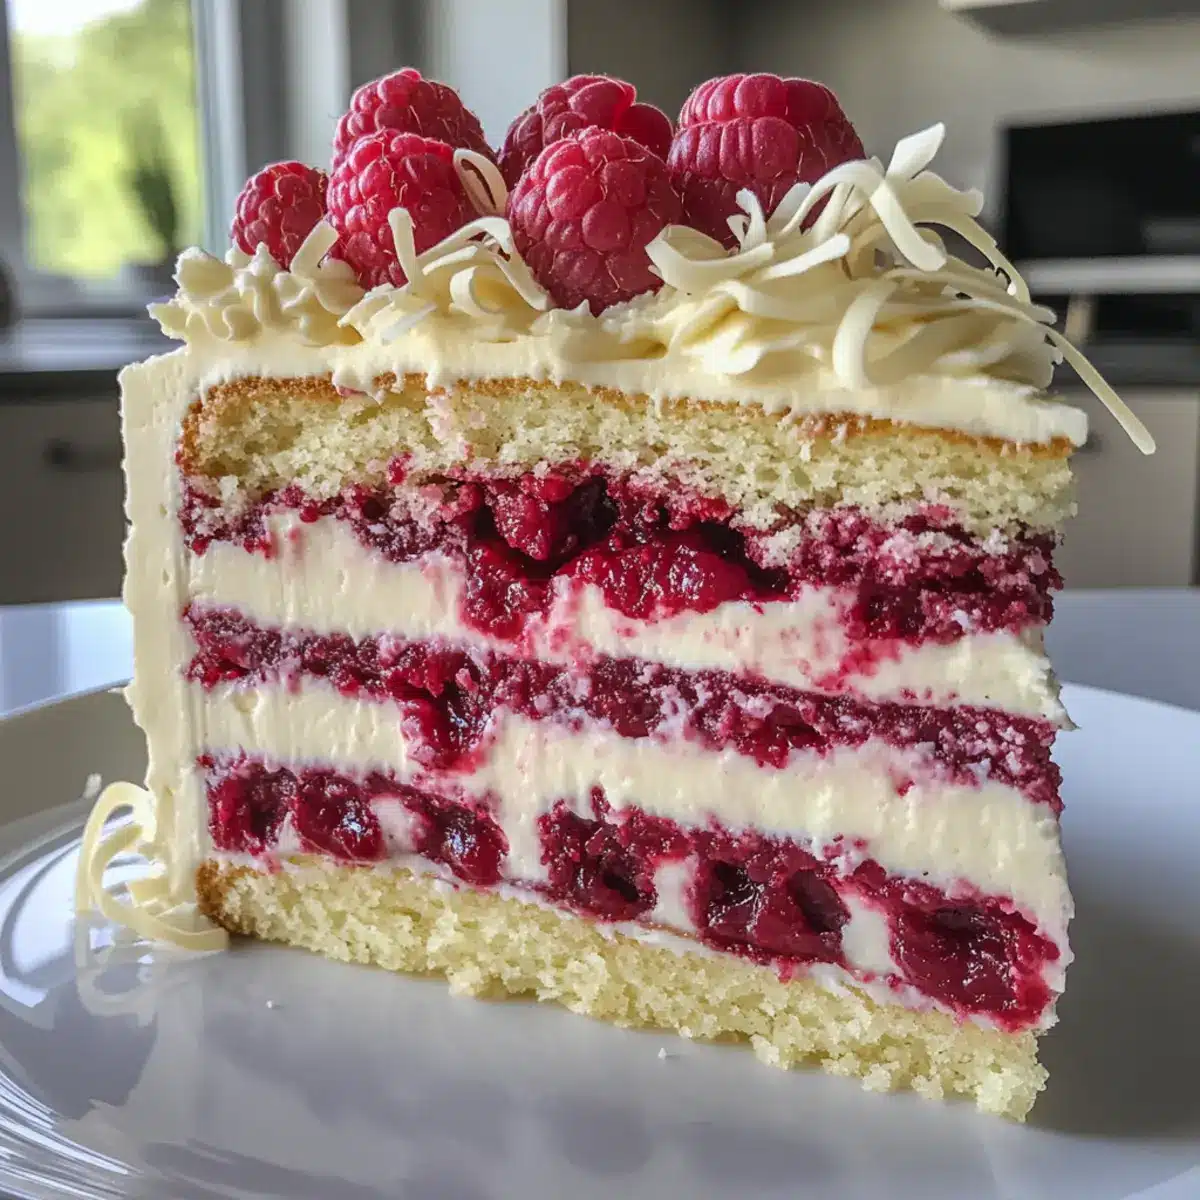
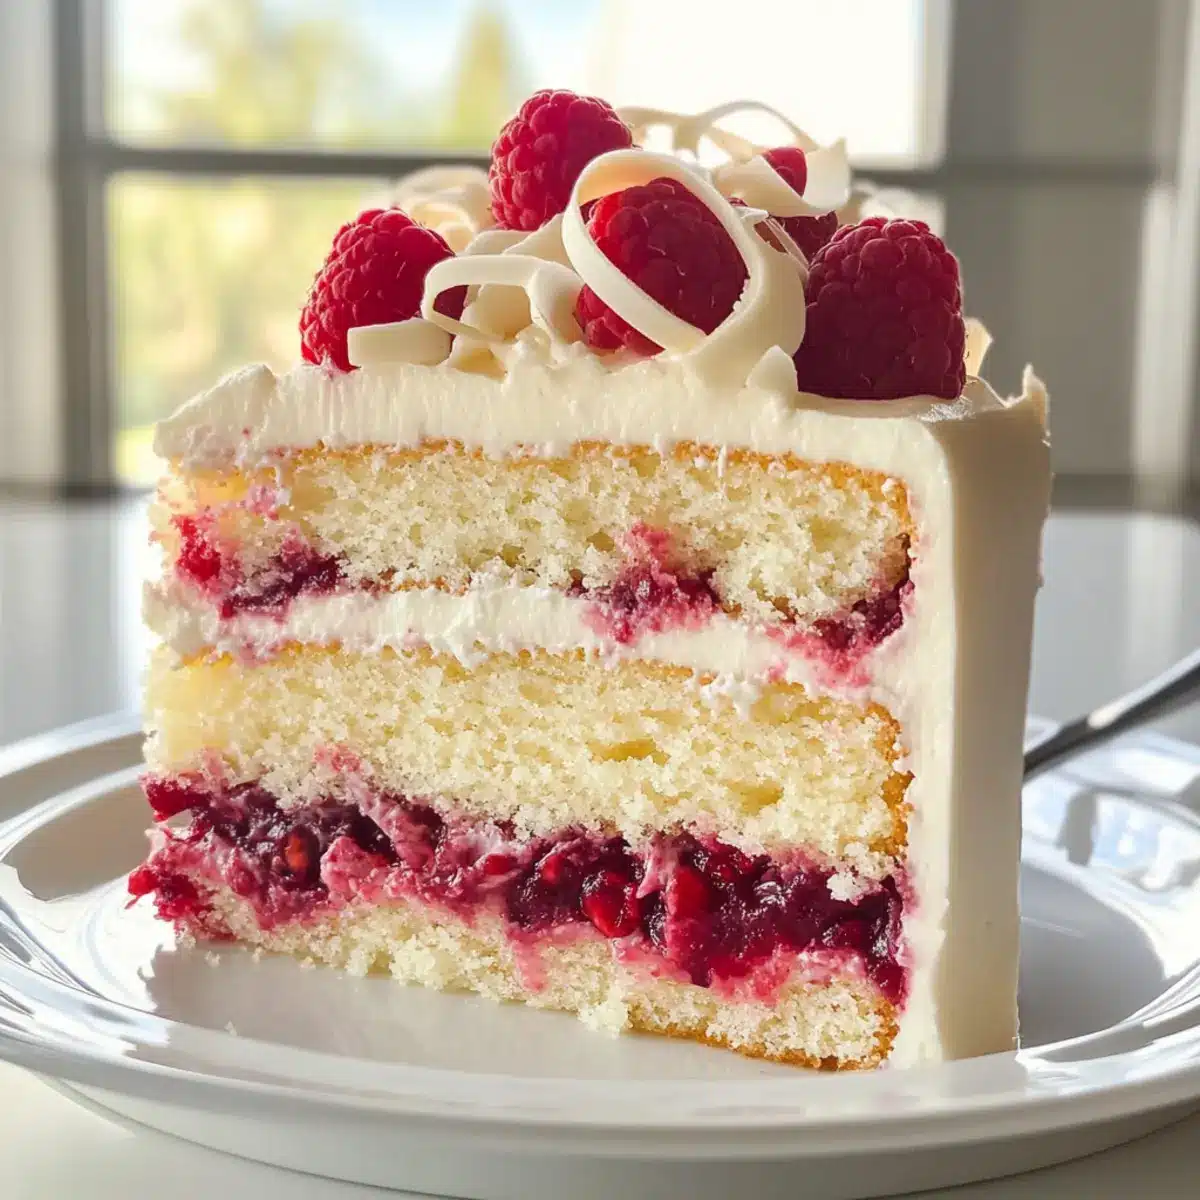
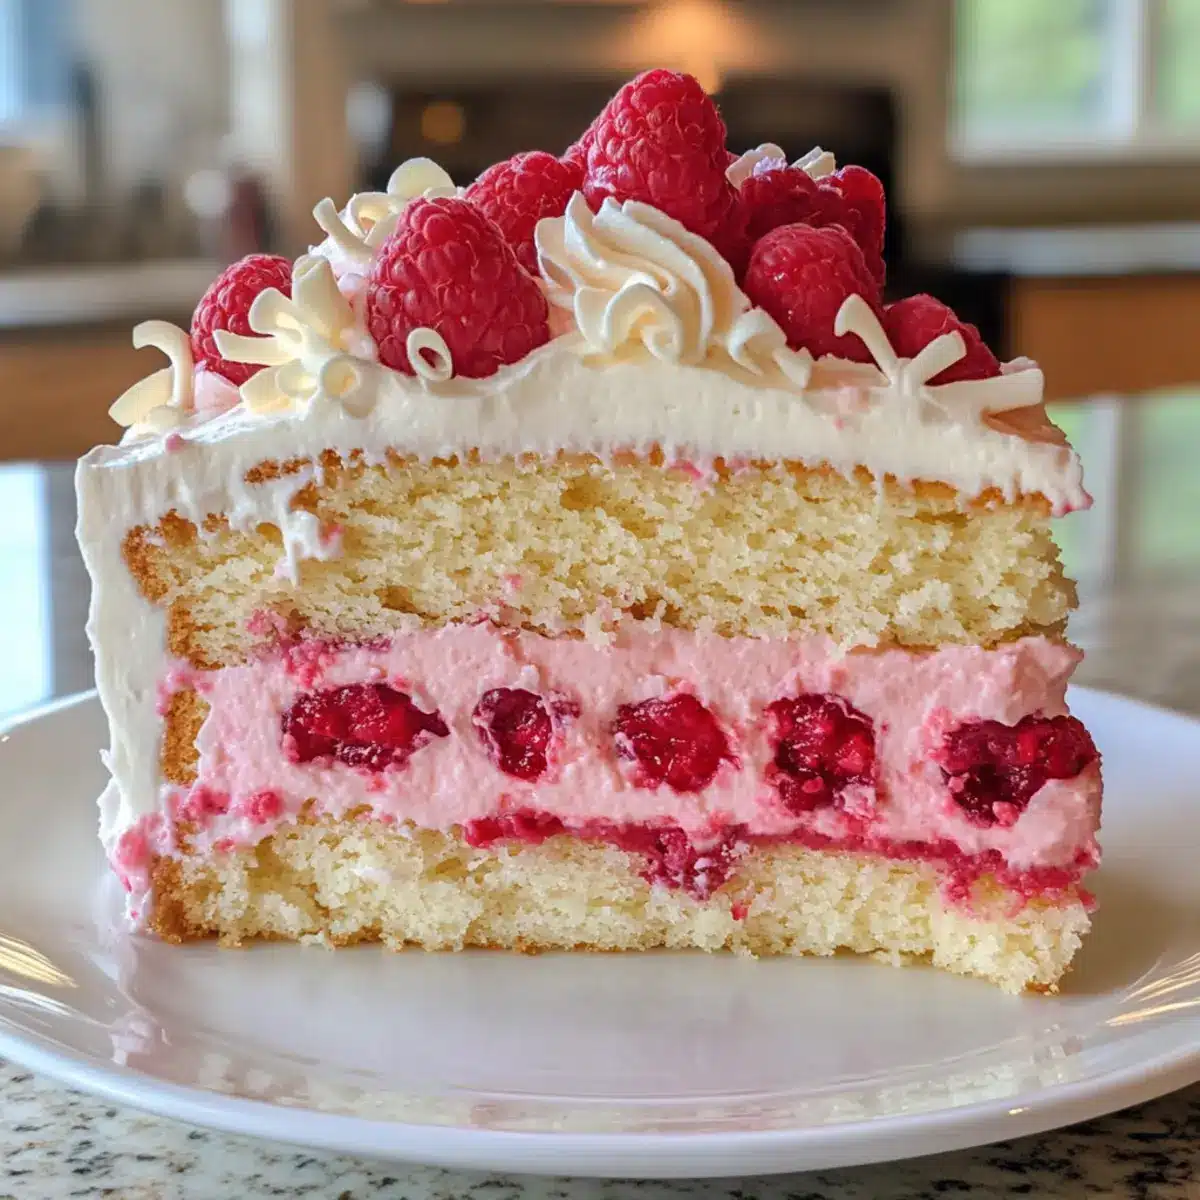
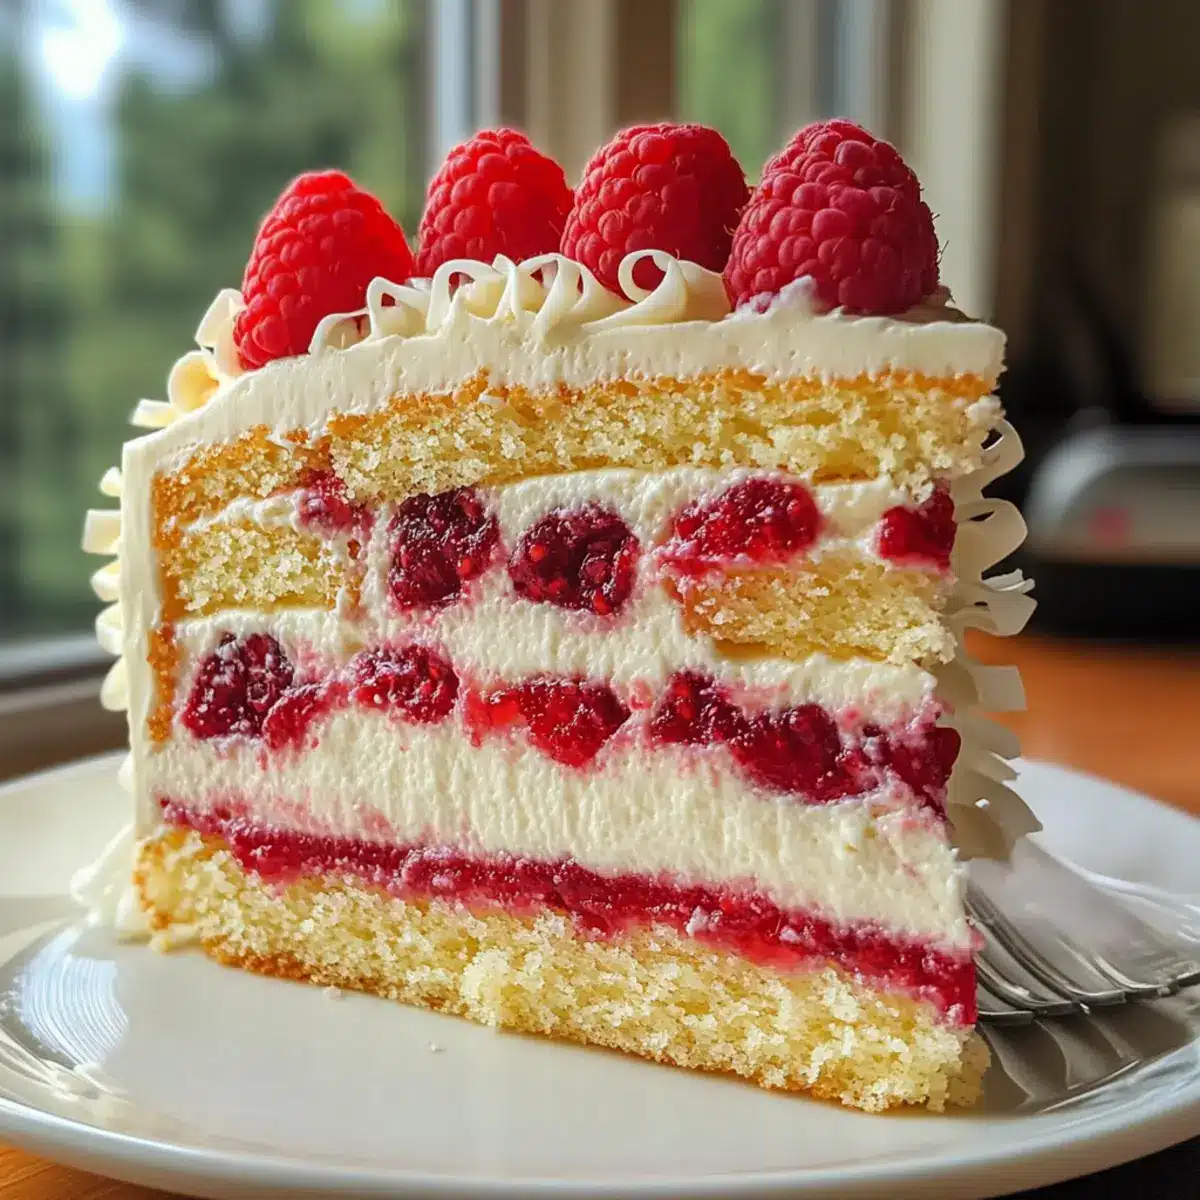
The aroma of freshly baked cake mingles with the tart fragrance of ripe raspberries—a combination that instantly transports me to bright summer afternoons. Today, I’m excited to share my recipe for a stunning White Chocolate Raspberry Dream Cake, an elegant dessert that effortlessly steals the show at any celebration. This delightful creation features layers of moist cake complemented by a luscious raspberry filling, making it a true crowd-pleaser for birthdays, baby showers, or holidays. Plus, it’s surprisingly simple to make, ensuring that even novice bakers can achieve impressive results. With its striking layers and creamy frosting, each slice is a treat that keeps everyone coming back for more. Ready to impress your friends and family? Let’s dive into this deliciously dreamy cake!
Why Is This Cake a Must-Try?
Boldly elegant and visually stunning, the White Chocolate Raspberry Dream Cake is perfect for any gathering, be it a birthday bash or a holiday feast. Rich, luscious flavors combine sweet white chocolate and tangy raspberries, creating a dessert that tantalizes your taste buds. Easy preparation assures that even novice bakers can bring forth a masterpiece, making it an accessible indulgence. Looking for versatility? This recipe can easily be transformed into cupcakes or a festive slab cake! For those who enjoy delightful desserts, this cake will surely become a favorite alongside other tempting treats like High Protein Chocolate or White Cheddar Spinach. Each slice invites celebration, ensuring your friends and family will savor this delightful creation!
White Chocolate Raspberry Dream Cake Ingredients
For the Cake
- All-purpose flour – A sturdy base that provides structure for a delightful cake.
- Baking powder – The key leavening agent to achieve that perfect light texture.
- Salt – Enhances sweetness and balances the overall flavor profile of the cake.
- Unsalted butter – Adds moisture and richness; ensure it’s softened for seamless mixing.
- Granulated sugar – Sweetens the cake; brown sugar can be used for extra richness.
- Eggs – Act as a binding agent; four large eggs ensure a wonderful texture.
- Vanilla extract – Deepens the cake’s flavor; try almond extract for a unique twist.
- White chocolate chips – Adds sweetness and indulgence; opt for high-quality chocolate for the best flavor.
- Whole milk – Ensures a tender crumb; buttermilk can be a delightful substitute here.
For the Raspberry Filling
- Raspberries (fresh or frozen) – The star of the filling, providing vibrant color and tartness.
- Sugar – Adjust based on the raspberries’ tartness for the perfect balance.
- Lemon juice – Brings brightness to the filling; lime juice works as a zesty alternative.
- Cornstarch – Serves as a thickening agent, ensuring the filling holds beautifully.
For the Frosting
- Unsalted butter – Creates a creamy base; shortening can be used for a dairy-free frosting.
- Powdered sugar – Essential for a smooth and sweet texture; feel free to reduce for a less sweet option.
- White chocolate – Infuses rich flavor; melt and cool it before incorporating for the best results.
- Milk – Adjusts the frosting’s consistency to your liking; use gradually as needed.
- Vanilla extract – Enhances the frosting’s aroma and flavor; can skip for a simpler taste.
With these ingredients at your fingertips, you’re well on your way to creating a stunning White Chocolate Raspberry Dream Cake that’s sure to impress!
Step‑by‑Step Instructions for White Chocolate Raspberry Dream Cake
Step 1: Prep the Cake
Preheat your oven to 350°F (175°C) and grease three 8-inch round cake pans with a light dusting of flour. In a mixing bowl, whisk together the all-purpose flour, baking powder, and salt. In your stand mixer, beat the softened unsalted butter and granulated sugar until the mixture is light and fluffy, about 3-5 minutes. Add the eggs one at a time, ensuring each one is well blended before proceeding. Finally, mix in the vanilla extract and melted white chocolate until smooth, then gradually incorporate the flour mixture and milk until just combined; be careful not to overmix.
Step 2: Bake
Divide the prepared batter evenly among the three cake pans, ensuring an even distribution for uniform baking. Place the pans in the preheated oven and bake for approximately 30 minutes. To check for doneness, insert a toothpick into the center of each cake—when it comes out clean, the cakes are ready. Allow them to cool in the pans for 10 minutes before transferring carefully to wire racks to cool completely.
Step 3: Make the Raspberry Filling
While the cakes cool, prepare the raspberry filling. In a medium saucepan, combine fresh or frozen raspberries, sugar, lemon juice, and cornstarch. Cook this mixture over medium heat, stirring gently, until it thickens and becomes bubbly—this should take about 8-10 minutes. Once thickened, remove from heat and let the raspberry filling cool completely to room temperature before using it in the cake assembly.
Step 4: Prepare the Frosting
For the frosting, return to your stand mixer and beat the softened butter until creamy and smooth. Gradually add powdered sugar to the butter, mixing until combined. Then, fold in the melted and cooled white chocolate, followed by just enough milk to achieve a smooth, spreadable consistency. Stir in some vanilla extract for a lovely aroma, ensuring that your frosting is rich and velvety, perfect for decorating your cake.
Step 5: Assemble the Cake
Begin assembly by placing one layer of the cake on your serving plate. Spread a generous layer of the cooled raspberry filling over the top, ensuring it reaches the edges for the best flavor in every bite. Add the second cake layer on top and repeat the process with another layer of raspberry filling. Finish by placing the final cake layer on top, which will serve as the base for your frosting.
Step 6: Frost the Cake
Using your prepared white chocolate frosting, frost the top and sides of the layered cake, creating a smooth and even coat. For a decorative touch, feel free to use a spatula to create swirls or patterns. Once frosted, you may choose to adorn the cake with fresh raspberries, white chocolate curls, and sprigs of mint for an elegant presentation that enhances the overall beauty of your White Chocolate Raspberry Dream Cake.
Step 7: Serve
To achieve clean slices, chill the completed cake in the refrigerator for about 30 minutes. This step allows the frosting to set, making it easier to serve. The cake can be enjoyed chilled or at room temperature, and with its delightful layers of cake, raspberry filling, and rich frosting, it promises to be a memorable dessert for any occasion.
Expert Tips for White Chocolate Raspberry Dream Cake
-
Room Temperature Ingredients: Ensure all your ingredients, especially butter and eggs, are at room temperature. This creates a smoother batter and helps the cake rise beautifully.
-
Don’t Overmix: Once the flour is added, mix just until combined. Overmixing can lead to a dense and tough White Chocolate Raspberry Dream Cake, rather than a light, airy texture.
-
Quality Matters: Use high-quality white chocolate for both the batter and frosting. It significantly enhances the flavor and makes your cake taste truly gourmet.
-
Cool Layers Properly: Allow each cake layer to cool completely before assembly. This prevents the raspberry filling from melting the frosting during assembly.
-
Chill Between Layers: For added stability, chill the assembled cake for 30 minutes before frosting. This helps to maintain perfect layers while serving.
-
Decorative Touches: Consider adding fresh mint leaves or edible flowers for a delightful touch on the final presentation of your White Chocolate Raspberry Dream Cake!
Storage Tips for White Chocolate Raspberry Dream Cake
Fridge: Keep your cake covered in an airtight container to enjoy it for up to 4 days. This will help maintain its moisture and flavor.
Freezer: If you want to savor it longer, wrap individual slices tightly in plastic wrap and store in a freezer-safe container for up to 2 months.
Reheating: To enjoy leftovers, let frozen slices thaw in the fridge overnight or room temperature for a couple of hours. Serve chilled or allow to warm to room temperature before indulging.
Frosting Maintenance: If you have leftover frosting, store it in an airtight container in the fridge for up to a week. Rewhip before using to regain its smooth texture.
Make Ahead Options
These White Chocolate Raspberry Dream Cake layers are perfect for meal prep! You can bake the cake layers up to 24 hours in advance; simply cool them completely, then wrap each layer tightly in plastic wrap and refrigerate to keep them moist. The raspberry filling can also be prepared up to 3 days ahead; store it in an airtight container in the fridge. When you’re ready to assemble, whip up the frosting and layer it with the raspberry filling between the cake layers. This way, everyone will enjoy your cake just as delicious as if made fresh, and you’ll save valuable time for enjoying special moments with loved ones!
What to Serve with White Chocolate Raspberry Dream Cake
Imagine a table adorned with delectable delights, where every bite complements the elegance of your dreamy dessert creation.
-
Whipped Cream: A dollop of lightly sweetened whipped cream enhances the cake’s rich flavors, adding an airy texture that balances the dense cake layers.
-
Fresh Berries: A medley of vibrant strawberries, blueberries, and raspberries creates a refreshing contrast, elevating the dish with bright colors and natural sweetness.
-
Vanilla Ice Cream: Creamy vanilla ice cream melts over the warm cake, providing a delightful temperature contrast and intensifying the white chocolate experience.
-
Chocolate Ganache: Drizzling silky chocolate ganache adds an extra layer of decadence and richness, truly satisfying any chocolate lover’s cravings.
-
Mint Sprigs: Fresh mint leaves not only enhance the visual appeal but lend a hint of freshness that cuts through the cake’s sweetness, revitalizing the palate.
-
Sparkling Wine: A bubbly glass of sparkling wine or prosecco offers a celebratory touch, balancing the cake’s richness while elevating any special occasion.
-
Coffee or Espresso: Serving with a warm cup of coffee or espresso deepens the flavors, providing a lovely counterbalance to the dessert’s sweetness.
-
Chocolate-Covered Strawberries: For those seeking an extra treat, chocolate-covered strawberries serve as a delightful side that pairs beautifully with both white chocolate and raspberry flavors.
White Chocolate Raspberry Dream Cake Variations
Feel empowered to customize your White Chocolate Raspberry Dream Cake with these delightful twists that will tantalize your taste buds and suit your preferences.
-
Gluten-Free: Substitute all-purpose flour with a 1:1 gluten-free flour blend for a gluten-free version that doesn’t sacrifice taste.
-
Vegan Delight: Replace eggs with flax eggs and use coconut milk in place of whole milk for a creamy, plant-based treat.
-
Berry Blend: Mix in blueberries or strawberries with the raspberries for a delightful berry medley that adds vibrant colors and flavors.
-
Extra Chocolate: Incorporate chocolate ganache between the layers for a rich, extra layer of indulgence that chocolate lovers will adore.
-
Lemon Zing: Replace some of the raspberry filling with lemon curd for a bright, citrusy kick that beautifully balances the sweetness.
-
Nutty Crunch: Add toasted almond or hazelnut pieces to the frosting to introduce a delightful crunch that complements the cake’s velvety layers.
-
Spice It Up: Mix in a dash of cinnamon or cardamom to the cake batter for a warm, aromatic flavor twist that elevates the entire dessert.
-
Raspberry Sauce Drizzle: Enhance the visual appeal by drizzling homemade raspberry sauce over the frosting for a stunning finish that adds flavor and presentation.
Ready to take your cake to the next level? Whether you want a gluten-free, vegan treat, or a boost in flavor, these variations will make this beautiful dessert uniquely yours! And while you’re at it, don’t forget to explore other scrumptious recipes like the High Protein Chocolate cake or the elegant White Chocolate Raspberry. Enjoy your baking adventure!
White Chocolate Raspberry Dream Cake Recipe FAQs
How do I select the best raspberries for my cake?
Absolutely! When choosing raspberries, look for plump and vibrant berries that have a deep red hue. Avoid any with dark spots or mold, as these can indicate overripeness. If buying frozen, select those that are flash-frozen and free from ice crystals. Fresh raspberries should be used within 1-2 days for optimal flavor, but frozen can last up to 12 months!
What’s the best way to store leftover White Chocolate Raspberry Dream Cake?
Very! For maximum freshness, store your cake covered in an airtight container in the refrigerator for up to 4 days. If you’d like to keep it longer, you can freeze individual slices. Just wrap each slice tightly in plastic wrap and then place them in a freezer-safe container; they’ll stay good for up to 2 months!
Can I freeze the raspberry filling or frosting?
Absolutely! You can freeze the raspberry filling and white chocolate frosting separately. For the filling, ensure it’s fully cooled, then transfer it to a freezer-safe container. It can last for up to 3 months. Just thaw it in the fridge overnight before using. For the frosting, it’s best to store it in an airtight container; it will maintain quality for up to a week, but can be frozen for about 2 months as well. Be sure to rewhip it to restore its luscious texture!
What should I do if my cake layers dome while baking?
No worries! If your cake layers dome up, you can simply level them off with a sharp serrated knife once they’ve cooled completely. To avoid doming in the future, ensure your oven temperature is accurate using an oven thermometer. Additionally, you can gently tap the pans on the counter before baking to release any air bubbles, resulting in flatter layers.
Are there any dietary considerations I should be aware of with this recipe?
Very! Since this recipe includes eggs and dairy, it’s not suitable for those with milk allergies or vegans. However, you can substitute flax eggs for eggs (1 tablespoon ground flaxseed mixed with 2.5 tablespoons water equals one egg), and use coconut or almond milk instead of dairy milk. Always check for hidden allergens in ingredients like chocolate or pre-made products.
What do I do if my frosting is too thick?
If your frosting turns out too thick, don’t worry, there’s an easy fix! Gradually add milk, one teaspoon at a time, until you reach your desired consistency. Mix until smooth after each addition. Be patient and go slowly, as it’s easier to thin it down than to fix runny frosting.
Indulge in the Dreamy White Chocolate Raspberry Dream Cake
Ingredients
Equipment
Method
- Preheat your oven to 350°F (175°C) and grease three 8-inch round cake pans.
- In a mixing bowl, whisk together the all-purpose flour, baking powder, and salt.
- In your stand mixer, beat the softened unsalted butter and granulated sugar until light and fluffy.
- Add the eggs one at a time, mixing well before adding the next.
- Mix in the vanilla extract and melted white chocolate until smooth.
- Gradually incorporate the flour mixture and milk until just combined.
- Divide the prepared batter evenly among the three cake pans.
- Bake for approximately 30 minutes. Check for doneness with a toothpick.
- Allow to cool in the pans for 10 minutes before transferring to wire racks.
- In a medium saucepan, combine raspberries, sugar, lemon juice, and cornstarch.
- Cook over medium heat, stirring gently until it thickens and becomes bubbly, about 8-10 minutes.
- Remove from heat and allow to cool completely to room temperature.
- Return to your stand mixer and beat the softened butter until smooth.
- Gradually add powdered sugar, mixing until combined.
- Fold in melted and cooled white chocolate, adjusting consistency with milk as needed.
- Stir in vanilla extract.
- Place one layer of cake on a serving plate and spread with raspberry filling.
- Add the second cake layer and repeat with raspberry filling.
- Top with the final cake layer and frost the cake with the white chocolate frosting.
- Chill the completed cake in the refrigerator for about 30 minutes to set the frosting.
- Serve chilled or at room temperature.
Leave a Reply