
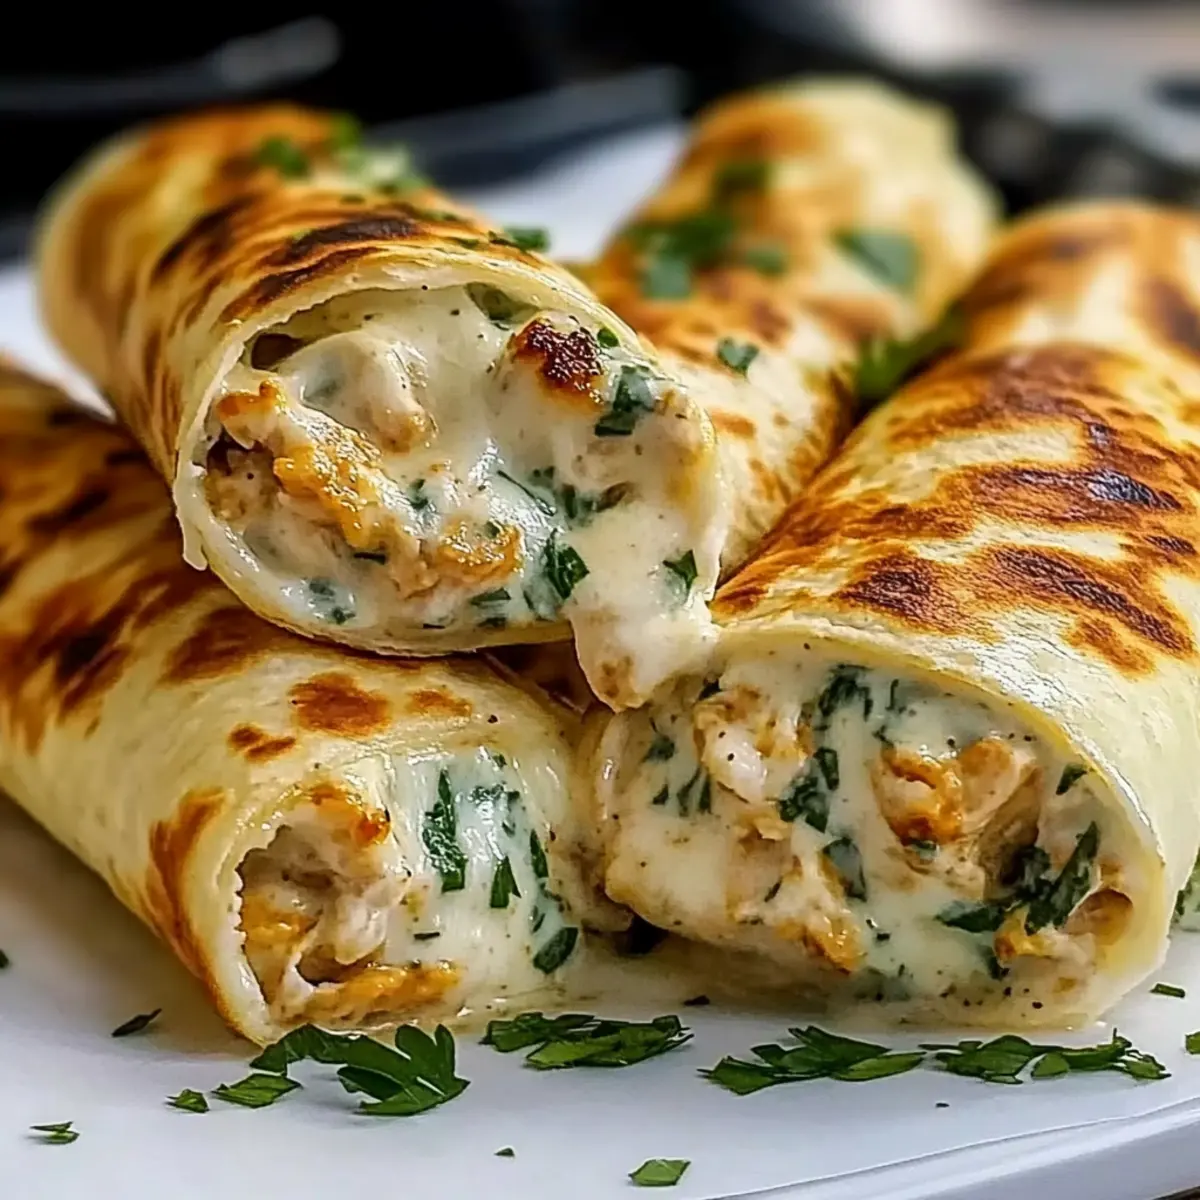
As I stood in my kitchen one bustling evening, with the clock ticking ever closer to dinner time, a lightbulb moment struck: why not whip up some Low Carb Cheesy Garlic Chicken Wraps? Within just 20 minutes, I could create a satisfying meal that’s just as indulgent as those takeout options, but without the carb overload. These wraps are not only quick and easy to prepare, but they also deliver a protein-packed punch that even the pickiest eaters will love. Imagine creamy cheese mingling with garlicky goodness, all wrapped in a crispy tortilla—pure comfort in every bite! Are you ready to turn your kitchen into a cozy haven of deliciousness? Let’s dive into this tasty adventure together!
Why You’ll Crave These Wraps?
Simplicity at its finest: These Cheesy Garlic Chicken Wraps come together in just 20 minutes, making them a perfect choice for busy weeknights.
Irresistible flavor explosion: The combination of creamy cheeses and aromatic garlic creates a delightful taste that will tantalize your taste buds.
Healthy indulgence: With their low-carb, high-protein profile, these wraps let you enjoy a satisfying meal without sacrificing your dietary goals.
Versatile options: Feel free to customize these wraps—try adding crumbled bacon or colorful veggies like bell peppers for an extra twist!
Crowd-pleaser: Even picky eaters won’t be able to resist this comforting dish, making it an ideal option for family dinners or casual gatherings.
Perfectly paired with a refreshing arugula salad or your favorite garlic herb yogurt dip for a deliciously complete meal!
Cheesy Garlic Chicken Wraps Ingredients
For the Filling
• Cooked Chicken Breast (2 cups; shredded) – Provides protein and substance; feel free to substitute it with rotisserie chicken for added flavor.
• Shredded Mozzarella Cheese (1 cup) – Adds that melty consistency; opt for block cheese and shred yourself for improved texture.
• Shredded Cheddar Cheese (1/2 cup) – Contributes sharpness and depth of flavor; perfect for achieving a cheesy richness.
• Minced Garlic (2 cloves) – Infuses the filling with a delicious garlicky aroma; fresh is best, but garlic powder can serve in a pinch.
• Softened Cream Cheese (1/4 cup) – Acts as a creamy binder for the filling; ensure it’s softened for easy mixing—Greek yogurt can be a tangy alternative.
• Chopped Fresh Parsley (1 tablespoon) – Adds a fresh flavor; substitute with other herbs like basil or cilantro if desired.
• Salt and Pepper (to taste) – Enhances flavor; adjust according to your preference.
• Baby Spinach (optional) – Packs in extra nutrients and color; swap with other greens like kale for variety.
For the Wraps
• Olive Oil (1 tablespoon) – Essential for cooking the wraps to crispy perfection.
• Low-Carb Tortillas (4 large) – The perfect vessel for your filling; Mission Carb Balance is recommended for the best results.
Step‑by‑Step Instructions for Cheesy Garlic Chicken Wraps
Step 1: Preheat the Skillet
Begin by preheating a skillet or grill pan over medium heat, allowing it to warm up for about 5 minutes. Add 1 tablespoon of olive oil to the pan, swirling it around to coat the surface evenly. This will create a perfect, crispy exterior for your Cheesy Garlic Chicken Wraps.
Step 2: Warm the Tortillas
While the skillet heats, wrap your low-carb tortillas in a damp paper towel and microwave them for 10-15 seconds. This crucial step ensures they stay pliable and won’t crack when you fill and roll them later. Keep them covered until you’re ready to use them, maintaining their warmth.
Step 3: Prepare the Filling
In a large mixing bowl, combine 2 cups of shredded cooked chicken, 1 cup of shredded mozzarella, 1/2 cup of shredded cheddar, 1/4 cup of softened cream cheese, 2 cloves of minced garlic, 1 tablespoon of chopped fresh parsley, and salt and pepper to taste. Mix everything together until fully combined and creamy, creating a luscious filling for your Cheesy Garlic Chicken Wraps.
Step 4: Fill the Tortillas
Divide the cheesy chicken filling evenly among the warm tortillas, using about 1/2 cup per wrap. Carefully roll each tortilla tightly, tucking in the sides as you go to seal in the delicious filling. The warmth of the tortillas will help them hold their shape beautifully without tearing.
Step 5: Cook the Wraps
Place the filled tortillas seam-side down in the preheated skillet. Cook them for about 2-3 minutes on one side until golden brown. Gently flip the wraps over using tongs and cook the other side for another 2-3 minutes until the cheese inside starts to ooze, and the tortillas achieve a delightful crispness.
Step 6: Slice and Serve
Once the Cheesy Garlic Chicken Wraps are golden and crispy, carefully remove them from the skillet. Let them cool for a minute before slicing each wrap diagonally for a stunning presentation. Serve them hot, perhaps paired with a refreshing salad or a tangy dip to complement the hearty flavors within!
What to Serve with Cheesy Garlic Chicken Wraps
A delightful array of sides can elevate your Cheesy Garlic Chicken Wraps into a feast that’s both satisfying and nutritious.
- Crispy Arugula Salad: Fresh arugula adds a peppery crunch that beautifully contrasts the creamy wraps; toss with olive oil and lemon for zest.
- Garlic Herb Yogurt Dip: A tangy, creamy dip enhances the garlicky flavors of the wraps, providing a refreshing coolness in every bite.
- Roasted Vegetables: Seasonal vegetables like zucchini and bell peppers, roasted until tender, make a bright and colorful accompaniment to your meal.
- Zucchini Noodles: Light and low-carb, spiralized zucchini offers a tender, veggie boost, pairing nicely with the richness of the wraps.
- Sautéed Spinach: Lightly sautéed with garlic, spinach complements the wraps with its earthiness, adding a nutritious touch to the table.
- Olive Tapenade: This savory spread, made from olives and capers, introduces a burst of flavor that blends well with the cheesy goodness.
- Chilled Cucumber Salad: Crisp cucumbers and a splash of vinegar create a light, refreshing side that enhances the warm, cheesy wraps.
- Lemon Sparkling Water: A bubbly, citrusy drink brightens everything up, cleansing the palate between bites of the creamy chicken wraps.
- Chocolate Avocado Mousse: For dessert, indulge in this rich, creamy treat; it’s dairy-free and the perfect sweet end to your delicious meal!
Cheesy Garlic Chicken Wraps Variations
Feel free to get creative and customize your Cheesy Garlic Chicken Wraps to suit your taste preferences!
-
Turkey Swap: Substitute cooked chicken with leftover turkey to reduce waste and add a new flavor twist.
-
Bacon Boost: Add crumbled bacon to the filling for a delightful smoky taste that’ll have everyone reaching for seconds. The bacon brings a savory crunch that pairs beautifully with the creamy cheeses.
-
Cheese Medley: Experiment with your favorite cheese combinations, such as pepper jack for a spicy kick or provolone for a smoother melt. Each cheese will bring a unique flavor experience!
-
Veggie Delight: Incorporate diced bell peppers, mushrooms, or zucchini into the filling for an extra serving of nutrients and a pop of color. These veggies not only enhance texture but also elevate the overall freshness of the wraps.
-
Herbal Variations: Try swapping fresh parsley for basil or cilantro to give the wraps a completely different flavor profile. Each herb adds its unique aromatic flair, making the wraps feel like a brand new dish!
-
Spicy Kick: Add a dash of crushed red pepper flakes or diced jalapeños to the filling for a delightful heat that will warm your taste buds. Perfect for those who love a kick in their meals!
-
Creamy Alternatives: Swap out the cream cheese for Greek yogurt or cottage cheese for a lighter version of the filling. This replaces the creaminess while adding a hint of tanginess to the dish.
Consider enjoying your wraps with a side of fresh homemade garlic herb yogurt dip or serve alongside a refreshing arugula salad to create a delightful meal!
Make Ahead Options
These Low Carb Cheesy Garlic Chicken Wraps are perfect for meal prep enthusiasts looking to save time during busy weeknights! You can prepare the filling (chicken, cheeses, garlic, and herbs) up to 24 hours in advance—just refrigerate it in an airtight container to maintain its freshness. Additionally, wrap and store the filled tortillas for up to 3 days, but be careful not to overfill them to prevent splitting. When you’re ready to serve, simply cook the wraps in a skillet for 2-3 minutes on each side until they’re golden brown and the cheese is melty. This way, you can enjoy restaurant-quality results with minimal effort, making dinner a breeze!
Expert Tips for Cheesy Garlic Chicken Wraps
-
Perfect Filling Ratio: Don’t overfill your tortillas; aim for about 1/2 cup per wrap to prevent them from splitting while cooking.
-
Warm Tortillas First: Microwaving the tortillas briefly keeps them pliable, helping you avoid cracking and ensuring easier rolling.
-
Crispy Gold: For that perfect crispy texture, make sure to toast the wraps in a preheated skillet until golden brown on both sides.
-
Cheese Variation: Feel free to experiment with cheese; trying different combinations like provolone or pepper jack can elevate your Cheesy Garlic Chicken Wraps to new flavor heights.
-
Add Veggies: Incorporating chopped bell peppers or spinach not only boosts nutrition but adds a delightful crunch and flavor contrast to the wrap.
-
Storage Tips: Leftovers can be stored in the refrigerator for up to two days; reheat in the oven to maintain crispiness.
How to Store and Freeze Cheesy Garlic Chicken Wraps
Fridge: Store leftover Cheesy Garlic Chicken Wraps in an airtight container for up to 2 days to maintain their freshness.
Freezer: Freeze the wraps individually by wrapping them tightly in plastic wrap, then placing them in a freezer bag for up to 2 months.
Reheating: For best results, reheat frozen wraps in the oven at 350°F for 10-15 minutes until warm and crispy, ensuring that the cheese is melty again.
Thawing: When ready to enjoy, thaw the wraps overnight in the fridge before reheating for easier handling and cooking.
Cheesy Garlic Chicken Wraps Recipe FAQs
What type of chicken should I use for the wraps?
Absolutely! Shredded cooked chicken breast works perfectly for these wraps. You can also use leftover rotisserie chicken for a flavor boost and added convenience.
How should I store leftovers from the cheesy garlic chicken wraps?
Store your leftover wraps in an airtight container in the refrigerator for up to 2 days. This will help them retain their freshness, but be sure to reheat them in the oven for the best texture!
Can I freeze cheesy garlic chicken wraps?
Yes, you can! Wrap each cooled wrap tightly in plastic wrap, then place them in a freezer bag. They can be frozen for up to 2 months. When you’re ready to enjoy, thaw them overnight in the fridge, then reheat in the oven at 350°F for 10-15 minutes until crispy.
What if my wraps are cracking when I roll them?
No worries! If your tortillas crack, they might not be warm enough. Try microwaving them for another 10-15 seconds while wrapped in a damp paper towel to keep them pliable, making it easier to roll without cracking.
Are these wraps suitable for dietary restrictions such as gluten-free or dairy-free?
For a gluten-free option, simply use gluten-free low-carb tortillas. To make it dairy-free, you can substitute both types of cheese with dairy-free alternatives and use vegan cream cheese, ensuring everyone can enjoy this tasty dish!
How can I add more vegetables to my cheesy garlic chicken wraps?
Feel free to include chopped bell peppers, spinach, or even mushrooms in your filling. Just sauté them lightly before mixing with the chicken and cheese to add a nutritious crunch while enhancing the flavor!
Cheesy Garlic Chicken Wraps: Quick, Low Carb Delight
Ingredients
Equipment
Method
- Preheat a skillet or grill pan over medium heat for about 5 minutes and add olive oil to coat the surface evenly.
- Wrap the low-carb tortillas in a damp paper towel and microwave for 10-15 seconds to keep them pliable.
- In a large mixing bowl, combine chicken, mozzarella, cheddar, cream cheese, garlic, parsley, salt, and pepper, mixing until creamy.
- Divide the filling among the warm tortillas, using about 1/2 cup per wrap, and roll tightly.
- Cook filled tortillas seam-side down in the skillet for 2-3 minutes on each side until golden brown and crispy.
- Remove the wraps from the skillet, let them cool slightly, then slice diagonally and serve hot.
Leave a Reply