
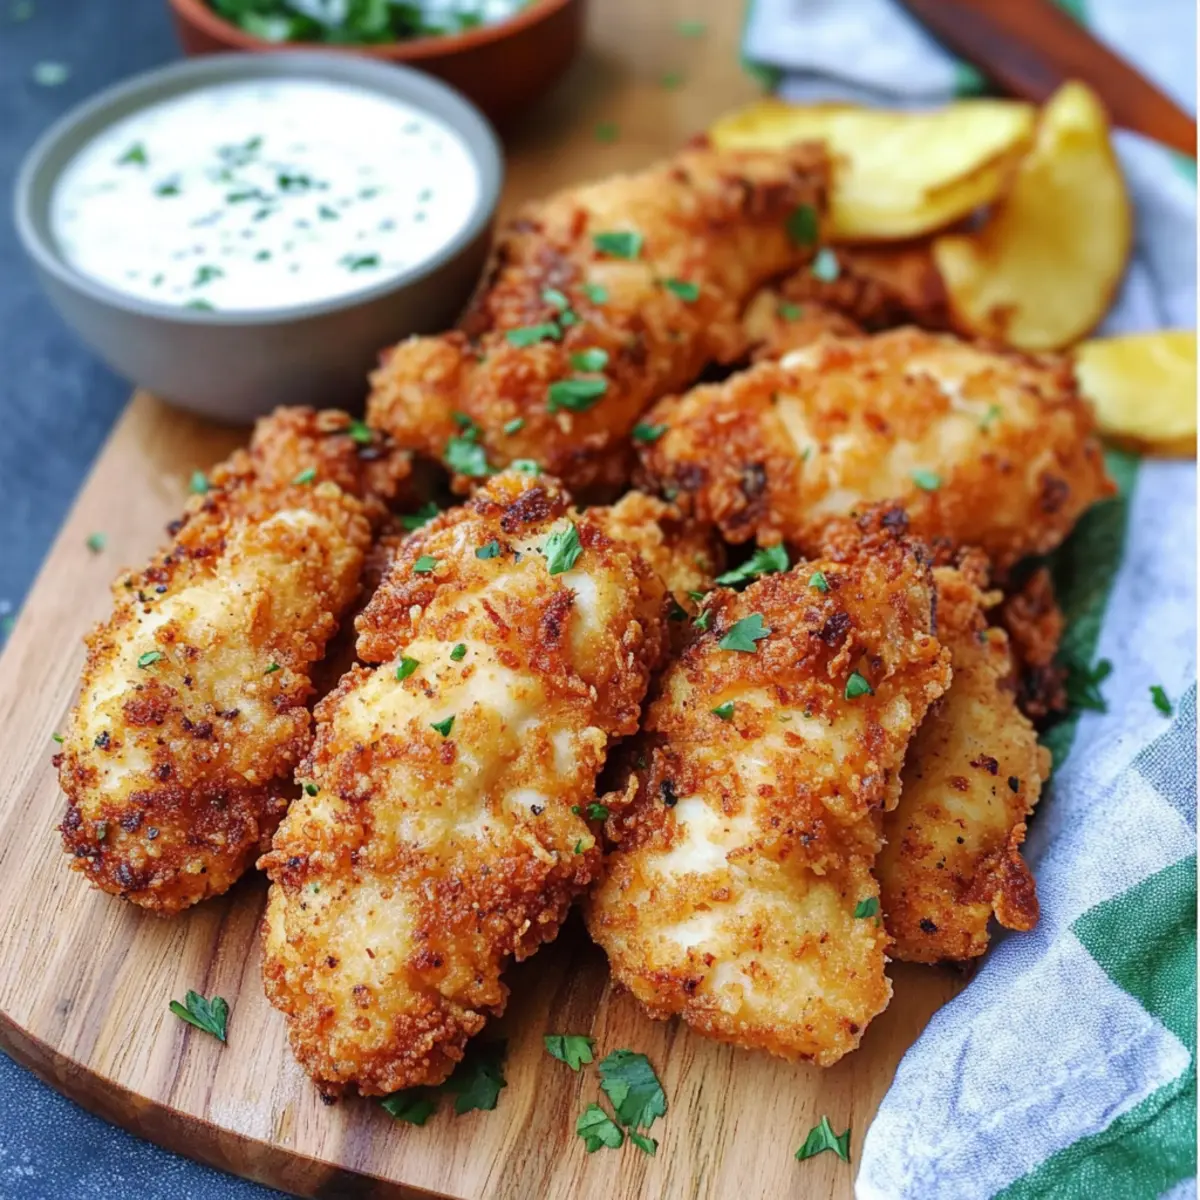
As I flipped through my recipe notebook, a familiar pang of nostalgia washed over me, sparking memories of game nights shared with friends and family. Those evenings were never complete without an irresistible platter of Crispy Ranch Chicken Tenders—my go-to comfort food! This easy fried chicken recipe marries crunchy, golden-brown tenders with the zesty goodness of ranch seasoning, hitting the perfect balance between savory and satisfying. Whether you whip them up for a quick family dinner or the ultimate game day snack, these tenders promise to be a crowd-pleaser. Plus, with options for both traditional frying and air frying, you’ll cater to every craving and preference. Ready to indulge in a flavorful adventure? Let’s dive into making these delightful tenders!
Why Are Crispy Ranch Chicken Tenders Irresistible?
Crispy Crunch: The perfect golden-brown exterior delivers a satisfying bite that keeps you coming back for more.
Savory Satisfaction: Infused with zesty Ranch seasoning, these tenders are a flavor explosion perfect for any occasion.
Quick and Easy: With straightforward steps, you can whip up a batch in no time, making them ideal for busy evenings.
Versatile Options: Whether you prefer traditional frying or a healthier air-fried version, this recipe caters to all tastes.
Crowd-Pleasing Appeal: Serve them as a game day snack, or pair with sides like coleslaw or potato wedges for a complete family meal. They are destined to impress! For another delicious family option, check out Cheesy Chicken Broccoli.
Crispy Ranch Chicken Tenders Ingredients
For the Tenders
• Boneless, Skinless Chicken Tenderloins – The primary protein of the dish, offering a tender and juicy texture. Note: Can be substituted with chicken breasts cut into strips.
• Buttermilk – Provides moisture and tanginess, crucial for marinating and ensuring the coating adheres well. Substitute: Milk with a splash of vinegar or lemon juice.
For the Dredging Mixture
• All-Purpose Flour – Forms the base for the dredging mixture, contributing to the crispy outer layer when fried. Note: For gluten-free, use a gluten-free flour blend.
• Buttermilk Ranch Dressing Seasoning Mix – Enhances flavor with a blend of herbs and spices. Substitution: Create a homemade mix with dried herbs such as dill, parsley, and garlic powder.
• Coarse Ground Black Pepper – Adds a hint of heat and enhances overall flavor profile. Note: Use freshly ground for best results.
• Dried Parsley – Provides freshness and mild herbal flavor. Substitution: Fresh parsley can be used for enhanced flavor and color.
For Frying
• Canola or Peanut Oil – Used for frying, giving the chicken its crispy texture. Note: Peanut oil has a higher smoke point, while canola is more neutral in flavor.
Indulge in these Crispy Ranch Chicken Tenders and experience comfort food like never before!
Step‑by‑Step Instructions for Crispy Ranch Chicken Tenders
Step 1: Heat Oil
In a Dutch oven, cast iron skillet, or deep fryer, heat about 2 inches of canola or peanut oil to 375°F. Use a candy thermometer to ensure accuracy, or drop a pinch of the flour mixture into the oil; it should sizzle immediately when ready. This high temperature is crucial for achieving that perfect crispy exterior for your Crispy Ranch Chicken Tenders.
Step 2: Marinate Chicken
While the oil heats, soak your boneless, skinless chicken tenderloins in buttermilk, making sure each piece is well-coated. Let them marinate for at least 30 minutes to infuse moisture and flavor, while also ensuring the coating adheres nicely. This step is key to creating juicy, flavorful tenders that will impress your family at any dinner table.
Step 3: Prepare Dredging Mixture
In a shallow bowl, combine all-purpose flour, the buttermilk Ranch dressing seasoning mix, coarse ground black pepper, and dried parsley. Mix thoroughly to ensure an even distribution of flavors. This flavorful dredging mixture will form the golden crust on your Crispy Ranch Chicken Tenders, giving them their irresistible crunch.
Step 4: Dredge Chicken
After marinating, take each tenderloin from the buttermilk, letting excess drip off, and dredge it in the flour mixture. Press the flour mixture onto the chicken to create an even coating, then rest each coated tender on a wire rack. This resting step helps the coating adhere and prepares the tenders for frying, ensuring that they turn out beautifully crispy.
Step 5: Fry Chicken
Once fully coated, carefully place the chicken tenders into the hot oil, frying them in batches to avoid overcrowding. Cook each batch for 5 to 8 minutes, flipping halfway through, until the tenders are golden brown and crispy. Keep an eye on the color for that beautiful crunch, and adjust the heat as necessary to maintain that high frying temperature.
Step 6: Drain & Season
After frying, carefully remove the tenders from the oil and place them on a wire rack or a paper towel-lined baking sheet to drain excess oil. While they are still hot, sprinkle with salt and additional dried parsley if desired. This finishing touch enhances flavor and provides a fresh look, inviting your family to dig into those delightful Crispy Ranch Chicken Tenders.
Step 7: Serve
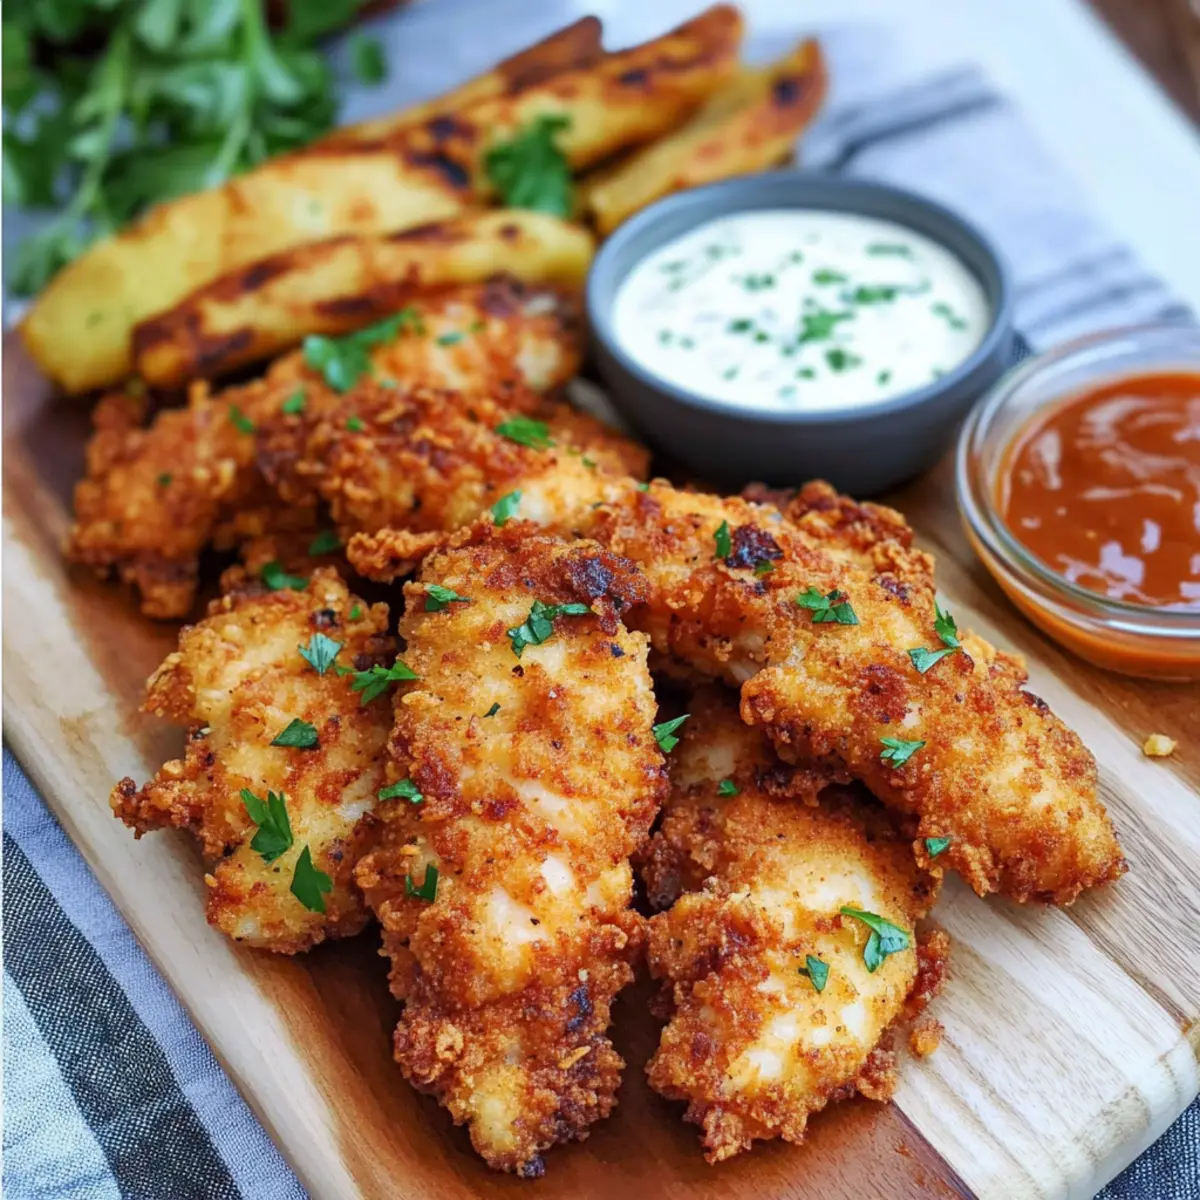
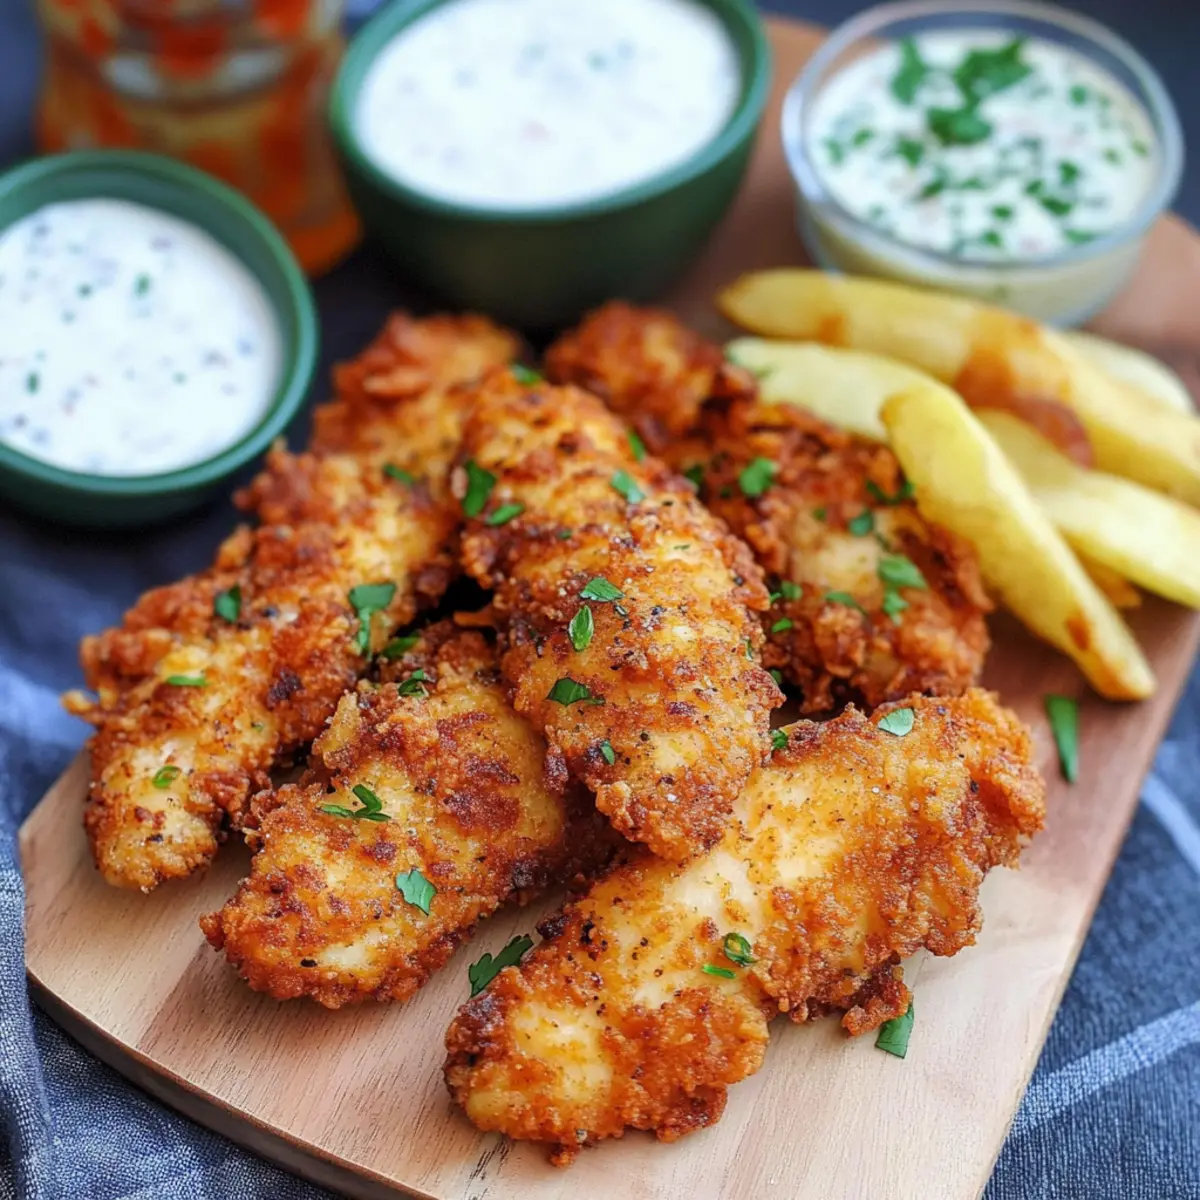
Once the tenders are cool enough to handle, serve them warm alongside a selection of dipping sauces like ranch or honey mustard. Pair these crispy delights with potato wedges, a fresh salad, or coleslaw for a complete meal. The combination of flavors and textures makes these Crispy Ranch Chicken Tenders a winning choice for any occasion!
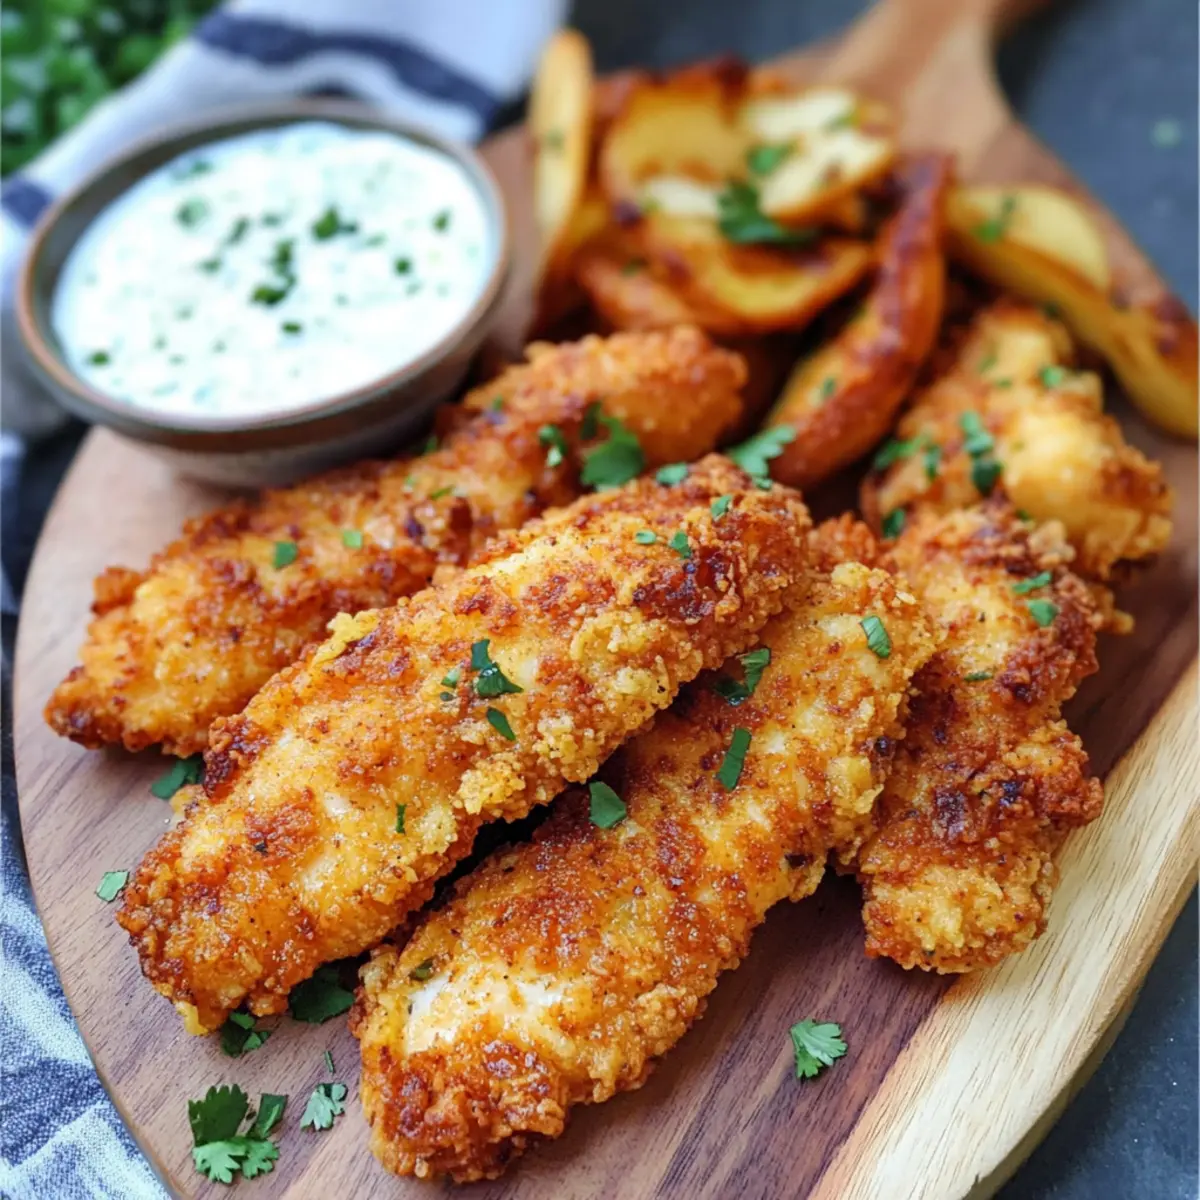
What to Serve with Crispy Ranch Chicken Tenders
Elevate your dining experience by complementing these crunchy and flavorful tenders with vibrant sides and sauces that tantalize your taste buds.
-
Creamy Coleslaw: This refreshing slaw adds a crisp contrast, balancing the warmth of the tenders with its coolness and crunch.
-
Garlic Parmesan Fries: Crispy on the outside and fluffy on the inside, these fries infused with garlic and parmesan create a perfect flavor pairing.
-
Fresh Garden Salad: A light and zesty salad loaded with seasonal veggies offers a refreshing bite that lifts the hearty tenders with its vibrant flavors. Each forkful provides a delightful balance.
-
Honey Mustard Dipping Sauce: Sweet and tangy, this sauce perfectly complements the savory flavors of the chicken tenders, providing a taste that grips the senses.
-
Baked Mac and Cheese: The creamy, cheesy goodness of mac and cheese creates a comforting accompaniment, making for a warm hug on the plate, ideal for family meals.
-
Sweet Potato Wedges: With their natural sweetness and crisp texture, sweet potato wedges add a unique flavor profile that pairs beautifully with the crispy tenders, enhancing any meal.
-
Lemonade or Iced Tea: Beat the heat with a refreshing glass of homemade lemonade or iced tea, their refreshing zest uplifting the dish’s savory elements.
Expert Tips for Crispy Ranch Chicken Tenders
-
Correct Oil Temperature: Ensure the oil is at 375°F before frying. Dropping a bit of flour in should create a sizzle for perfectly crispy tenders.
-
Don’t Overcrowd the Pan: Fry in batches to avoid steaming. Overcrowding lowers the oil temperature and results in soggy Crispy Ranch Chicken Tenders.
-
Adjusting for Air Frying: For air-fried tenders, substitute one cup of flour with panko breadcrumbs to boost crunch. Cook at 400°F for 10 minutes, flipping halfway.
-
Resting Period: Allow the coated chicken to rest on a wire rack before frying. This step helps the coating adhere better and ensures a delicious crunch.
-
Seasoning Choices: Feel free to customize by adding cayenne pepper or substituting with BBQ seasoning for a unique flavor twist. Adjust to your taste!
How to Store and Freeze Crispy Ranch Chicken Tenders
Fridge: Keep leftover Crispy Ranch Chicken Tenders in an airtight container in the refrigerator for up to 3 days. This helps maintain flavor and moisture.
Freezer: For longer storage, freeze the cooled chicken tenders in a single layer on a baking sheet. Once frozen, transfer them to a freezer-safe bag or container for up to 3 months.
Reheating: To restore their crispy texture, reheat the tenders in the oven at 350°F for 10-15 minutes. Avoid the microwave, as it may result in sogginess.
Make-Ahead Tip: You can also prep and freeze the dredged raw chicken tenders, allowing for quick frying any day you crave a delicious meal!
Crispy Ranch Chicken Tenders Variations
Feel free to personalize these crispy tenders to match your taste and dietary needs!
-
Spicy Kick: Add cayenne pepper to the flour mixture for a fiery twist that elevates the flavor profile. It’s an adventurous spin that makes every bite an exciting experience!
-
BBQ Flavor: Swap out Ranch seasoning for BBQ seasoning to create a smoky flavor that pairs perfectly with your favorite summer sides. Perfect for those who enjoy a delightful change!
-
Air Fryer Option: Use panko breadcrumbs instead of flour for an air fryer version that boasts an even crispier texture. Cook at 400°F for about 10 minutes, flipping halfway for best results. You’ll savor the same crunch with fewer calories!
-
Herb & Garlic Boost: Mix in dried garlic powder and extra parsley into the dredging mixture for a fresh herbaceous flavor. It adds a beautiful aroma that lingers in the air!
-
Gluten-Free Delight: Substitute all-purpose flour with a gluten-free flour blend for a delicious gluten-free version that everyone can enjoy without sacrificing flavor! You’ll love how everyone can dig in worry-free.
-
Protein Swap: Try using chicken breasts cut into strips instead of tenderloins for a leaner option. They will still turn out juicy and flavorful, perfect for epic family meals!
-
Cheesy Coating: For a fun twist, mix grated Parmesan cheese into your flour mixture. This rich addition will add an incredible cheesy crust that will make your taste buds dance with joy!
-
Baked Alternative: If you’re looking to skip the frying altogether, coat the tenders and bake them at 425°F for about 20-25 minutes. This way, you’ll enjoy a healthier version while still satisfying your cravings!
These variations promise to keep your cooking fresh and fun! For additional comforting recipes, don’t miss out on the delightful experience of Butter Chicken Cozy.
Make Ahead Options
Crispy Ranch Chicken Tenders are perfect for meal prep enthusiasts looking to save time during busy weeknights! You can marinate the chicken in buttermilk for up to 24 hours in advance, which enhances both moisture and flavor. Additionally, the dredging mixture can be prepared ahead and stored in an airtight container for up to 3 days. Just remember to keep the coated tenders ready for frying no more than an hour before you plan to serve, as this helps maintain their crispiness. When it’s time to serve, simply fry the chicken as instructed, ensuring those tenders emerge golden-brown and just as delicious as when they were freshly made!
Crispy Ranch Chicken Tenders Recipe FAQs
What type of chicken is best for Crispy Ranch Chicken Tenders?
Absolutely! Boneless, skinless chicken tenderloins are ideal for this recipe because they offer a tender, juicy texture that cooks beautifully. If you can’t find tenderloins, you can also use chicken breasts cut into strips for similar results. Just be sure to adjust cooking time if the strips are thicker!
How do I store leftover chicken tenders?
Very! Leftover Crispy Ranch Chicken Tenders can be kept in an airtight container in the refrigerator for up to 3 days. This ensures they retain their flavor and moisture. When reheating, I recommend using the oven at 350°F for about 10-15 minutes to keep them crispy.
Can I freeze Crispy Ranch Chicken Tenders?
Yes, you can! To freeze, allow the cooked chicken tenders to cool completely. Then, place them in a single layer on a baking sheet, freeze until solid, and transfer them to a freezer-safe bag or container. They can be stored for up to 3 months. When you’re ready to enjoy them, reheat in the oven at 350°F for 10-15 minutes for the best texture.
What should I do if my chicken tenders aren’t crispy?
If your tenders aren’t crispy, check a couple of things! First, ensure that the oil is heated to the right temperature of 375°F; if it’s too cool, the tenders will absorb oil instead of frying properly. Additionally, avoid overcrowding the pan, as this can lower the oil temperature and lead to sogginess. For air frying, consider using panko breadcrumbs in place of flour for an extra crunch!
Are there any dietary considerations for this recipe?
Definitely! If you or someone you’re serving has dietary restrictions, there are a few easy adjustments. For gluten-free options, use a gluten-free flour blend. Additionally, if you’re catering to someone with egg allergies, stick with the buttermilk for marinating. Always check your seasoning mixes to ensure they are free from allergens.
Can I prepare the chicken tenders ahead of time?
For sure! You can prep the dredged raw chicken tenders in advance. Simply coat them in the dredging mixture, then store them in the refrigerator for up to a day before frying. This makes it incredibly convenient to whip up a delicious meal with little fuss at dinner time!
Crispy Ranch Chicken Tenders for Game Day Delight
Ingredients
Equipment
Method
- Heat about 2 inches of canola or peanut oil to 375°F in a Dutch oven, cast iron skillet, or deep fryer.
- Soak boneless, skinless chicken tenderloins in buttermilk for at least 30 minutes.
- Combine all-purpose flour, buttermilk Ranch dressing seasoning mix, coarse ground black pepper, and dried parsley in a shallow bowl.
- Dredge chicken tenderloins in the flour mixture, pressing to adhere, and rest on a wire rack.
- Fry chicken tenders in the hot oil for 5 to 8 minutes until golden brown and crispy.
- Remove fried tenders and place on a wire rack or paper towel-lined sheet to drain excess oil; sprinkle with salt and parsley.
- Serve warm with dipping sauces and enjoy!
Leave a Reply