
The first hint of autumn in the air means it’s time to start thinking about Halloween, and what better way to celebrate than with some spooky treats? These Halloween Rice Krispie Treats are not only adorably creepy but also incredibly easy to whip up, making them the perfect addition to your festive gatherings. As a mom who loves to combine creativity with fun cooking experiences, I find these delights a fantastic no-bake option that kids and adults alike will adore. With their gooey texture and endless decorating possibilities, they’re a great way to embrace the spirit of the season! So, are you ready to summon your inner ghoulish chef and create delicious Halloween memories?
Who doesn’t love spooky treats?
Fun, Festive Fun: These Halloween Rice Krispie Treats are a delightful way to celebrate the season with laughter and creativity.
No-Bake Magic: You can whip them up in no time—perfect for busy schedules!
Kid-Friendly: Everyone can join in on the decorating fun, making it an engaging experience for all ages.
Endless Creativity: From ghostly designs to pumpkin shapes, the decorating options are limited only by your imagination.
Perfect for Parties: These treats are sure to be a hit at any Halloween gathering, just like my Taco Rice Bowl or Chicken Broccoli Rice recipes.
Halloween Rice Krispie Treats Ingredients
For the Base
• Rice Krispies – These provide the signature crunch and structure for your treats.
• Marshmallows – Use mini or large; they create the gooey goodness that binds everything together.
• Butter – A dash of richness; make sure to melt it carefully to avoid burning.
For the Decorations
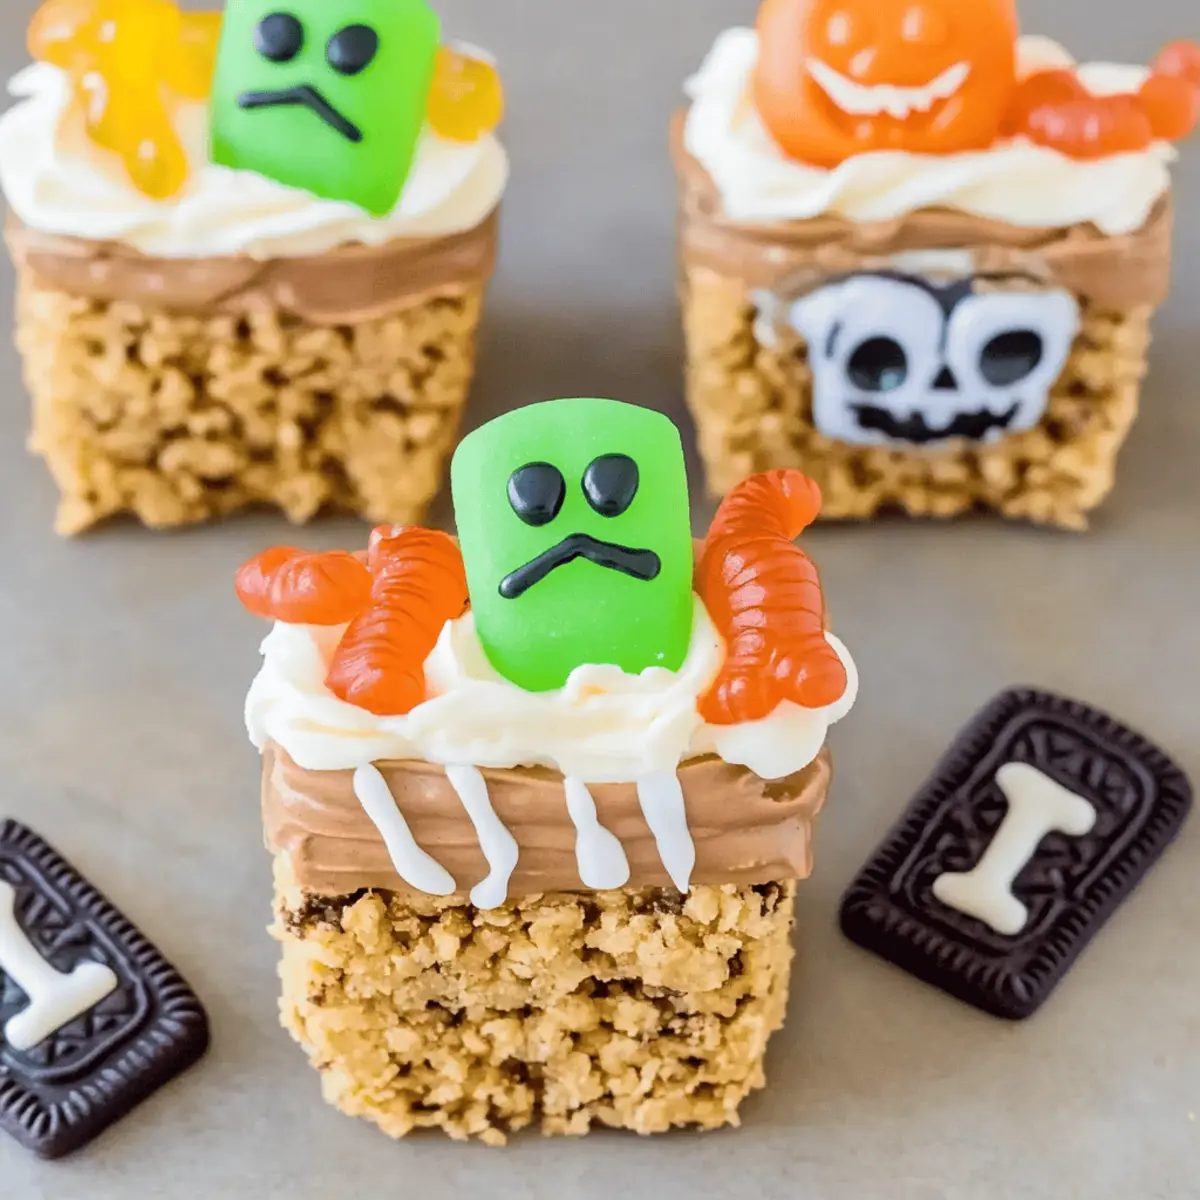
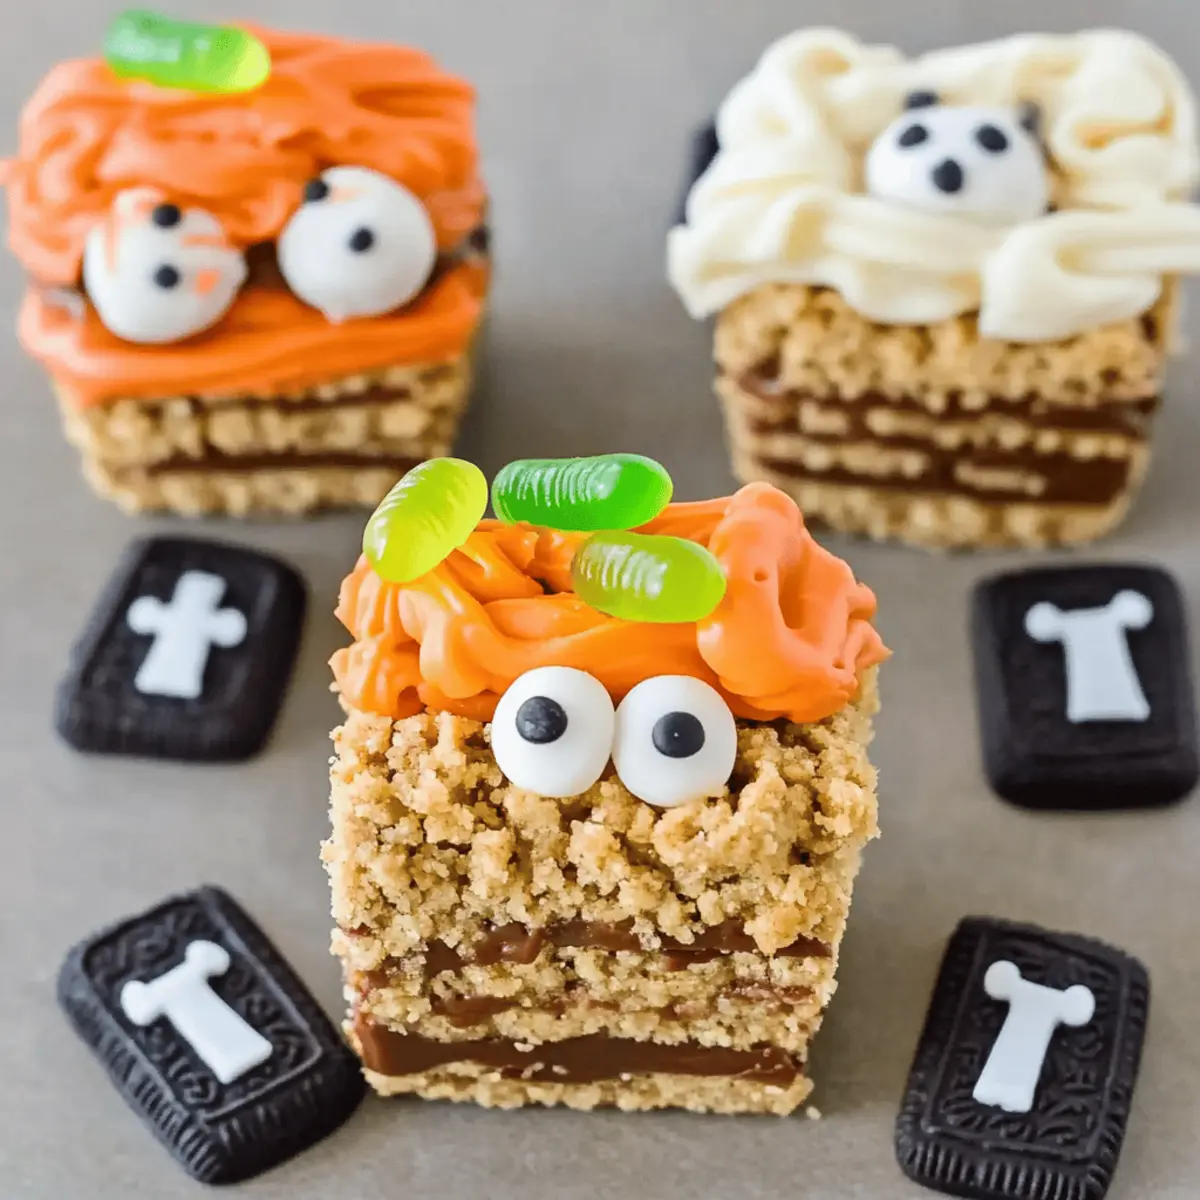
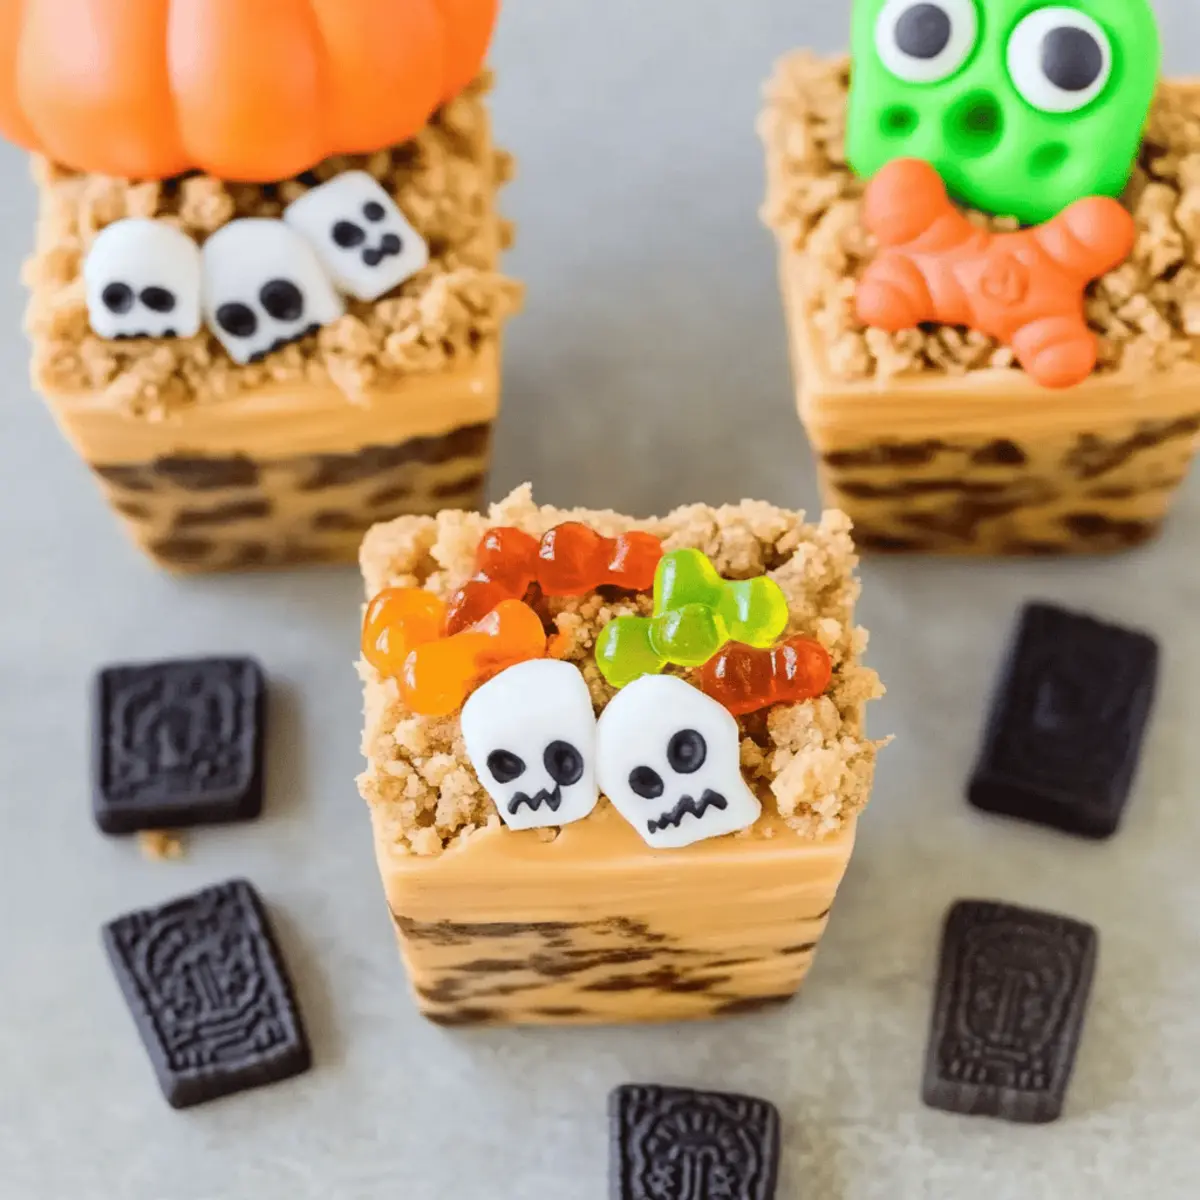
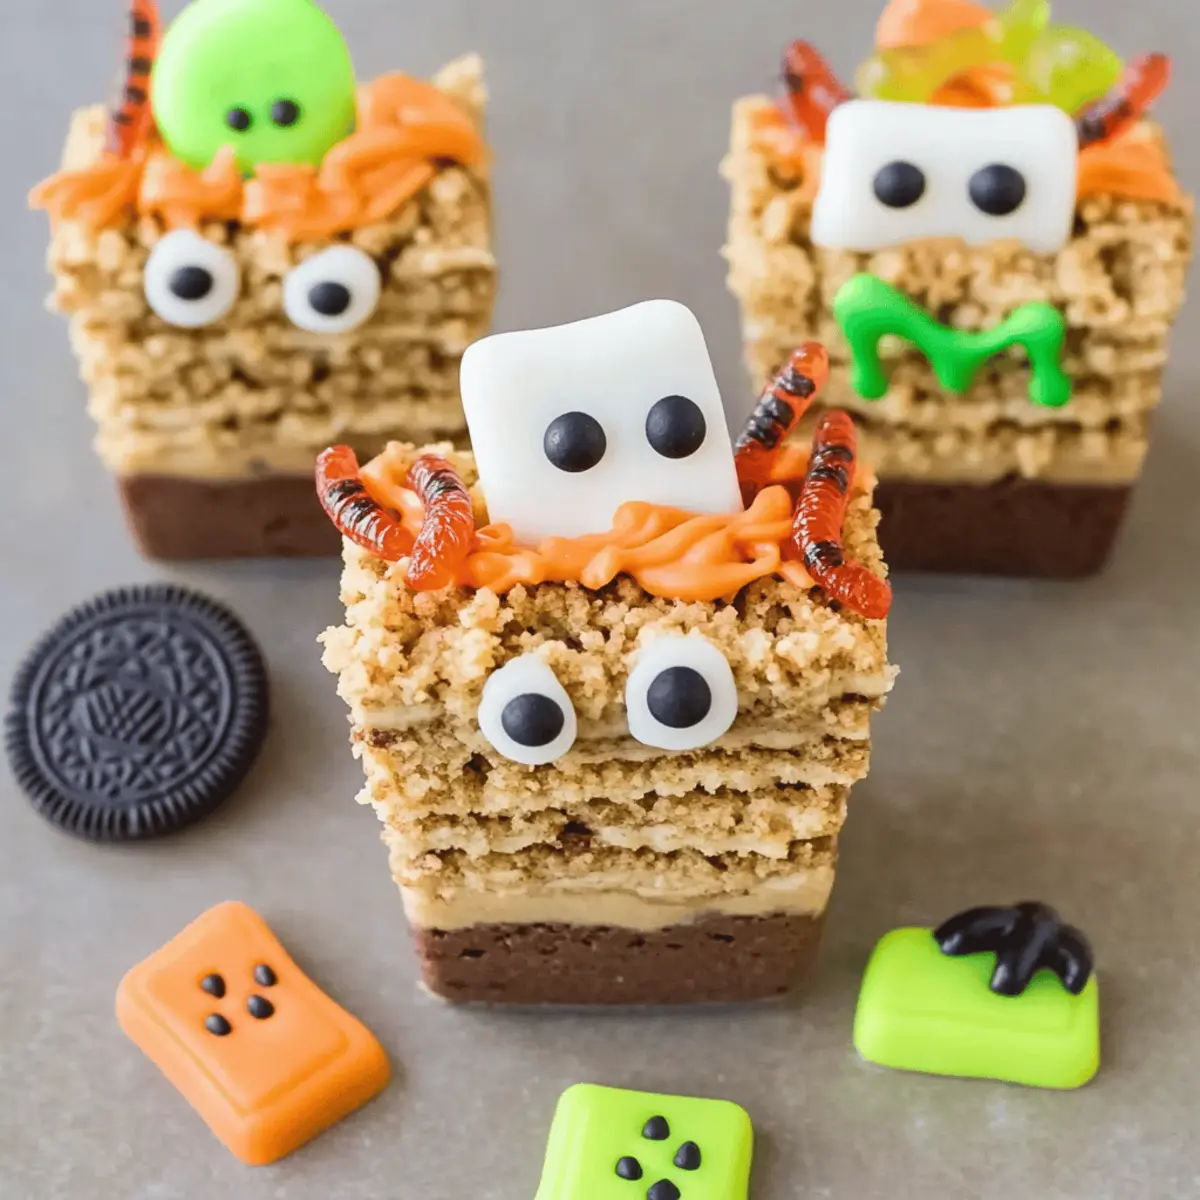
• Candy Melts – These are great for drizzling and creating spooky designs; choose festive colors for Halloween flair.
• Sprinkles – Add fun with Halloween-themed sprinkles; they add a pop of color and texture.
• Chocolate Chips – Perfect for making eyes or adding a rich chocolate flavor; feel free to use dark or white chocolate.
• Edible Eyes – These are essential for creating that ghostly look; they bring your spooky creations to life!
• Marzipan or Fondant – Use these to shape pumpkins or other festive designs to make your treats extra special.
These delightful Halloween Rice Krispie Treats not only reflect the joy of the season but also allow for plenty of creativity in your kitchen!
Step‑by‑Step Instructions for Spookily Fun Halloween Rice Krispie Treats
Step 1: Melt the Marshmallows
In a large pot, melt 3 tablespoons of butter over low heat, stirring constantly to prevent burning. Once the butter is melted, add 10 ounces of marshmallows, stirring until they completely dissolve and form a smooth mixture, about 3-5 minutes. Remove from heat, and let the gooey goodness cool slightly while you prepare your Rice Krispies.
Step 2: Combine with Rice Krispies
Quickly add 6 cups of Rice Krispies cereal to the melted marshmallow mixture, stirring to coat all the cereal evenly. Use a silicone spatula or wooden spoon for easy mixing. The Rice Krispies should be fully combined and all pieces lightly coated with the marshmallow blend. This step takes about 1-2 minutes to ensure an even mixture.
Step 3: Press into the Pan
Grease a 9×13 inch baking dish with butter or non-stick spray to prevent sticking. Pour the Rice Krispie mixture into the dish, and press it down evenly with your hands or a greased spatula. Aim for an even layer about 1-inch thick. Let the mixture set for at least 30 minutes at room temperature to firm up before decorating.
Step 4: Melt Candy Melts for Decoration
While your Rice Krispie Treats cool, melt your candy melts. Place them in a microwave-safe bowl and heat in 30-second intervals, stirring in between, until smooth. This usually takes about 1-2 minutes total. Choose festive colors for a spooky Halloween touch, and prepare to drizzle or dip your treats.
Step 5: Decorate the Treats
Once your Rice Krispie Treats are firm, cut them into desired shapes using a sharp knife or cookie cutter. Dip them in melted candy, drizzle patterns over them, and add sprinkles, chocolate chips, or edible eyes to create spooky faces. Be creative and let your personality shine through your Halloween Rice Krispie Treats—this is where the fun begins!
Step 6: Final Touches and Setting
After decorating, place the treats on a lined baking sheet and let them sit at room temperature for about 15 minutes until the candy melts set up. This will keep all your spooky designs intact. Now your delightful Halloween Rice Krispie Treats are ready to be served at your festive gathering.
Step 7: Serve and Enjoy
Arrange your decorated treats on a themed platter, adding decorative elements like mini pumpkins or ghost figures for an extra festive touch. These spooky delights are sure to be a hit, beckoning everyone to treat themselves to a delightful bite. Don’t forget to snap some photos to capture your festive creations!
Storage Tips for Halloween Rice Krispie Treats
Room Temperature: Keep your Halloween Rice Krispie Treats in an airtight container at room temperature for up to 3 days to maintain their freshness and chewy texture.
Fridge: If you need them to last a bit longer, you can refrigerate them for up to a week; just ensure they are well-wrapped to prevent them from becoming stale.
Freezer: For extended storage, freeze your treats individually wrapped in plastic wrap or in a freezer-safe container for up to 2 months. Thaw them at room temperature before serving.
Reheating: If they become too hard after freezing, you can microwave them in 10-second intervals to soften slightly, making them gooey and delightful once again.
What to Serve with Spookily Fun Halloween Rice Krispie Treats
These delightful treats are perfect for bringing the spirit of Halloween to your table and can be accompanied by fun items that make the whole gathering festive.
- Pumpkin Spice Cookies: These soft and chewy cookies add a warm, spiced flavor to your dessert spread, complementing the sweet marshmallow treats beautifully.
- Witch’s Brew Punch: A vibrant and fizzy drink garnished with floating gummy eyeballs will wow your guests and keep the party spirit alive with spooky fun.
- Candied Apples: Crisp apples coated in sticky caramel or candy give an additional crunchy texture, offering a classic Halloween favorite that pairs wonderfully with the soft Rice Krispie Treats.
- Spooky Cheese Platter: Include an assortment of eerie cheeses shaped like bats or mummies for a delightful contrast to the sweetness, providing savory bites amongst the treats.
- Chocolate-Dipped Pretzels: Combine salty and sweet with these crunchy bites; their salty notes balance the sweetness of the Rice Krispie Treats, adding delightful variety.
- Ghostly Marshmallow Pops: Adorned with cute faces, these pops make for excellent thematic companions and are light enough to round out your dessert offerings without overwhelming your guests.
With these festive delights alongside your Halloween Rice Krispie Treats, your gathering promises to be a memorable, fun-filled celebration!
Halloween Rice Krispie Treat Variations
Feel free to let your creativity run wild by customizing your Halloween Rice Krispie Treats!
-
Choco-Coconut: Mix shredded coconut into the Rice Krispie base for a tropical twist that contrasts with the sweetness. The coconut adds fun texture and flavor that will surprise everyone.
-
Nutty Delight: Add chopped nuts like almonds or walnuts into the mixture before pressing it into the pan. This brings a delightful crunch that elevates each bite. Try pairing this with some chocolate drizzle for added richness.
-
Pumpkin Spice: Stir in a teaspoon of pumpkin spice to the melted marshmallow for a seasonal flavor that feels cozy and festive. This unexpected twist adds warmth and delight to your treats!
-
Colorful Layers: Create a fun, layered effect by using colored Rice Krispies. Alternate layers of regular and colored cereals for a visually stunning treat that excites the eyes.
-
Gluten-Free: Use gluten-free rice cereal to keep these spooky treats accessible for everyone at your gathering. No one will miss the difference in taste!
-
Fruity Fun: Fold in mini marshmallows or dried fruit pieces like cranberries or apricots for a sweet pop of flavor. This fruity addition adds color and natural sweetness.
-
Switch Up the Shapes: Use Halloween-themed cookie cutters to shape your treats into bats, pumpkins, or ghosts. This playful presentation makes them even more irresistible! You could also place them on a platter alongside my festive Chicken Broccoli Rice for a visually appealing spread.
-
Savory Treats: For a surprising twist, consider adding a sprinkle of sea salt to the melted mixture before combining with Rice Krispies—balance out the sweetness and enhance the flavors remarkably!
By exploring these delightful variations, you can create a personalized Halloween treat that perfectly matches your festive spirit!
Tips for the Best Halloween Rice Krispie Treats
-
Melt Carefully: Always melt the marshmallows and butter over low heat to avoid burning. This ensures a smooth, gooey base for your treats.
-
Grease the Pan: Use butter or non-stick spray when greasing your baking dish. This will make it easier to remove the treats without sticking.
-
Press Firmly: Make sure to press the mixture evenly into the pan without over-compressing it to maintain the perfect chewy texture.
-
Get Creative: Use various colors of candy melts to customize your Halloween Rice Krispie Treats for a festive flair. Let your imagination run wild!
-
Let Them Set: Allow the decorated treats to sit at room temperature for about 15 minutes so the candy melts fully harden. This keeps your spooky decorations in place.
Make Ahead Options
These Halloween Rice Krispie Treats are perfect for busy home cooks looking to embrace the festive spirit without the last-minute rush! You can prepare the base (Rice Krispie mixture) up to 3 days in advance, simply pressing it into your baking dish and wrapping it tightly in plastic wrap before refrigerating. When you’re ready to serve, just cut into shapes and start decorating with melted candy melts and sprinkles. For best quality, wait to add decorations until the day of your gathering to maintain their freshness and crunch. This way, you can enjoy a stress-free Halloween while still delivering delicious, spooky treats that everyone will love!
Halloween Rice Krispie Treats Recipe FAQs
How do I choose the best marshmallows for my Rice Krispie Treats?
Absolutely! For the best results, I recommend using fresh mini marshmallows. They melt evenly and blend perfectly with the butter, creating a gooey texture. If you can, avoid any marshmallows that feel hard or stale as they won’t dissolve well and will affect the overall consistency.
How should I store my Halloween Rice Krispie Treats?
You can keep your Halloween Rice Krispie Treats in an airtight container at room temperature for up to 3 days for optimal freshness. If you want them to last longer, refrigerate them for up to a week; just ensure they’re well-wrapped. If you want to freeze them, wrap each treat in plastic wrap and place them in a freezer-safe container where they can stay fresh for up to 2 months. When you’re ready to enjoy them, let them thaw at room temperature.
What if my Rice Krispie Treats turn out too hard?
The more the merrier when it comes to keeping things soft! If your treats become too hard after chilling, you can gently warm them in the microwave for 10-second intervals until they soften a bit. Ensure you don’t overheat them, as that could make them melt away entirely!
Are there any allergy considerations I should keep in mind?
Very good question! For those with nut allergies, be sure to use nut-free chocolate chips if you’re adding them and consider double-checking all your ingredients, especially if you’re also using candies for decoration. If you’re using butter and are concerned about dairy, you could substitute it with a dairy-free margarine. Always double-check labels for those surprise allergens!
Spookily Fun Halloween Rice Krispie Treats for Everyone
Ingredients
Equipment
Method
- Melt 3 tablespoons of butter over low heat, then add 10 ounces of marshmallows, stirring until smooth, about 3-5 minutes.
- Combine 6 cups of Rice Krispies cereal with the melted marshmallow mixture, stirring evenly.
- Press the mixture into a greased 9x13 inch baking dish and let it set for at least 30 minutes.
- Melt the candy melts in a microwave-safe bowl, stirring until smooth.
- Cut the treats into shapes and decorate with melted candy, sprinkles, chocolate chips, and edible eyes.
- Let the decorated treats sit for 15 minutes at room temperature to set.
- Serve arranged on a platter, optionally adding festive elements for decoration.
Leave a Reply