
I’ll never forget the first time I tasted a slice of Russian No Bake Wafer Cake at a friend’s gathering. The crisp, layered texture combined with that creamy, caramel-rich filling practically danced on my taste buds! With just three ingredients and a mere 15 minutes of prep time, this delightful wafer cake is a dream for anyone tired of the usual fast-food desserts. Not only is it a quick fix for parties or cozy afternoons, but its customizable nature also allows you to add your unique twist—think roasted nuts or fruit preserves for a refreshing change. Ready to impress your family and friends with a dessert that’s both easy and elegant? Let’s dive into the recipe!
Why is This Wafer Cake So Irresistible?
Simplicity: With just three ingredients, whipping up this decadent dessert couldn’t be easier!
Quick Prep Time: In only 15 minutes, you can prepare a show-stopping cake that’s ready to chill.
Customizable: Feel free to add your flair—incorporate nuts or fruit preserves for a twist you’ll love.
Crowd-Pleasing: This cake is perfect for gatherings, sparking joy and conversation among friends and family.
Cultural Delight: Embrace a taste of tradition with a modern take on a beloved Russian dessert, making it a delightful addition to any table. For more inspired treats, check out this Chai Cake Decadent or our Toffee Crunch Cake.
Wafer Cake Ingredients
• Discover the simplicity of a wafer cake recipe that requires just three ingredients!
For the Cake
- Tort Wafers – These provide a delightful crisp texture that supports the layers of this cake.
- Caramelized Sweetened Condensed Milk – This ingredient adds a rich, caramel flavor that makes the cake truly special. You can use regular sweetened condensed milk but be ready for a lighter taste.
- Butter – Ensuring a creamy filling, use softened butter for the best consistency and mixability.
Optional Add-ins
- Nuts – Chopped nuts like walnuts or hazelnuts can add a delightful crunch between the layers.
- Fruit Preserves – A spoonful of tart jam can introduce a refreshing contrast to the sweetness of the cake.
Get ready to whip up this delightful wafer cake and enjoy the compliments!
Step‑by‑Step Instructions for 3-Ingredient No Bake Russian Wafer Cake
Step 1: Cream the Butter
Begin by placing the softened butter in a mixing bowl. Use an electric mixer at medium speed to beat the butter for about 3-5 minutes until it becomes light and fluffy in texture. This step is crucial as it ensures a creamy consistency for your wafer cake filling.
Step 2: Mix in the Caramelized Sweetened Condensed Milk
Gradually incorporate the caramelized sweetened condensed milk into the whipped butter. Continue to mix for an additional 2-3 minutes until the ingredients are well-combined and the mixture is uniform. You’ll know it’s ready when the cream is smooth and slightly glossy, perfect for layering onto the tort wafers.
Step 3: Assemble the Wafer Layers
Take the tort wafers and spread a thin, even layer of the creamy mixture onto each wafer sheet. Leave the top wafer uncoated, as it will serve as the final layer. Ensure the cream is not too thick to avoid sogginess in your delicious wafer cake; a smooth, even sheen should be your goal.
Step 4: Set the Wafer Cake
Once assembled, place a cutting board or another flat weight on top of the stacked wafers. This helps the layers meld together beautifully. Refrigerate the cake for at least 2 hours, allowing it to set properly. The time in the fridge will transform the layers into a deliciously cohesive treat.
Step 5: Cut for Serving
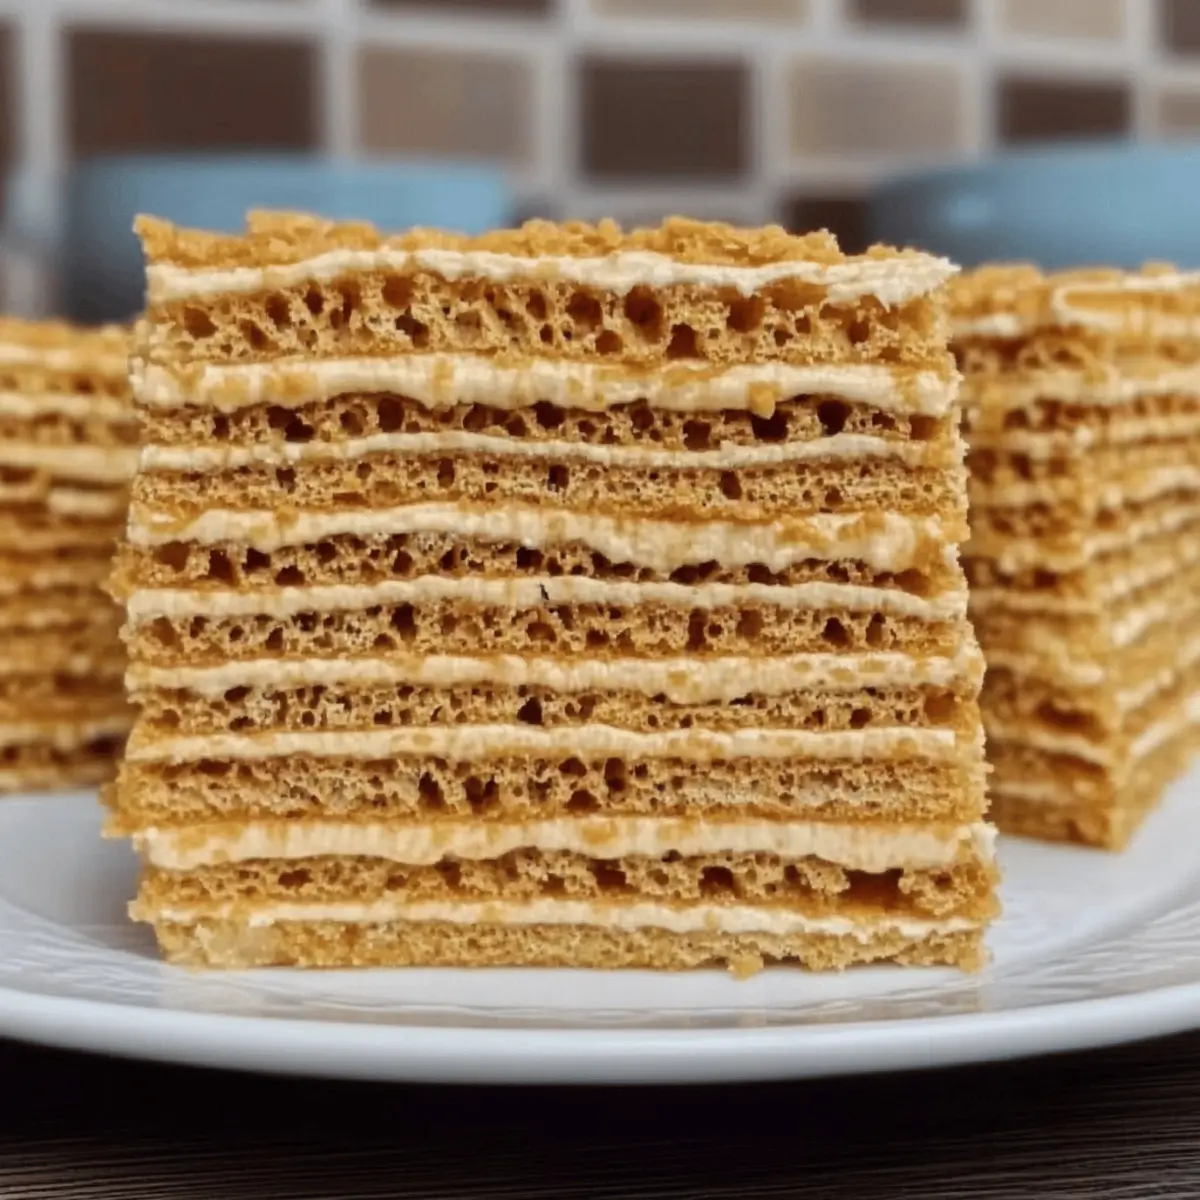
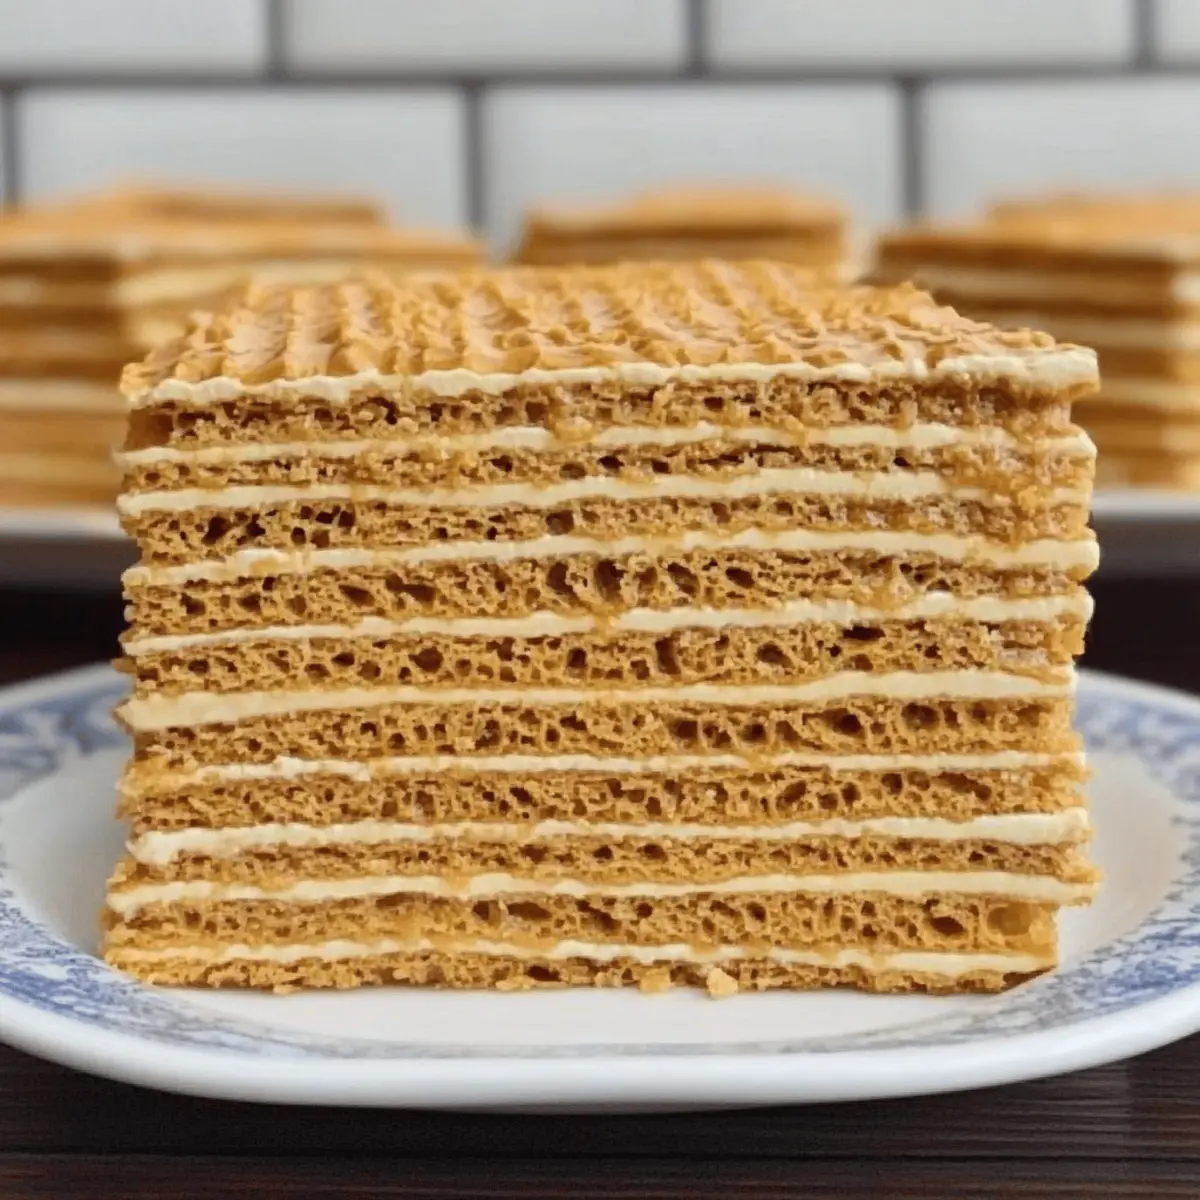
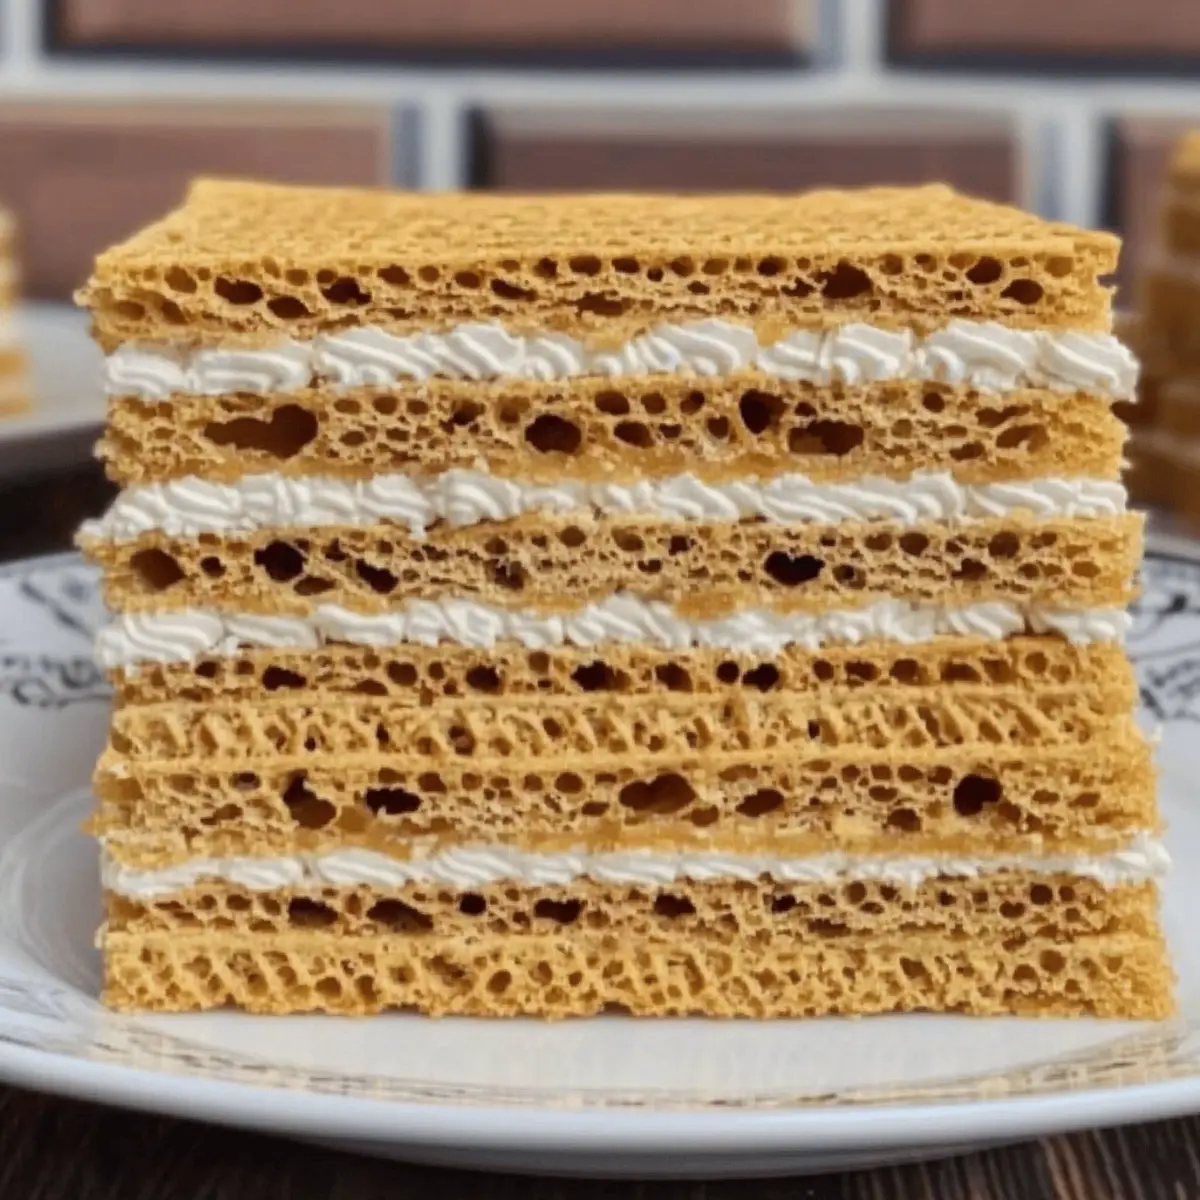
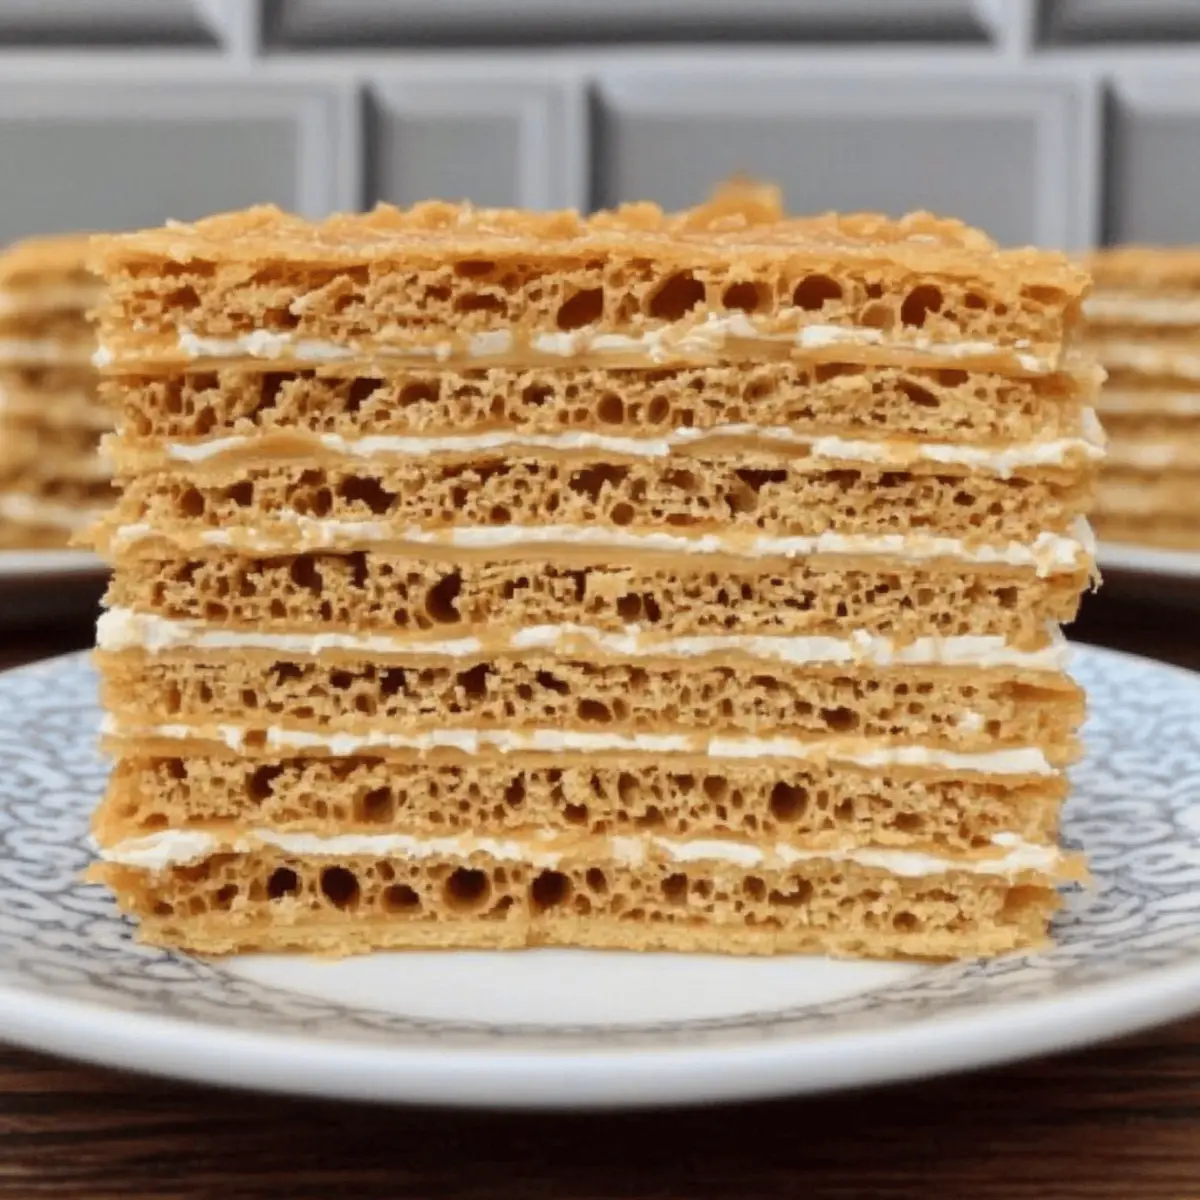
After chilling, remove the wafer cake from the refrigerator. Carefully cut it into square pieces using a sharp knife, ensuring each slice retains those lovely, layered edges. The crisp texture combined with the creamy filling creates a delightful treat that is visually appealing and perfect for sharing with family and friends.
How to Store and Freeze Wafer Cake
Fridge: Store your wafer cake in the refrigerator, ideally on a plate covered with plastic wrap to maintain its crisp texture, for up to 4 days.
Airtight Container: For a softer texture, place it in an airtight container; it will stay fresh for about 5 days, but expect some loss of crispness.
Freezer: You can freeze the wafer cake for up to 2 months. Wrap individual slices tightly in plastic wrap and place them in a freezer-safe bag, ensuring minimal air exposure.
Reheating: If you prefer a firmer texture, simply thaw the frozen slices in the fridge overnight before serving—no need to reheat, as the wafer cake is delicious chilled!
Expert Tips for the Best Wafer Cake
-
Cream Consistency: Ensure butter is at room temperature before mixing. This creates a smooth filling that spreads easily on the wafers.
-
Layer Thickness: Avoid spreading too thick of a layer between the wafers. A thin, even coating prevents sogginess and keeps the wafer cake crisp.
-
Chilling Time: Allow the wafer cake to chill for at least 2 hours. This step is essential for achieving that perfect texture and flavor melding.
-
Topping Ideas: Consider sprinkling crushed nuts or coconut flakes on top for added texture. Just be careful not to overpower the sweet caramel flavor.
-
Serving Fresh: For the best experience, serve the wafer cake within a day or two after chilling to ensure it remains fresh and crispy.
What to Serve with 3-Ingredient No Bake Russian Wafer Cake
Indulging in rich, creamy layers and crisp wafers calls for a delightful spread to elevate your dessert experience.
-
Fresh Berries: A handful of juicy raspberries or strawberries provides a tart contrast, enhancing the sweetness of the wafer cake.
-
Whipped Cream: Light and airy, a dollop of fresh whipped cream brings a luxurious touch and can help balance the richness of the layers.
-
Mint Tea: The refreshing, lightly herbal notes of mint tea serve as a calming drink alongside the sweet layers, perfect for afternoon gatherings.
-
Chocolate Drizzle: Adding a drizzle of melted dark chocolate introduces a rich bitterness that complements the caramel flavor of the cake beautifully.
-
Nuts on the Side: Serving a small bowl of mixed roasted nuts adds crunchy texture and a savory balance to the cake’s sweetness.
-
Coffee: A warm cup of coffee pairs wonderfully, offering a classic contrast that highlights the nutty, caramel undertones of the wafer cake.
-
Ice Cream: Pairing with a scoop of vanilla ice cream brings a delightful creaminess, creating a dessert experience that’s both indulgent and satisfying.
-
Custard Sauce: A light drizzle of warm custard elevates each bite, offering a creamy texture that harmonizes with the cake’s crispness.
-
Lemonade: For a refreshing beverage option, serve chilled lemonade to cleanse the palate and enhance the sweetness of the cake.
Wafer Cake Variations & Substitutions
Feel free to explore these exciting variations for your wafer cake to suit every palate and occasion!
- Dairy-Free: Use coconut cream and dairy-free butter for a delectable option that everyone can enjoy.
- Nutty Delight: Incorporate chopped hazelnuts or walnuts between layers for an extra crunch and flavor boost.
- Fruity Twist: Swap in fruit preserves or a layer of fresh fruit between wafers for a refreshing contrast to the creaminess.
- Chocolate Lovers: Drizzle melted chocolate over the top or mix cocoa powder into the cream for a rich chocolate flavor.
- Spicy Kick: Add a pinch of cinnamon or nutmeg to the cream for a warm, aromatic twist.
- Caramel Drizzle: Top each slice with a drizzle of caramel sauce for that added layer of sweet indulgence!
- Vegan Version: Replace butter with plant-based margarine and the sweetened condensed milk with a vegan alternative for a compassionate treat.
- Layered Delight: Try stacking your wafer cake with layers of your favorite cake or cookies for a more complex dessert experience.
Each of these variations provides a unique twist that allows you to personalize your wafer cake. If you’re looking for more delightful desserts to try, don’t miss our Ube Mochi Cake or the scrumptious White Chocolate Cake!
Make Ahead Options
These 3-Ingredient No Bake Russian Wafer Cakes are perfect for meal prep enthusiasts looking to save time! You can assemble the layers and refrigerate the cake up to 24 hours in advance, allowing the flavors to meld beautifully without compromising quality. Simply prepare the creamy filling and layer it onto the tort wafers as instructed, then place a weight on top and refrigerate. For the best results, store the cake in an airtight container after it’s set to prevent drying out. When you’re ready to impress guests or indulge, just cut it into squares and serve. You’ll enjoy a delightful treat that’s just as delicious as if it were freshly made!
Russian No Bake Wafer Cake Recipe FAQs
How do I choose the right tort wafers?
Absolutely! Look for fresh tort wafers without any dark spots or damage, as these will affect the texture and taste of your cake. You can find them at local grocery stores or order online from Russian specialty shops to ensure you’re getting the authentic variety.
What’s the best way to store leftover wafer cake?
Very! To maintain the crispy texture of your wafer cake, store it on a plate covered with plastic wrap in the refrigerator for up to 4 days. For a softer cake, keep it in an airtight container; it will last about 5 days, although note that the crispiness may be affected.
Can I freeze wafer cake, and if so, how?
Absolutely! To freeze your wafer cake, wrap individual slices tightly in plastic wrap and place them in a freezer-safe bag. This method helps maintain the quality for up to 2 months. When you’re ready to enjoy a slice, simply thaw it in the refrigerator overnight—no need to reheat!
What should I do if my filling is too thick?
No problem! If your filling is too thick, try adding a splash of milk or cream to loosen it up. Whip the mixture for another minute or so to achieve a smooth and spreadable consistency. The goal is to have a creamy texture that will marry nicely with the tort wafers.
Is this wafer cake suitable for people with allergies?
Very! This recipe contains dairy (butter and sweetened condensed milk), so it’s not suitable for vegans or those with lactose intolerance. If you’re looking for alternatives, consider using dairy-free butter and coconut cream instead. Always check ingredient labels for any other allergens, especially if you’re incorporating add-ins.
How can I customize the flavor of my wafer cake?
The more the merrier! Get creative by mixing in flavors you love. Adding a teaspoon of vanilla extract to the filling can give it a lovely depth, while incorporating zesty fruit preserves between layers adds a refreshing twist. Don’t hesitate to try out roasted nuts or coconut flakes for added crunch!
Delightful Wafer Cake: Easy 3-Ingredient No Bake Treat
Ingredients
Equipment
Method
- Cream the softened butter in a mixing bowl using an electric mixer at medium speed for 3-5 minutes until light and fluffy.
- Mix in the caramelized sweetened condensed milk gradually for another 2-3 minutes until smooth and glossy.
- Spread the creamy mixture onto each tort wafer, leaving the top wafer uncoated.
- Place a flat weight on top of the assembled wafers and refrigerate for at least 2 hours.
- Carefully cut the chilled wafer cake into square pieces before serving.
Leave a Reply