
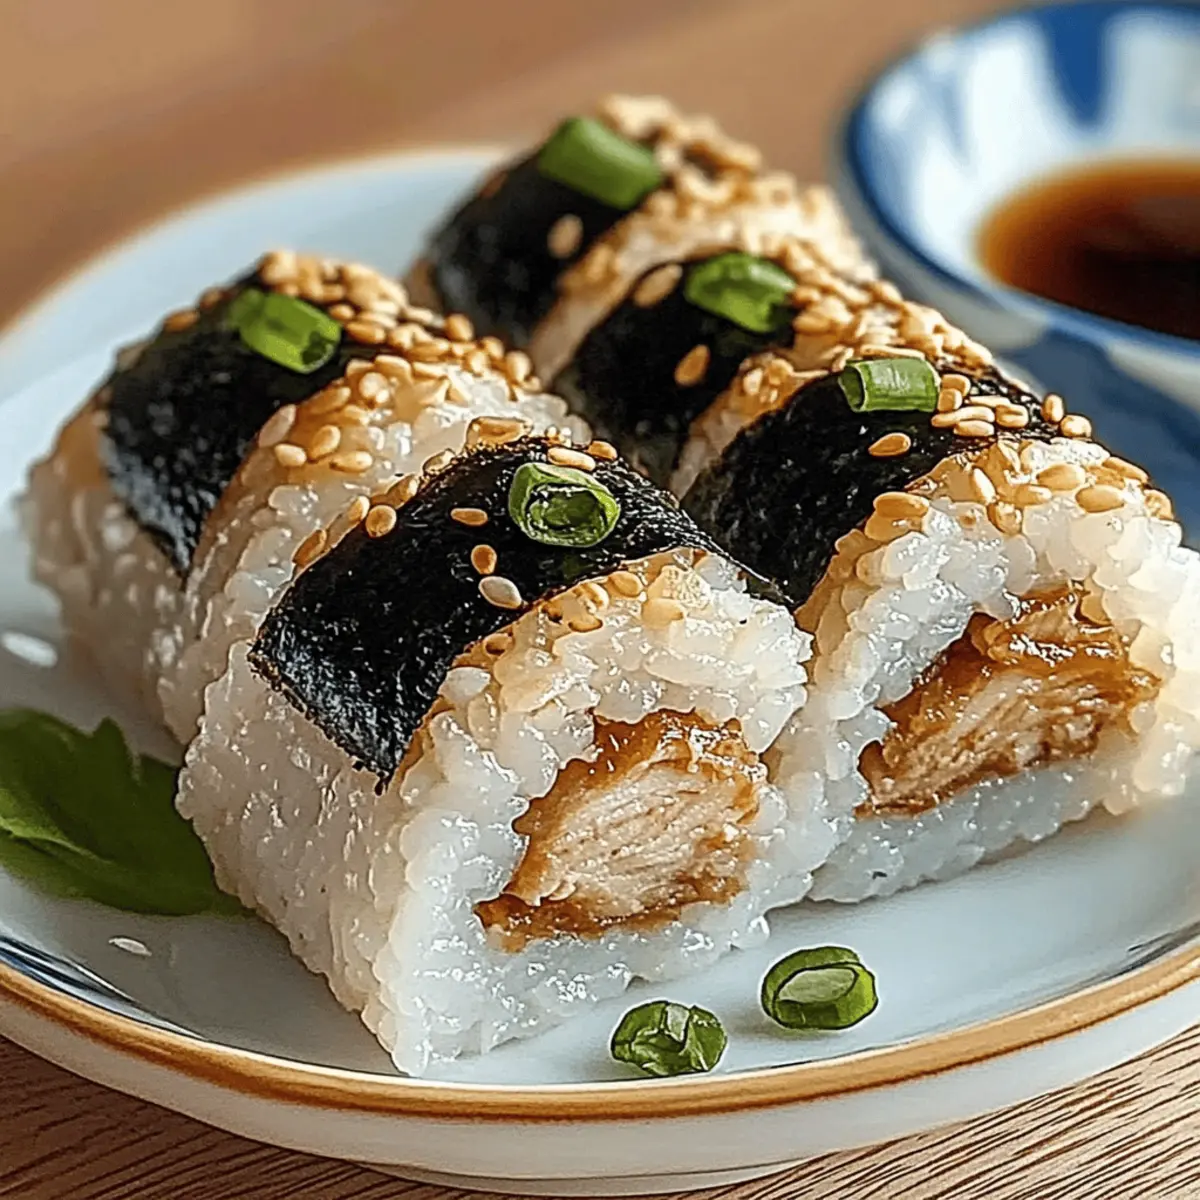
As I looked out at the picnic spread, I was reminded of the joy that simple, homemade food brings. One dish that never fails to impress is Irresistible Chicken Onigiri. These delightful Japanese rice balls, filled with tender, seasoned chicken, are perfect for any occasion—whether you’re packing a lunch, hosting a gathering, or just treating yourself. The best part? They’re incredibly quick to prepare, making them a fantastic option for busy days. Plus, you can customize the fillings to suit your taste, ensuring everyone will love this savory snack. Ready to dive into this delicious recipe? Let’s elevate your culinary skills and create something truly special together!
Why Is Chicken Onigiri So Fantastic?
Flavorful Fusion: The balance of seasoned chicken and sticky rice creates an unforgettable taste experience.
Quick and Easy: This recipe comes together in just about 30 minutes, perfect for busy weeknights.
Customizable: Feel free to swap in your favorite proteins or add extra veggies for a unique twist.
Ideal for Any Occasion: Whether it’s a quick lunch or a fun dinner party, Chicken Onigiri is sure to impress.
Crowd-Pleaser: Everyone loves these bite-sized treats, making them a great option for gatherings. Plus, if you’re looking for more delicious chicken recipes, you can check out my Spicy Chipotle Chicken or Maple Chicken Bacon for more flavor inspiration!
Irresistible Chicken Onigiri Ingredients
For the Chicken Filling
• Boneless, Skinless Chicken Breasts – The star of the dish; you can substitute with leftover chicken for quick preparation.
• Fresh Garlic – Adds depth to the flavor; omit or use garlic powder if preferred.
• Low-Sodium Soy Sauce – Essential for umami; opt for gluten-free soy sauce to make this dish gluten-free.
• Sugar – Balances out the saltiness; substitute honey or a sugar alternative for a different sweetness.
For the Rice
• Sushi Rice – Key for achieving that perfect sticky texture; short-grain rice works well if sushi rice is unavailable.
• Rice Vinegar – Brings a touch of acidity; apple cider vinegar can be a suitable sub if needed.
With these simple ingredients on hand, you’re all set to create your own Irresistible Chicken Onigiri! Let’s make something special!
Step‑by‑Step Instructions for Irresistible Chicken Onigiri
Step 1: Cook the Chicken
Start by bringing a pot of water to a gentle boil. Carefully add the boneless, skinless chicken breasts and let them cook for 15–20 minutes, ensuring they’re fully cooked and no longer pink inside. Use a meat thermometer if you have one; the internal temperature should reach 165°F (75°C). Once done, remove the chicken from the pot and let it cool slightly on a cutting board.
Step 2: Shred the Chicken
After the chicken has cooled for a few minutes, use two forks to shred it into bite-sized pieces. This not only makes it easier to fill the onigiri but also ensures that every rice ball is packed with delicious chicken goodness. Set the shredded chicken aside while you prepare the sauce, allowing the flavors to settle for the next step.
Step 3: Make the Sauce
In a small bowl, combine low-sodium soy sauce and sugar, stirring well until the sugar is completely dissolved. This savory sauce is essential for enhancing the chicken’s flavor. Once the sugar has disappeared, add the shredded chicken to the bowl and toss it thoroughly in the sauce, making sure each piece is well-coated and flavorful.
Step 4: Cook the Rice
Rinse the sushi rice under cold water until the water runs clear, which typically takes a few minutes. This step helps eliminate excess starch and ensures each grain will stick perfectly after cooking. After rinsing, cook the rice according to the package instructions—generally around 20 minutes. Once complete, remove it from the heat and gently fold in rice vinegar for that authentic onigiri taste.
Step 5: Form the Onigiri
Once the rice is warm and slightly sticky, wet your hands to prevent sticking. Take a handful of rice and flatten it into a disc shape in the palm of your hand. Place a spoonful of the coated chicken filling in the center, then fold the rice around it, reshaping into a triangle or ball. This process should be done gently, ensuring a firm hold while showing the beautiful filling.
Step 6: Serve
Your Irresistible Chicken Onigiri is now ready to delight your taste buds! Serve them immediately while they’re warm, or you can wrap them in plastic wrap for later enjoyment. Whether you’re taking them on a picnic, packing them for lunch, or enjoying them as a snack, these tasty rice balls are sure to impress your family and friends.
Make Ahead Options
These Irresistible Chicken Onigiri are perfect for meal prep enthusiasts! You can cook and shred the chicken (step 1 and step 2) up to 24 hours in advance, then toss it in the sauce (step 3) to enhance the flavor before using. Additionally, the sushi rice can be prepared ahead and stored in the refrigerator for up to 3 days; just remember to refrigerate it in an airtight container to preserve its texture. When you’re ready to assemble, reheat the rice gently in the microwave if needed, and then follow step 5 to form your onigiri. This way, you’ll have delicious, homemade snacks ready in a flash, perfect for busy weeknights!
How to Store and Freeze Irresistible Chicken Onigiri
- Fridge: Store your homemade Chicken Onigiri in an airtight container for up to 3 days. If you’re prepping in advance, make sure they cool down before sealing to maintain freshness.
- Freezer: For longer storage, freeze shaped onigiri on a baking sheet until solid, then transfer to a freezer-safe bag for up to 1 month. Thaw in the fridge before reheating.
- Reheating: To enjoy your onigiri warm, microwave them for about 30 seconds or until heated through. Alternatively, steam them briefly for a delightful texture.
- Serving: Chicken Onigiri is best enjoyed fresh, but having some ready in the fridge or freezer makes for a quick, satisfying snack whenever you crave something delicious!
Irresistible Chicken Onigiri Variations
Customizing your Chicken Onigiri is a fun way to explore flavors and textures that excite your taste buds!
- Turkey Filling: Swap the chicken for ground turkey and season it with your favorite herbs. This lean protein alternative keeps the dish hearty and satisfying.
- Tofu Replacement: For a vegetarian option, replace chicken with firm tofu, seasoned and sautéed until golden. This will offer a deliciously unique taste and texture for veggie lovers!
- Vegetable Add-Ins: Mix in finely chopped vegetables like carrots, bell peppers, or scallions into your chicken filling for a crunch. These vibrant additions not only enhance flavor but also boost nutrition.
- Seaweed Wrap: Wrap your onigiri in nori (seaweed sheets) before serving for a classic touch that adds flavor and makes them easier to handle as snacks.
- Spicy Twist: Add a touch of sriracha or chili paste to the chicken filling for those who crave a little heat. The spiciness pairs beautifully with the savory chicken and rice!
- Sweet Teriyaki: Marinate your chicken in teriyaki sauce before cooking for a delightful sweetness that will take your onigiri to the next level. It’s a flavor experience reminiscent of delicious Japanese takeout!
- Crispy Toppings: Sprinkle crispy fried onions or garlic over the chicken before shaping them into onigiri for extra crunch and a savory boost. This textural contrast creates a delightful mouthfeel!
- Herbed Rice Variation: Mix freshly chopped herbs into your sushi rice, such as cilantro or basil, for the ultimate flavor lift that complements the chicken perfectly.
You can experiment with these variations to suit your dietary preferences. And if you’re looking for more delicious chicken recipes, try my Cheesy Chicken Broccoli or even a savory Butter Chicken Cozy for more inspiration!
What to Serve with Irresistible Chicken Onigiri
Dive into a flavorful adventure with these delightful pairings that elevate your Chicken Onigiri experience!
- Miso Soup: This warm, savory soup complements the onigiri perfectly, adding an umami depth that enhances the meal.
- Edamame: Lightly salted edamame brings a sweet, tender texture that balances the savory rice balls beautifully.
- Pickled Vegetables: The tartness of pickled cucumbers or radishes adds a refreshing crunch, providing a delightful contrast to the soft rice.
- Seaweed Salad: This vibrant salad introduces an earthy flavor and a chewy texture that pairs wonderfully with the tender chicken.
- Japanese Green Tea: Refreshing and warm, this tea cleanses the palate and enhances the overall dining experience.
- Tempura Vegetables: Crispy and light, tempura vegetables add crunch and elevate the meal, keeping the flavors exciting.
- Sesame Noodle Salad: A cold noodle salad with sesame dressing creates a satisfying textural contrast, marrying well with the warm onigiri.
- Ginger Lemonade: A bright, citrusy drink that refreshes the taste buds, making it a fantastic choice for a light beverage accompaniment.
- Mochi Ice Cream: Finish your meal with this creamy dessert; the subtle sweetness and chewy texture make for a delightful contrast to the savory onigiri.
Tips for the Best Chicken Onigiri
-
Perfectly Cooked Chicken: Ensure chicken reaches 165°F (75°C) to guarantee it’s thoroughly cooked and tender, adding to the flavor of your Irresistible Chicken Onigiri.
-
Rinse the Rice: Wash sushi rice until the water runs clear; this removes excess starch for that perfect sticky texture essential to great onigiri.
-
Wet Hands: Keep your hands damp while shaping the rice balls. This prevents sticking and allows for easy handling, making shaping a breeze.
-
Flavor Boost: Mix in avocado or toasted sesame seeds into the chicken filling for a delightful twist that elevates the flavor profile of your Chicken Onigiri.
-
Make-Ahead Tip: Allow assembled onigiri to cool before storing in the fridge in an airtight container—this keeps them fresh for up to three days!
Irresistible Chicken Onigiri Recipe FAQs
What type of chicken is best for making Chicken Onigiri?
Boneless, skinless chicken breasts are ideal for making Chicken Onigiri as they are tender and flavorful. You can also use leftover chicken to save time and minimize waste, just ensure it’s well-seasoned so every bite is delightful!
How should I store leftover Chicken Onigiri?
Store your Chicken Onigiri in an airtight container in the fridge for up to 3 days. It’s best to let them cool completely before sealing them, as this helps maintain freshness and prevents them from getting soggy.
Can I freeze Irresistible Chicken Onigiri?
Absolutely! To freeze, lay the shaped onigiri on a baking sheet to solidify, then transfer them to a freezer-safe bag. They can be frozen for up to 1 month. When you’re ready to enjoy them, simply thaw in the fridge overnight before reheating.
How do I reheat Chicken Onigiri?
For optimal flavor and texture, microwave the onigiri for about 30 seconds or until warmed through. Alternatively, you can steam them briefly for a soft, delightful treat. Either method works wonderfully to bring back that freshly made taste!
What are some common issues when making onigiri?
One common issue is the rice not being sticky enough, which can happen if you don’t rinse it well or use the right type of rice. Make sure to rinse the sushi rice until the water runs clear and stick with sushi rice or short-grain rice for the best results. Remember, damp hands help with shaping too!
Are Chicken Onigiri safe for my pets?
While chicken is generally safe for dogs, avoid giving your dog any onigiri that contain garlic or soy sauce, as these can be harmful. Always consult your vet before introducing new foods to your pet’s diet to ensure their safety and well-being.
Irresistible Chicken Onigiri: Your New Favorite Snack
Ingredients
Equipment
Method
- Start by bringing a pot of water to a gentle boil. Carefully add the boneless, skinless chicken breasts and let them cook for 15–20 minutes, ensuring they're fully cooked and no longer pink inside.
- After the chicken has cooled for a few minutes, use two forks to shred it into bite-sized pieces.
- In a small bowl, combine low-sodium soy sauce and sugar, stirring well until the sugar is completely dissolved.
- Rinse the sushi rice under cold water until the water runs clear, which helps eliminate excess starch.
- Once the rice is warm and slightly sticky, wet your hands to prevent sticking and shape the rice around the chicken.
- Serve them immediately while they're warm or wrap them in plastic wrap for later enjoyment.
Leave a Reply