
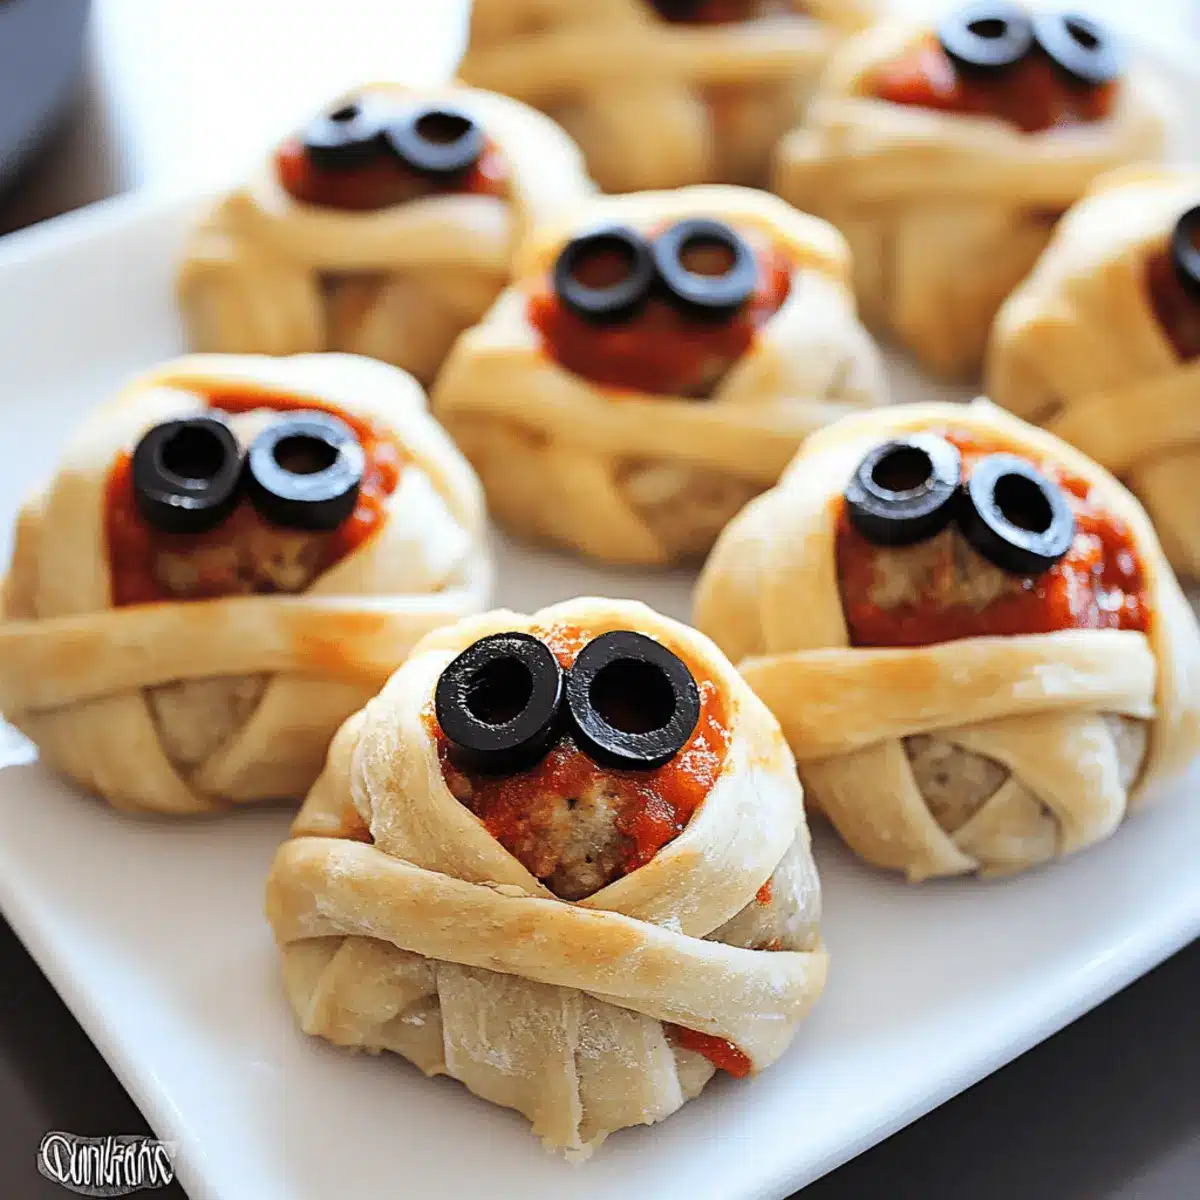
As the chilly winds of October whisper through the trees, it’s time to bring some whimsy to your Halloween festivities! With Halloween just around the corner, I’ve got a playful twist on a classic appetizer: Easy Meatball Mummies. These delightful finger foods are not only quick and easy to whip up, but they also add a fun and spooky flair to your party spread. Encased in a flaky crescent roll blanket and accented with olive eyes, these adorable mummies are sure to bring smiles to family and friends alike. Whether you’re hosting a gathering or simply looking for a creative way to enjoy a meal, these Meatball Mummies make for a perfect crowd-pleaser that combines deliciousness with festive spirit. Are you ready to impress your guests with this charming treat? Let’s dive into the recipe!
Why Are Meatball Mummies a Must-Try?
Fun Presentation: These adorable Meatball Mummies bring a playful touch to your Halloween spread, making them a hit with kids and adults alike.
Quick to Prepare: With just a few ingredients and minimal prep time, you can whip up a batch in no time—perfect for last-minute gatherings.
Savory Flavor: The combination of crispy crescent rolls and juicy meatballs packed with marinara sauce ensures each bite is full of flavor.
Versatile Twist: Feel free to customize your Mummies with toppings or dipping sauces, such as BBQ or ranch—perfect for picky eaters!
Crowd-Pleasing Appeal: Whether at a party or a cozy family dinner, these fun appetizers will be the stars of the show, leaving everyone begging for seconds.
A great alternative can be to check out our delicious Baked Meatballs Savory or elevate your snack table with Baked Chicken Meatballs!
Meatball Mummies Ingredients
For the Crescent Wrapping
• Crescent Roll Sheet – This flaky dough wraps the meatballs perfectly; you can substitute with puff pastry for a thinner crust.
For the Meatball Filling
• Frozen Meatballs (14 oz) – These ready-to-use meatballs save time and can easily be replaced with homemade ones for a personal touch.
For the Spooky Eyes
• Sliced Olives (4 oz, drained) – Black olives make ideal eyes for the mummies, adding a fun and spooky element to your Meatball Mummies.
For Serving
• Marinara Sauce – This savory sauce complements the mummies beautifully; feel free to swap for any preferred dipping sauce.
Step‑by‑Step Instructions for Meatball Mummies
Step 1: Preheat and Prepare
Begin by preheating your oven to 350ºF (175ºC). While the oven warms up, line a baking sheet with parchment paper to prevent sticking and ensure easy cleanup. Having your baking sheet ready will make it convenient to place the Meatball Mummies as you wrap them.
Step 2: Roll Out the Dough
Unroll the crescent roll sheet onto a clean countertop. Using a sharp knife or pizza cutter, slice the dough into thin strips about 1/4 inch wide. This will create the “bandages” for your meatballs, so aim for even strips to ensure a consistent look when you wrap your Meatball Mummies.
Step 3: Wrap the Meatballs
Take a frozen meatball and gently wrap a strip of the prepared crescent dough around it, overlapping the dough slightly to mimic mummy wrappings. Repeat this process for all meatballs, placing each one onto the lined baking sheet as you go. A snug fit will help keep them together during baking.
Step 4: Add the Eyes
To give your Meatball Mummies their spooky charm, grab the sliced olives. Use a small dollop of marinara sauce to attach two olive slices to each wrapped meatball, positioning them to represent eyes. This playful touch adds character, making your mummies irresistibly cute and fun!
Step 5: Bake to Perfection
Slide the baking sheet into the preheated oven and bake for 15 to 20 minutes. Keep an eye on them—you’re looking for a lightly browned dough that is puffed up and crispy. The meatballs should be heated through, ensuring a warm, comforting bite when it’s time to serve.
Step 6: Serve with Marinara
Once your Meatball Mummies are golden and delicious, remove them from the oven and let them cool for a minute. Serve them warm on a platter alongside a bowl of marinara sauce for dipping. These delightful treats will be the star of your Halloween gathering, inviting everyone to dig in!
What to Serve with Meatball Mummies
These creative appetizers are perfect for enhancing your Halloween feast, pairing beautifully with a variety of delicious sides and drinks.
- Crispy Sweet Potato Fries: Their natural sweetness and crunchy texture provide the perfect contrast to the savory meatballs.
- Creamy Ranch Dip: A cool and tangy dip that balances the flavors of the Meatball Mummies while offering a refreshing contrast.
- Vegetable Platter: Fresh, crisp vegetables add a splash of color and health alongside the festive mummies. Pair with hummus or tzatziki for extra flavor!
- Spinach Salad: The earthy greens, topped with cranberries and walnuts, create a delightful textural balance against the crispy dough of the mummies.
- Hot Apple Cider: The warm and spiced flavor of apple cider perfectly complements the Halloween atmosphere, adding a cozy touch to your gathering.
- Chocolate Ghost Cupcakes: End your meal on a sweet note with these fun cupcakes that tie in the Halloween spirit, delighting both kids and adults.
Each of these accompaniments enhances the fun, festive vibe of your Meatball Mummies while tantalizing taste buds with their delicious contrasts!
Expert Tips for Meatball Mummies
-
Dough Thickness: Keep the crescent roll strips a uniform thickness to ensure they cook evenly and maintain their shape throughout baking.
-
Avoid Overstretching: Be gentle while wrapping the meatballs; overstretching the dough can lead to tearing and uneven cooking.
-
Cheese Option: Consider adding a sprinkle of shredded cheese on top of the wrapped meatballs before baking for an extra cheesy layer of flavor.
-
Custom Sauces: Experiment with dipping sauces! While marinara is classic, ranch or spicy mustard can add a fun twist that makes Meatball Mummies even more enjoyable.
-
Serve Fresh: For the best taste, serve these mummies immediately after baking. They’re at their flakiest and most delicious straight from the oven!
Make Ahead Options
These Meatball Mummies are perfect for busy home cooks looking to save time on Halloween festivities! You can prepare and wrap the meatballs up to 24 hours in advance. Simply follow the wrapping instructions, place them on a baking sheet, and cover tightly with plastic wrap before refrigerating. This setup allows the crescent dough to stay fresh and prevents any sogginess. When you’re ready to bake, just pop them in the oven directly from the fridge, adding a few extra minutes to the cooking time if necessary. By making these Meatball Mummies ahead of time, you’ll ensure a stress-free party with delicious treats that are just as tasty when freshly baked!
Meatball Mummies: Fun Variations to Explore
Feel free to get creative with these Meatball Mummies, customizing them to suit your taste and preferences!
-
Puff Pastry: Substitute crescent rolls with puff pastry for an even flakier texture and buttery flavor. It’s an elegant twist that adds sophistication to your mummies.
-
Homemade Meatballs: Swap frozen meatballs for your favorite homemade recipe, infusing them with personal spices and herbs for an extra zest. Nothing beats the freshness of home cooking!
-
Spicy Kick: Add red pepper flakes or chopped jalapeños to the marinara for a bold, spicy dipping sauce. The heat pairs wonderfully with the savory meatballs.
-
Colorful Eyes: Instead of olives, use small pieces of roasted red bell pepper or bright cherry tomatoes to give your mummies a vibrant appearance. Fun and festive!
-
Herbed Dough: Sprinkle Italian seasoning or garlic powder over the dough before wrapping for an aromatic kick. These subtle flavors will elevate your snack to a whole new level.
-
Cream Cheese Filling: Add a dollop of cream cheese or feta cheese inside the meatball for a surprise creamy center that contrasts beautifully with the crunchy exterior. It’s an irresistible mouthful!
-
Alternate Sauces: Swap marinara for delicious alternatives like pesto or tzatziki. These flavors will dazzle your guests and provide a refreshing twist to each bite.
Experimenting with these variations will not only make your Meatball Mummies unique but also cater to a variety of palates. You might even be inspired to try out some delightful Baked Meatballs Savory or bring in a twist with Baked Chicken Meatballs for your next bash!
How to Store and Freeze Meatball Mummies
Fridge: Store leftover Meatball Mummies in an airtight container for up to 3 days. Make sure they are completely cooled before sealing to maintain their crispiness.
Freezer: For longer storage, freeze unbaked Meatball Mummies on a baking sheet until solid. Transfer them to a freezer-safe bag and store for up to 2 months.
Reheating: To reheat, bake the Mummies at 350ºF (175ºC) directly from the fridge or freezer for about 20 minutes, until warmed through and the dough is crispy.
Make-Ahead: You can prepare the wrapped meatballs a day in advance and keep them in the refrigerator. This makes for an easy and fun last-minute bake on Halloween!
Meatball Mummies Recipe FAQs
How do I choose the best crescent roll dough for my Meatball Mummies?
Absolutely! Look for crescent roll sheets that are fresh, with no visible tears or dark spots. The dough should be soft to the touch and easy to unroll. If you prefer, you can use puff pastry for a flakier texture; just roll it out thinner before cutting it into strips.
How should I store leftover Meatball Mummies?
You’ll want to store any leftovers in an airtight container in the refrigerator. They’ll be good for up to 3 days. Make sure they’ve cooled completely before sealing to retain their crispy texture. When reheating, I recommend popping them back in the oven at 350ºF for about 10-15 minutes to warm them through and get that crusty finish back.
Can I freeze Meatball Mummies, and if so, how?
Absolutely! For freezing, prepare the Meatball Mummies but don’t bake them. Lay them on a baking sheet, freeze until solid, then transfer to a freezer-safe bag. They can last up to 3 months in the freezer. When you’re ready to enjoy them, bake from frozen at 350ºF for 20-25 minutes until hot and crispy!
What if my crescent roll dough tears while wrapping?
No worries! If you accidentally tear the dough, simply pinch it back together or use a small piece from another roll to patch it up. Just be careful not to overstretch it, as keeping a uniform thickness is key to ensuring they cook evenly without falling apart!
Are there any dietary considerations with Meatball Mummies?
Very! If you’re serving guests with dietary restrictions, opt for gluten-free crescent rolls. For a lower-calorie alternative, you can use turkey or chicken meatballs. Ensure the olives you choose are pitted and check for any allergies, as olives can be an issue for some. Enjoy customizing these delicious mummies to fit everyone’s needs!
Meatball Mummies: Spooky Appetizers for a Fun Halloween Party
Ingredients
Equipment
Method
- Preheat oven to 350ºF (175ºC) and line a baking sheet with parchment paper.
- Unroll the crescent roll sheet and slice it into thin strips about 1/4 inch wide.
- Wrap a strip of crescent dough around each frozen meatball, overlapping slightly, and place on the baking sheet.
- Attach two olive slices with a dollop of marinara sauce for eyes on each meatball.
- Bake for 15 to 20 minutes until dough is lightly browned and puffed up.
- Serve warm on a platter with marinara sauce for dipping.
Leave a Reply